The LGAP200 is a wireless access point that can be used standalone or as a bridge up to 120m.
Beam Angle
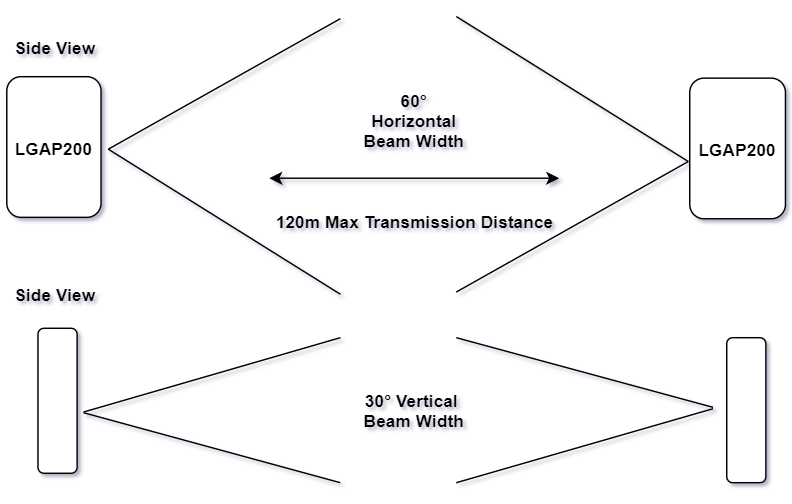
Diagram
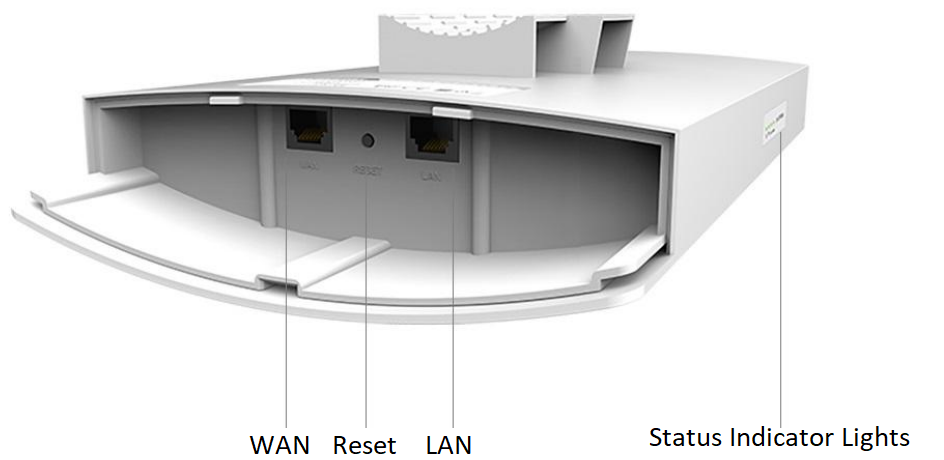
LGAP200 Setup
When configuring the LGAP200 you will need to connect to it with a Computer with an IP address in the same range as it (192.168.10.1 by default).
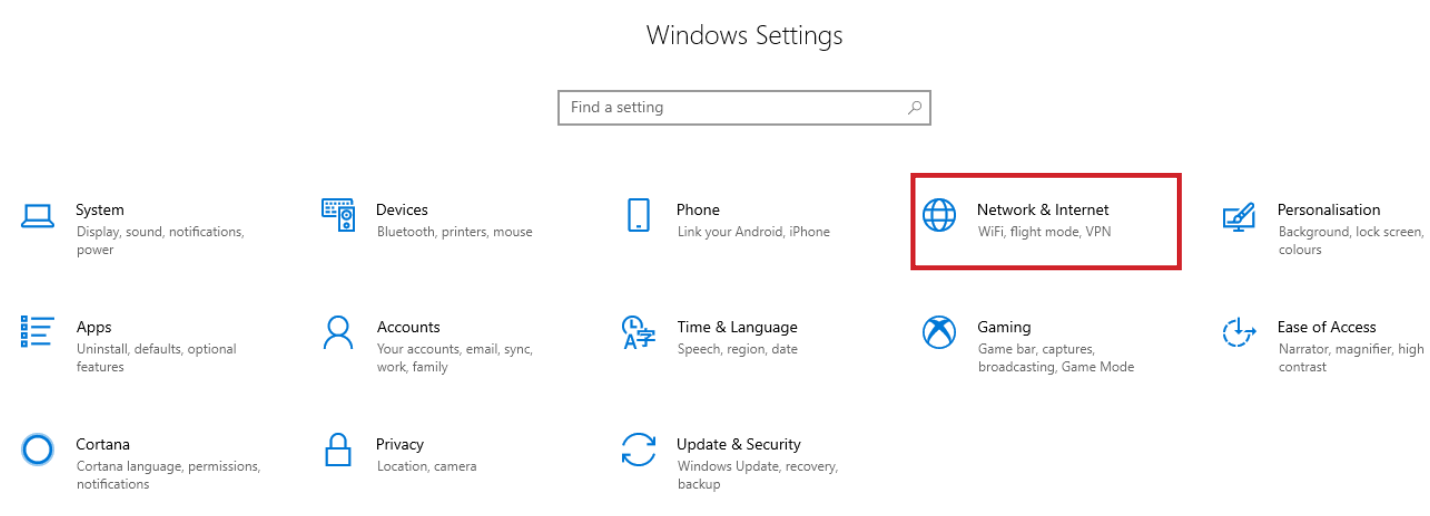
How to change you Computer's IP Address
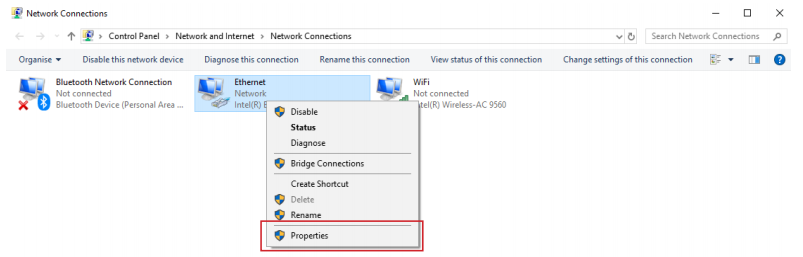
- Open Settings.
- Select Network & Internet.
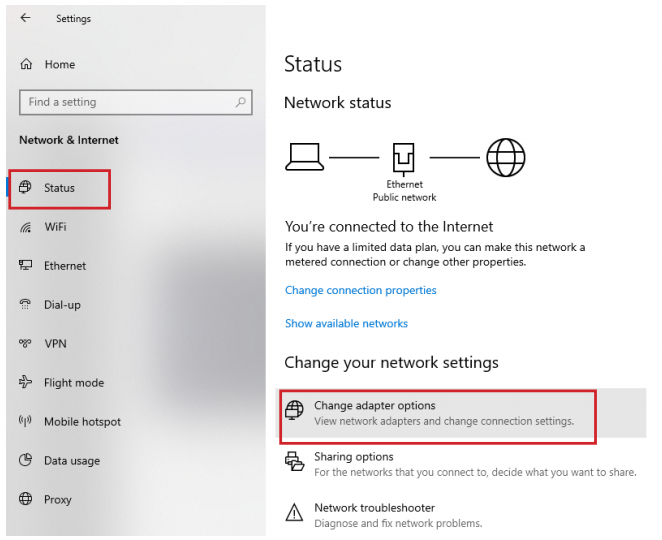
- Select Status, then Change Adapter Options.
-
Right-click the network adapter you want to change the IP address for, and select Properties.
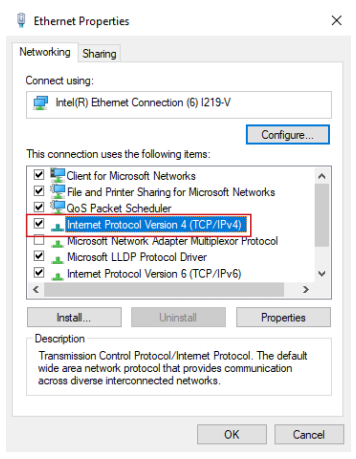
- Select the Internet Protocol Version 4 (TCP/IPv4) item.
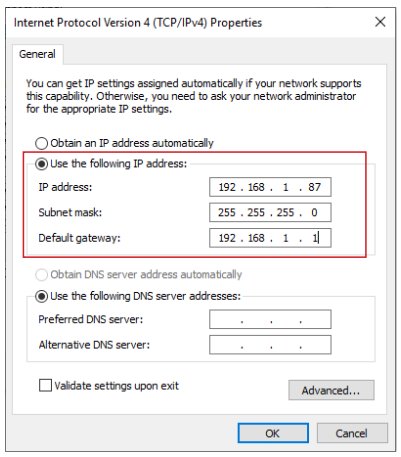
- Click Use the following IP address and enter an IP address in the same range as the device you are trying to access. (E.g when trying to access 192.168.1.108 use a IP address in the 192.168.1.x range.) Note: This cannot be the same as the device you are trying to connect to or any other device on the same network. Save your changes on both windows.
- Type the IP address of the device you are trying to access into the address bar of your web browser.
- Once finished configuring the device, change the adapter settings back to normal by following steps 1-6 and clicking Obtain an IP address automatically.
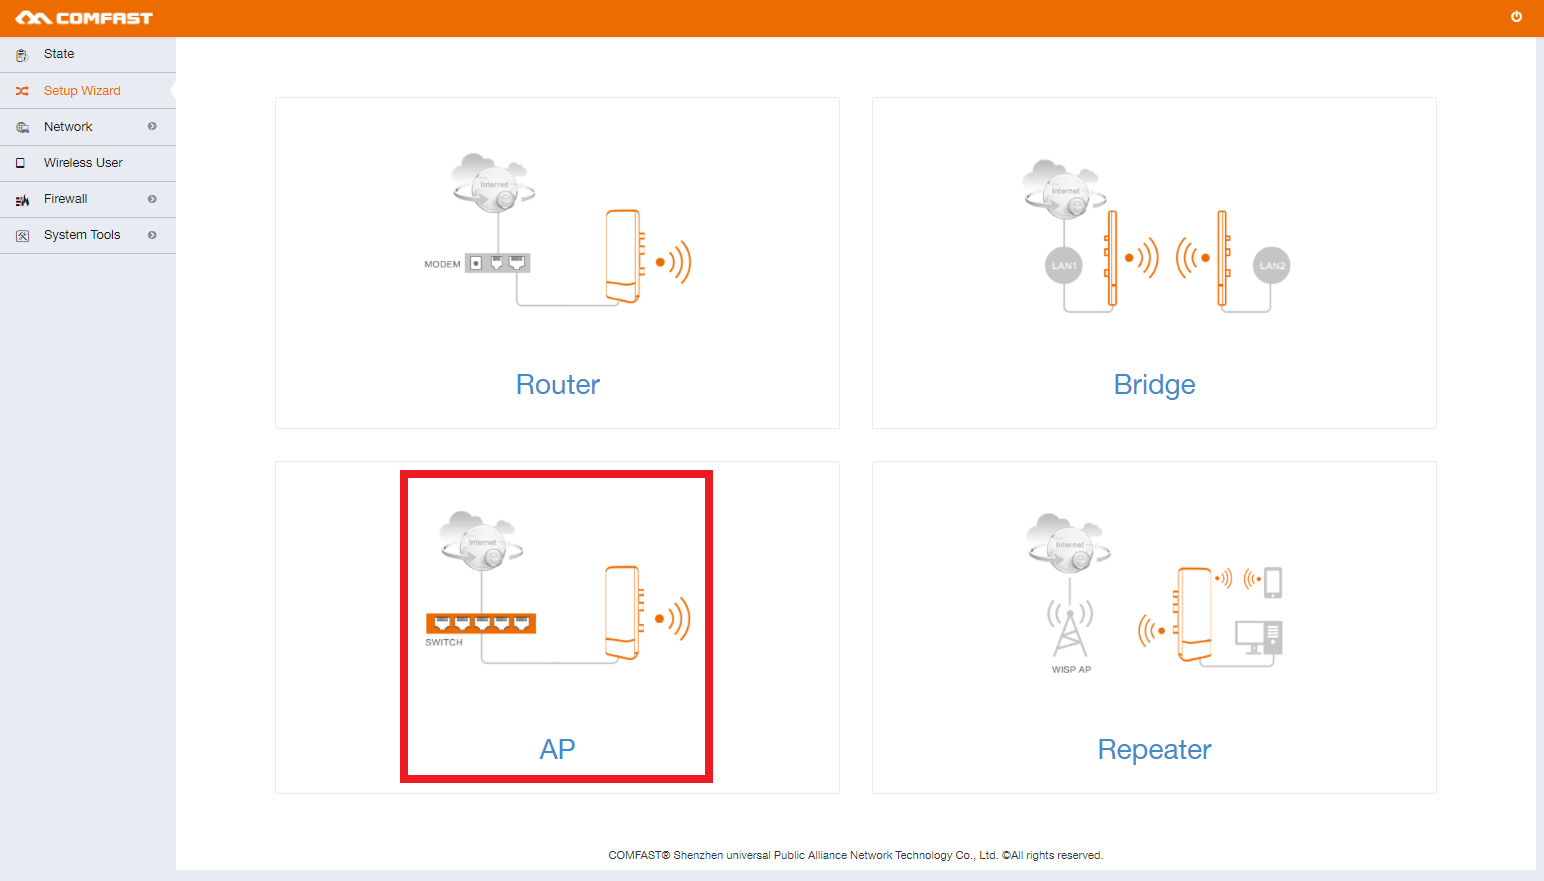
The LGAP200 can Be configured to act as an Access Point or as a Bridge
AP Mode Setup
AP Mode is used when you wish to extend the range of a wireless network.
- Set your computer in the same IP range as the device, see Step 1.
- Open a web browser and enter the default IP address of the device, 192.168.10.1
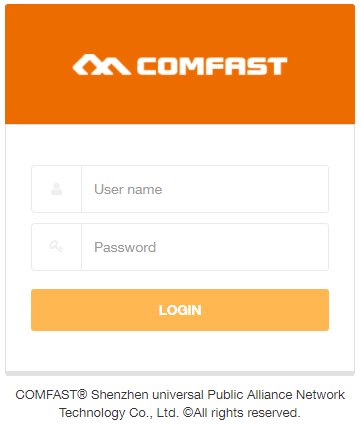
- Login with the default username of admin and password of admin

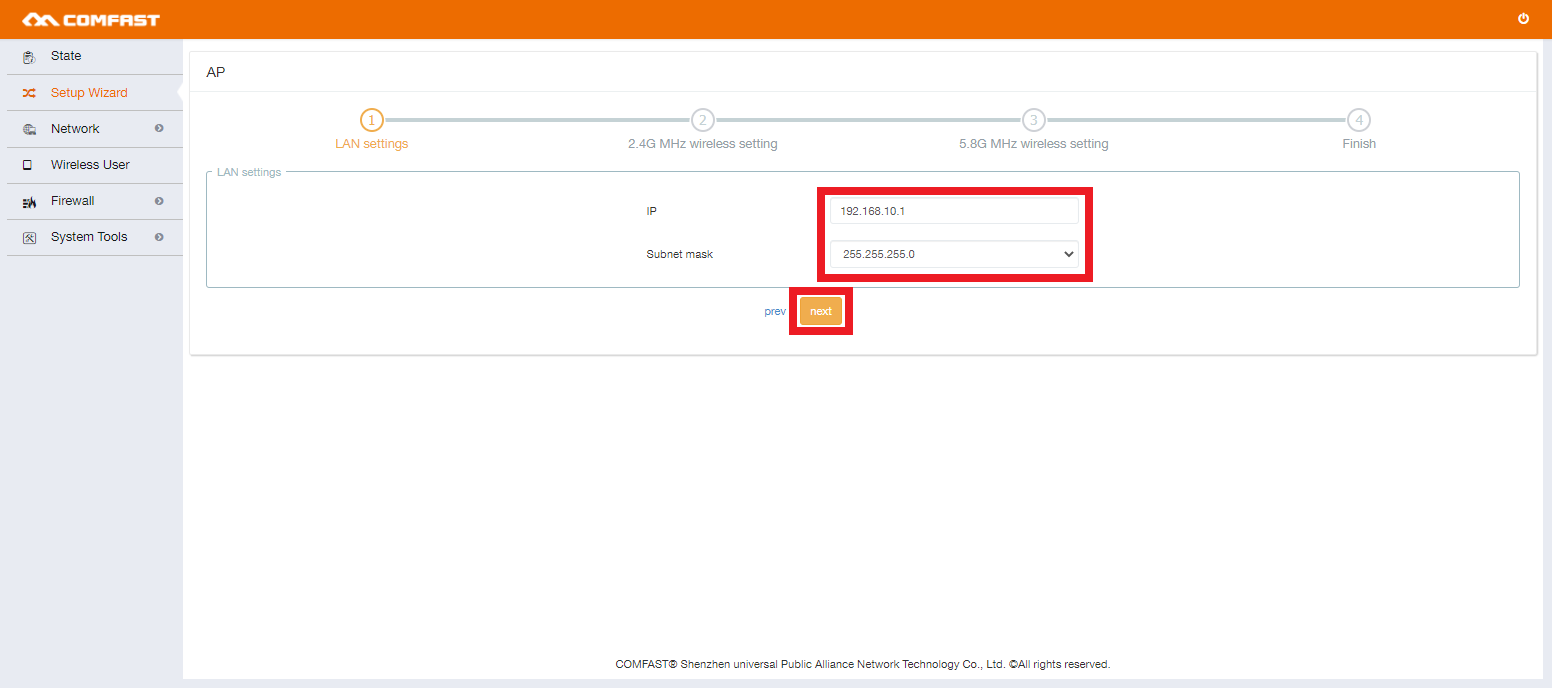
- Once logged in, select AP.
- Change the IP Address and Subnet Mask to suit the existing IP Address range that the device is going to be connected to. Select Next.
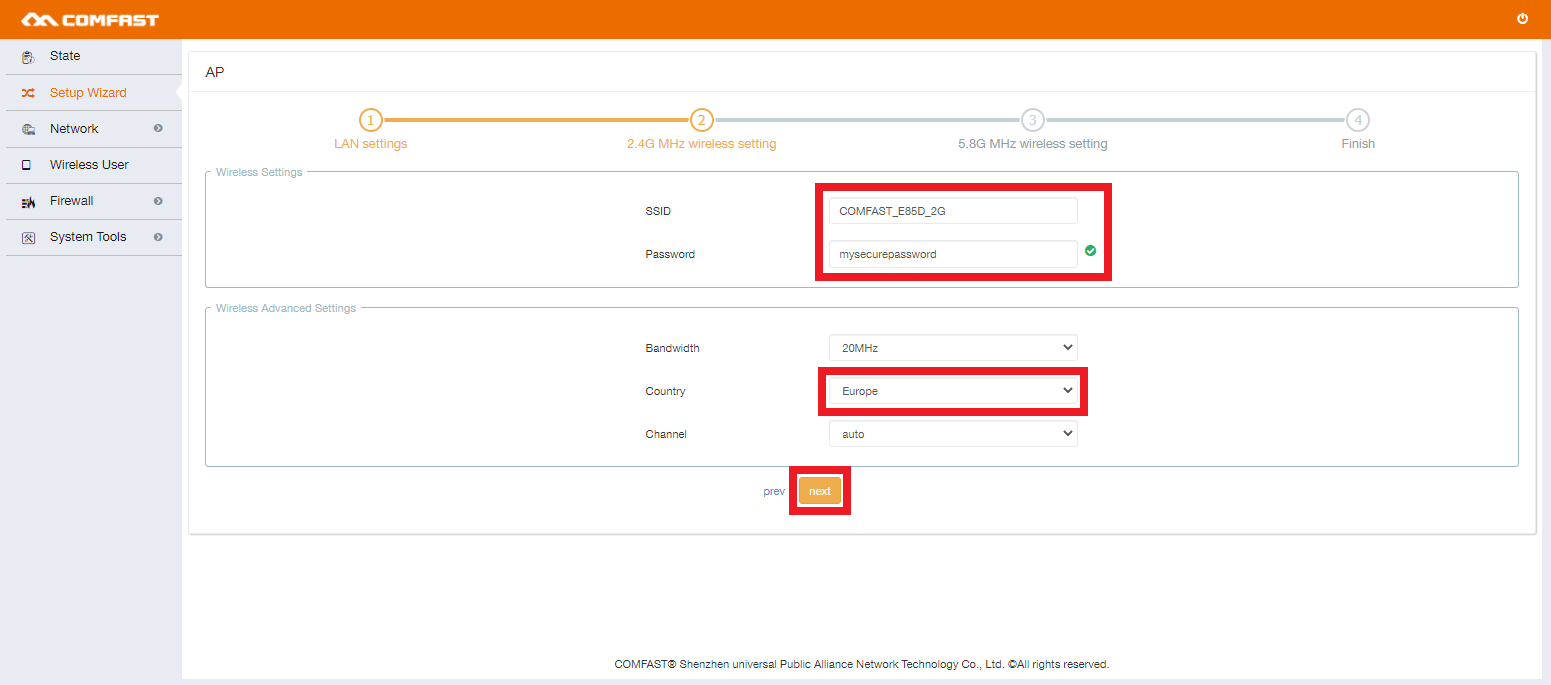
- Enter a SSID (Wireless Network Name) and a secure Password, these details are for the 2.4GHz Network. Select the Country as Europe. Select Next.
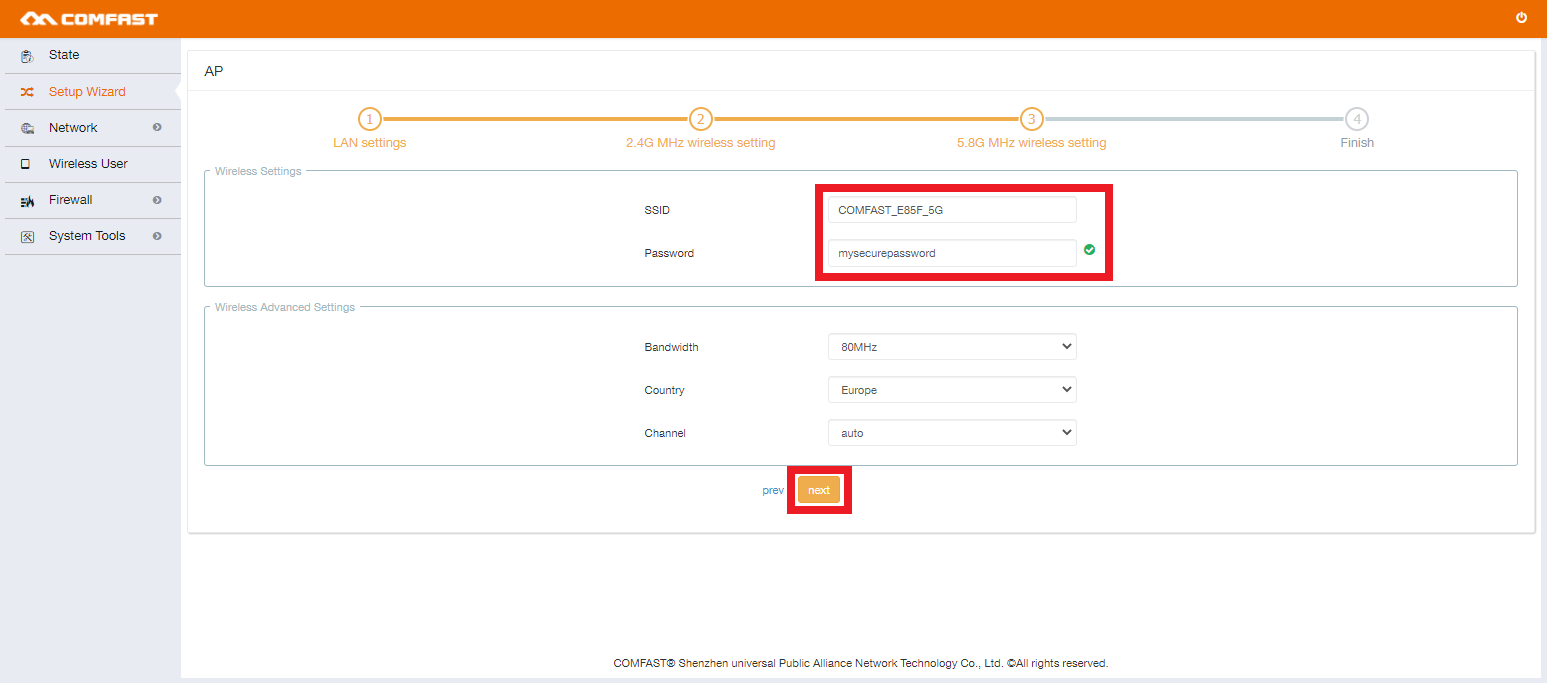
- Enter a SSID (Wireless Network Name) and a secure Password, these details are for the 5.8GHz Network. Select Next.
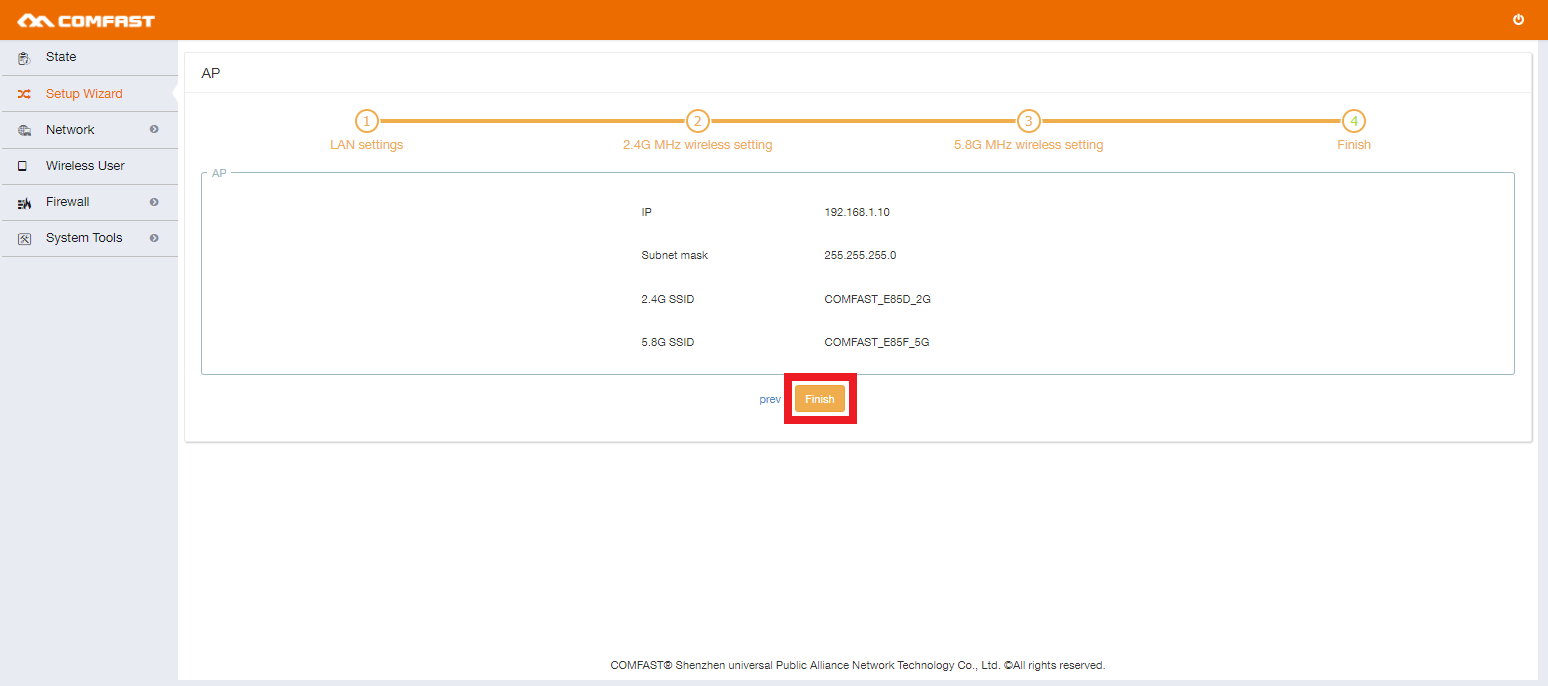
- Confirm the details that are listed are correct, and select Finish.
Bridge Mode Setup
Before beginning, ensure there is an existing device setup as an access point that is configured for this device to connect to.
- Set your computer in the same IP range as the device, see Step 1.
- Open a web browser and enter the default IP address of the device, 192.168.10.1
- Login with the default username of admin and password of admin
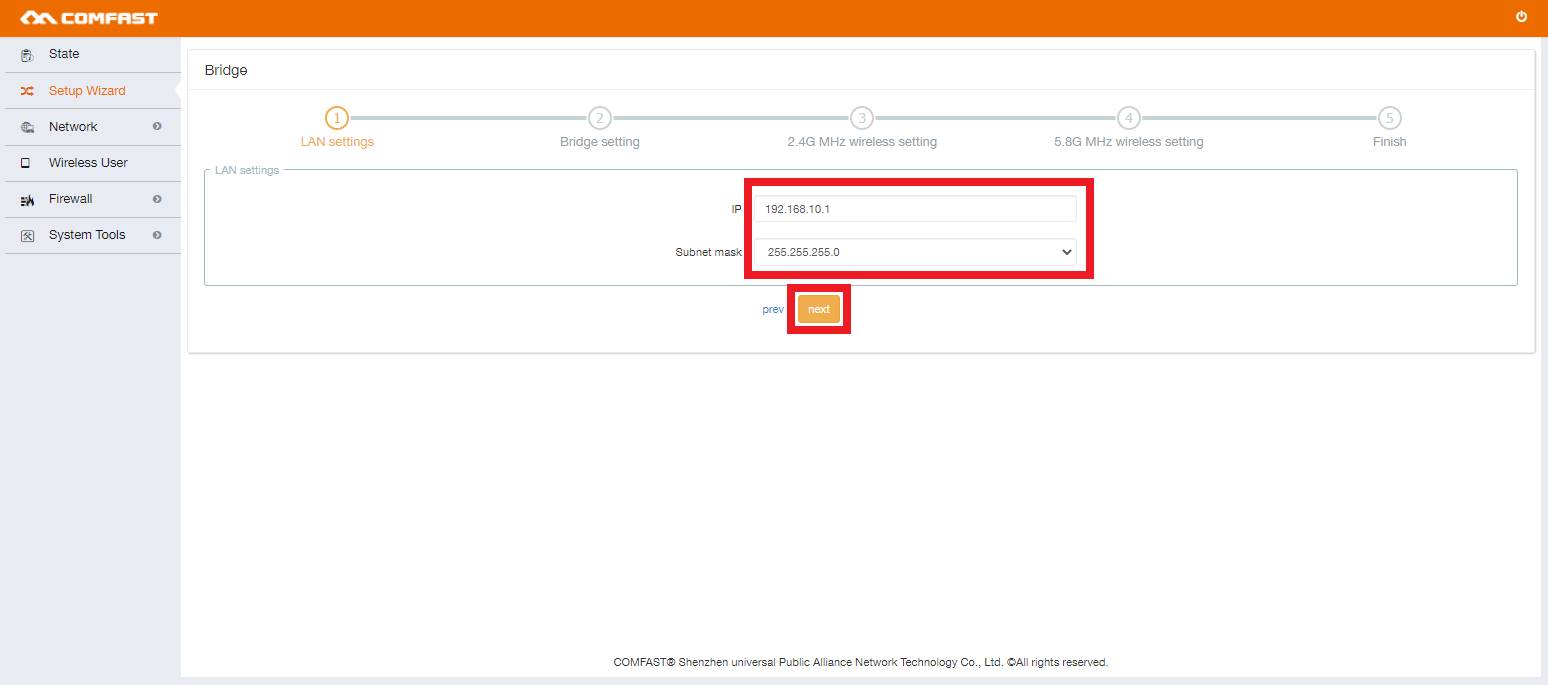
- Once logged in, select Bridge.
- Change the IP Address and Subnet Mask to suit the existing IP Address range that the device is going to be connected to. Select Next.
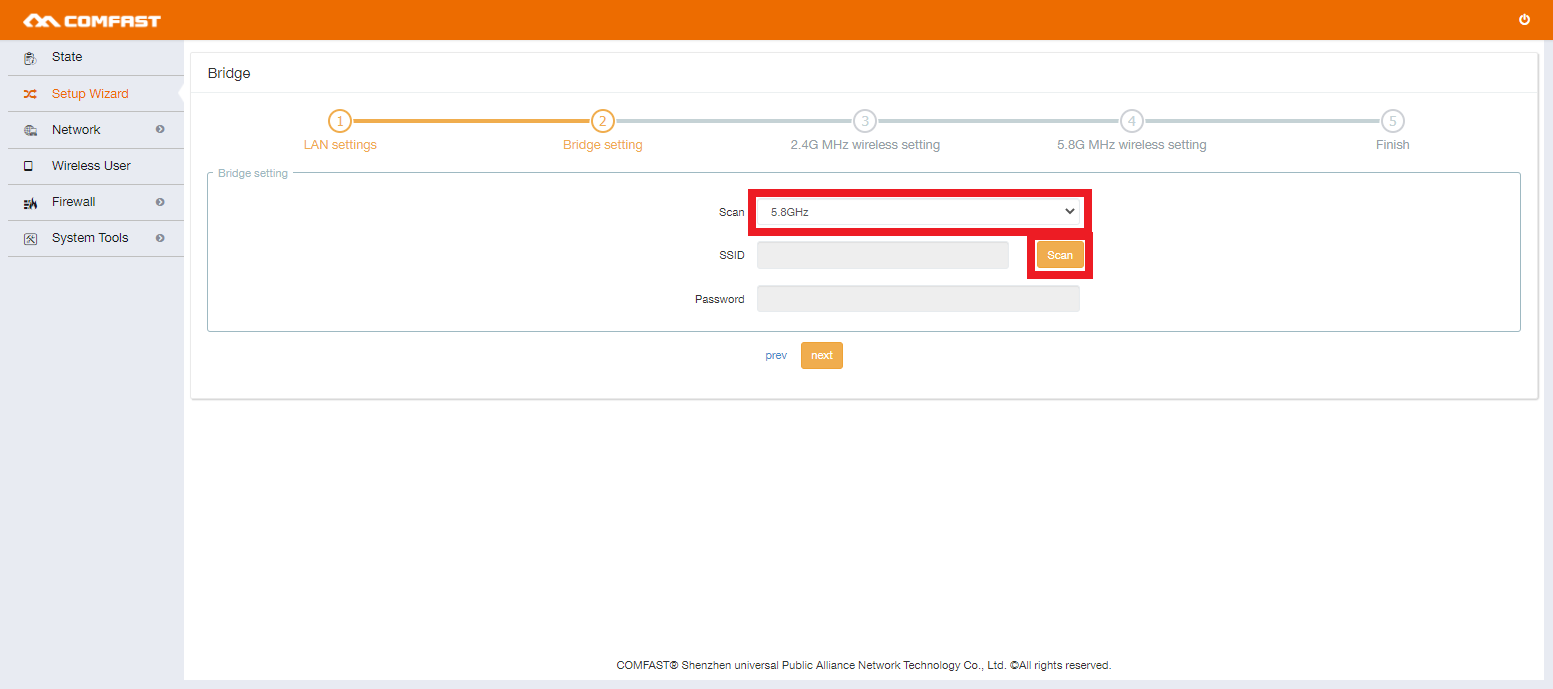
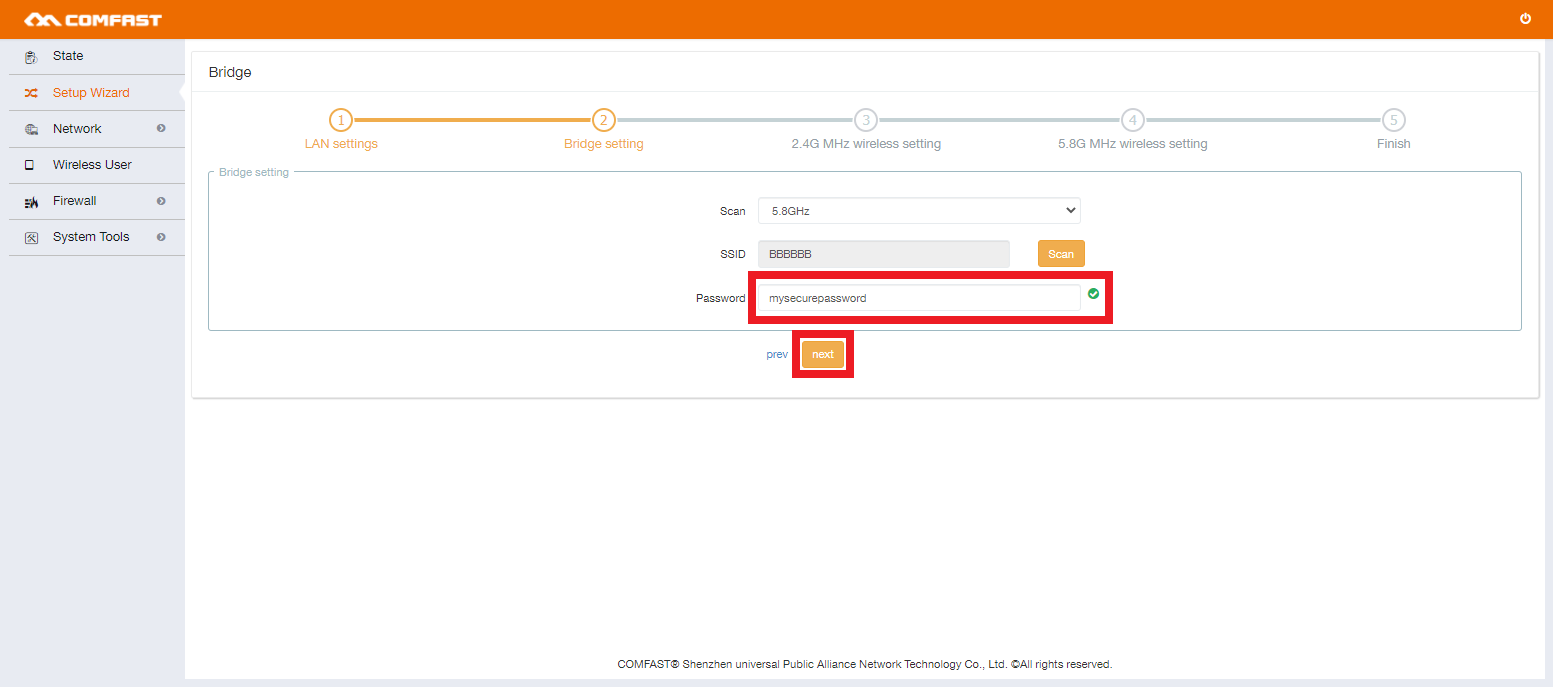
- To search for the existing network you would like to bridge to, select the Frequency, then select Scan.
- Once you have found the network, select the Operate button.
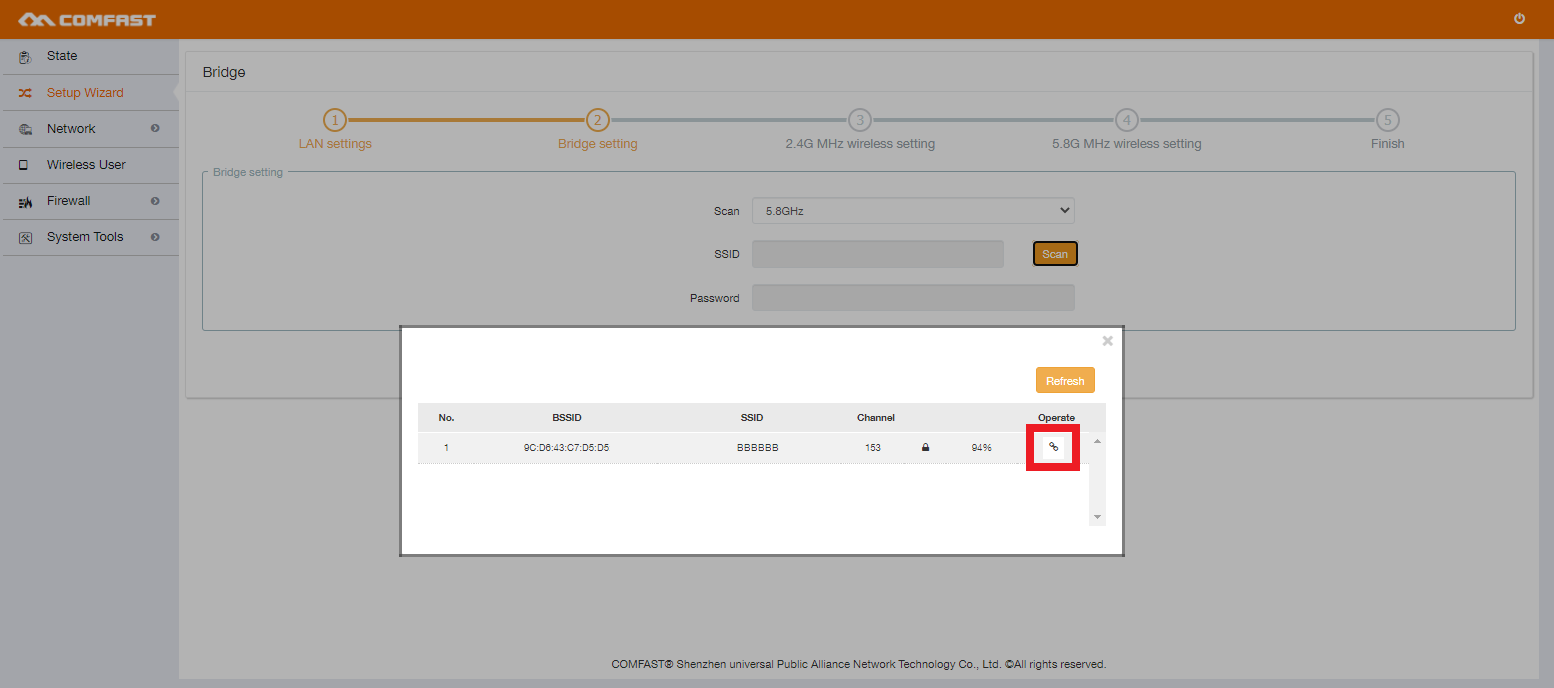
- Enter the Password for the network, and select Next.
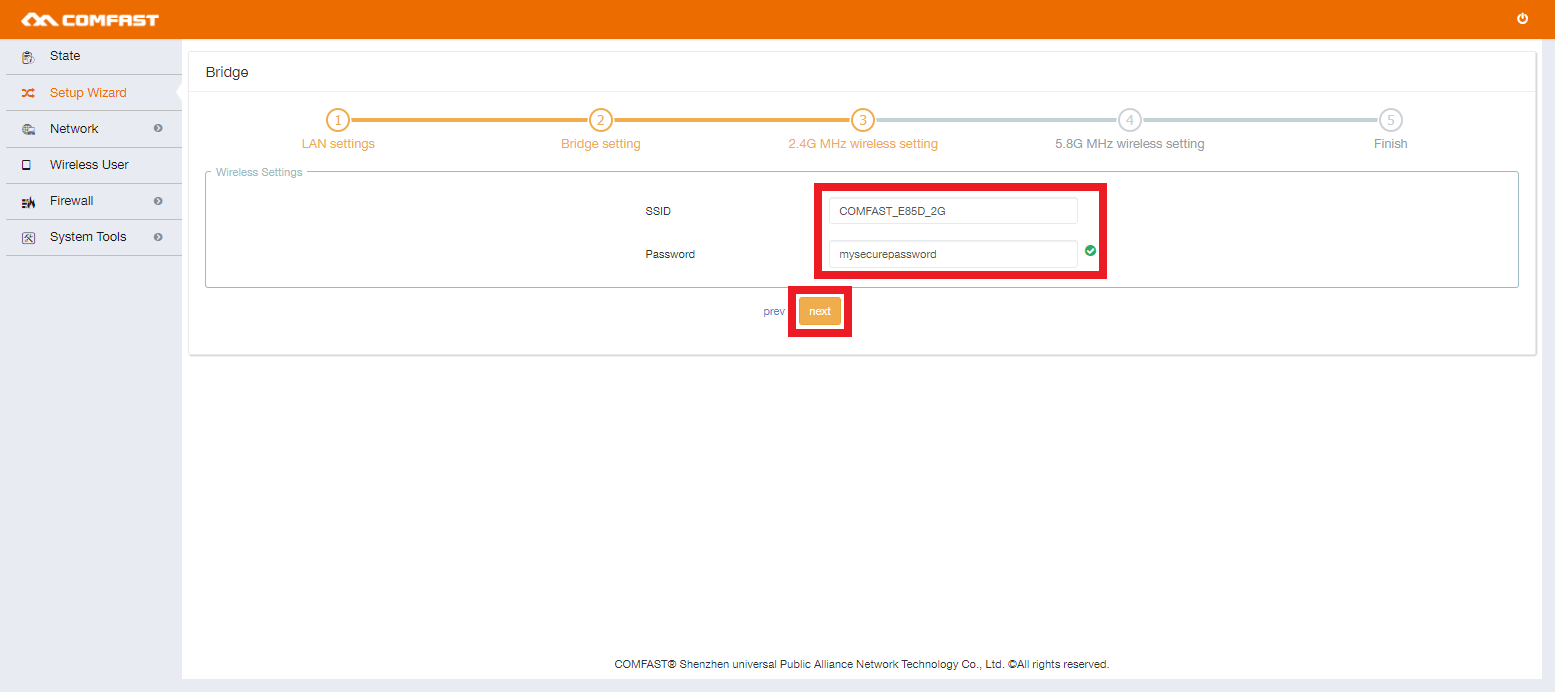
- Enter a SSID (Wireless Network Name) and a secure Password, these details are for the 2.4GHz Network. Select the Country as Europe. Select Next.
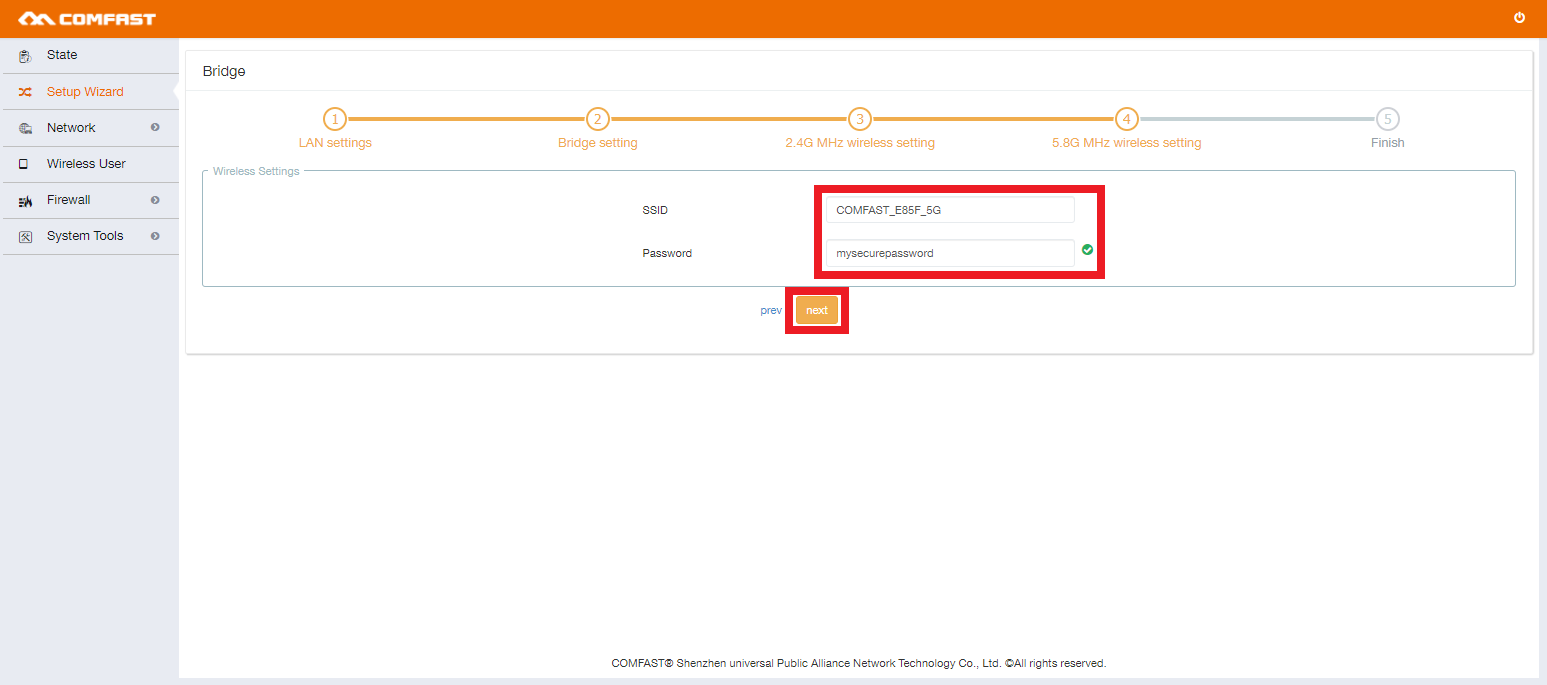
- Enter a SSID (Wireless Network Name) and a secure Password, these details are for the 5.8GHz Network. Select Next.
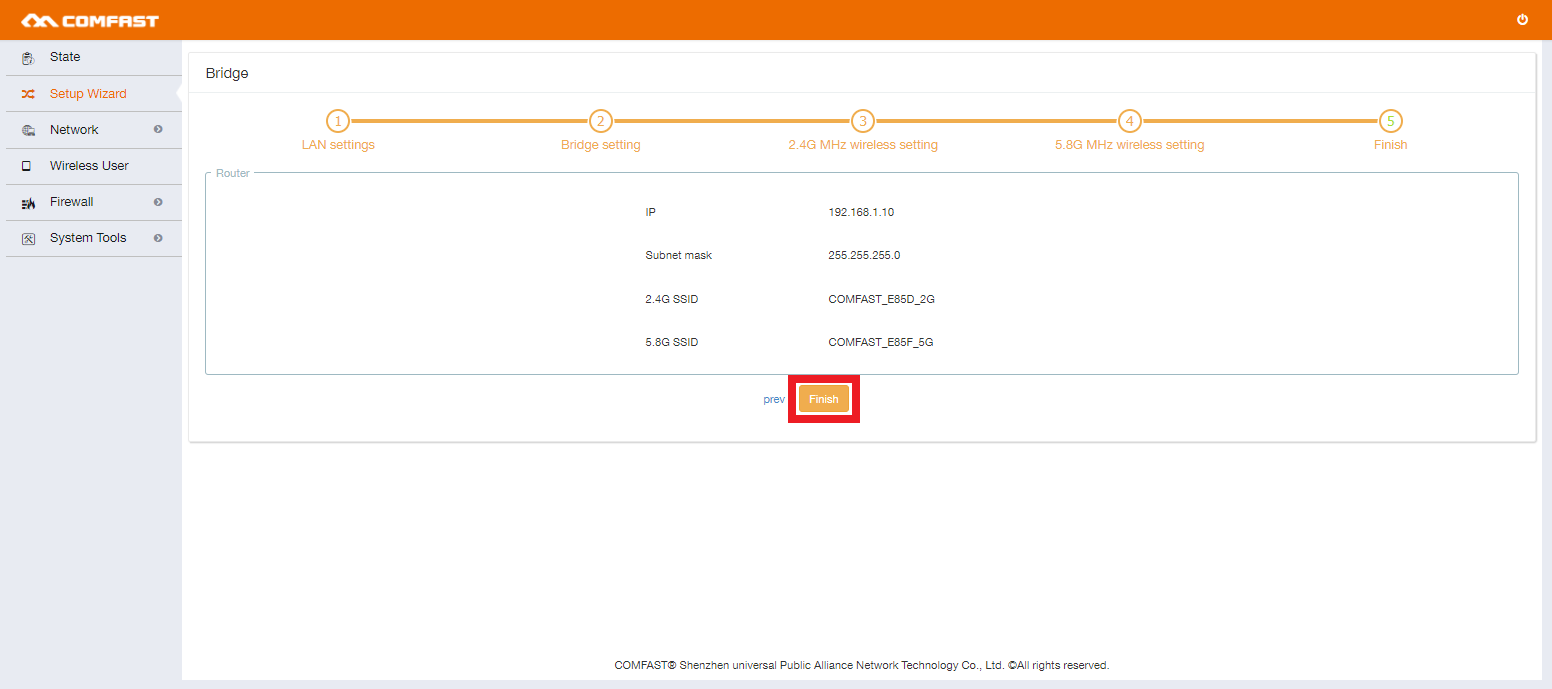
- Confirm the details that are listed are correct, and select Finish.
Factory Default
Press and hold the Reset button for 10 seconds, while the device is powered on.
This will set all values back to default, including the IP address, which will be 192.168.10.1