Wiring the Devices & Connecting to the Camera
Wiring Guide
.png)
This is how to wire the devices required. The Station and the Access Point need to be facing each other to function as intended.
Accessing the Camera for Setup
You will need to configure the camera though it's web interface. The Camera will need to be connected to the Laptop via an Ethernet cable. If your have wired your setup like the diagram above, you can unplug the cable from the modem and plug it into the laptop.
You can access the Web Interface by entering the camera's IP address into the address bar of Internet Explorer. 192.168.1.108 is the default IP of our cameras. You may need to change the IP address of your laptop to reach it
Changing the IP Address of a Windows PC
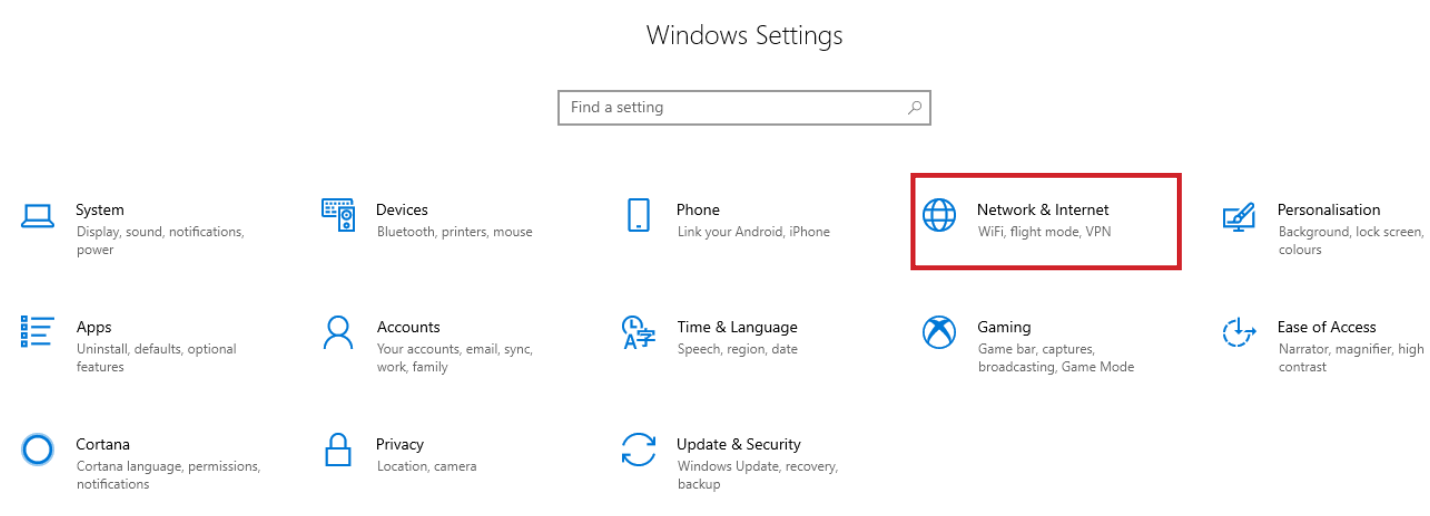
- Open Settings.
- Select Network & Internet.
- Select Status, then Change Adapter Options.
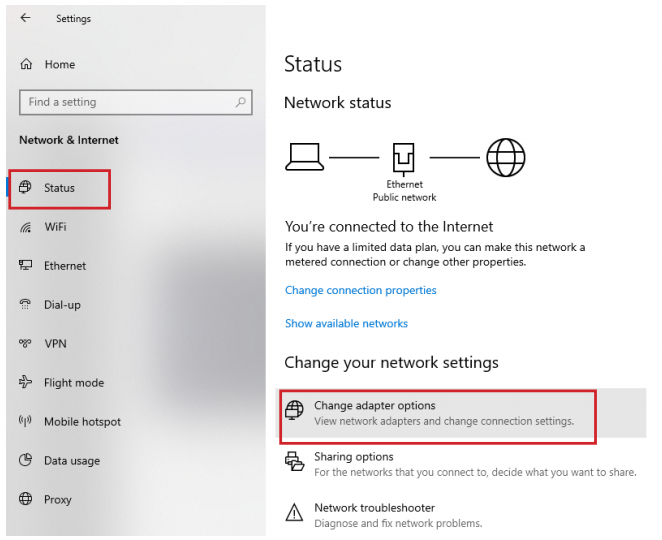
-
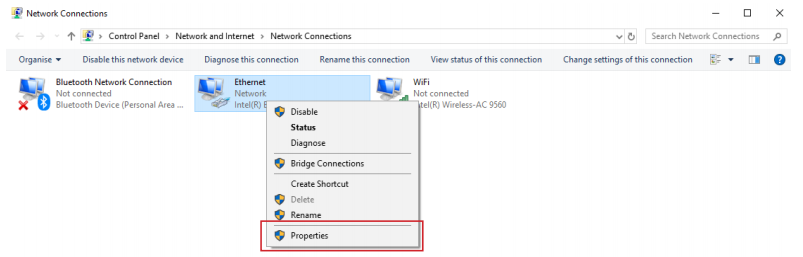
Right-click the network adapter you want to change the IP address for, and select Properties.
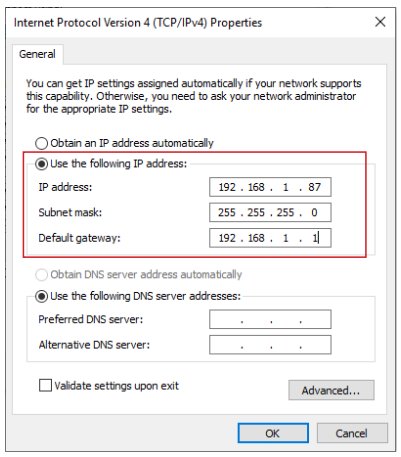
- Select the Internet Protocol Version 4 (TCP/IPv4) item.
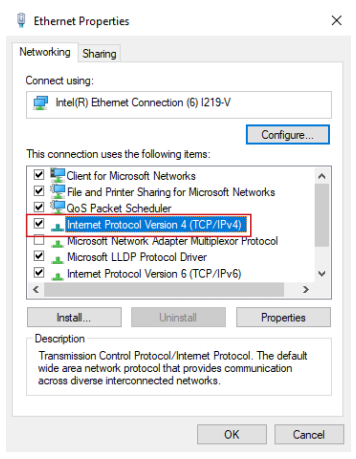
- Click Use the following IP address and enter an IP address in the same range as the device you are trying to access. (E.g when trying to access 192.168.1.108 use a IP address in the 192.168.1.x range.) Note: This cannot be the same as the device you are trying to connect to or any other device on the same network. Save your changes on both windows.
- Type the IP address of the device you are trying to access into the address bar of your web browser.
- Once finished configuring the device, change the adapter settings back to normal by following steps 1-6 and clicking Obtain an IP address automatically.
Configuring the Camera
Step 1 - Initialise the Camera
a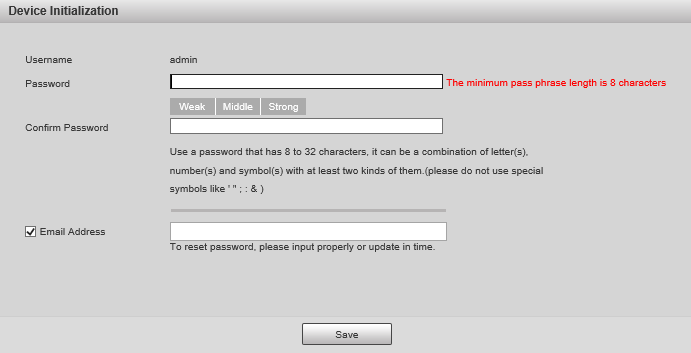
Initialise the camera by entering a new password (It will need to be at least 8 characters long), then click Save.
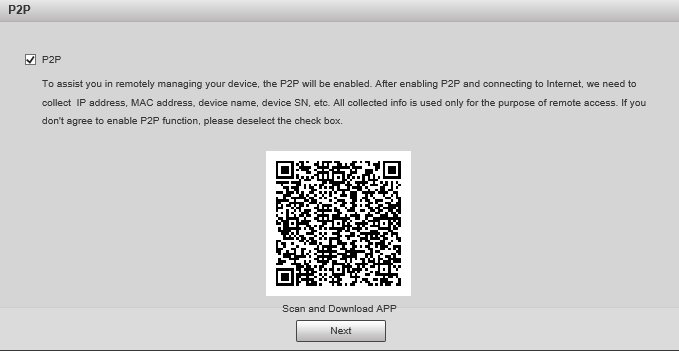
Ensure P2P is enabled and click Next
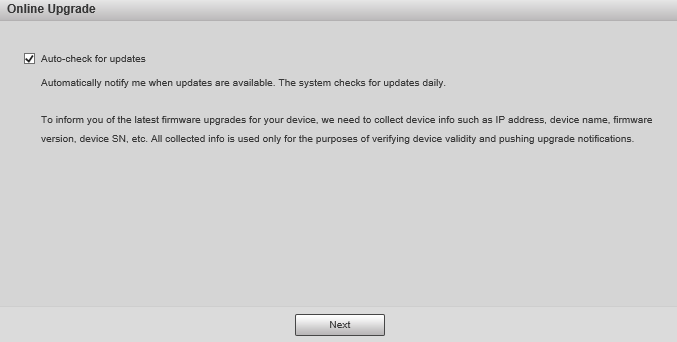
Click Next.
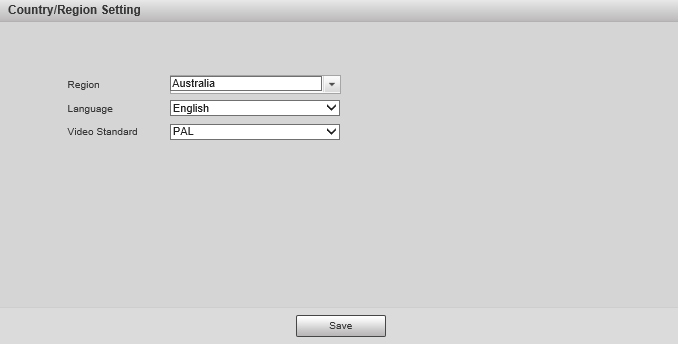
If prompted, select a region and click Save
Step 2 - Set Time & Date
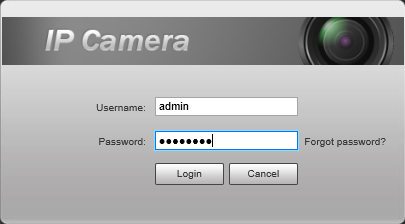
Log into the camera.
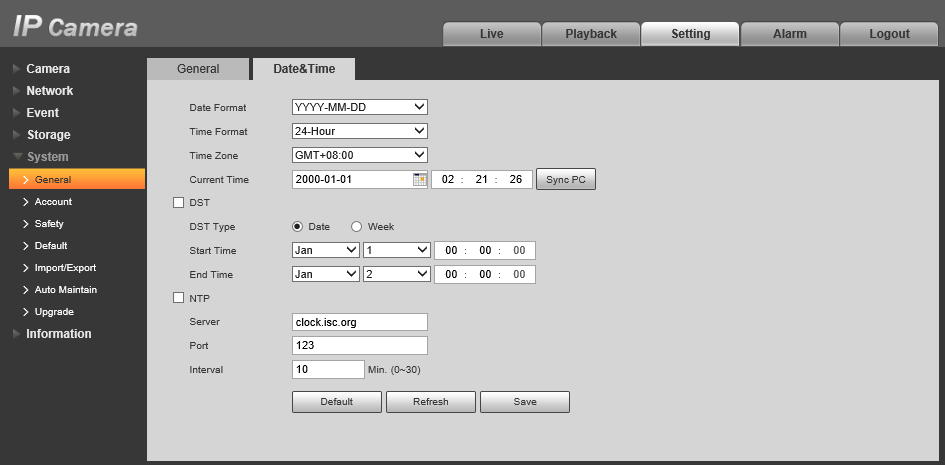
Navigate to Setting > System > General > Date&Time.
Configure the Time & Date settings and click Save
Step 3 - Enable and Schedule Motion.
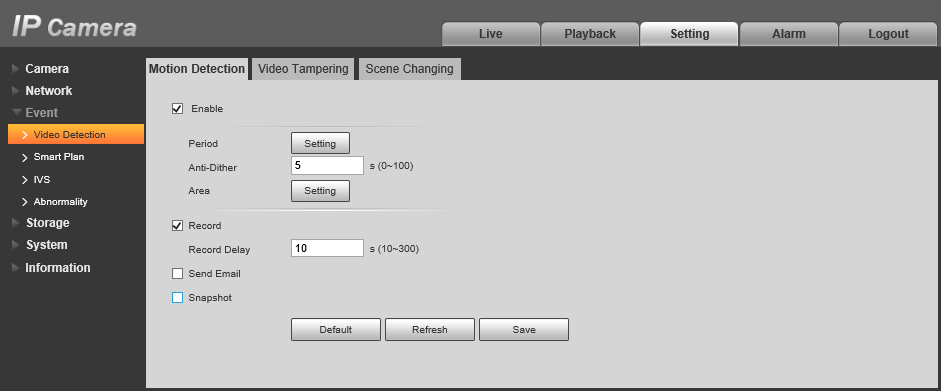
Navigate to Setting > Event > Video Detection > Motion Detection.
Tick Enable and click Save.
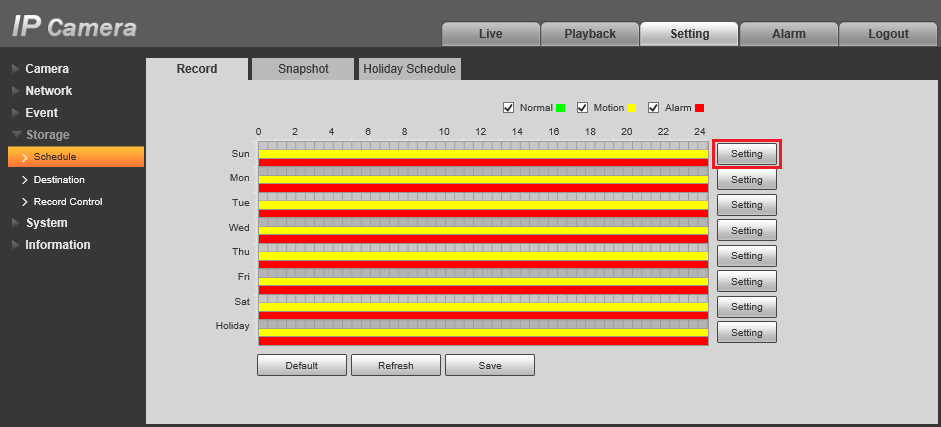
Navigate to Setting > Storage > Schedule > Record.
Click Setting
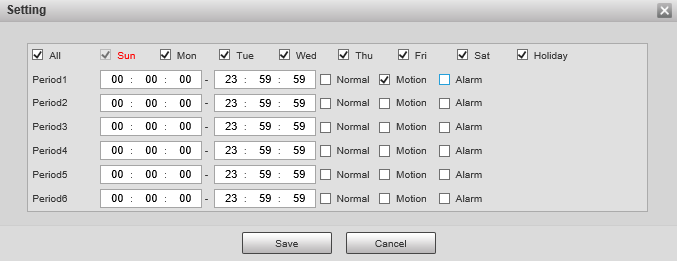
Configure this screen as desired. To record Motion, you will need to have Motion ticked.
If you want to record only Motion events on every day of the week, copy the settings above.
Click Save, and Save again on the previous screen.
Your Camera is now configured to detect and record motion.
Step 4 - Set an IP Address on the Camera
If the IP address of the camera is not in the same range as the network it will be on, you will need to change it's IP address.
Choosing an IP Address
To find the IP range on a network, or to find available IP addresses, follow the steps below.
Windows
Finding the IP Range of a Network
This is useful if you are unsure what the network details are, or if you have requested pre-programming. When pre-programming devices, we require these details.
1. Connect a Windows PC / Laptop, open the start menu and type cmd.
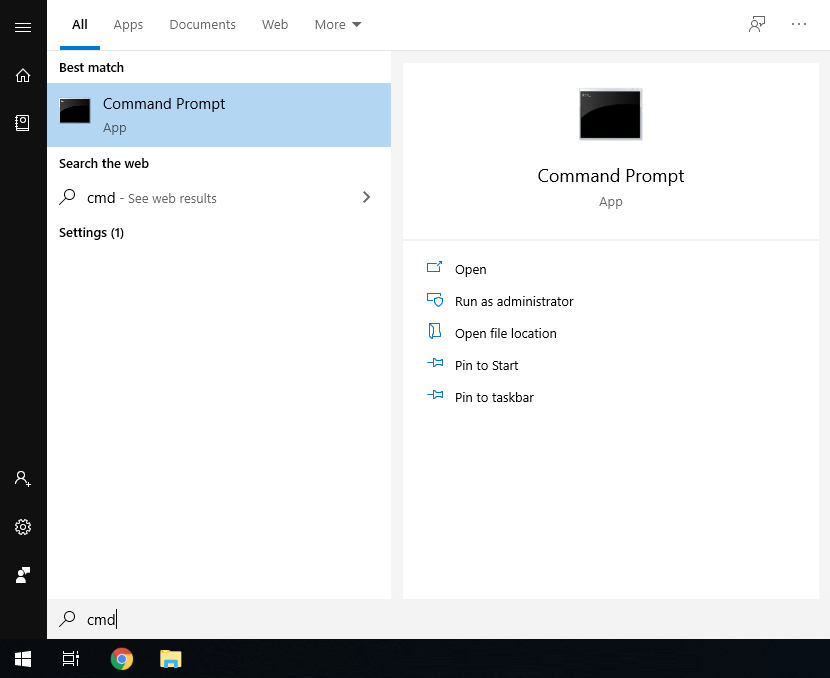
2. Launch the Command Prompt program.
3. Once it opens, enter the command ipconfig and take a screenshot or copy the information as below. We require the IP address, Subnet Mask and Default Gateway.
4. A screenshot can be taken by pressing the Windows + Shift + S keys simultaneously, then paste it into a document/email with Ctrl + V

Finding Available IP Addresses
If you wish to connect devices to the network for remote access, you must give each device an IP address, within your network range. In this example, we will be using a Windows computer which is connected to a modem to find the IP address of the computer, and available IP addresses to use for the devices. If the devices are being installed on a business or managed network, contact an IT representative for assistance.
1. Connect a Windows PC / Laptop, open the start menu and type cmd.

2. Launch the Command Prompt program.
3. Once it opens, enter the command ipconfig and take a screenshot or copy the information as below. Note down the IP Address, Subnet Mask and Default Gateway.
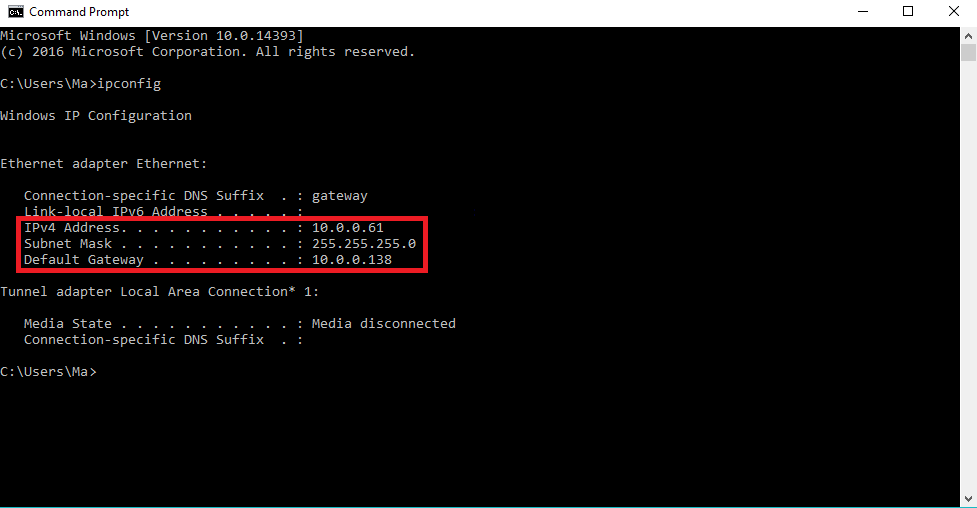
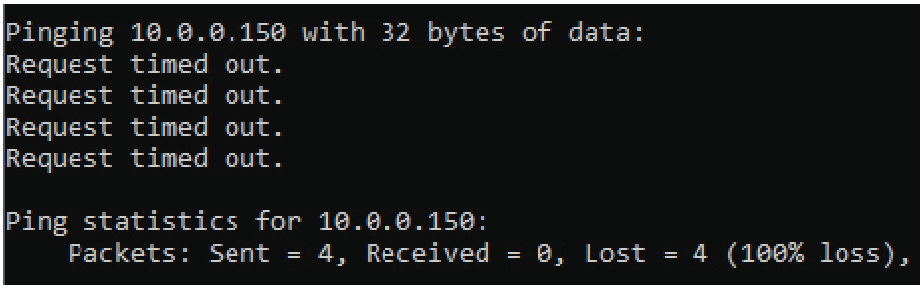
4. In our example, the IP address is 10.0.0.61. To check what IP address is available, type ping 10.0.0.XXX, where XXX is any number between 2 and 254. If Destination host unreachable or Request timed out is show on screen, there is no device using that IP address. Repeat the process to find multiple IP addresses that are available for use. Every devices requires one IP address. 10.0.0.XXX is used as an example, you the IP Address range will vary depending on the network.
5. When configuring the devices, use the IP addresses that you have found that are available, making sure each device has a unique IP address. The Subnet Mask and Default Gateway, will be set the same on each device.
MAC OSX
Finding the IP Range of a Network
This is useful if you are unsure what the network details are, or if you have requested pre-programming. When pre-programming devices, we require these details.
1. Open the Apple Menu ( ) and select System Preferences.
2. Select the Network option.

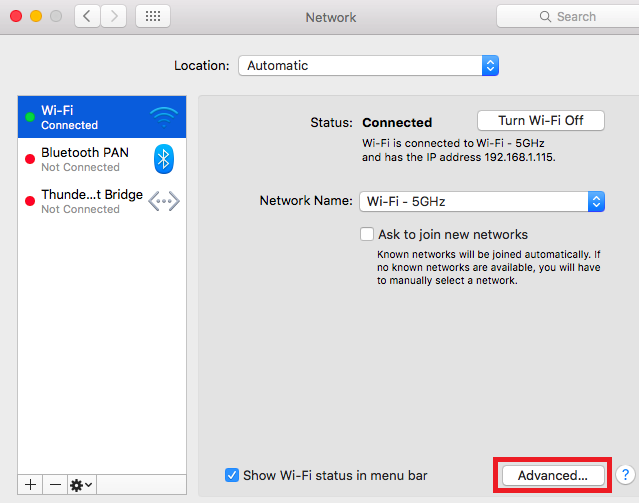
3. Select either Ethernet (for wired connections) or Wi-Fi (for wireless connections), then select advanced.
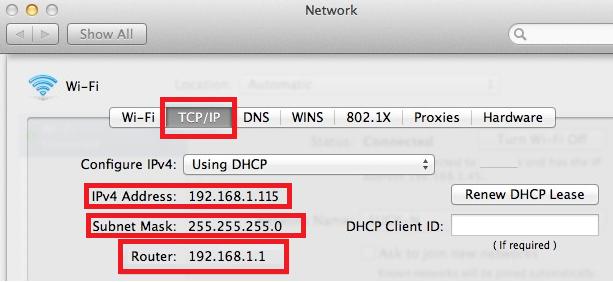
4. Select TCP/IP. The details in red are the network details.
5. A screenshot can be taken by pressing the Command + Shift + 3 keys simultaneously. The screenshot will be saved to the desktop
Finding Available IP Addresses
If you wish to connect devices to the network for remote access, you must give each device an IP address, within your network range. In this example, we will be using a Apple Mac which is connected to a modem to find the IP address of the computer, and available IP addresses to use for the devices. If the devices are being installed on a business or managed network, contact an IT representative for assistance.
1. Follow the steps for Finding the IP Range of a Network - Mac OSX.
2. Press Command + Space bar keys to bring up spotlight.
3. Type Terminal, and double click on the search result.
4. To check what IP address is available, type ping 192.168.1.XXX, where XXX is any number between 2 and 254. If Request timeout is show on screen, there is no device using that IP address. Repeat the process to find multiple IP addresses that are available for use. Every devices requires one IP address. 192.168.1.XXX is used as an example, you the IP Address range will vary depending on the network.
5. When configuring the devices, use the IP addresses that you have found that are available, making sure each device has a unique IP address. The Subnet Mask and Default Gateway, will be set the same on each device.
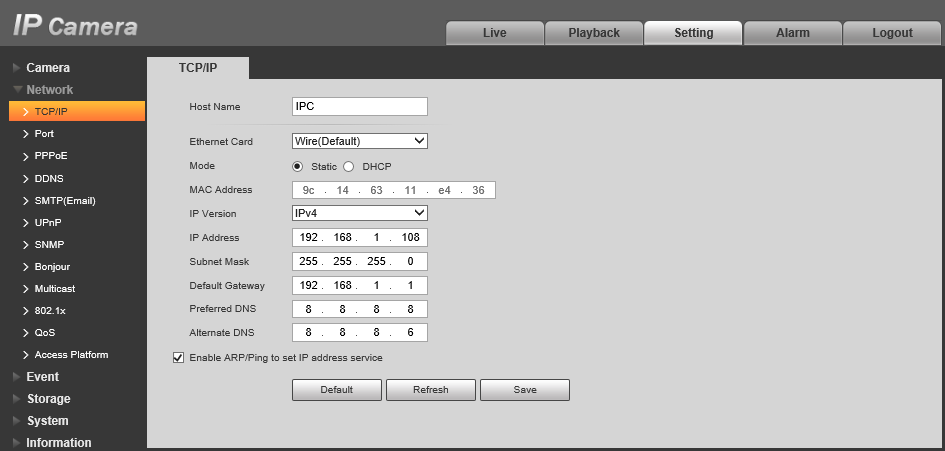
Navigate to Setting > Network > TCP/IP
Change the IP Address, Subnet Mask and Default Gateway.
(You may need to change the Laptop's IP address again to access the camera after you change this setting.)
Step 5 - Connect the Camera to the Modem & Check the P2P Status
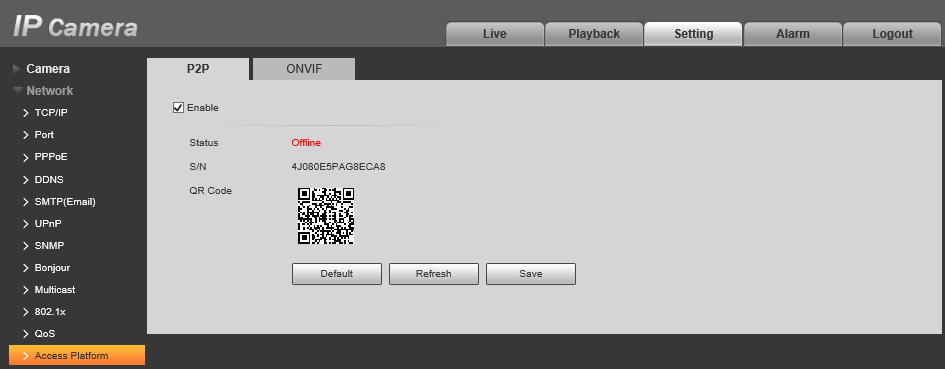
Navigate to Setting > Network > Access Platform > P2P
(At this point you can plug the cable back into the modem and connect to the modem's wifi with the laptop)
Make sure P2P is ticked. When the status on this page says Online you will be able to view the Camera remotely.
If it does not say online, check all of your cables and ensure the IP Address you chose is in the right range and not conflicting with anything.
You can use the S/N and QR code on this screen to add this camera to a remote viewing application.
Adding a Camera to the DMSS App & Enabling Notifications
 |
It can be used to access live view and recorded playback, receive push notifications and unlock Door Stations when away from home. Add devices such as IP Cameras, NVR & CVRs and Door Stations. DMSS can be found on the Google Play store and iOS App Store. |
How to add devices to the DMSS app via P2P
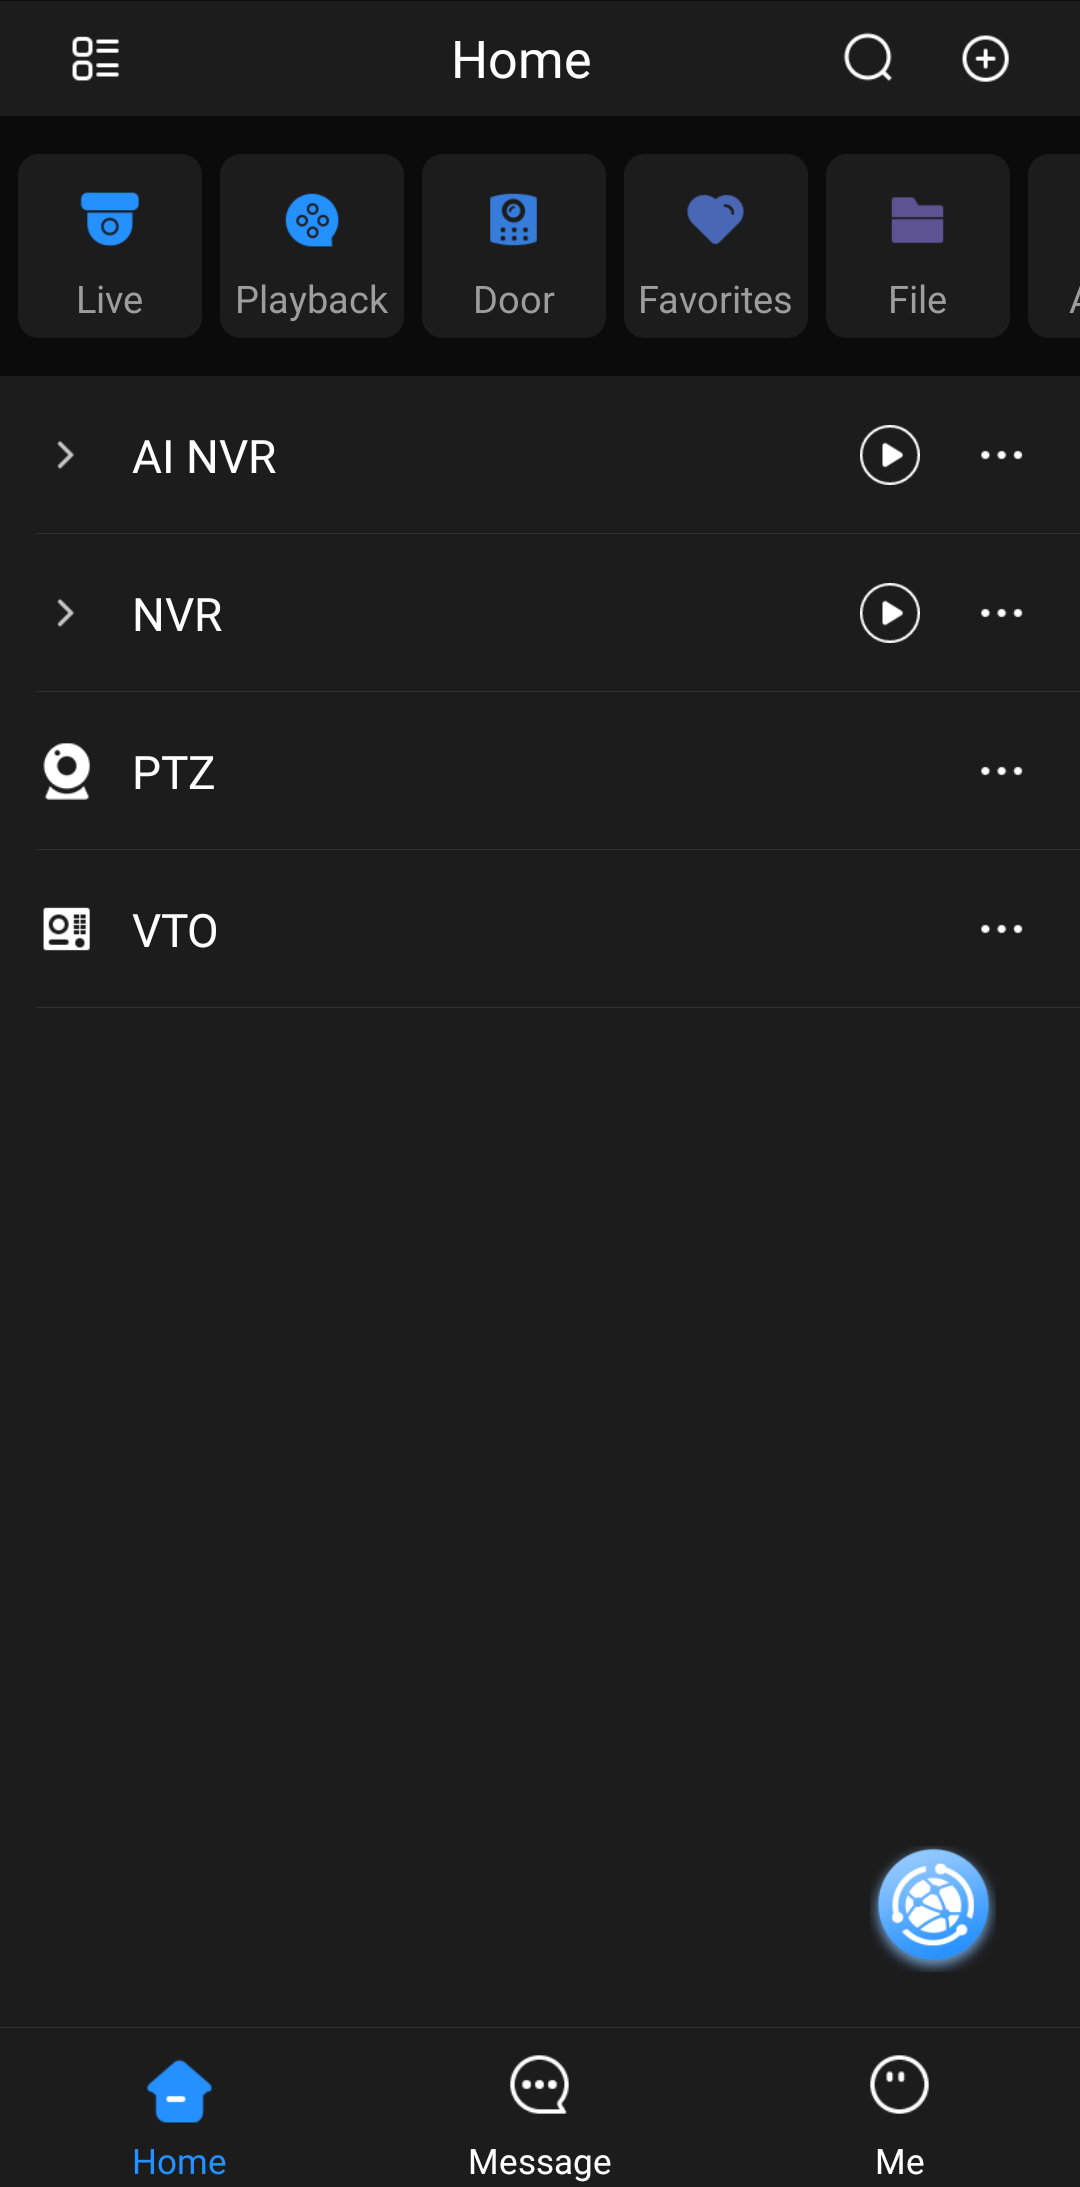 |
Tap on the
 icon icon |
 |
Tap on SN/Scan
|
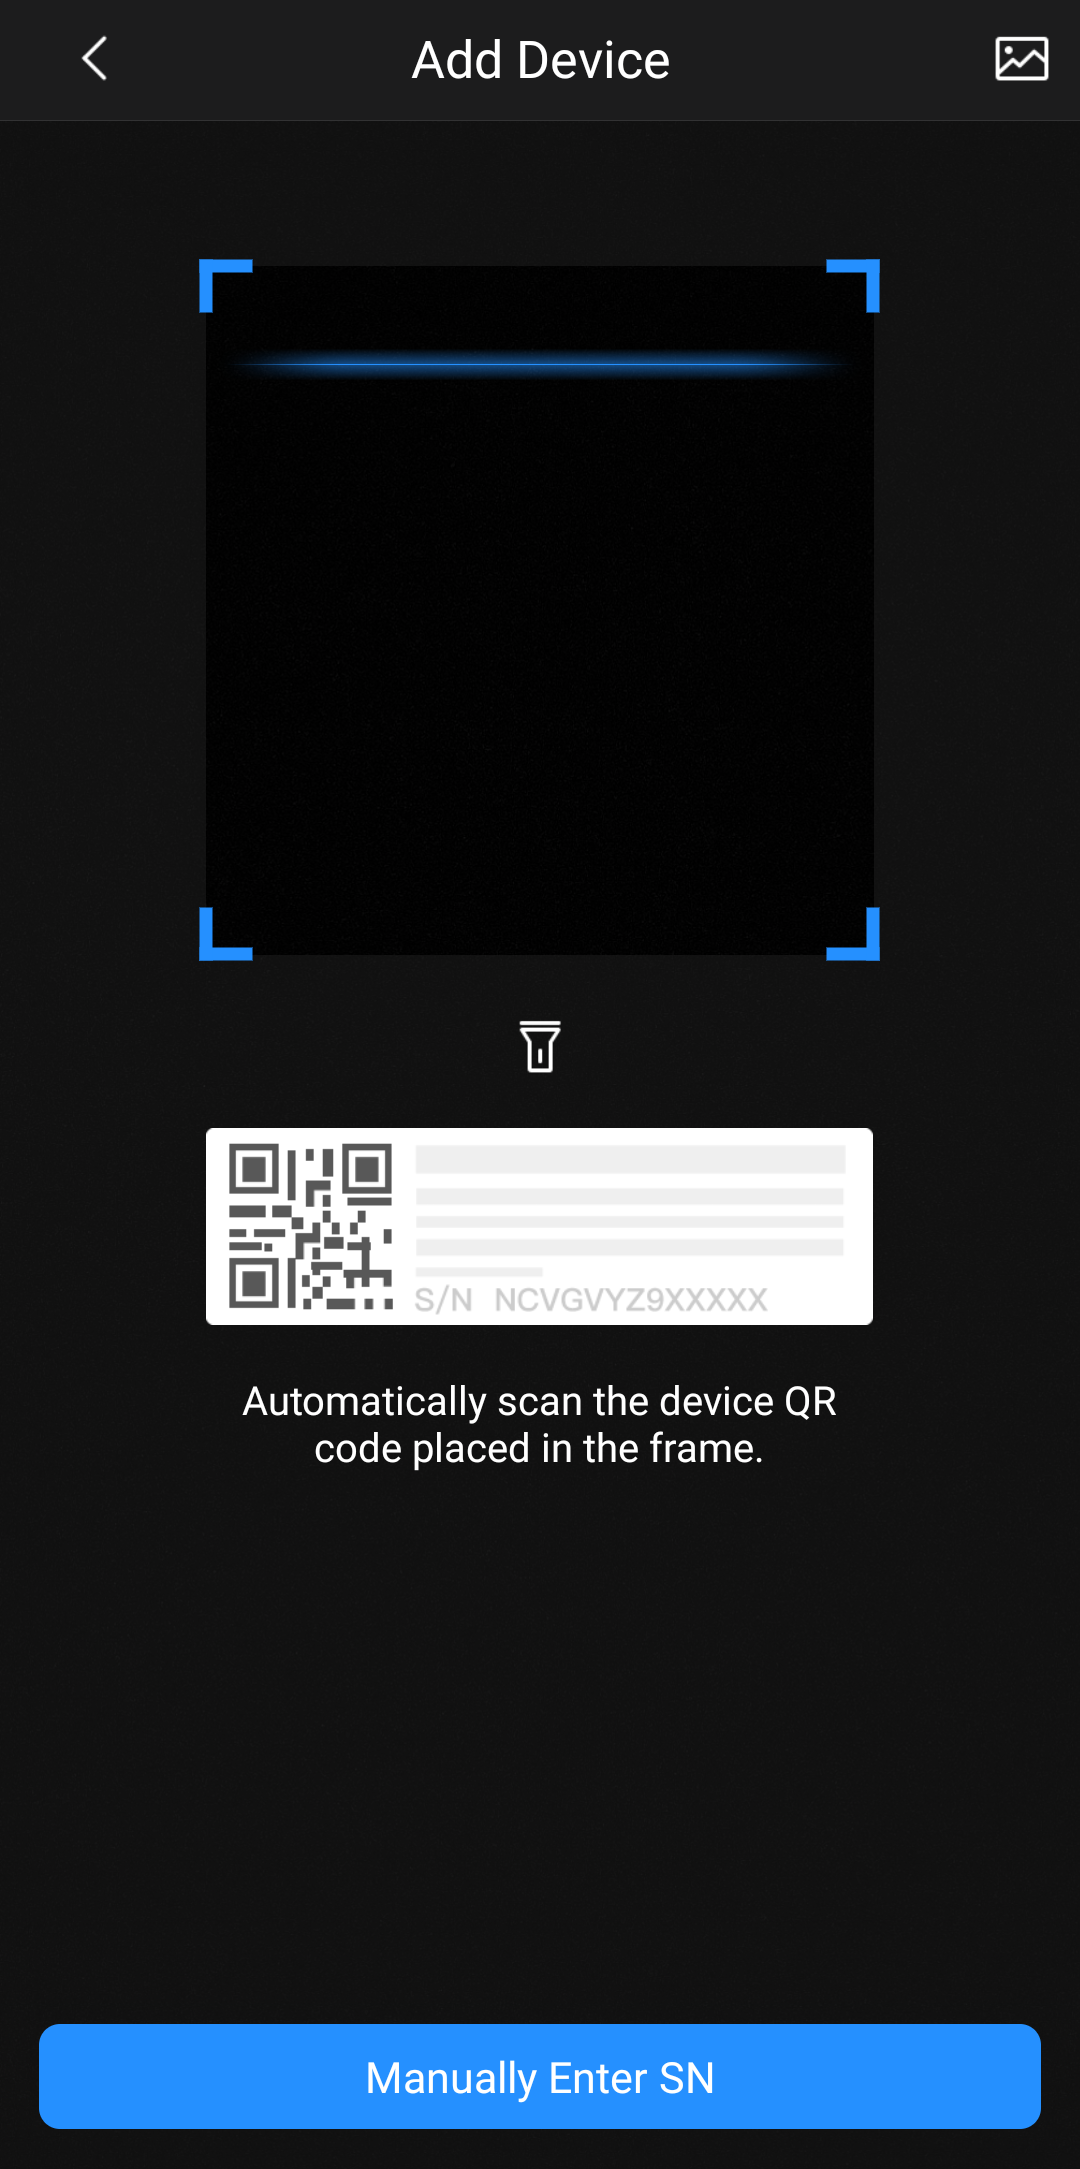 |
Scan the QR code for your Device's Serial Number, then click Next
If you don't have a QR code, tap the Manually Enter SN button and enter the serial number of your device manually.
|
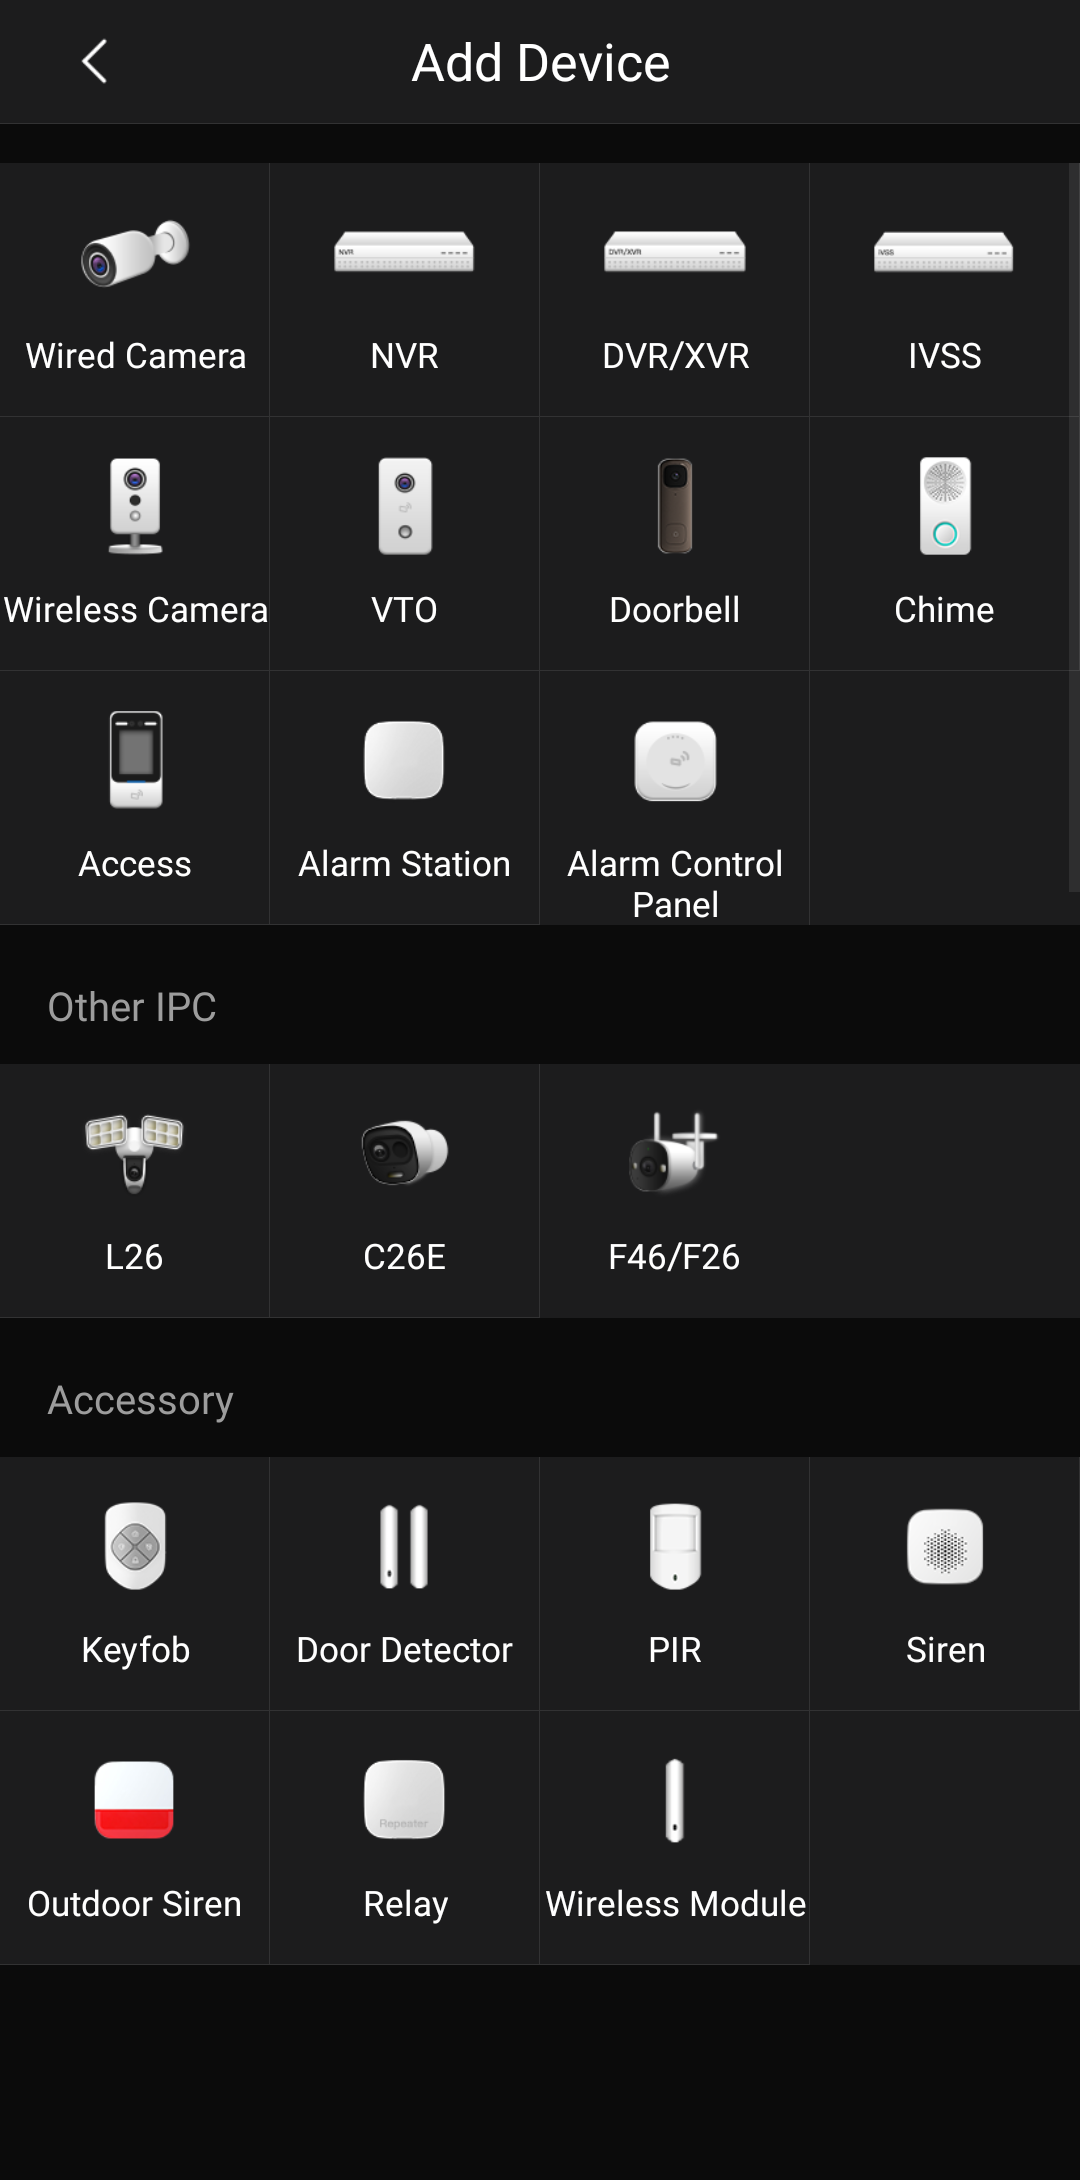 |
Tap on the type of device you wish to add.
|
 |
1) Name your device
2) Enter the admin account’s password 3) Tap Save |
How to add devices to the DMSS app via IP/Domain
If you wish to add a device to DMSS via it's IP address you will need to use Port Forwarding.
If you are unfamiliar with Port forwarding, we suggest that you use the P2P method outlined above.
 |
Tap on the
icon |
 |
Tap on IP/Domain
|
 |
Tap on the type of device you wish to add.
|
 |
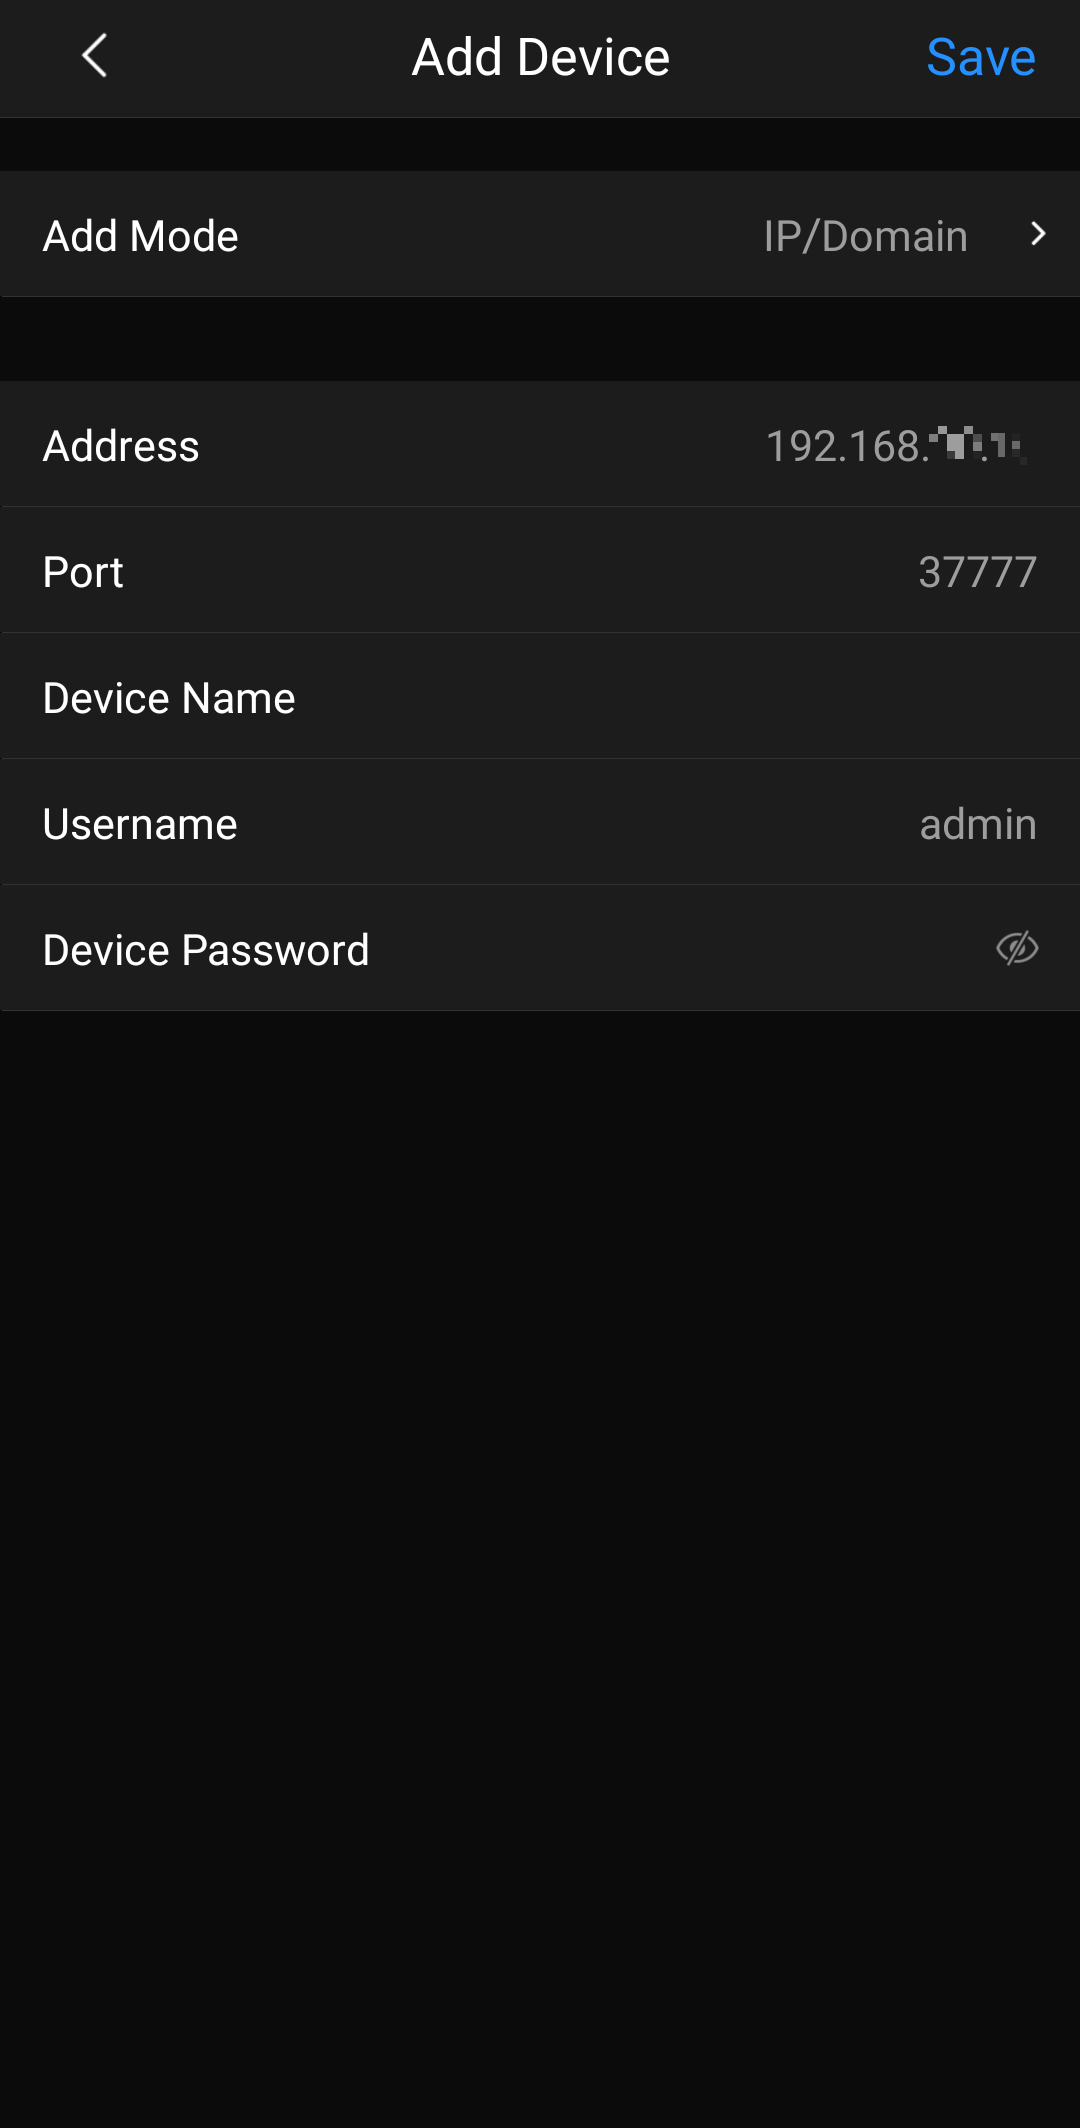
1) Enter the IP Address of your Device
2) Name your device 3) Enter the admin account’s Password 4) Tap Save |
How to add devices to the DMSS app that are on your local WiFi network
 |
Tap on the
icon |
 |
Tap on Online Search
|
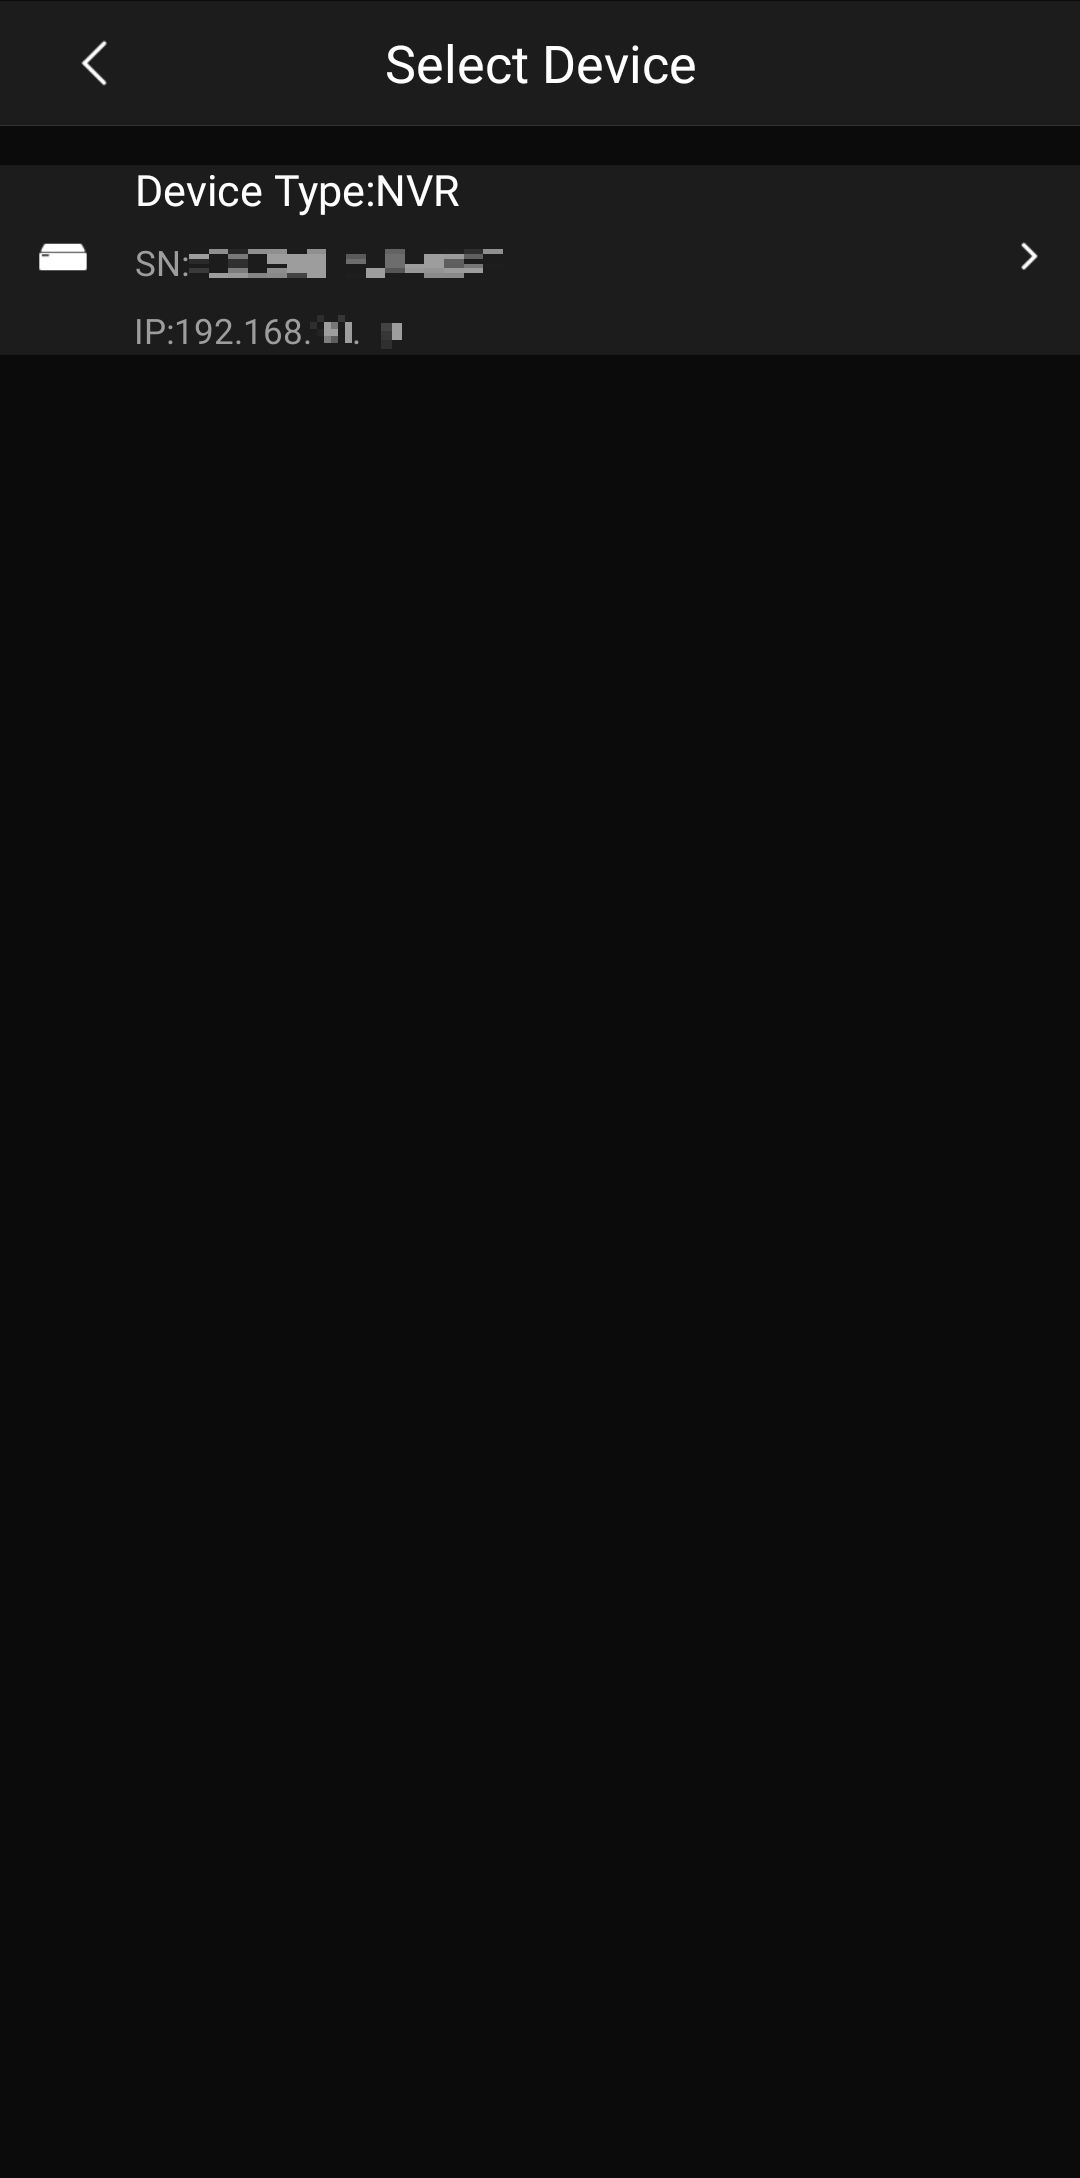 |
Tap on the Device you wish to add |
 |
Tap on Add Mode
|
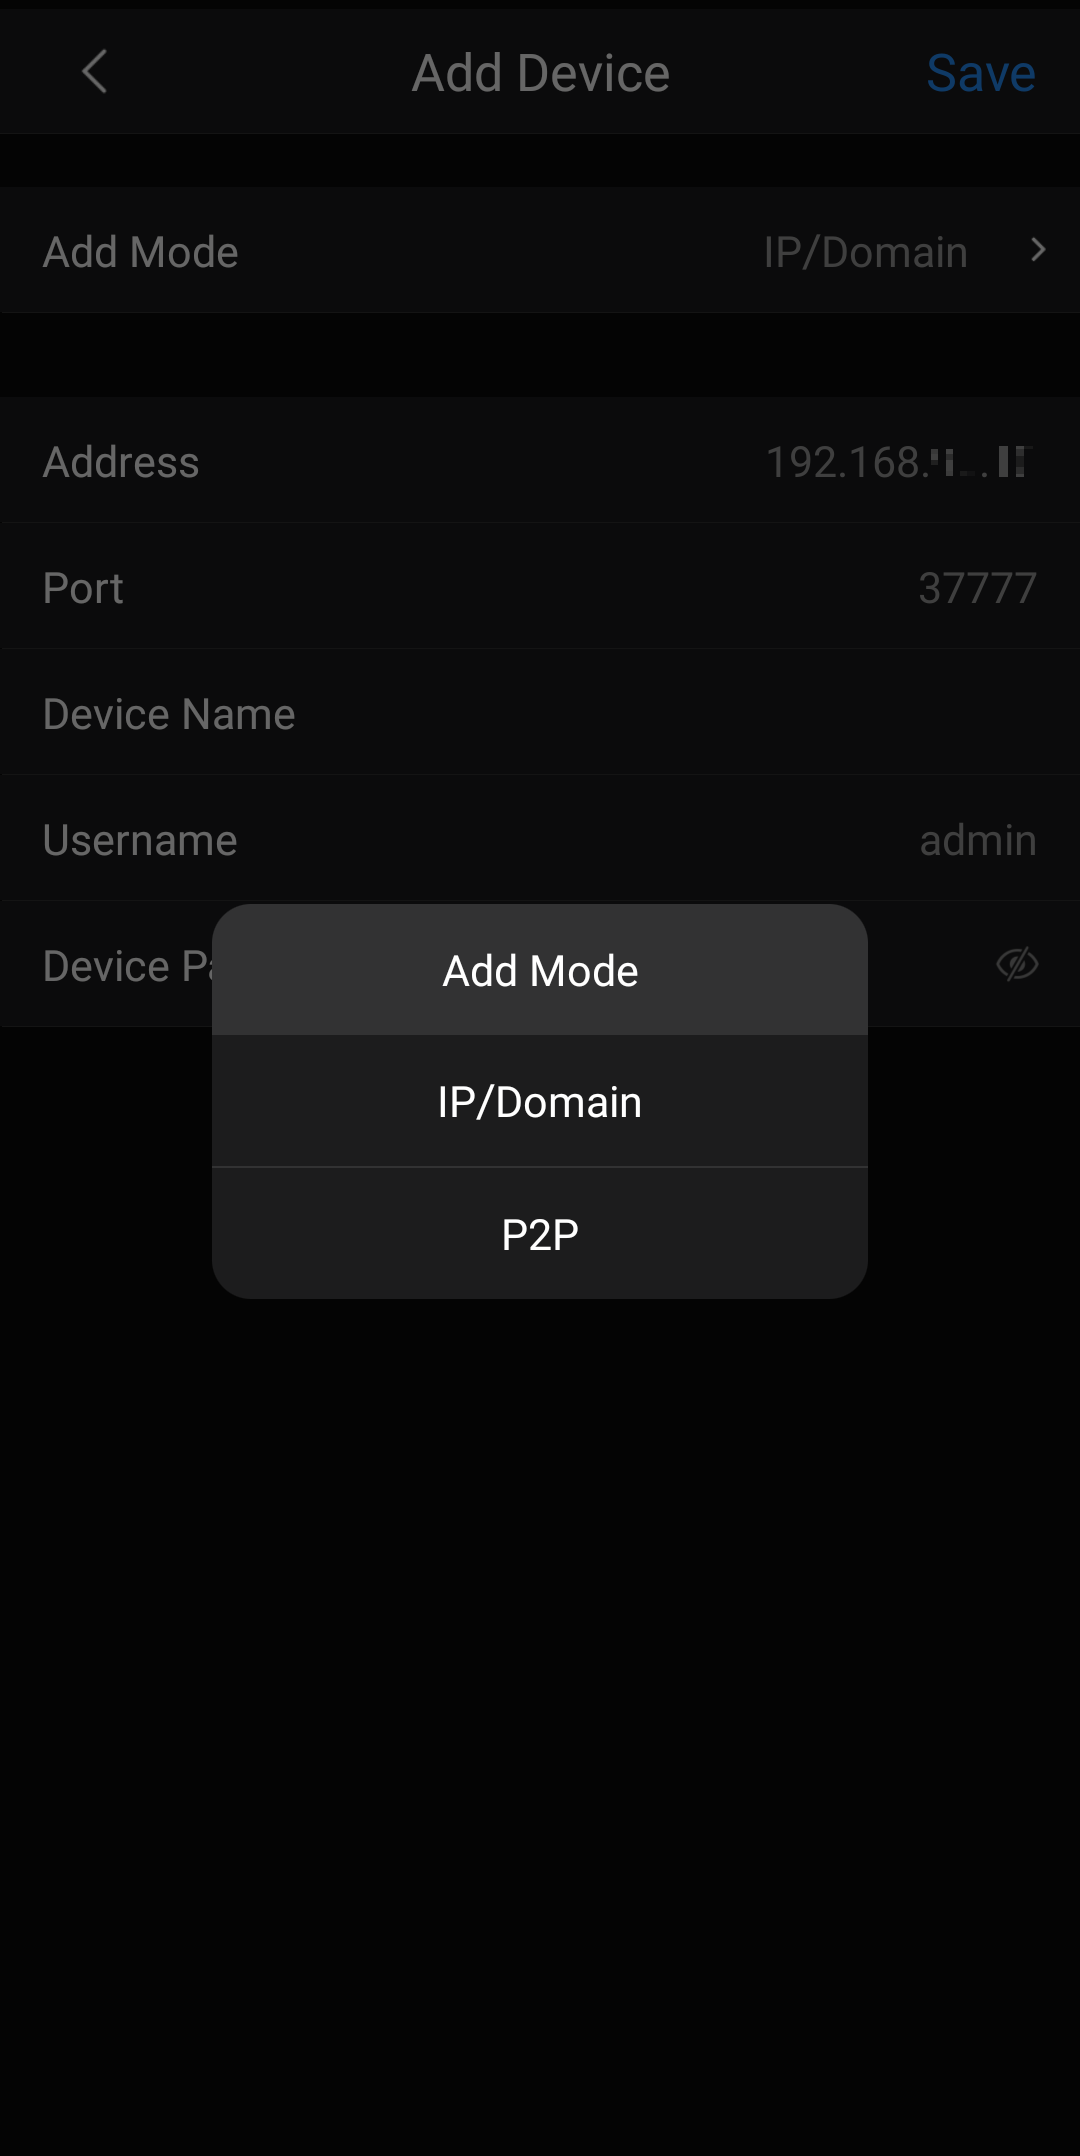 |
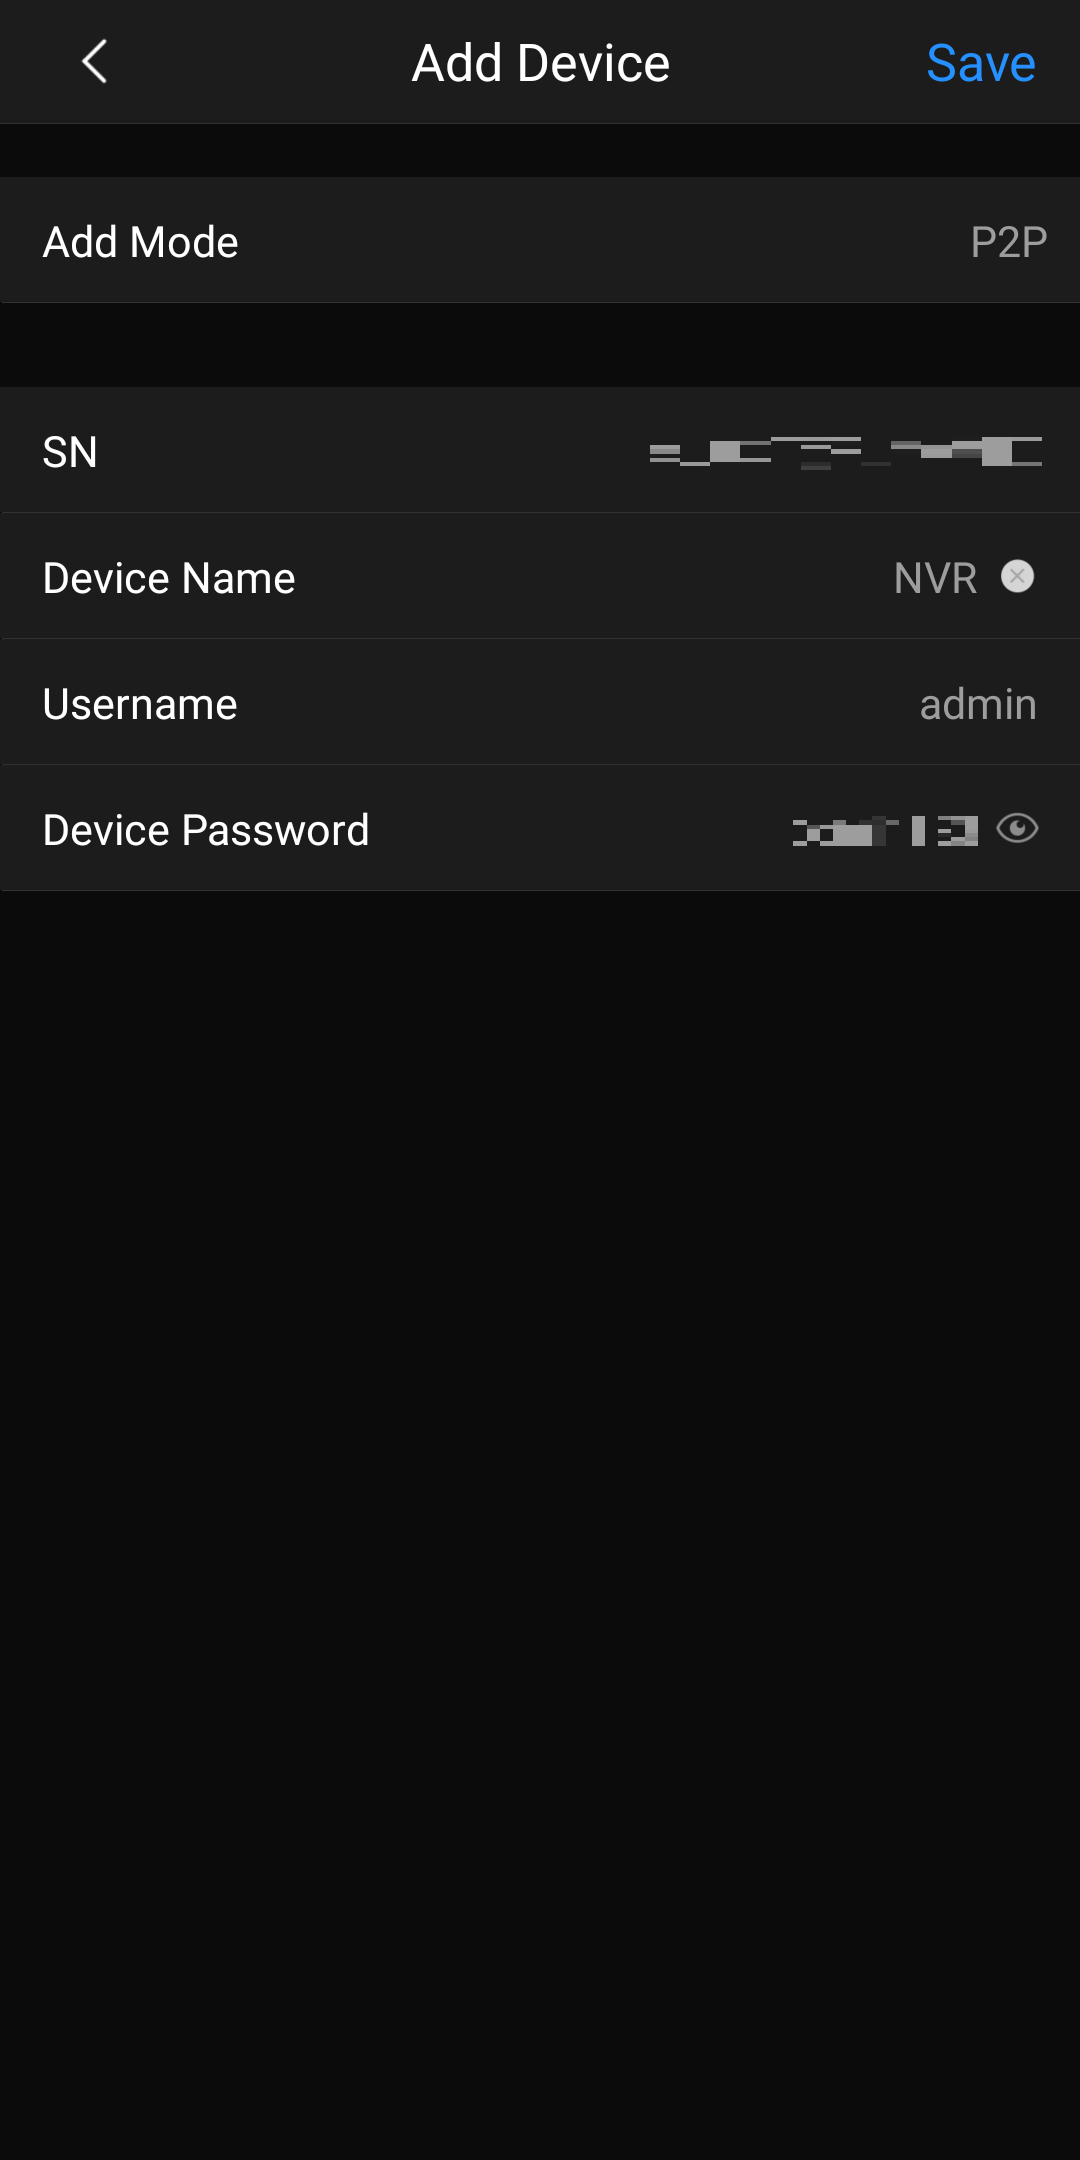
Tap on P2P
|
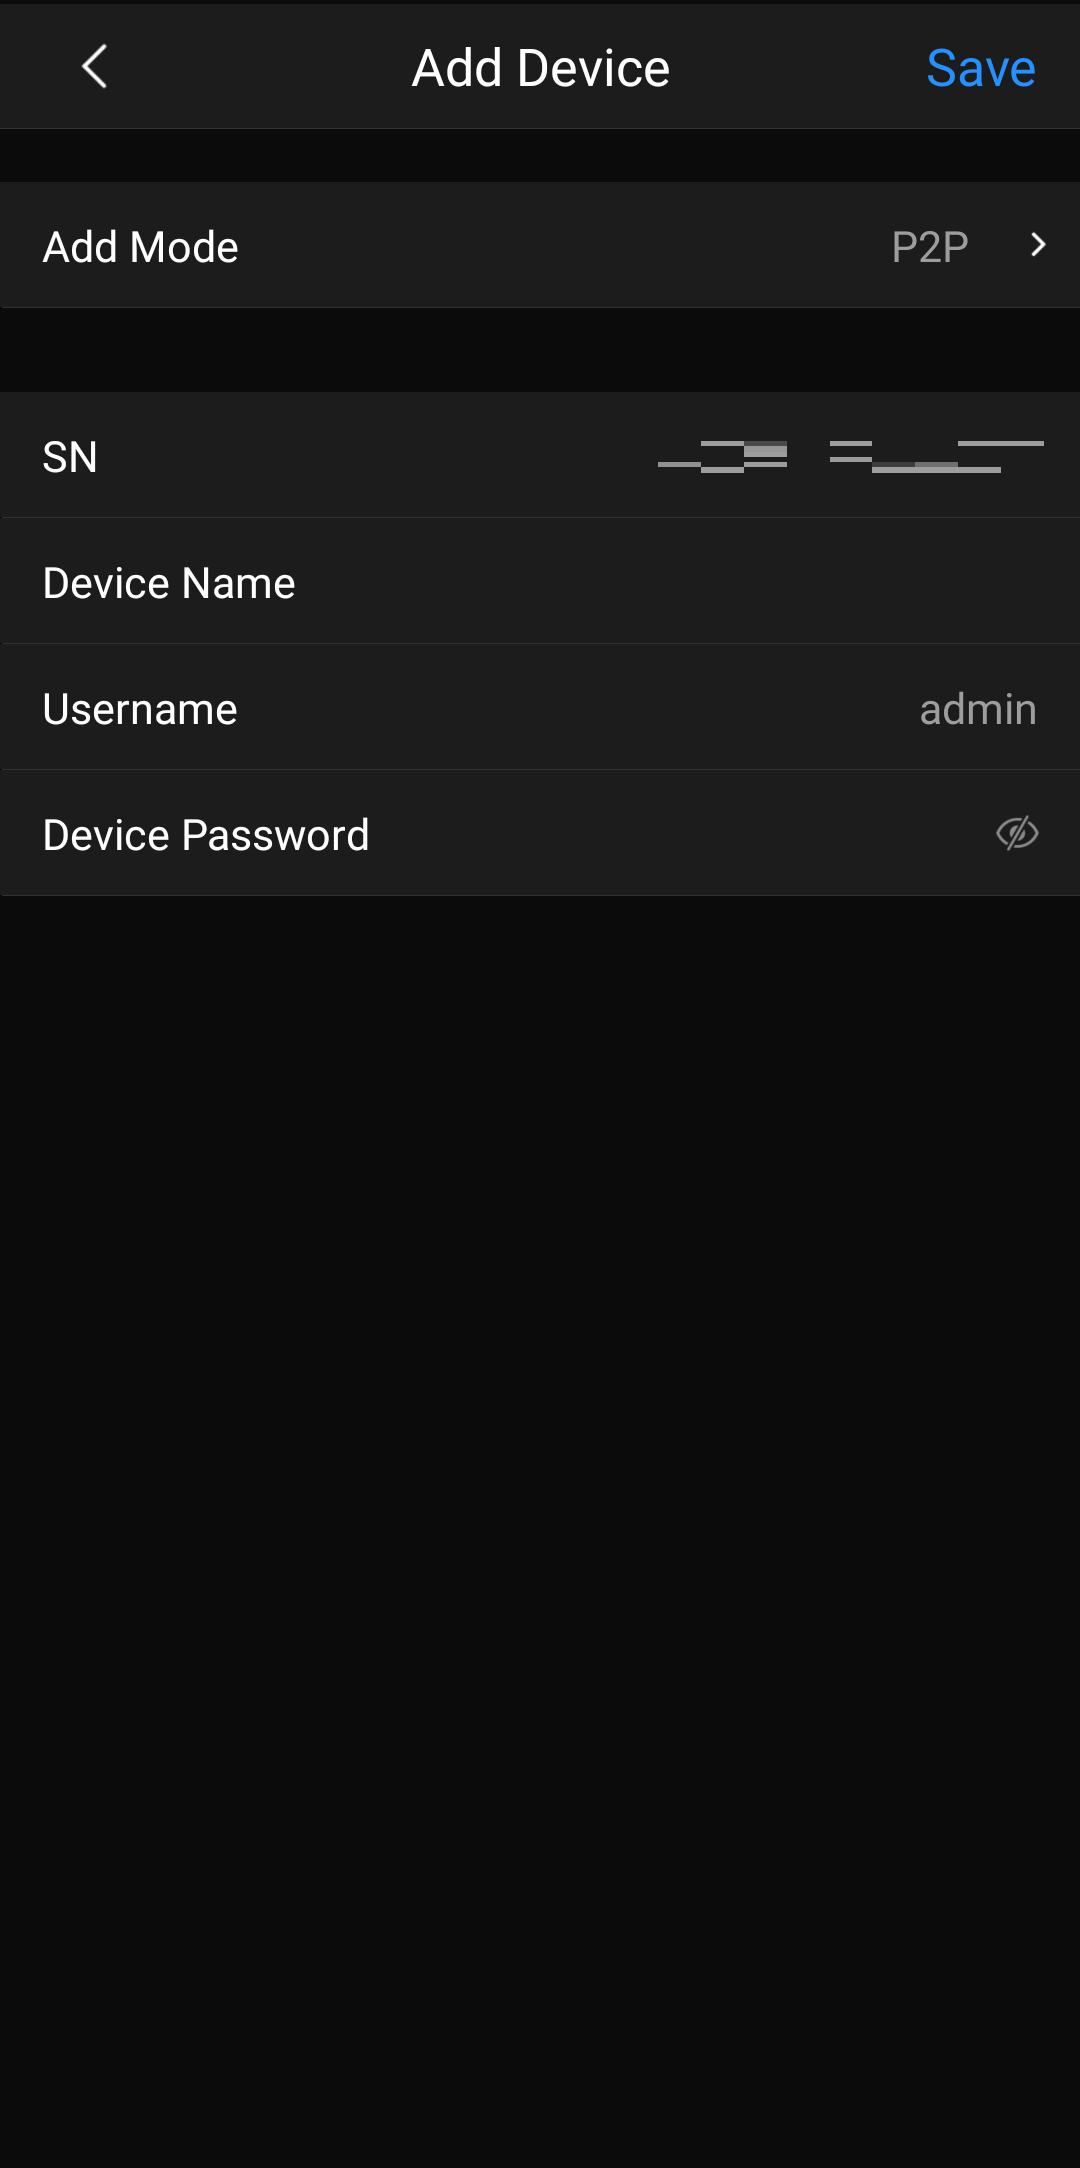 |
Enter the Device Name and Device Password, then tap Save
|
How to Configure Push Notifications
|
DMSS is a remote surveillance app that can be used to access your security products remotely. You can configure a whole range of push notifications in the DMSS app. |
How to Configure Push Notifications
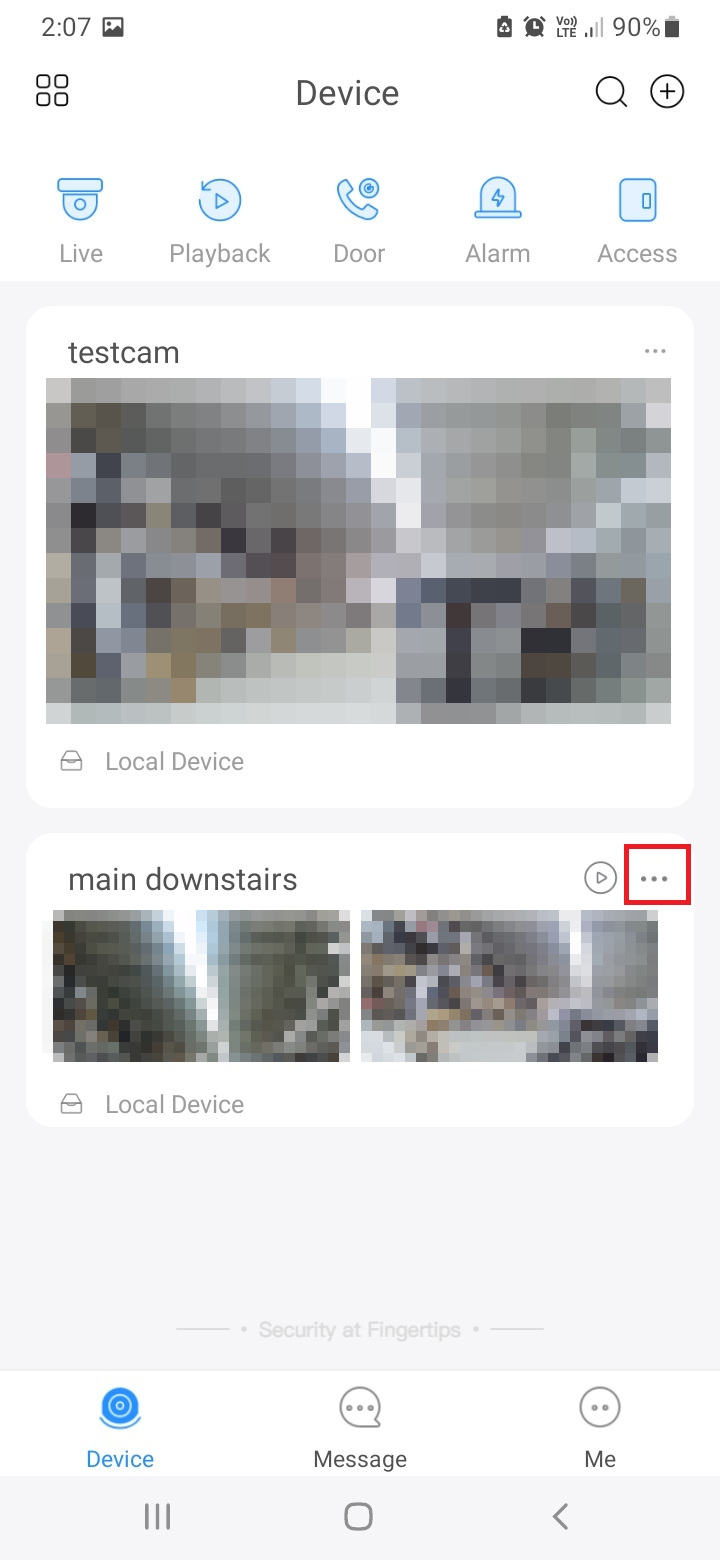 |
On the Home page, tap on the  icon next to the device you wish to subscribe to notifications for. icon next to the device you wish to subscribe to notifications for. |
Tap on Device Details
|
|
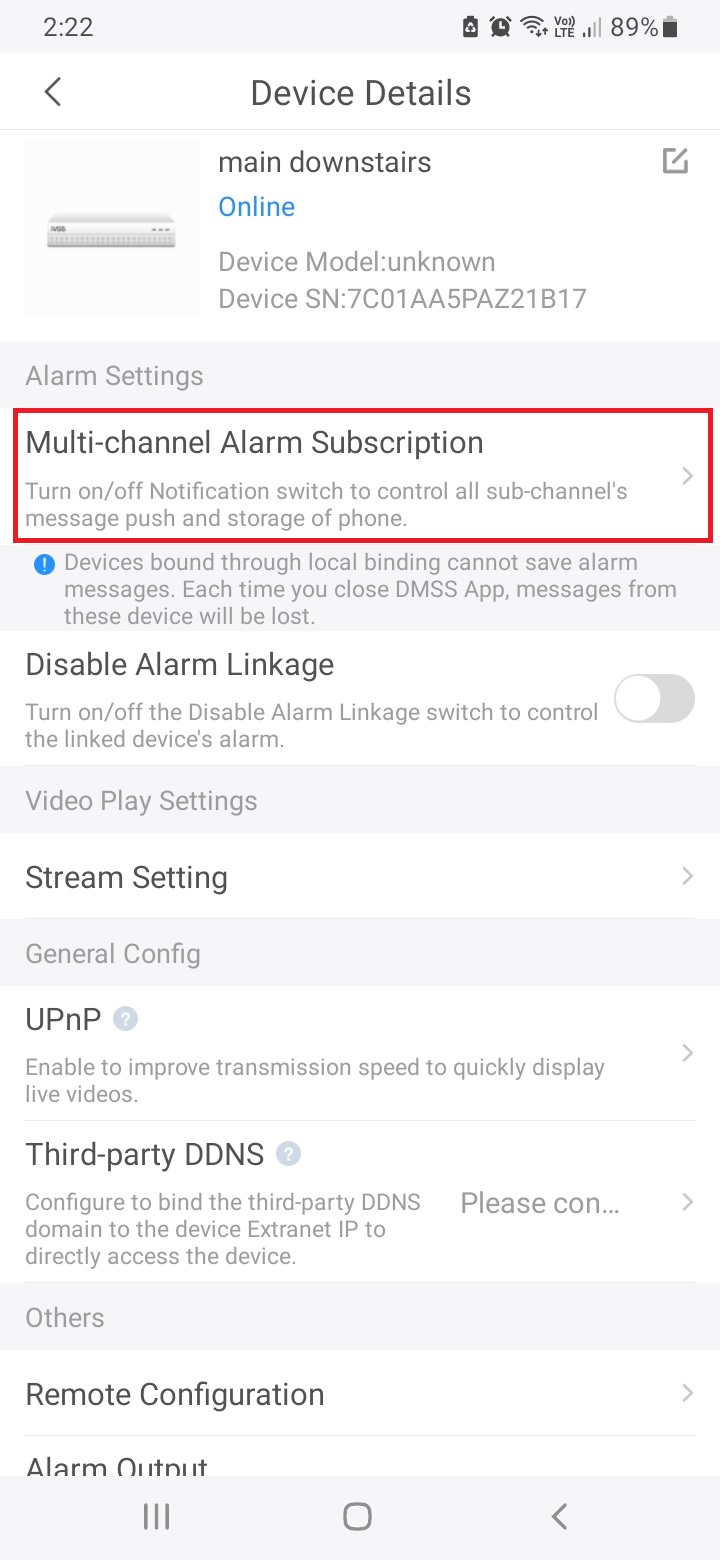 |
Tap on Notification or Multi-channel Alarm Subscription
|
 |
Tap on the switch to turn it on. |
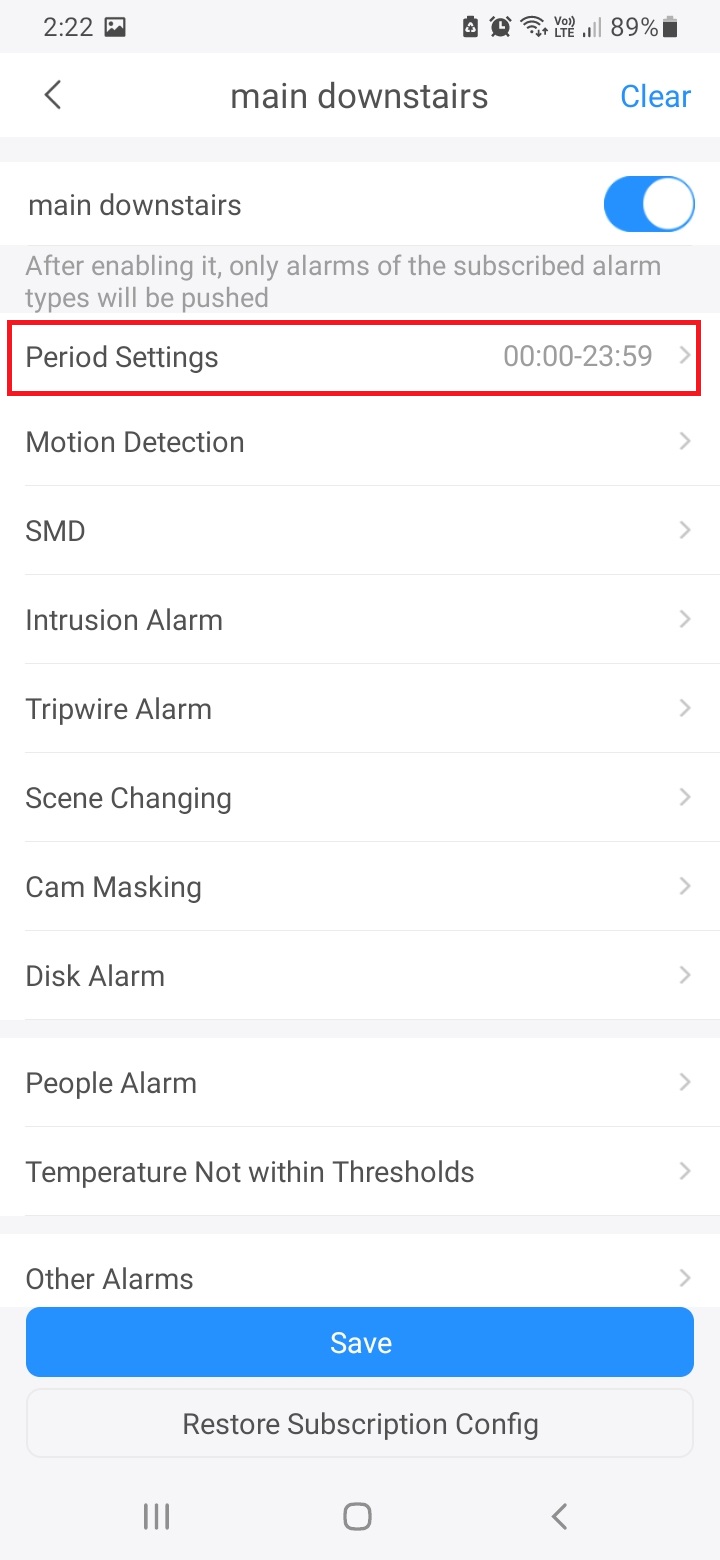 |
Tap on Period Settings to set the time period you wish to receive notifications during. Tap on the notifications you wish to receive and enable them.
Tap Save when you are done.
|
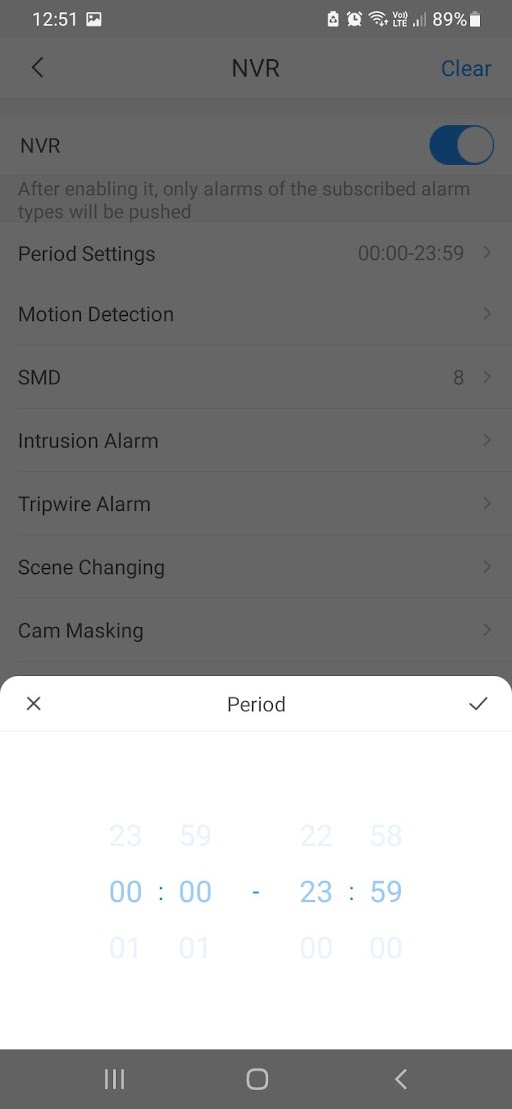 |
Set Period Select Tick |
Example of setting Motion Alarm Notification
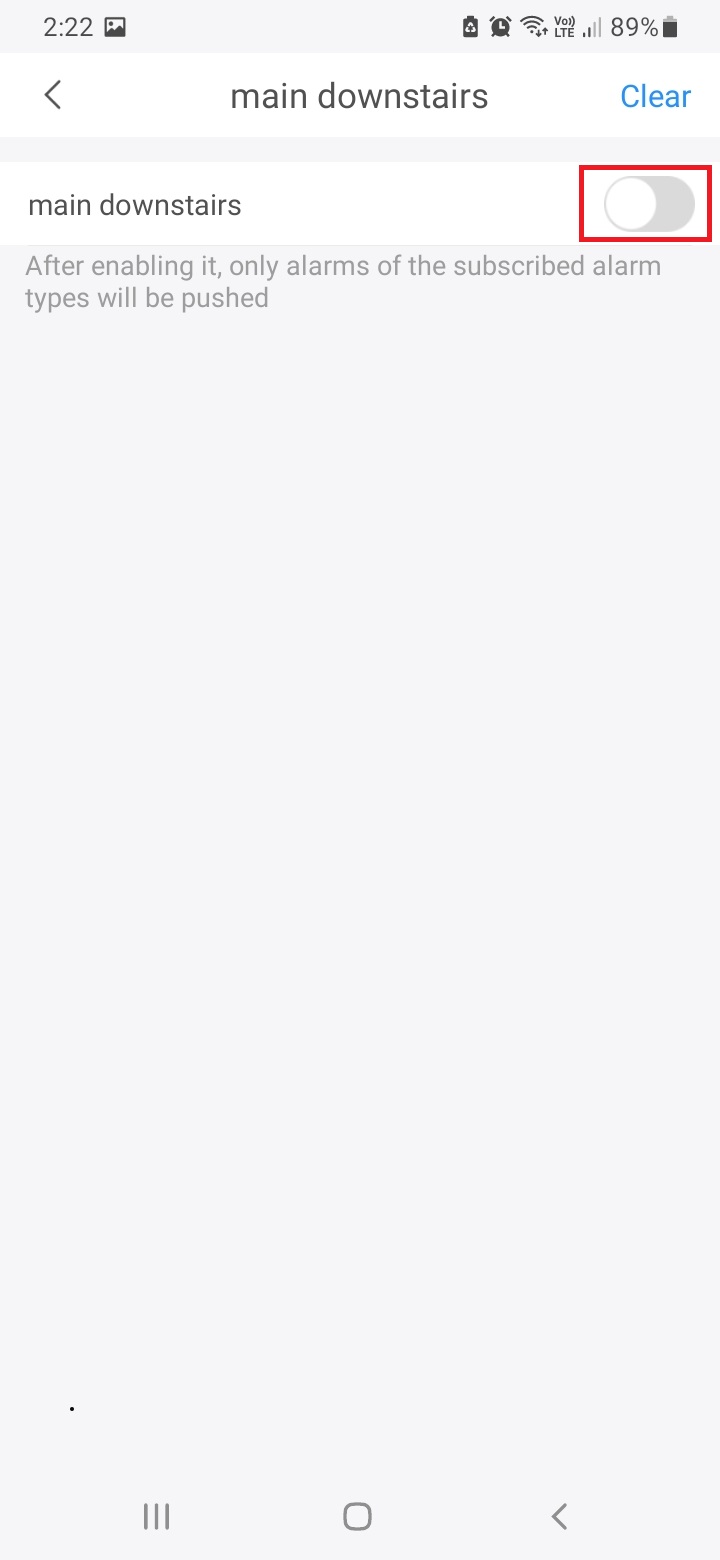 |
Enable Device Push notification |
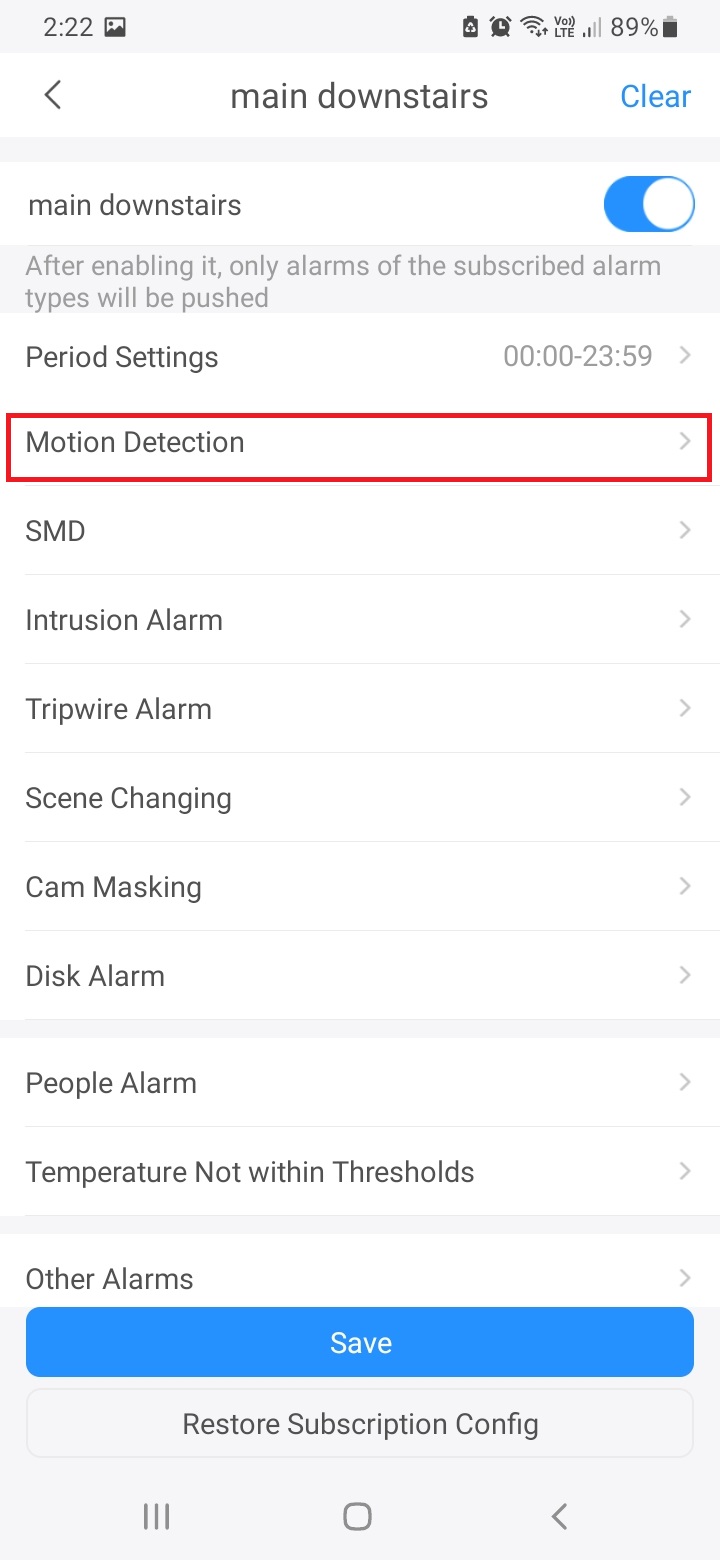 |
Select Notification type |
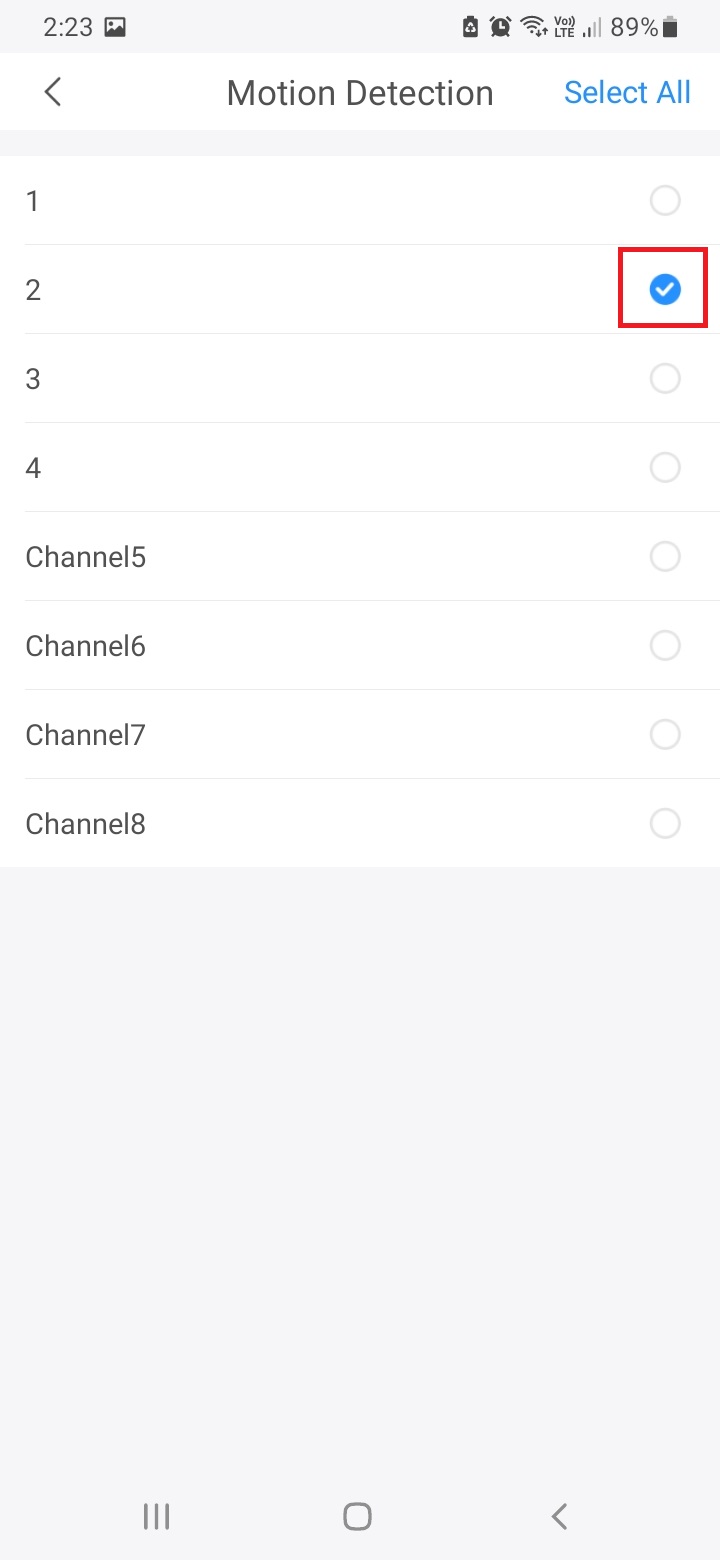 |
Select camera you wish to be notified on. |
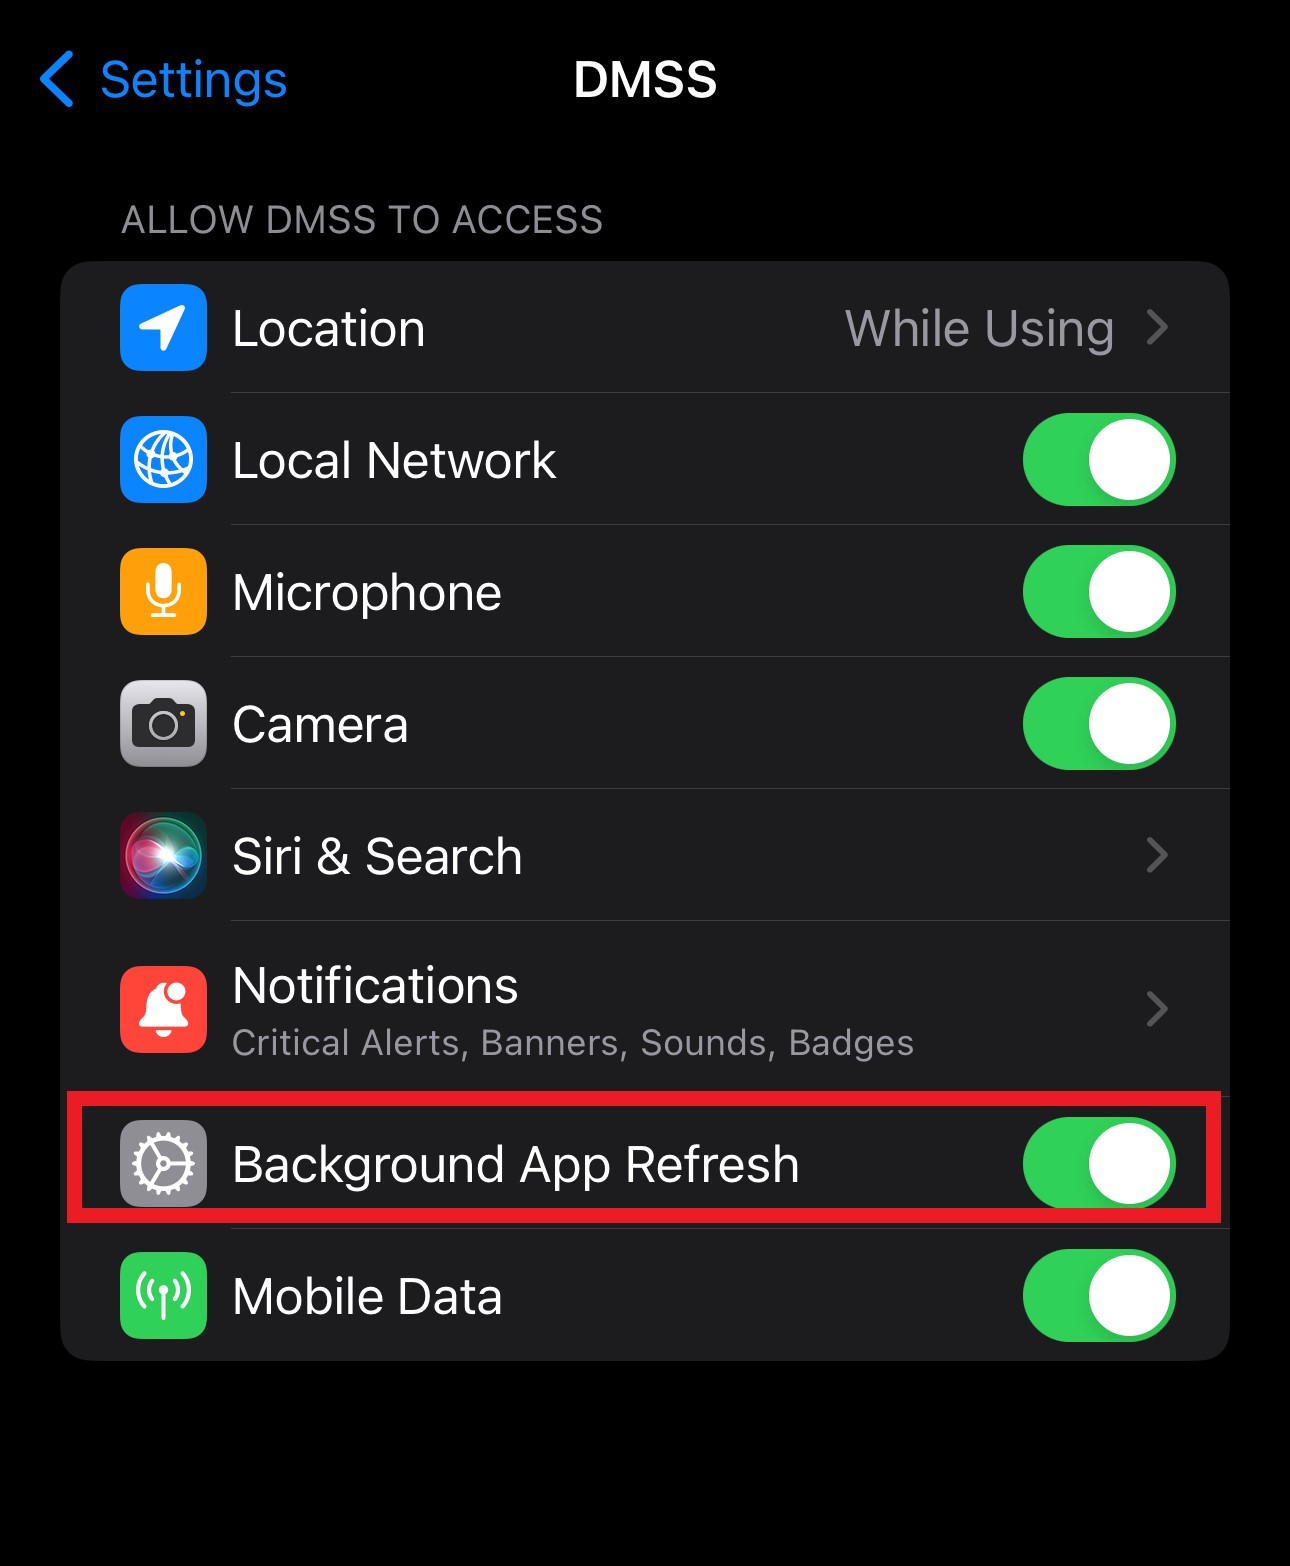
Notification on Intercom
While adding Intercoms to the DMSS app,
The Intercom unit should be added under a DMSS account.
Also, make sure the Background app refresh is 'enabled' and also the show previews is set to 'Always'

|
DMSS is a remote surveillance app that can be used to access your security products remotely. You can configure a whole range of push notifications in the DMSS app. |
How to Configure Push Notifications
|
On the Home page, tap on the icon next to the device you wish to subscribe to notifications for. |
Tap on Device Details
|
|
|
Tap on Notification or Multi-channel Alarm Subscription
|
|
Tap on the switch to turn it on. |
|
Tap on Period Settings to set the time period you wish to receive notifications during. Tap on the notifications you wish to receive and enable them.
Tap Save when you are done.
|
|
Set Period Select Tick |
Example of setting Motion Alarm Notification
|
Enable Device Push notification |
|
Select Notification type |
|
Select camera you wish to be notified on. |
Notification on Intercom
While adding Intercoms to the DMSS app,
The Intercom unit should be added under a DMSS account.
Also, make sure the Background app refresh is 'enabled' and also the show previews is set to 'Always'