IR / Night Vision
Most CCTV cameras have Infrared Illumination that is automatically activated at night.
By default, our IP cameras automatically will adjust the IR based on a few different things such as current brightness and current IR strength. We will call this reflected light, as this is how IR actually enables you to see at night. HDCVI cameras do not automatically adjust IR.
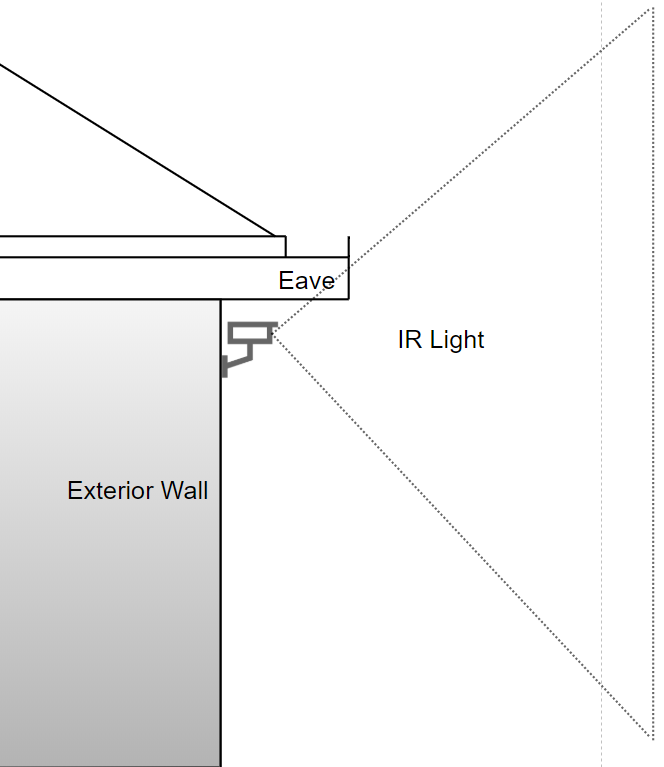
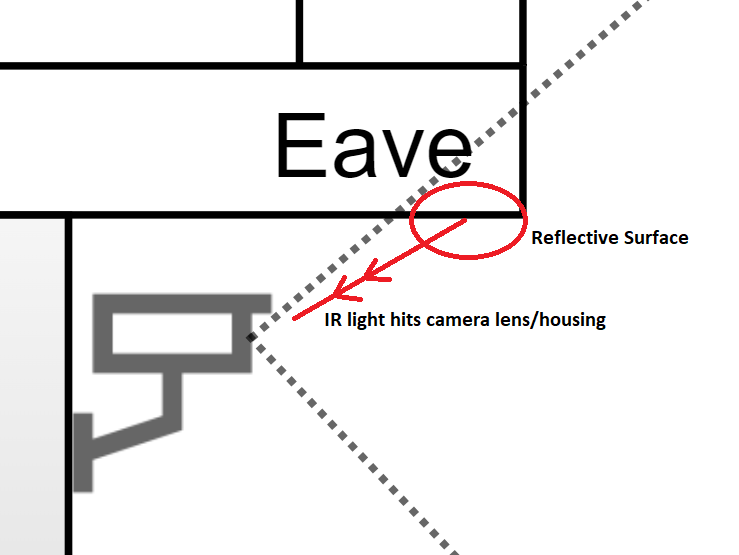
Generally, this is good, however, if the camera is close enough to a wall/eave or other reflective surface, it can cause the IR to bounce off nearby surfaces then reflect back into the camera lens, or camera housing.
The image below shows an example of how this can happen.
 |
 |
Resolving IR Glare
- Reposition the camera so there are no surfaces for the IR to reflect off.
- Move the camera to a lower point.
- Use a Junction box to move the camera away from the wall as much as possible.
- Ensure the camera is clean.
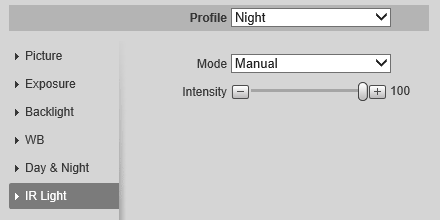
- In some cases, lowering IR strength can help, see the below for instructions.
Cameras with Dirty Dome Covers
Cameras with dirty dome covers usually look fine during the day, but come night time you can see IR reflecting off the dirt/fingerprints, causing glare.
Ensure that the inside and outside of the dome is free from dirt, and fingerprints.
This most commonly occurs on traditional style dome cameras.
Dirty Dome Cover - Day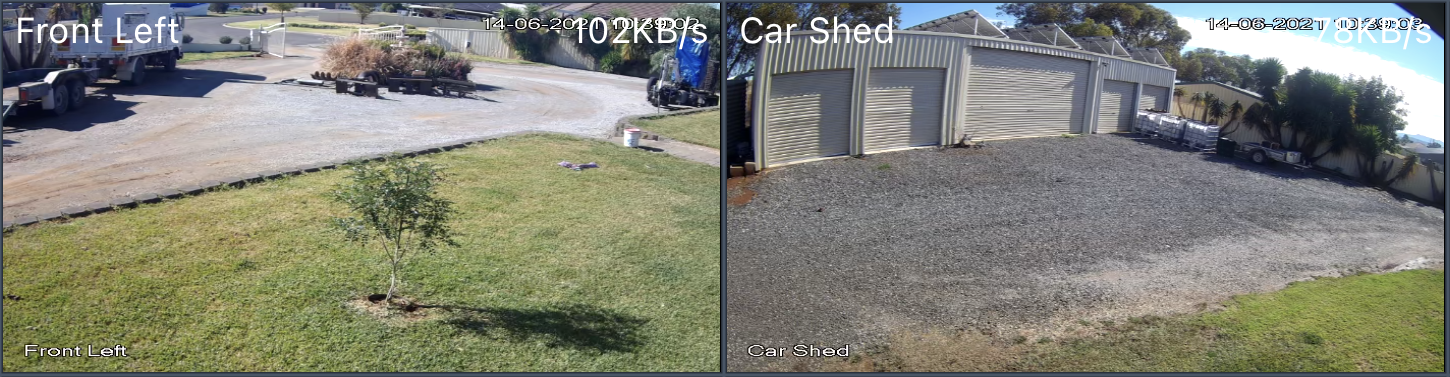
|
Dirty Dome Cover - Night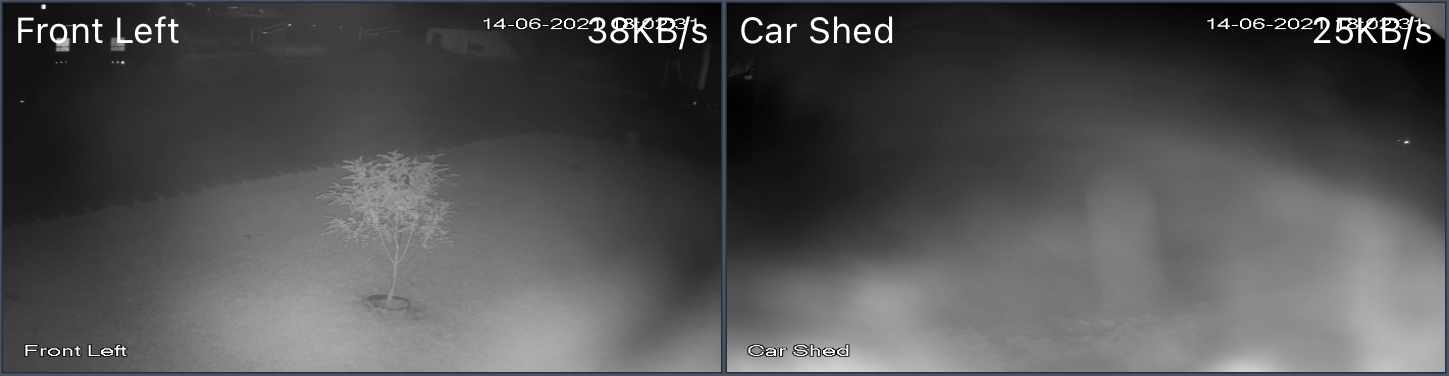
|
Clean Dome Cover - Night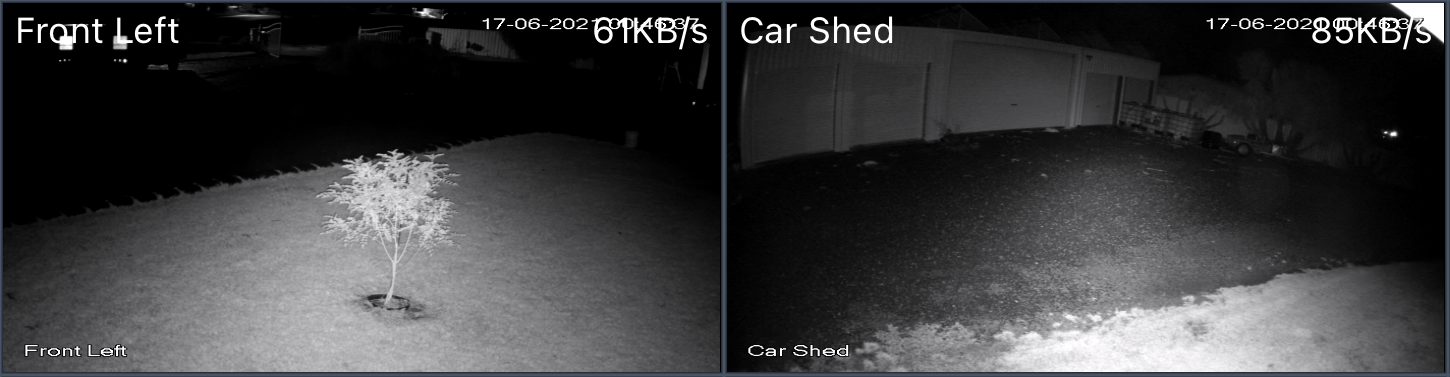
|
Configuring IR Sensitivity and Settings (IP Cameras only)
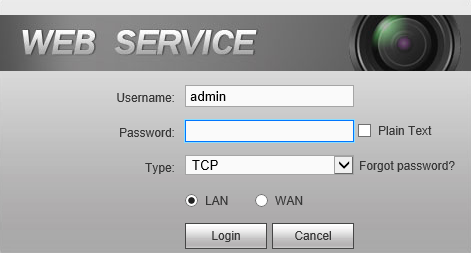
- Enter the IP address of the recorder or camera into the URL bar of internet explorer.
-
Enter the password for the admin account.

-
If you have logged into an NVR, select SETUP > IMAGE > REGISTRATION, If you have logged into an IP camera, go to Step 4. Any IP cameras that are currently connected will show here. To the right of each camera, there is a blue e. This will allow you to log into the camera directly.

-
A new tab will open and you will be presented with the login screen for the camera. Unless set otherwise, the camera password will be the NVR admin password.
-
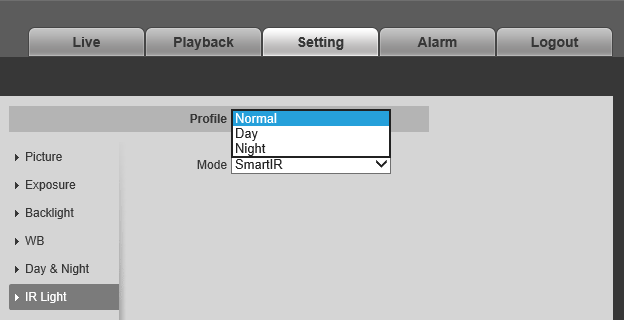
Click on Setting > Camera > Conditions. Then Select IR Light from the list.

|
Profiles Day: Profile specifically for Day. |
|
IR Mode Smart IR: Automatically adjust the IR Intensity based on lighting conditions. |
 |
Profile Management |
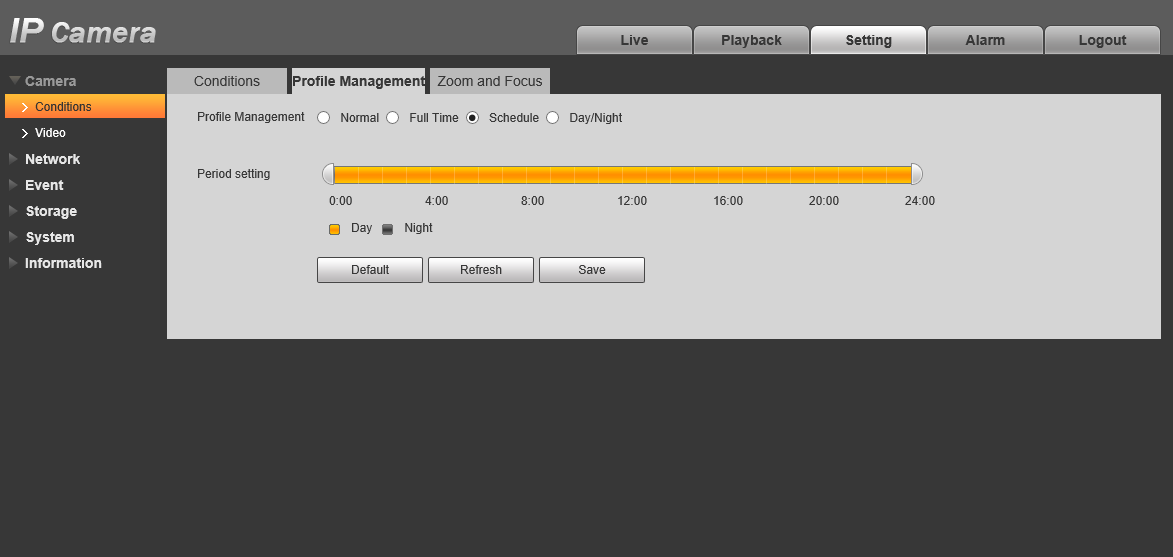
How to Configure IR Schedule
IR Configuration is available only on the IP camera web interface.
- Go to Setting > Camera > Conditions > Profile Management.
- Select the Schedule profile and configure the period setting.
- Select Save.