NVR Snapshot Types
There are two types of Snapshots, Event or Schedule/Time Based
Event Snapshots are taken when an event is triggered, e.g, motion detection/face recognition/tripwire etc.
Schedule Snapshots are taken at a specified interval during the snapshot schedule.
The amount of time between snapshots can be set via the web interface, refer to the last steps of this document for instructions.
NVR Scheduled Snapshot Configuration
Example 1 - One Snapshot, Once a Day
To obtain one snapshot a day, set the interval to 60 seconds, then set the snapshot schedule to only be active for 1 minute per day.
This tells the camera to take a snapshot once a minute, but the schedule restricts the camera from taking a snapshot until the time from the schedule is active. To change the schedule, go to the Main Menu > Storage > Schedule > Snapshot
One Snapshot, Once a Day Setup
Navigate to the Main Menu > Storage > Schedule > Snapshot
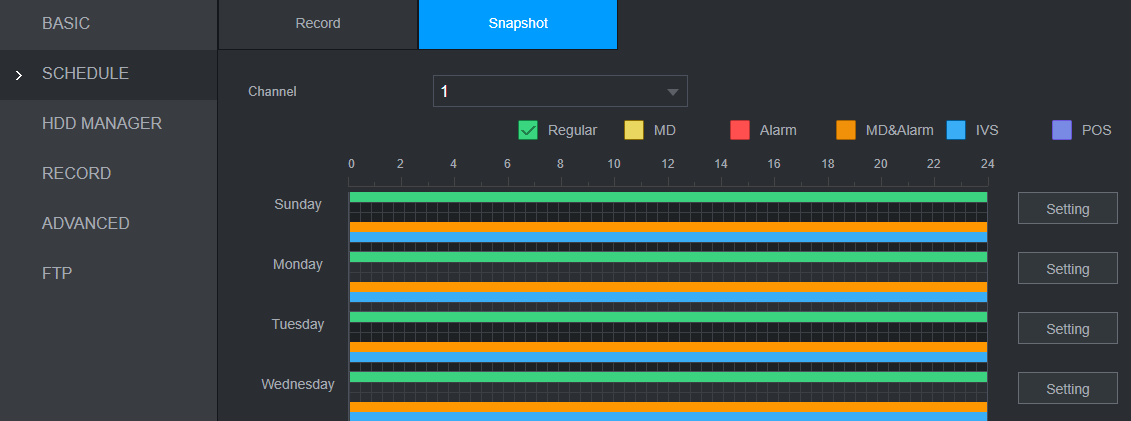
Click the Setting button then you can customise the first period. In the image below, I have enabled the ALL box to select everyday, then the time 10:30-10:31 will allow the camera to take a snapshot during this time.
Next select the Regular Tick box.
 Click OK, then Apply and Save.
If you do not have apply or save, simply click OK.
Example 2 - One Snapshot every 60 seconds
To capture a snapshot once a minute for the entire day, the Interval would be set to 60 seconds, then the snapshot schedule will need to be set to active for the whole day. Follow the same steps as outlined in #1 Daily Snapshot, but configure the time period for 00:00 24:00.
Snapshot Configuration for a Standalone Camera on PC
Configuring Snapshot Schedule
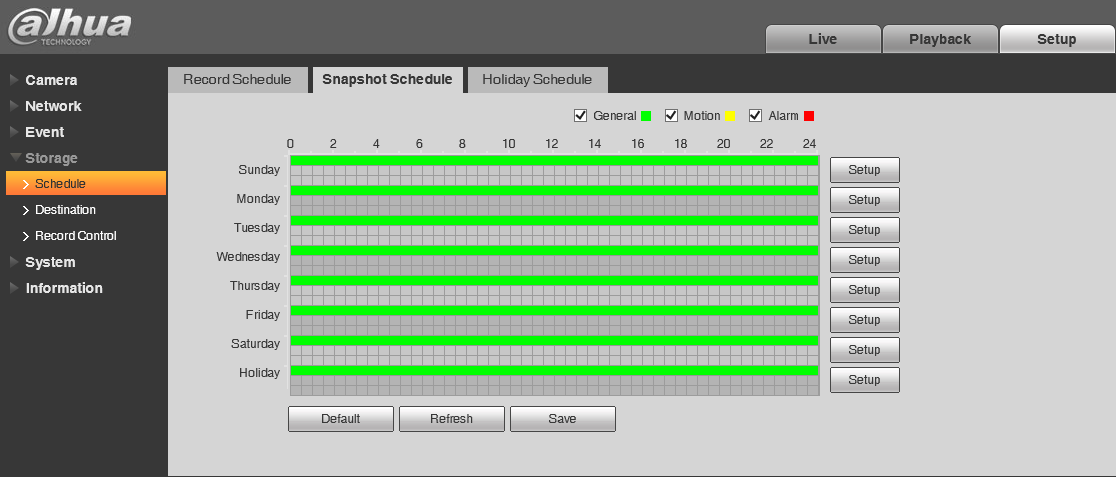
- Go to Storage -> Schedule -> Snapshot Schedule
- Tick the General box and draw green lines where you which schedule snapshot recording.
- Click Save to apply you changes.
(Old GUI - Grey)
Configuring Time-lapse Snapshot Options
- Go to Camera -> Video -> Snapshot
- Set Snapshot Type to General, Set a Picture Quality and set the Interval to a value between 1 to 16 seconds.
- Click Save button to apply.

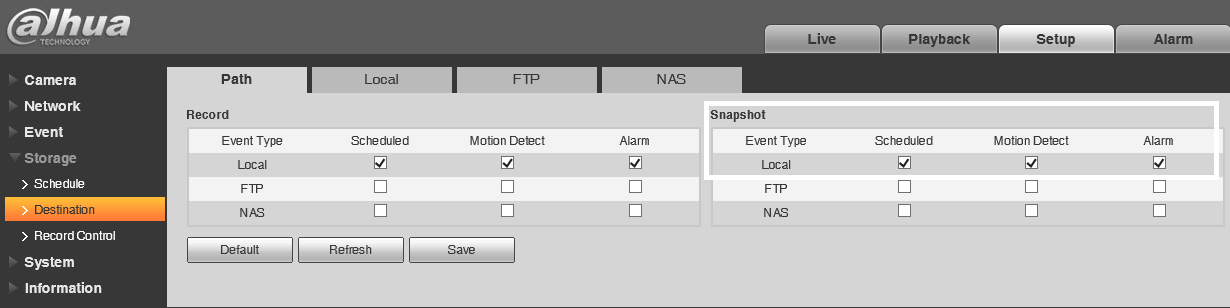
Configuring Snapshot Destination
- Go to Storage > Destination > Path
- Tick the scheduled box in snapshot. Ticking the Snapshot Box next to Local will save it to an SD Card. Ticking FTP or NAS will save it to a NAS or FTP if one has been configured.
- Click Save
Configuring Snapshot Options (New GUI - White/Blue)
Configuring Time-lapse Snapshot Options
Log into the cameras web interface.

1. (You may need to scroll to next menu selection)
2. Under Picture > Snapshot set Type to General
3. Set Quality (our example is set to 5)
4. Set Interval, Interval will control the time delay between Snapshots
Configuring Event Snapshot Options
-
Log into the cameras web interface.

2. (You may need to scroll to next menu selection)
3. Under Picture > Snapshot set Type to Event
4. Set Quality (our example is set to 4)
5. Set Interval, Interval will control the time delay between Events notification
Configuring Snapshot Schedule
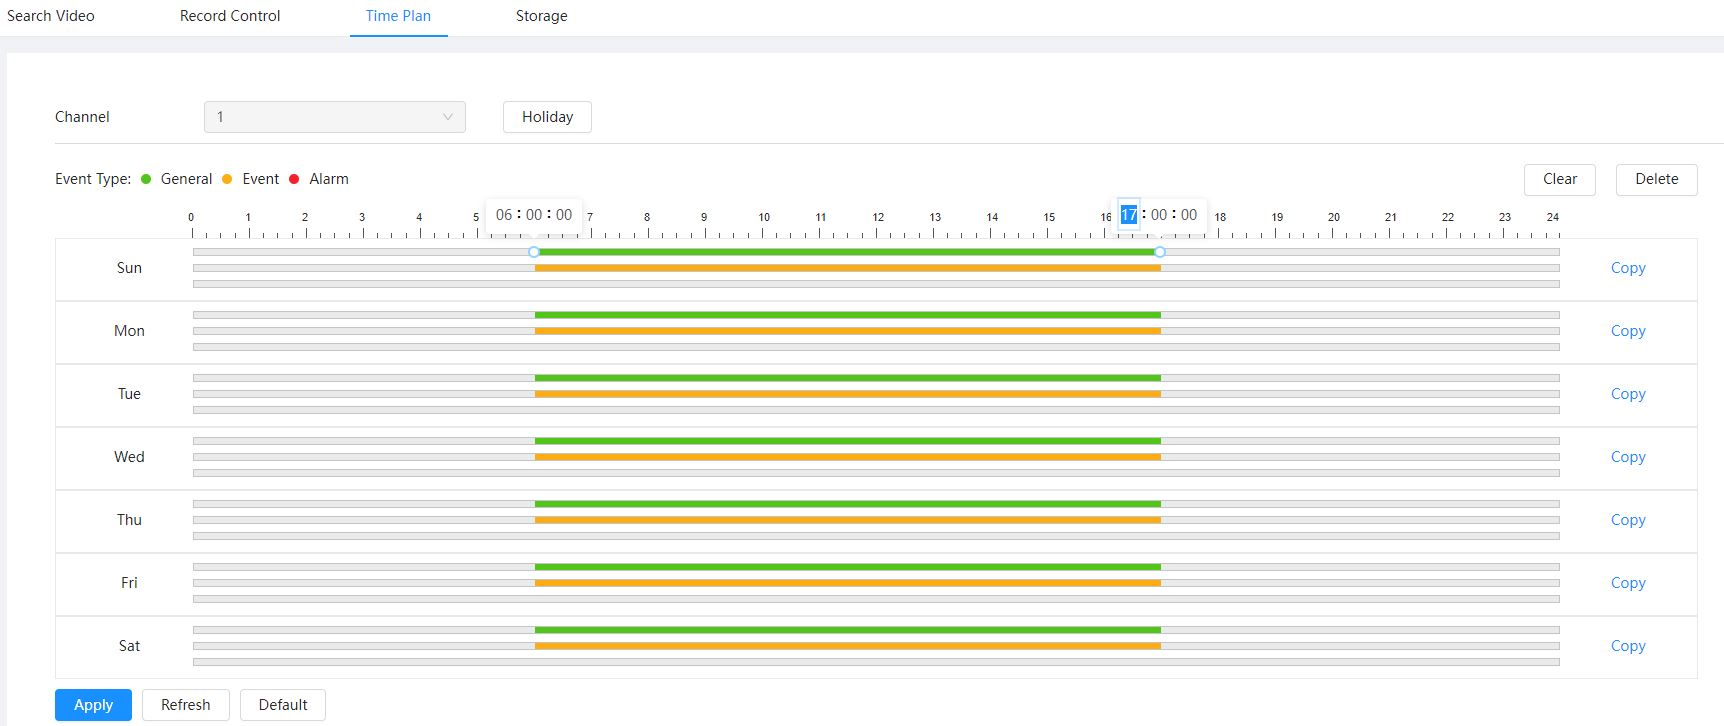
- Under Picture > Time Plan, Set the schedule to take snapshots to suit your requirements. (In our example it is set from 6am to 5pm, Monday to Friday). Select Apply.
Configuring Snapshot Destination
- Go to Picture > Storage
- Tick the General or Event box in snapshot (General for time-lapse, Event for event driven).
- Setting the Local on storage method will save it to the SD Card installed in the camera. Selecting FTP will enable the FTP settings
- Click Apply

Time-lapse Example - Configure a camera to take snapshots at set times and disable recording
(Old GUI)
Configuring Time-lapse
Info
Ensure an SD Card is installed into the camera
Configure the Snapshot Settings
- Navigate to Setup > Camera > Video > Snapshot

- Set Interval to a value such as 100.
- Navigate to Storage > Schedule > Snapshot.
- Select the Setting button on the right hand side.

- Enter the time when you would like the camera to take snapshots. In this example, the camera will take snapshots at 9am, 12pm and 4pm. You can customise this by day, or choose to copy it to all days.
- Select Save, and then Save on the next window.
Disable camera recording
Navigate to Setting > Storage > Record Control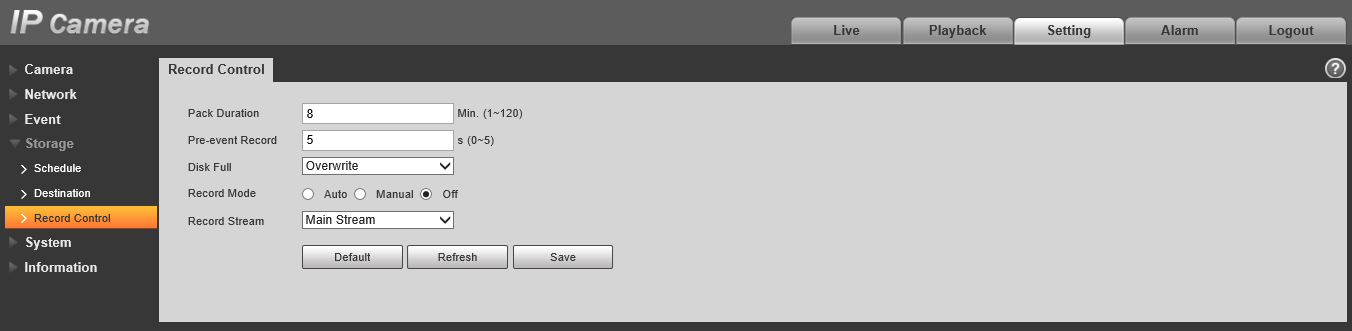
Set Record Mode to Off.
Info
In this example we are not recording footage, only snapshots. If you want to also record footage, you would not change this setting.
Event Example - Configure Motion detection event trigger.
New GUI
1. (You may need to scroll to next menu selection)
2. Under Picture > Snapshot set Type to Event
3. Set Quality (our example is set to 4)
4. Set Interval, Interval will control the time delay between Events notification
5. Under Picture > Time Plan, Set the schedule to take snapshots to suit your requirements. (In our example it is set from 6am to 5pm, Monday to Friday). Select Apply.
6. Go to Picture > Storage.
7. Tick the General or Event box in snapshot (General for time-lapse, Event for event driven).
8. Setting the Local on storage method will save it to the SD Card installed in the camera. Selecting FTP will enable the FTP settings
9. Click Apply
Set Notification on DMSS from camera
Info
With curtain cameras in order to activate motion Detection Smart motion detection need to be turned-off


Set Notification on DMSS from NVR


In This Example Camera 2 was the selected camera
