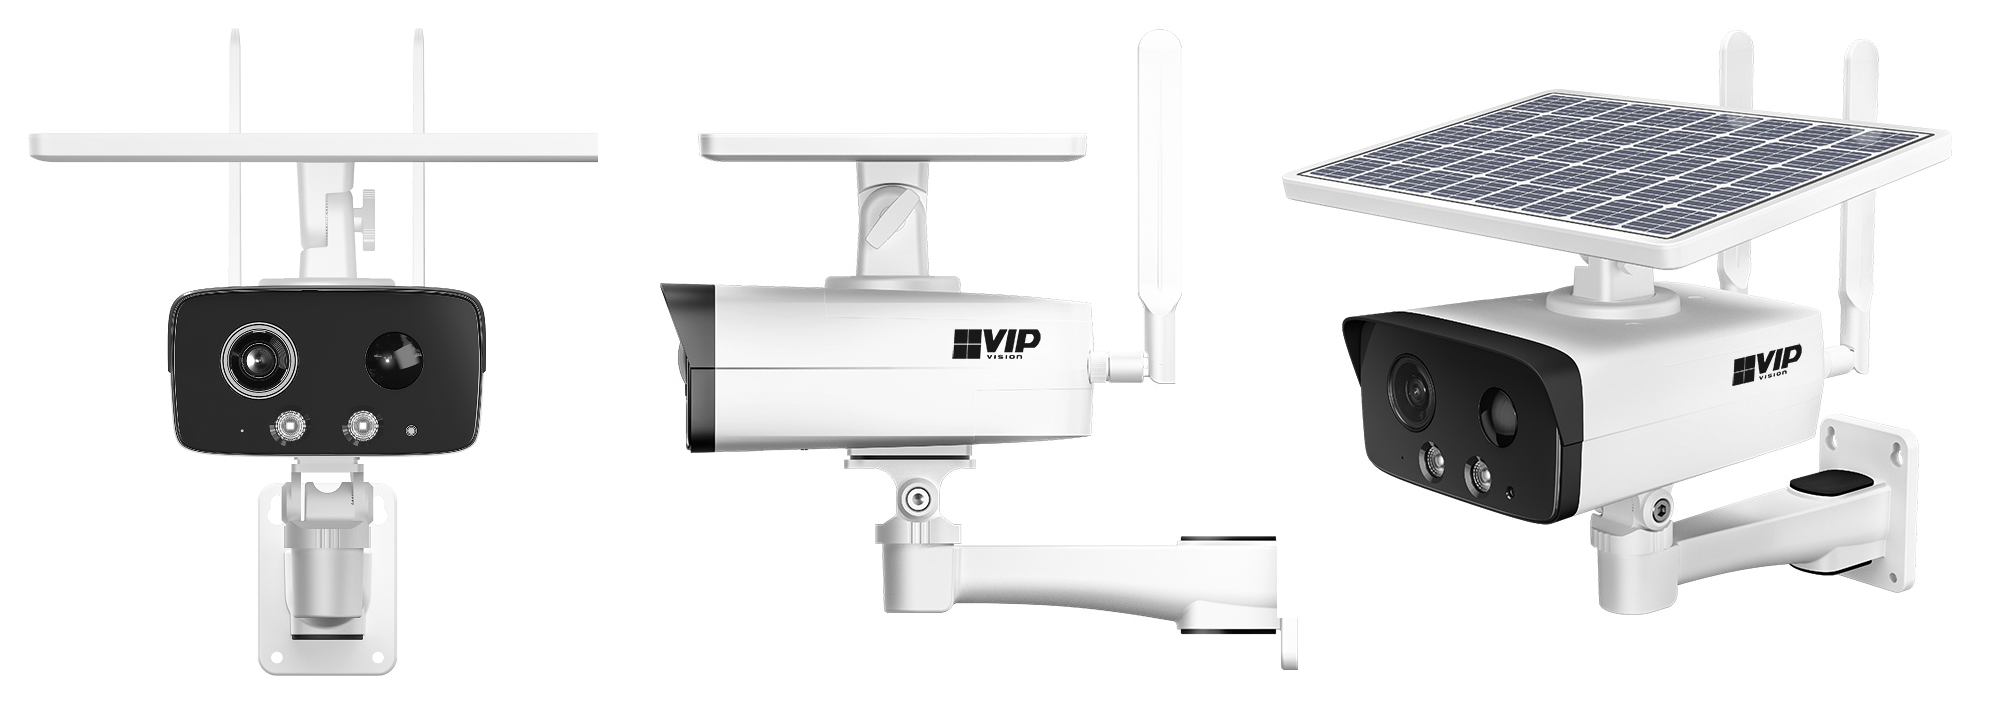
Step 1 - Assembly and installation
- Connect the Antenna.

- Mount the camera & feed the cables through the cable slot.

- Adjust the camera angle.
Info
It is recommended to install the device at the height of 2m to 3m from the ground due to the detection requirements of infrared detector (PIR).

- Adjust the Solar Panel angle.

Cable Connections
Warning
Waterproof all the cable joints with insulating tape and waterproof tape to avoid water damage and prevent short circuits from occurring.
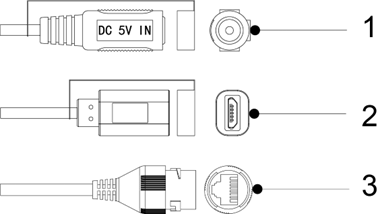
| No. | Port Name | Description |
| 1 | Power port | Inputs 5 VDC power to charge the battery. |
| 2 | Micro USB | Charge the battery in the device. The device will keep awake while charging by Micro USB. |
| 3 | Ethernet port | Connects to the network through a network cable. |
Step 2 - Install the MicroSD Card & SIM Card, then power on the camera
- Undo the two screws on the flap on the base of the camera.
- Install your MicroSD card and SIM card into their respective slots.
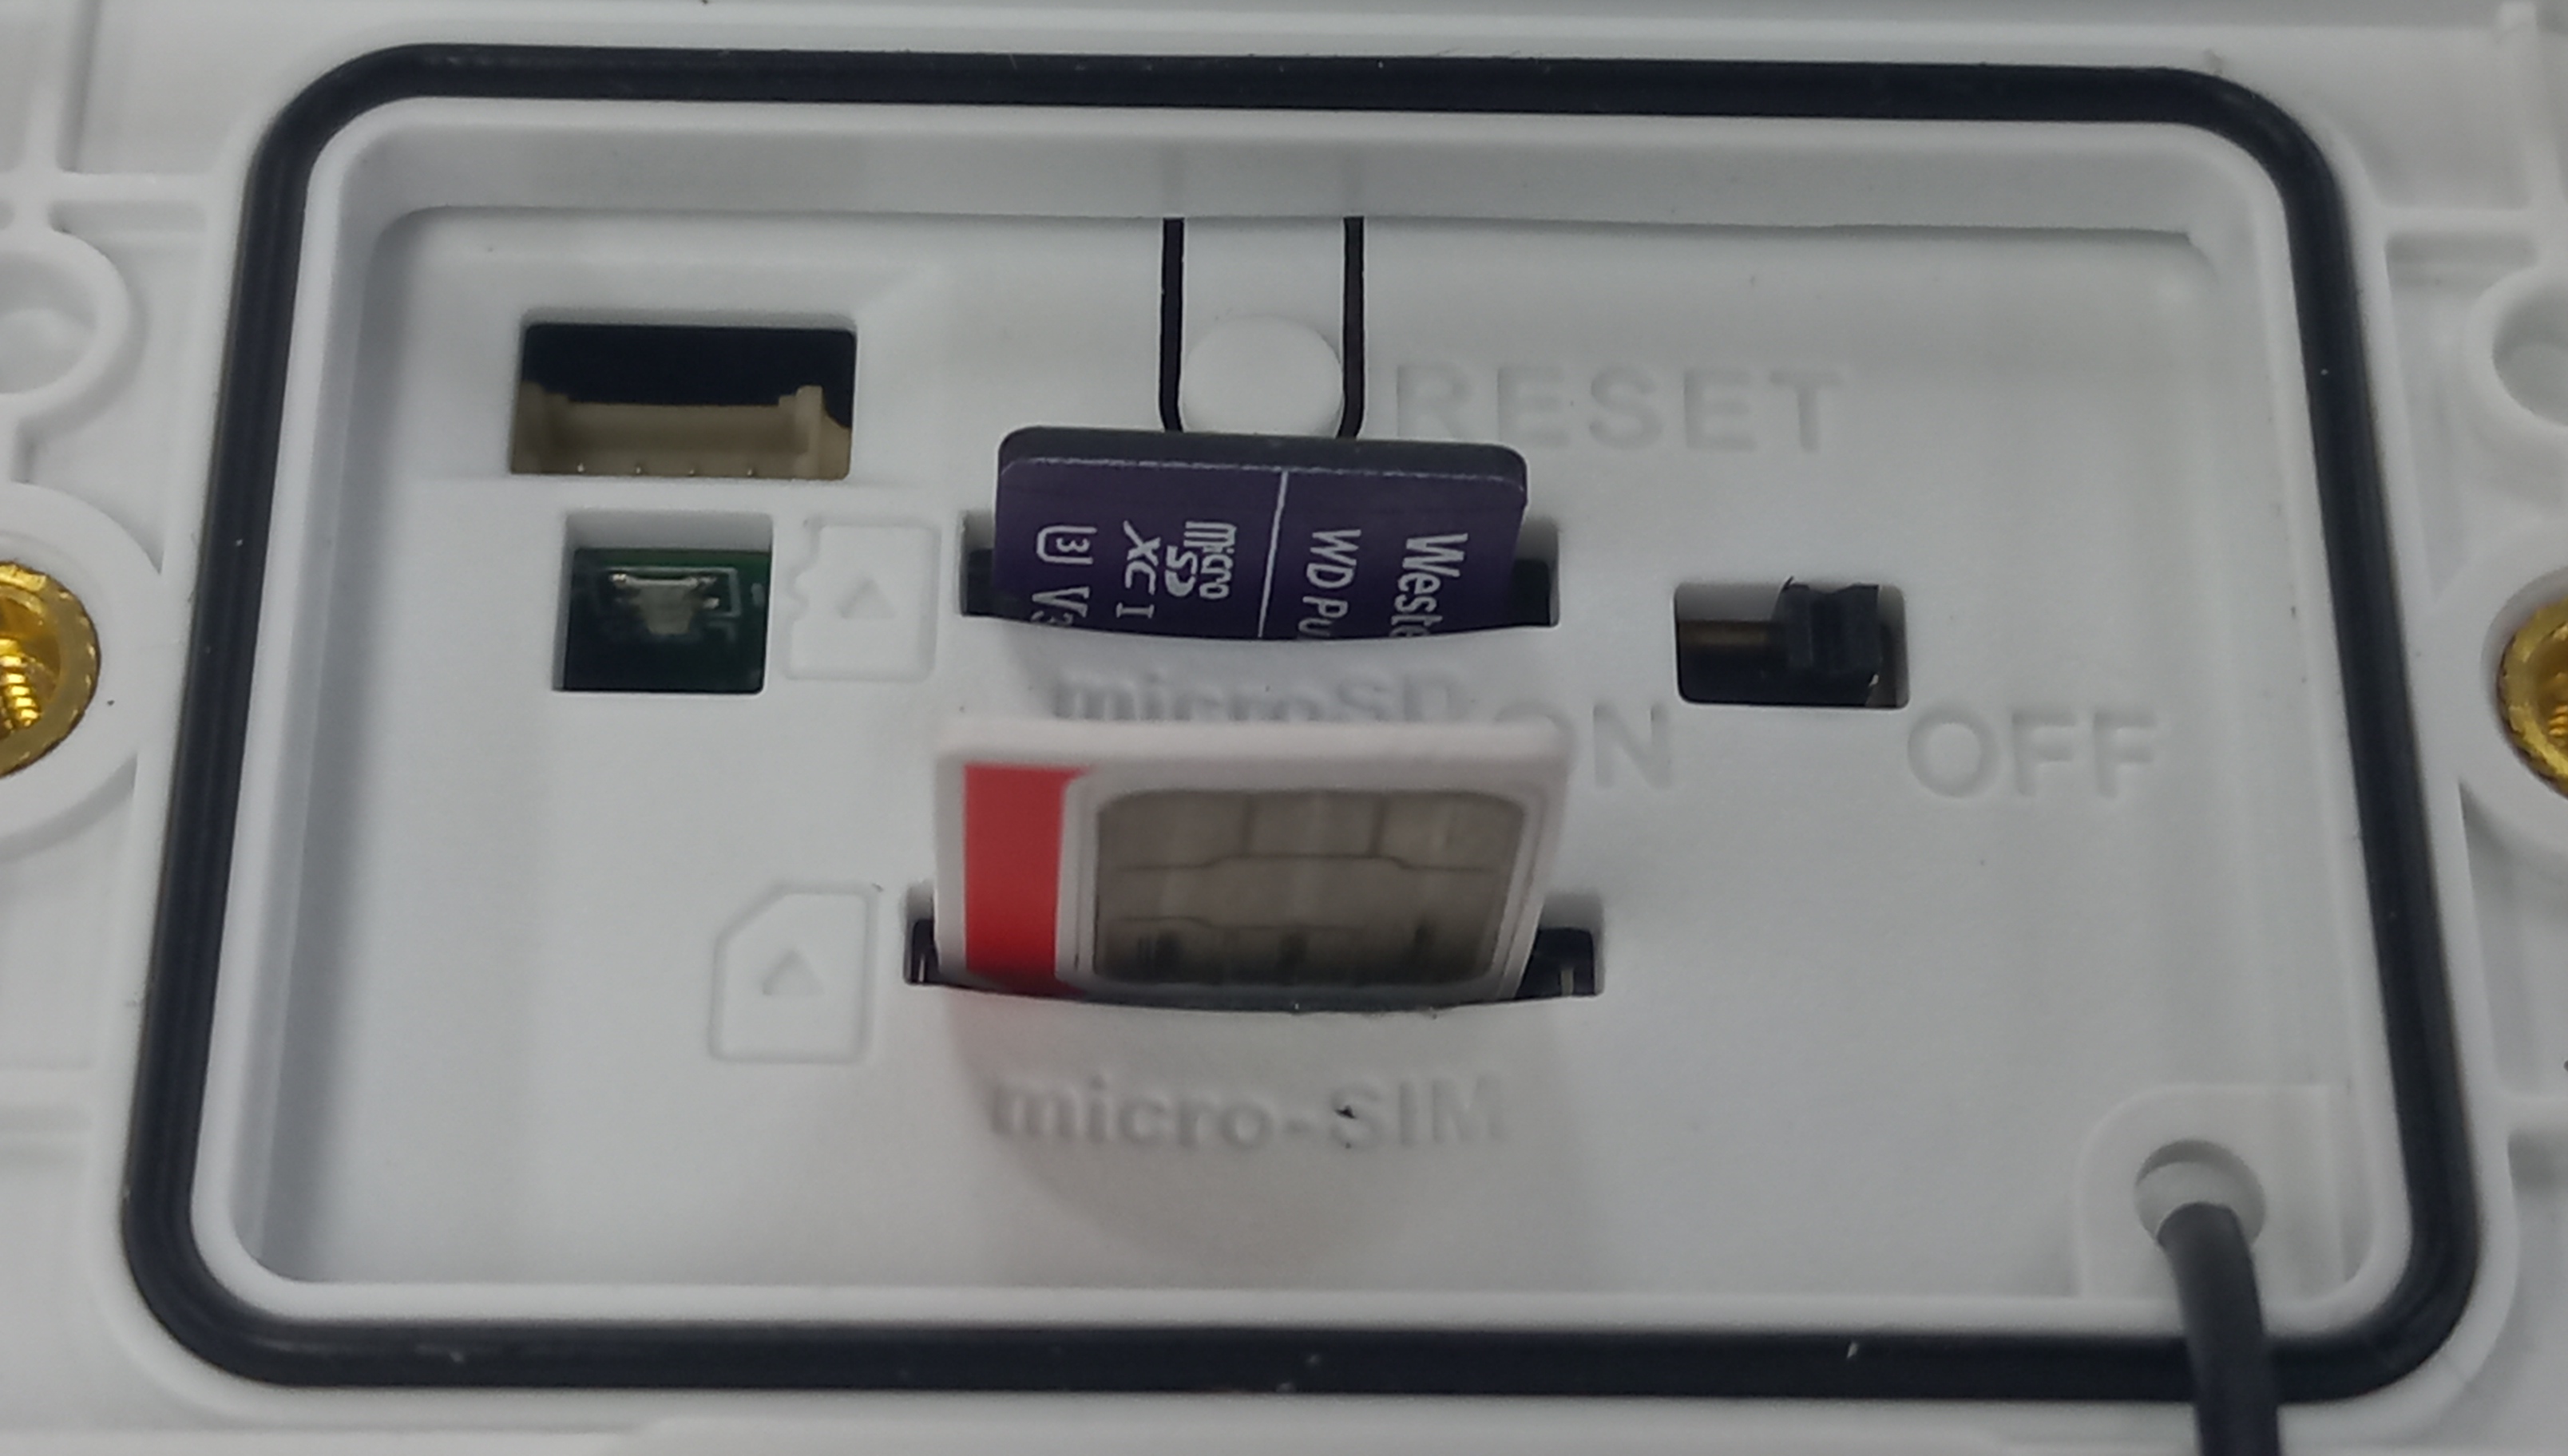
(Micro SD Card and Micro SIM Card partially inserted to show the orientation. Micro SD Card contacts face the towards the front of the camera, and the Micro SIM card contacts face the rear of the camera with the cut off corner being on the left side.)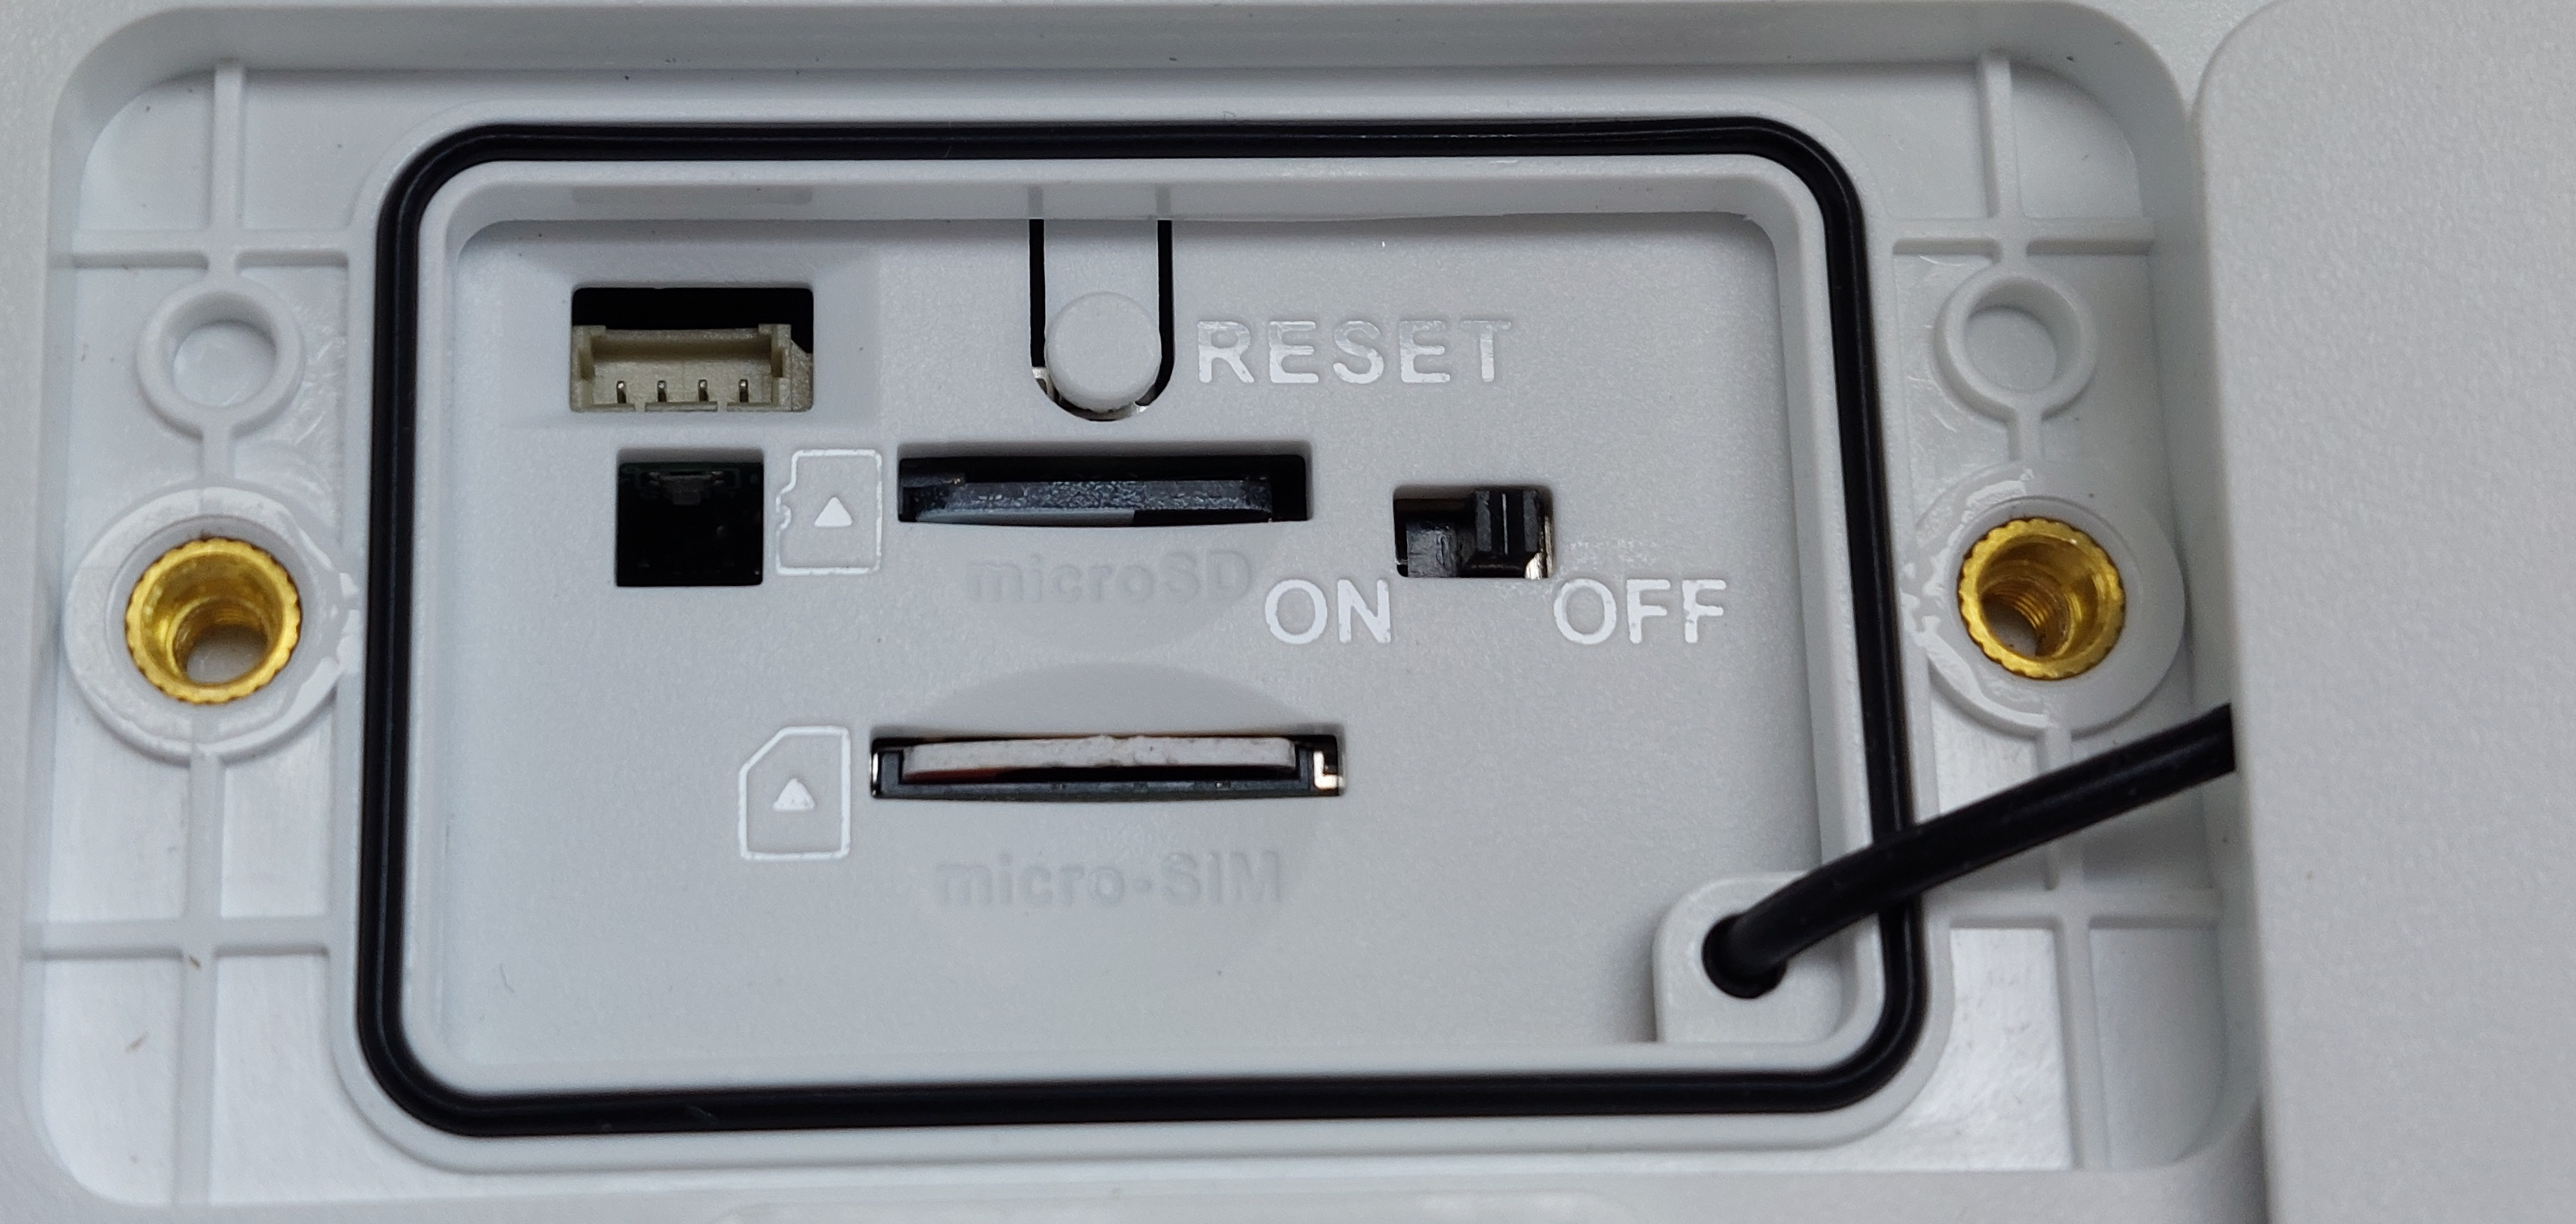
(Micro SD Card and Micro SIM Card correctly installed)
- Set the Power switch to the On position.
- Replace flap and tighten the screws.
Step 3 - Initialise the Camera
IP Camera Initialisation
Initialising a camera is the process of setting a password on it. All cameras manufactured post 2018 need to be initialised before use.
If connected to the POE Port of an NVR manufacturer post 2018 this process should happen automatically.
Option 1 - Initialisation via the Web Interface
The Camera will need to be connected to the Laptop via an Ethernet cable.
You can access the Web Interface by entering the camera's IP address into the address bar of Internet Explorer. 192.168.1.108 is the default IP of our cameras.
You may need to change the IP address of your computer to reach it.
How to change the IP Address of your computer
Windows 10
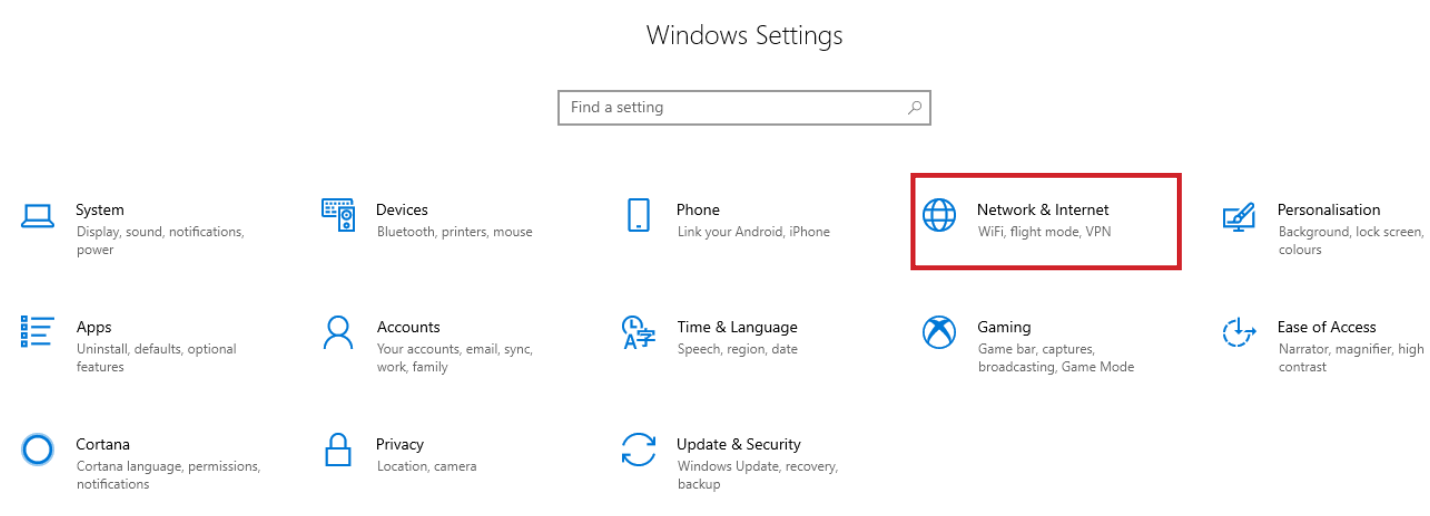
- Open Settings.
- Select Network & Internet.
- Select Status, then Change Adapter Options.
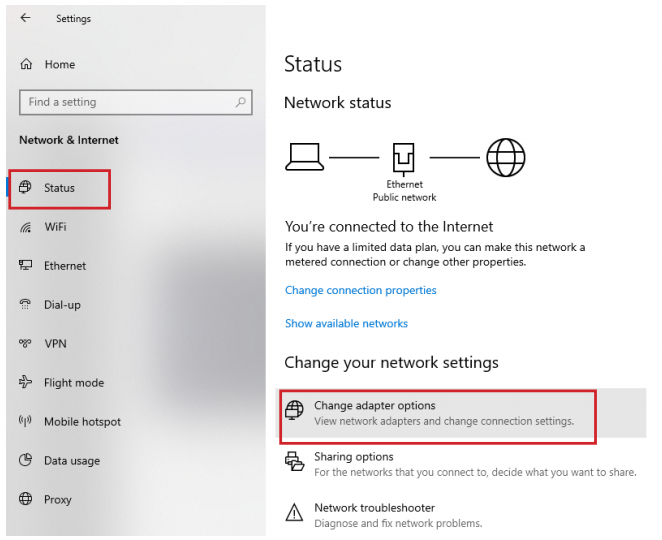
-
Right-click the network adapter you want to change the IP address for, and select Properties.
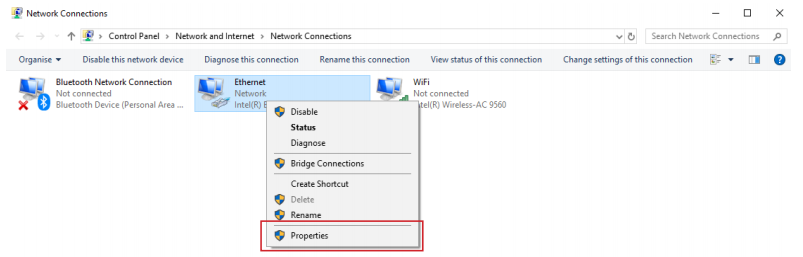
-
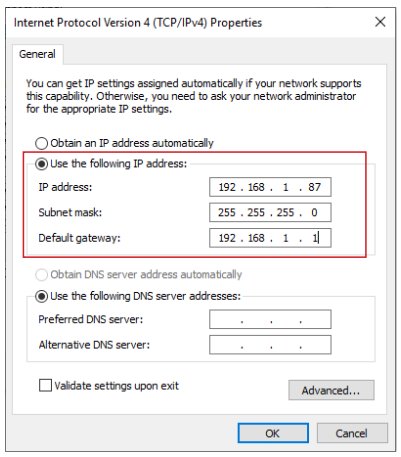
Double-click the Internet Protocol Version 4 (TCP/IPv4) item.
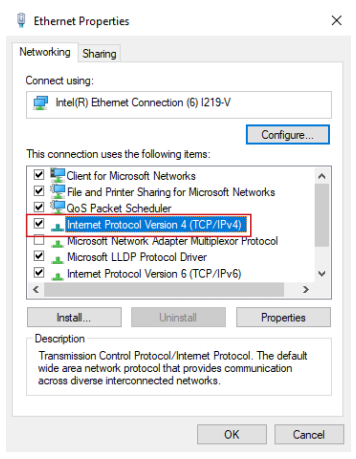
- Click Use the following IP address and enter an IP address in the same range as the device you are trying to access. (E.g when trying to access 192.168.1.108 use a IP address in the 192.168.1.x range.) Note: This cannot be the same as the device you are trying to connect to or any other device on the same network. Save your changes on both windows.
- Type the IP address of the device you are trying to access into the address bar of your web browser.
- Once finished configuring the device, change the adapter settings back to normal by following steps 1-5 and clicking Obtain an IP address automatically.
Windows 11
1. In the Windows search bar at the bottom of the page, type Control Panel and press enter.
2. Select Network and Internet.

3. Select Network and Sharing Centre.

4. Select the link for Connections in the network that you want to change the IP address for.

5. Select Properties.

6. Double-click the Internet Protocol Version 4 (TCP/IPv4) item.

7. Click Use the following IP address and enter an IP address in the same range as the device you are trying to access. (E.g when trying to access 192.168.1.108 use a IP address in the 192.168.1.x range.) Note: This cannot be the same as the device you are trying to connect to or any other device on the same network. Save your changes on both windows.

8. Type the IP address of the device you are trying to access into the address bar of your web browser.
9. Once finished configuring the device, change the adapter settings back to normal by following steps 1-6 and clicking Obtain an IP address automatically.
See the video below for a visual guide of the steps above:
Shortcut
1. In the Windows search bar at the bottom of the page, type Ncpa.cpl and press enter.
2. Right-click the network adapter you want to change the IP address for, and select Properties.
3. Select the Internet Protocol Version 4 (TCP/IPv4) item.

4. Click Use the following IP address and enter an IP address in the same range as the device you are trying to access. (E.g when trying to access 192.168.1.108 use a IP address in the 192.168.1.x range.) Note: This cannot be the same as the device you are trying to connect to or any other device on the same network. Save your changes on both windows.
5. Type the IP address of the device you are trying to access into the address bar of your web browser.
6. Once finished configuring the device, change the adapter settings back to normal by following steps 1-3 and clicking Obtain an IP address automatically.
See the video below for a visual guide of the steps above:
Delete
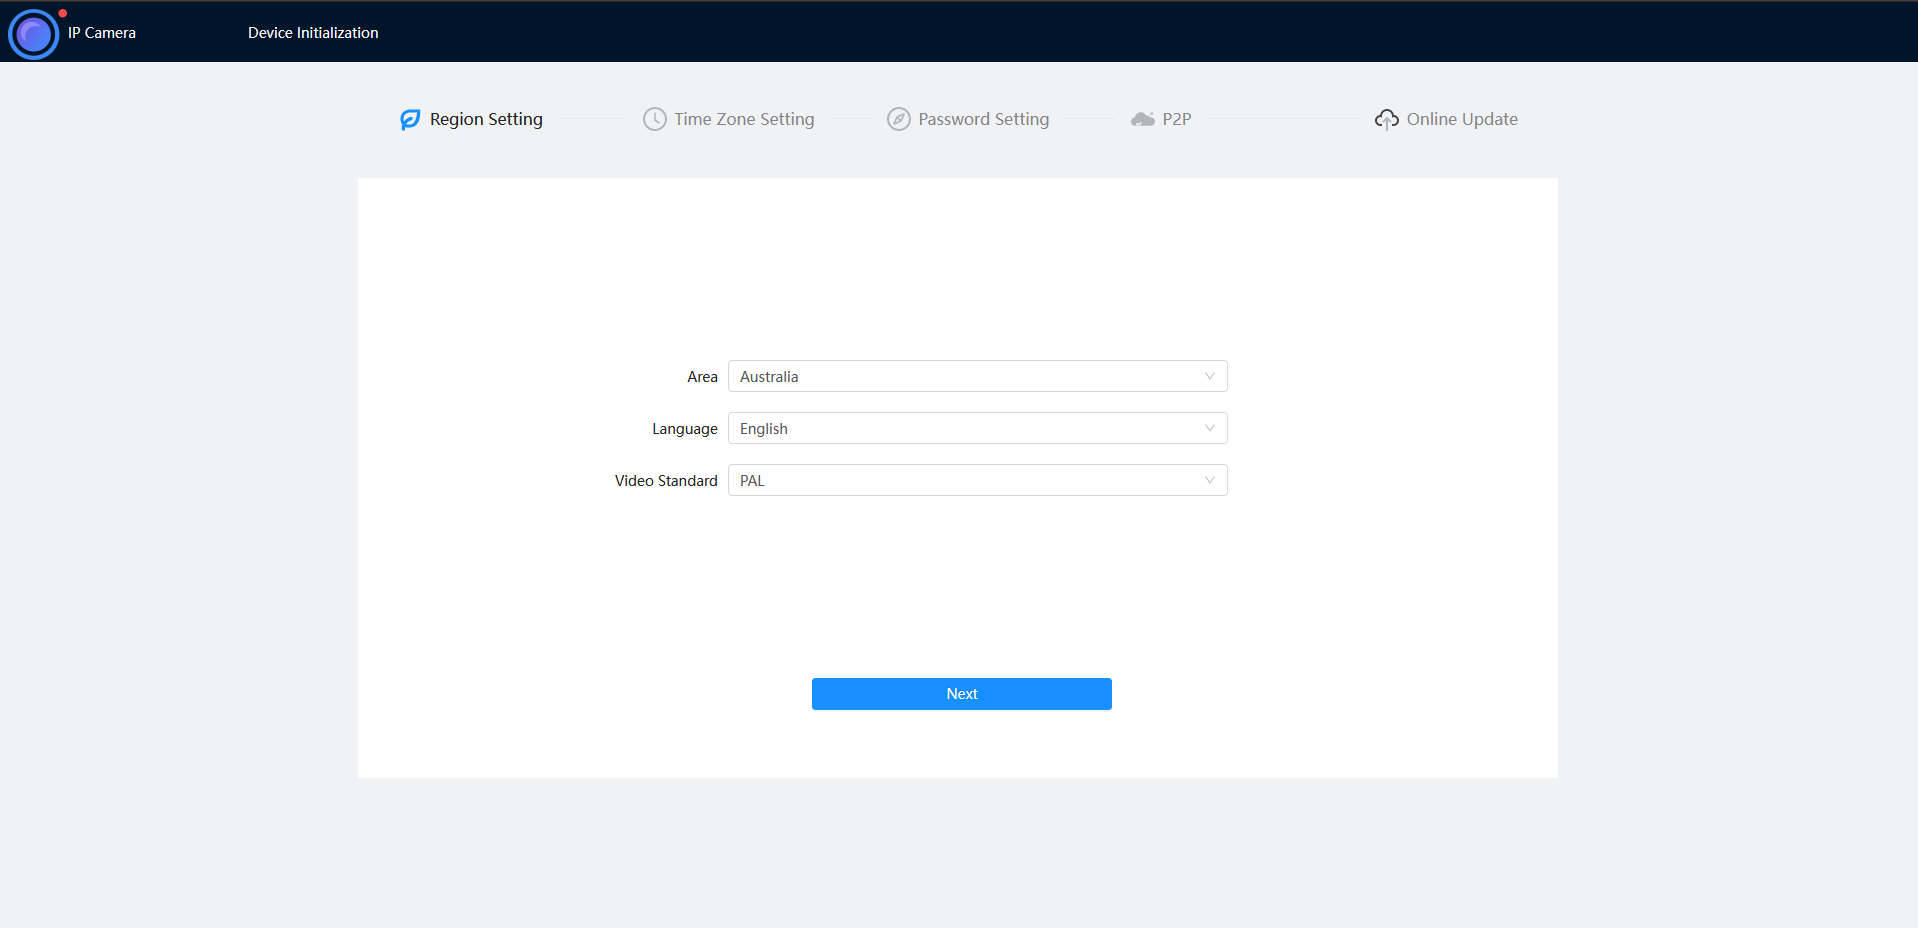
How to initialise a camera via Web interface 5.0
- Select your Region and Language.
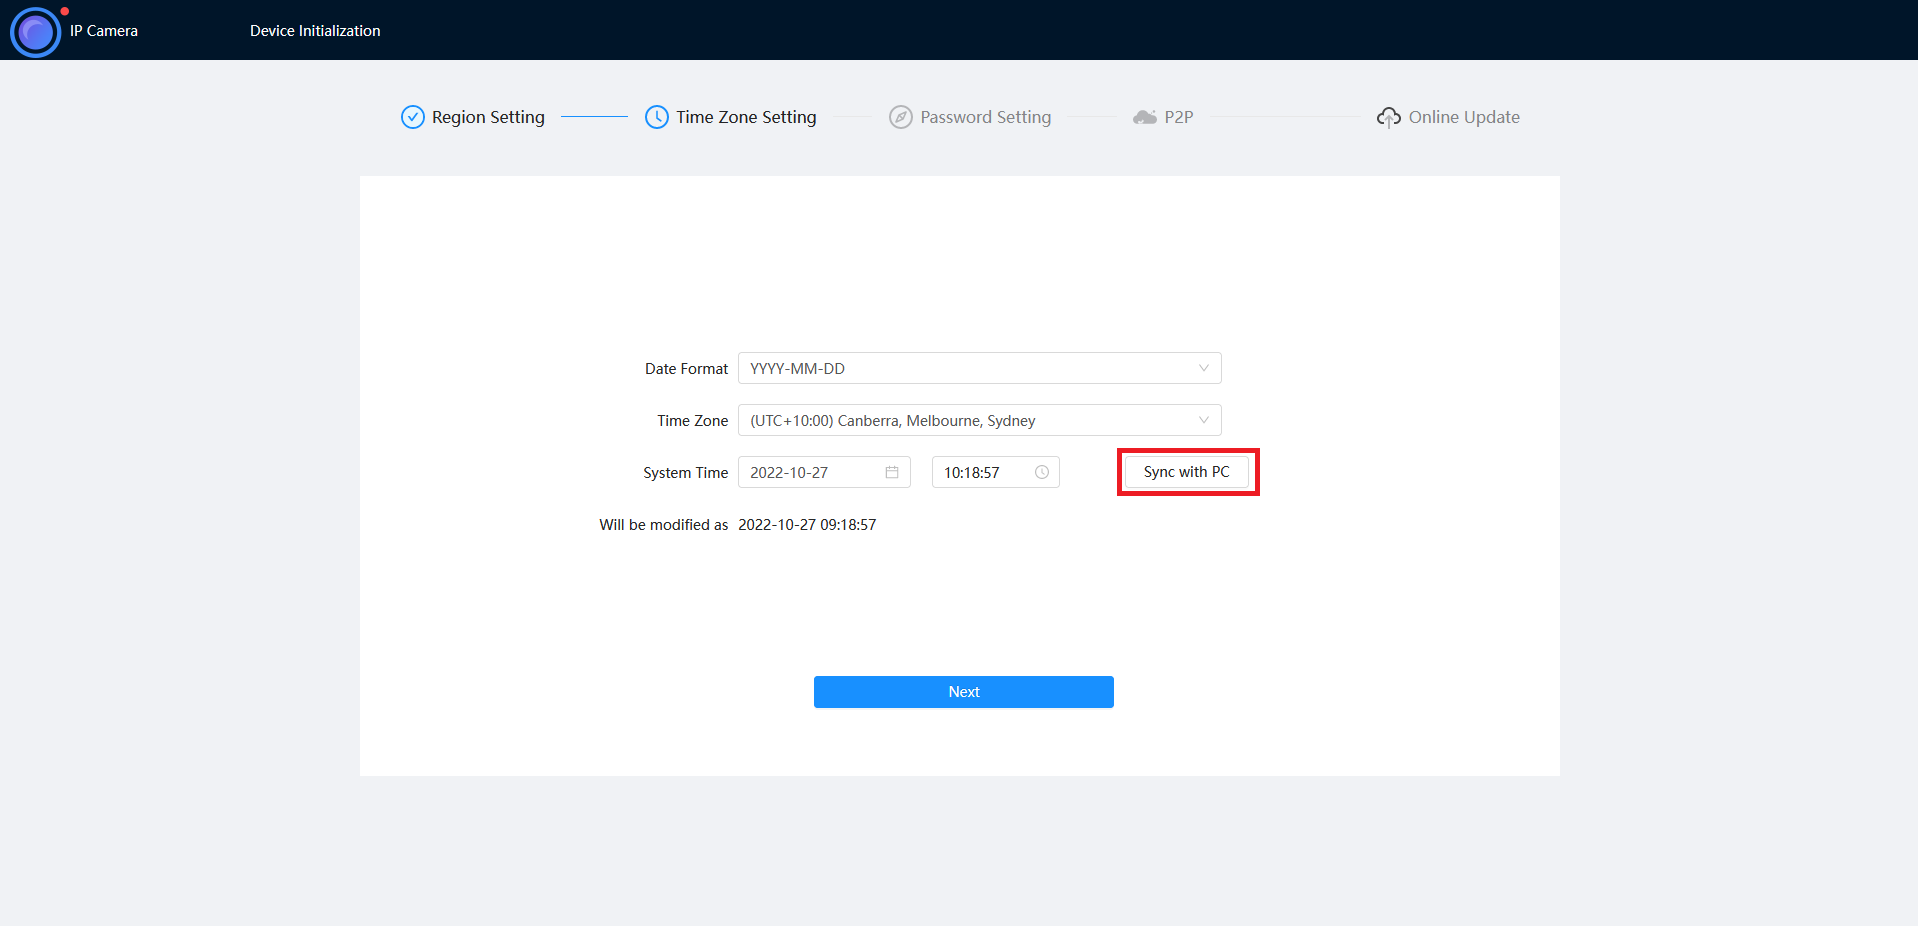
- Select your Time Zone, then press Sync with PC to sync your cameras time with the PCs time.
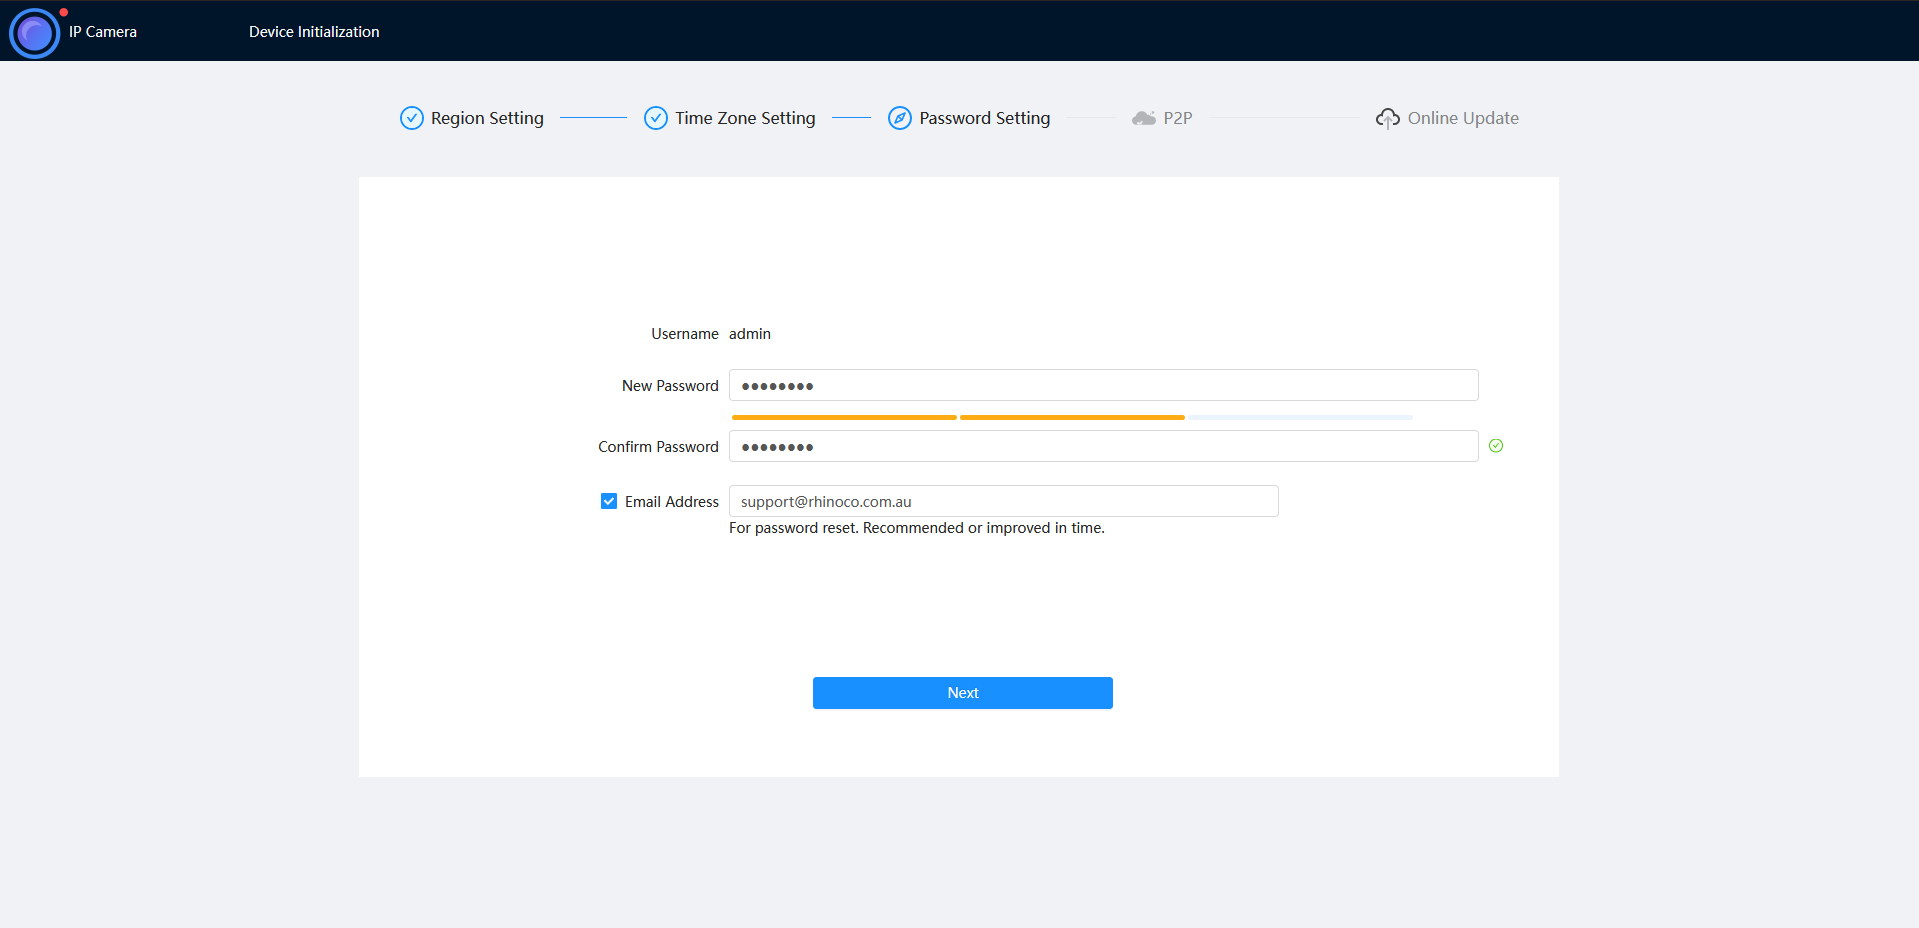
- Enter a password and recovery email.
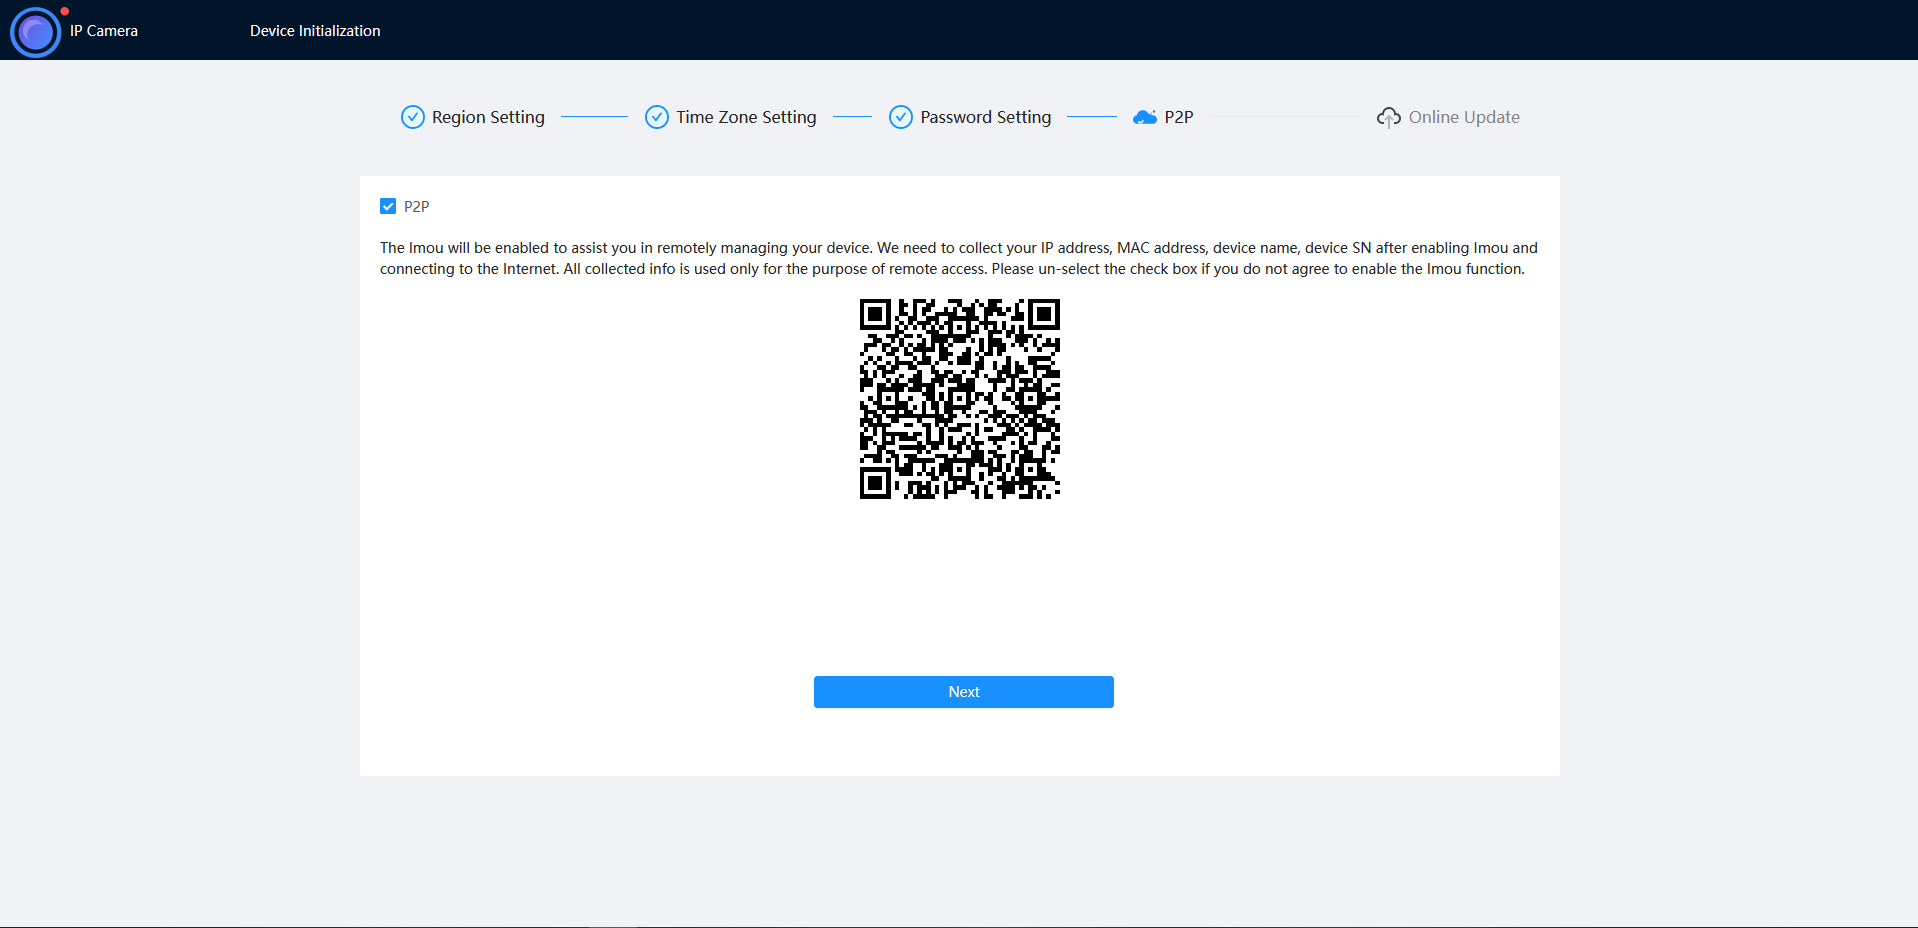
- Ensure P2P is enabled, then press Next.
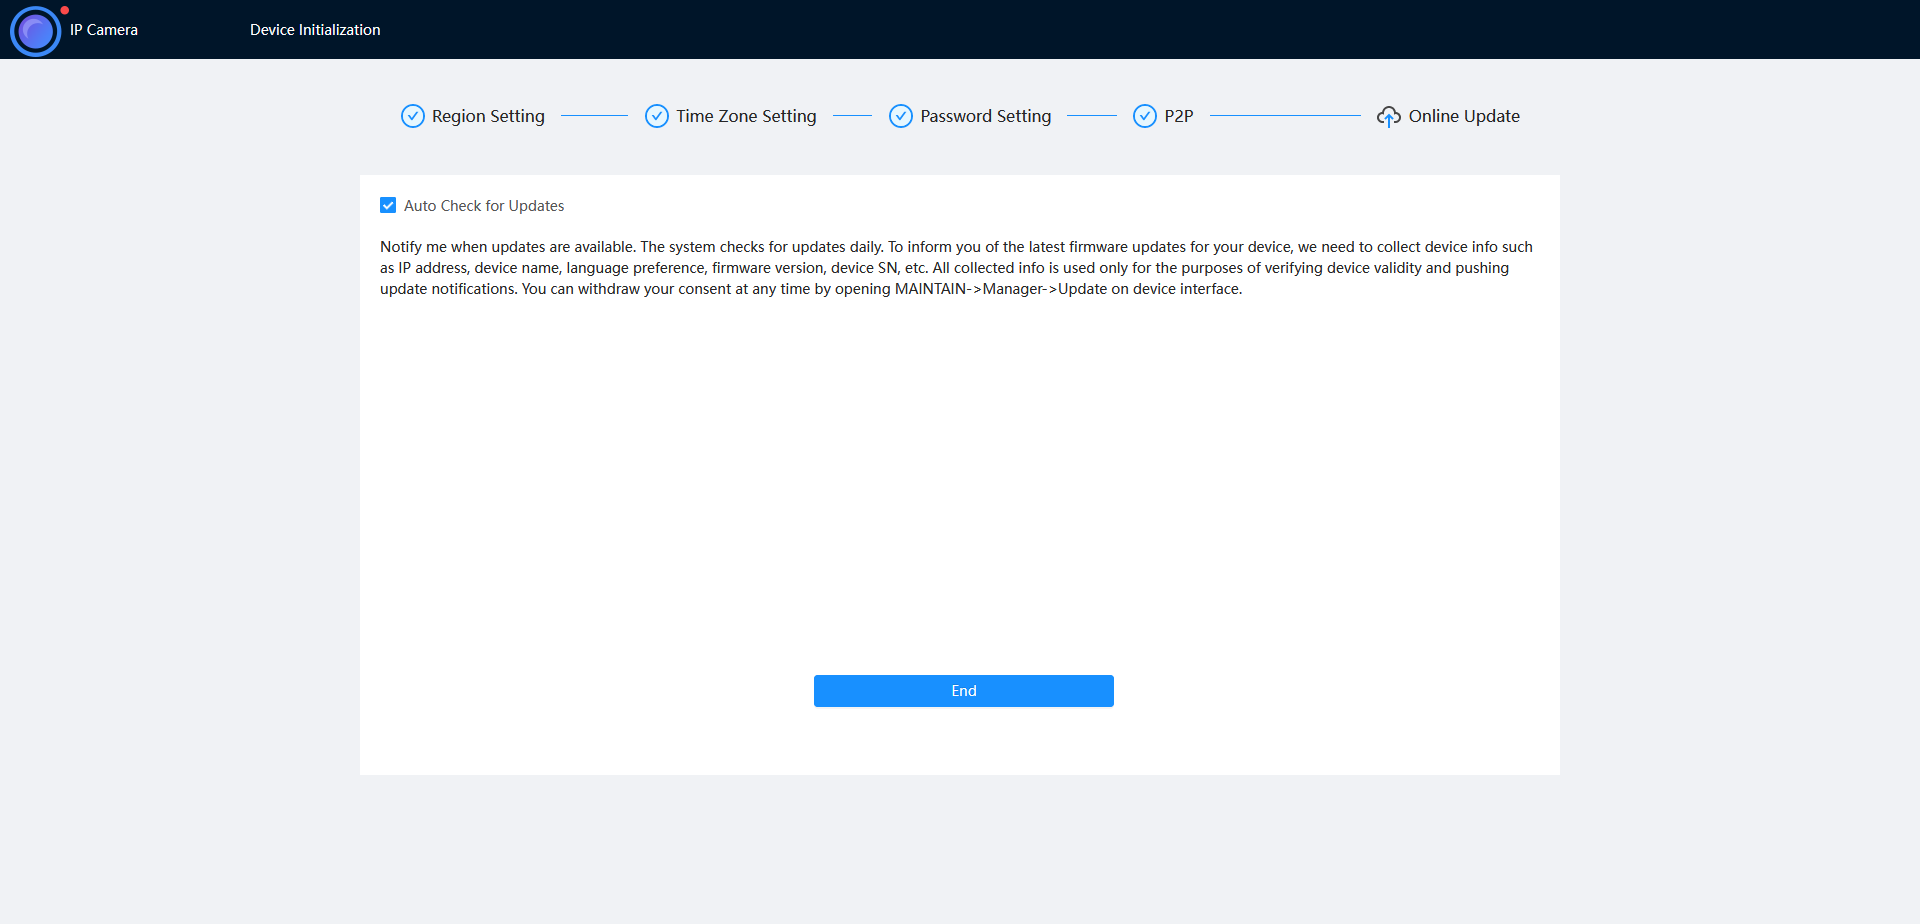
- Click End.
How to initialise a camera via Web interface 3.0
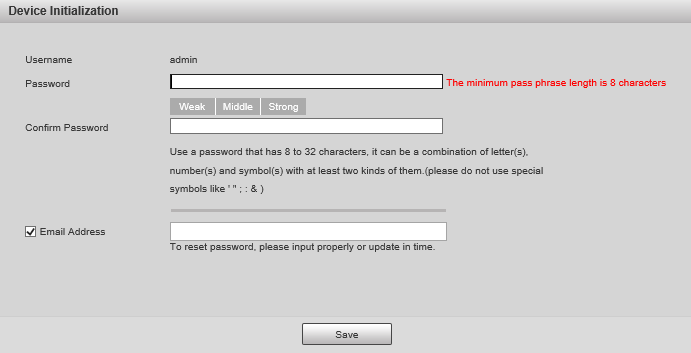
Initialize the camera by entering a new password (It will need to be at least 8 characters long), then click Save.
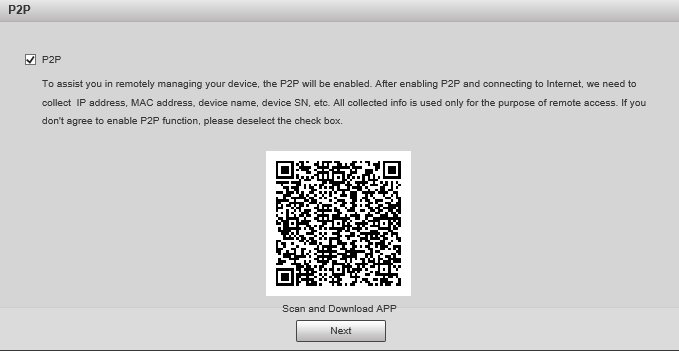
Ensure P2P is enabled and click Next
Click Next.
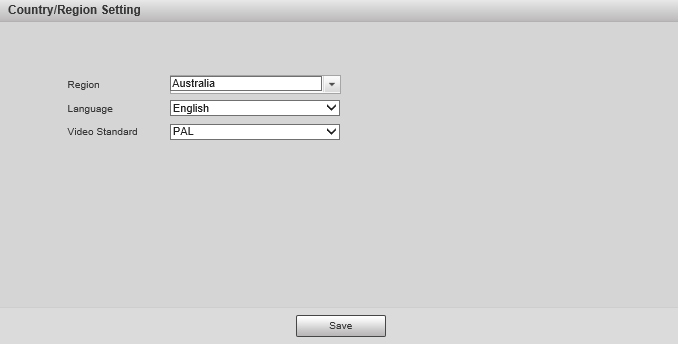
If prompted, select a region and click Save
DeleteOption 2 - Initialisation via the Config Tool
The initialisation process can also be performed using the latest version of our Config Tool - Please see the images below showing how this is done. To speed up the process the Config Tool also allows you to initialise multiple cameras at once.
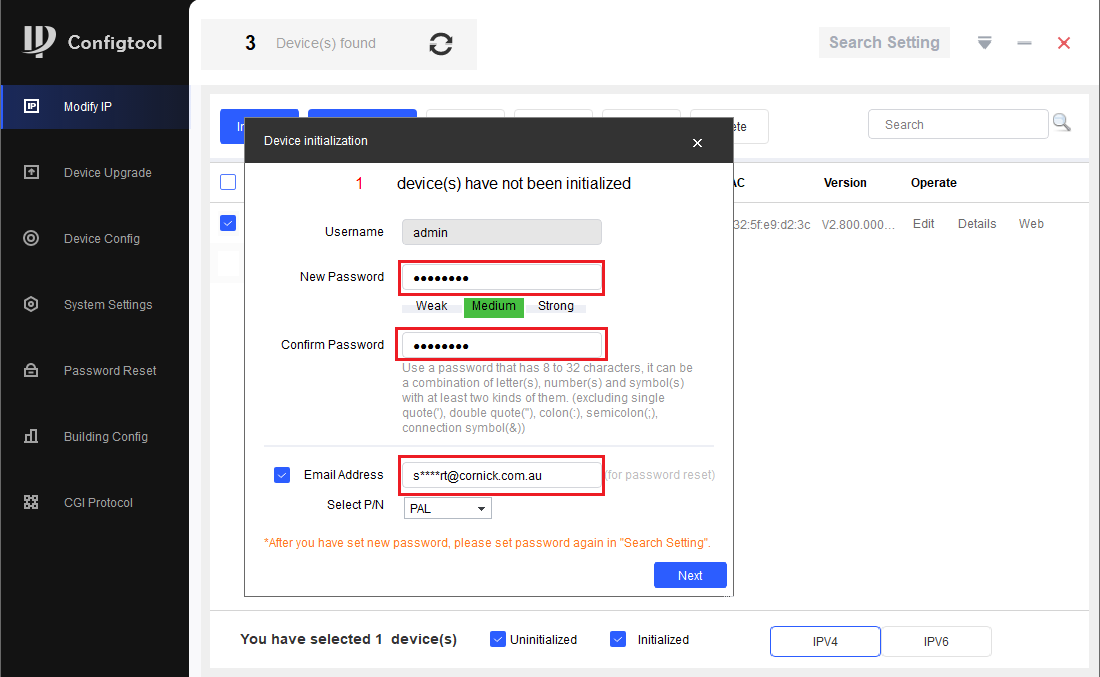
- Download and open Config Tool.
- Put a check in the box
 next to the device you would like to Initialise, and select the Initialize button.
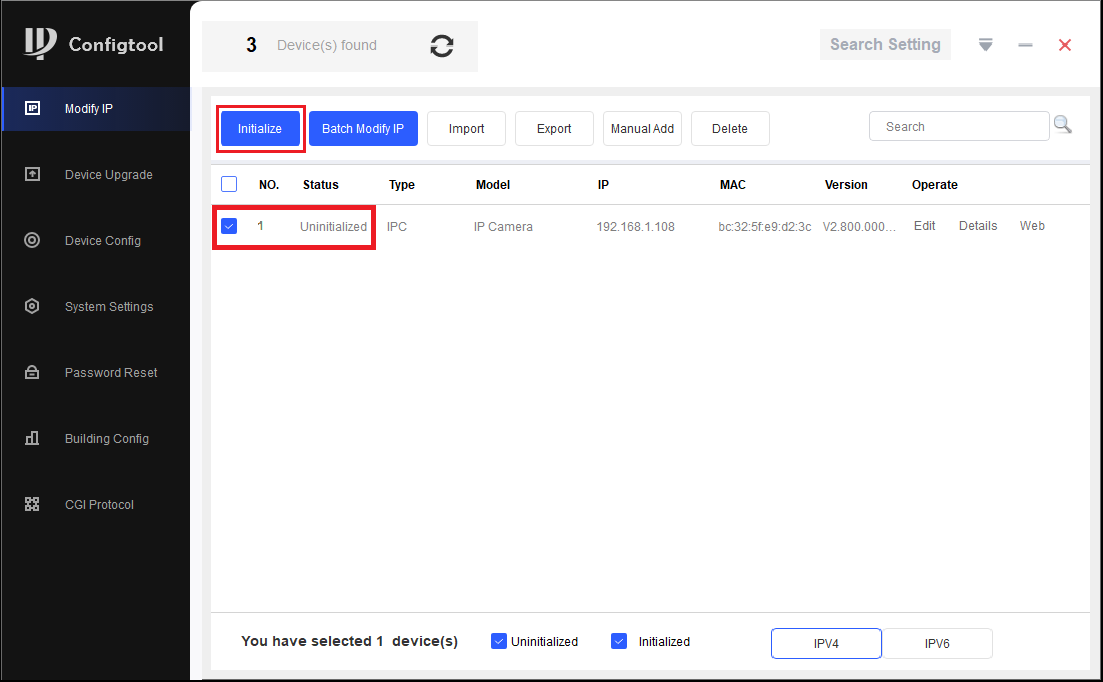
- Select the Initialize button.
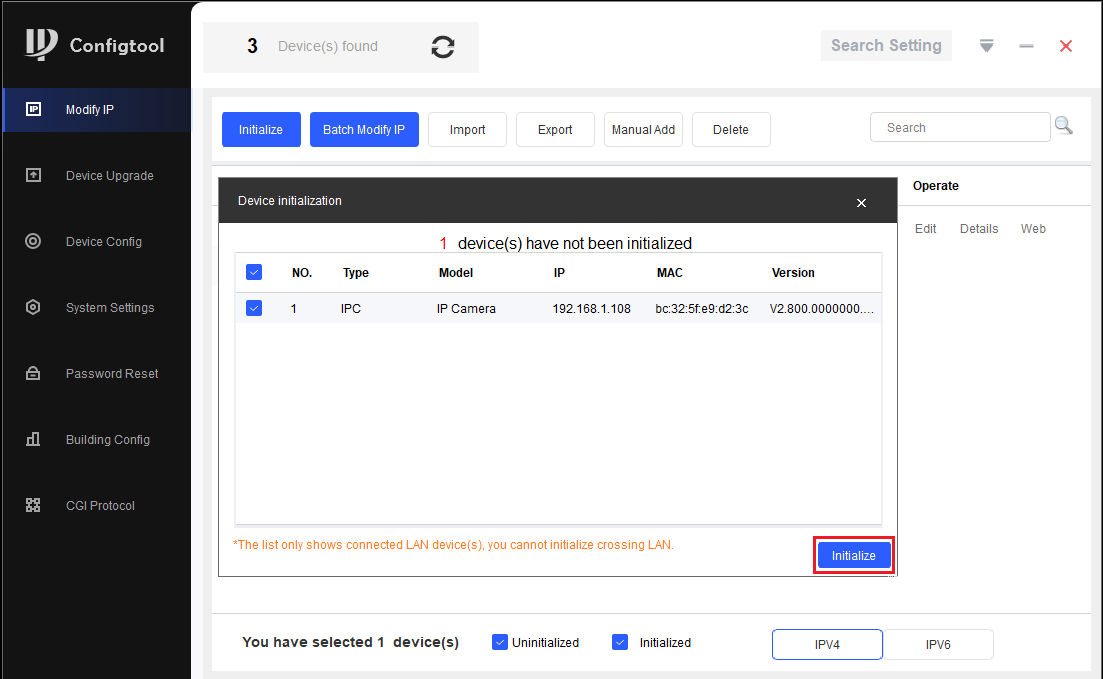
- Enter a password, that is at least 8 characters, and is a mix of letters and numbers. Enter an email address, this will be used if the password is ever forgotten. Select Next.
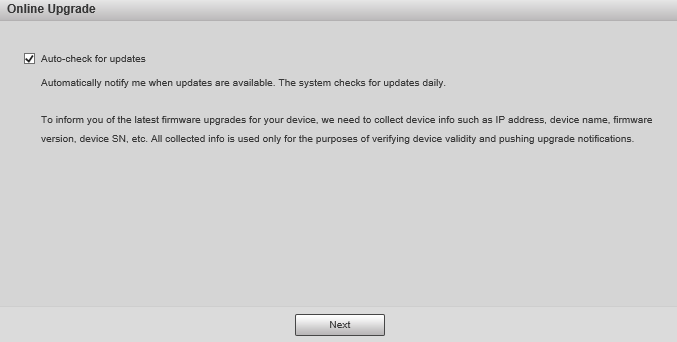
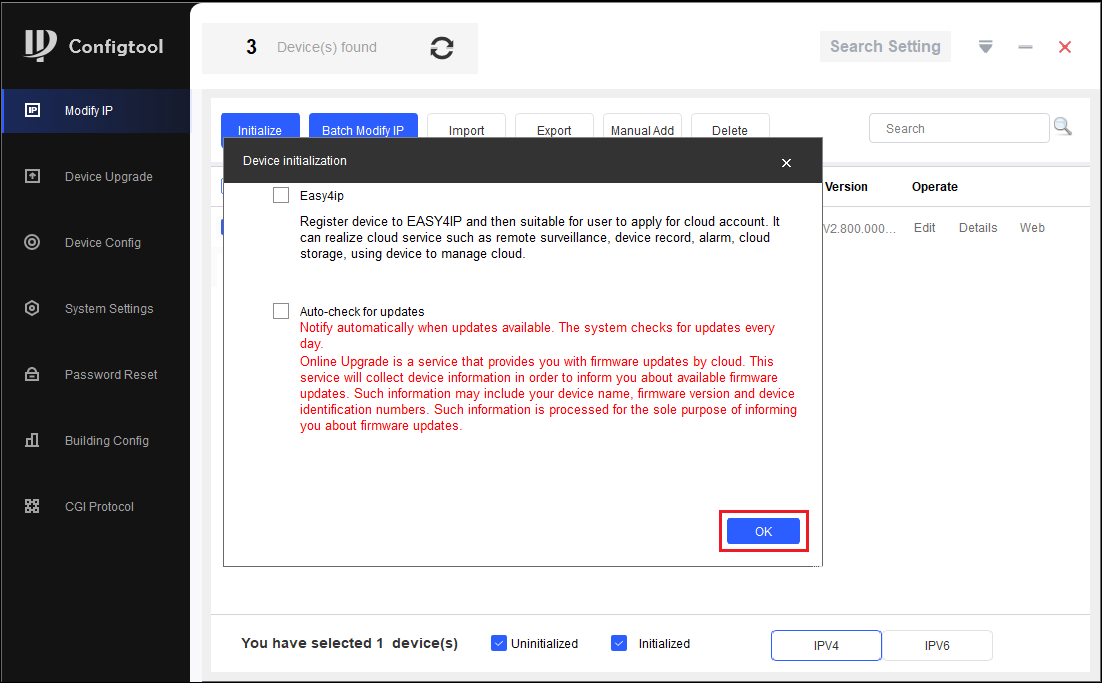
- Depending on the installation requirements, you can check or uncheck the boxes for Easy4IP (P2P Remote Access) and Auto-check for updates. Select OK.
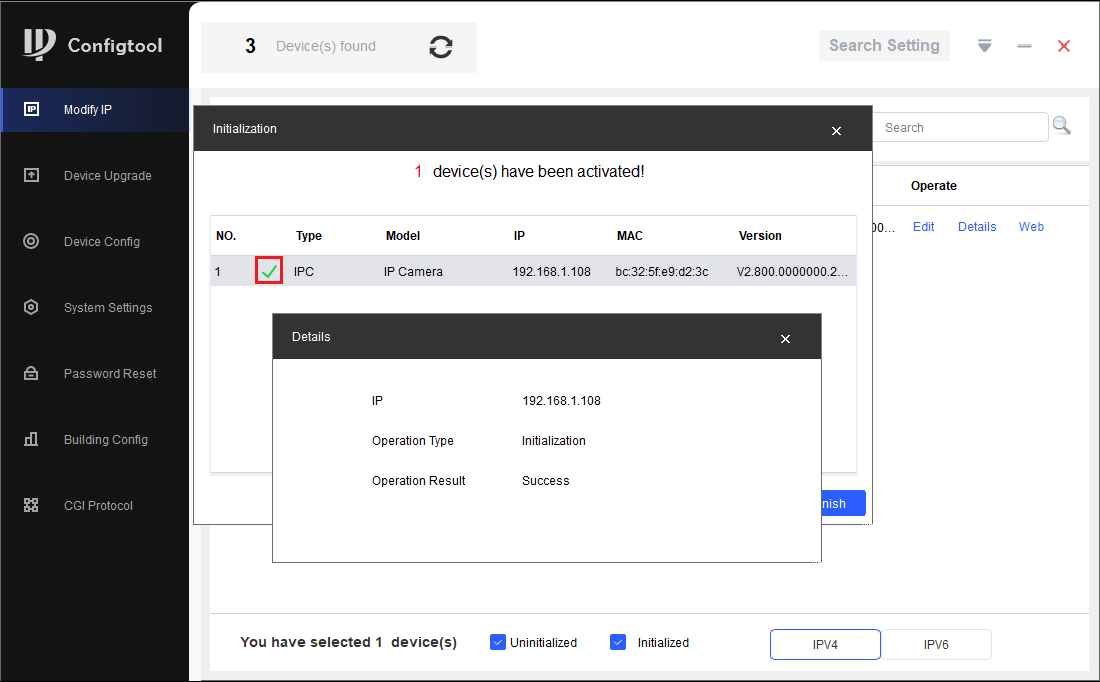
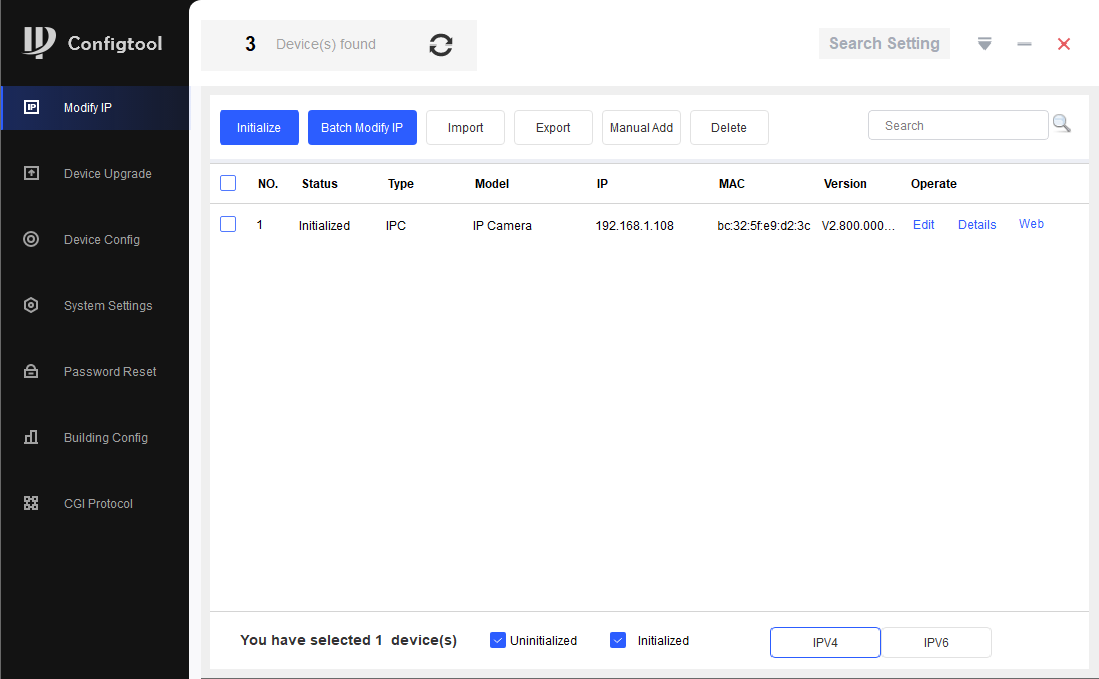
- If the status shows as Initialized, the process was completed successfully.
Step 4 - Configure the Network settings
- Navigate to Setting
 > Network > Cellular Network > Dial-Up
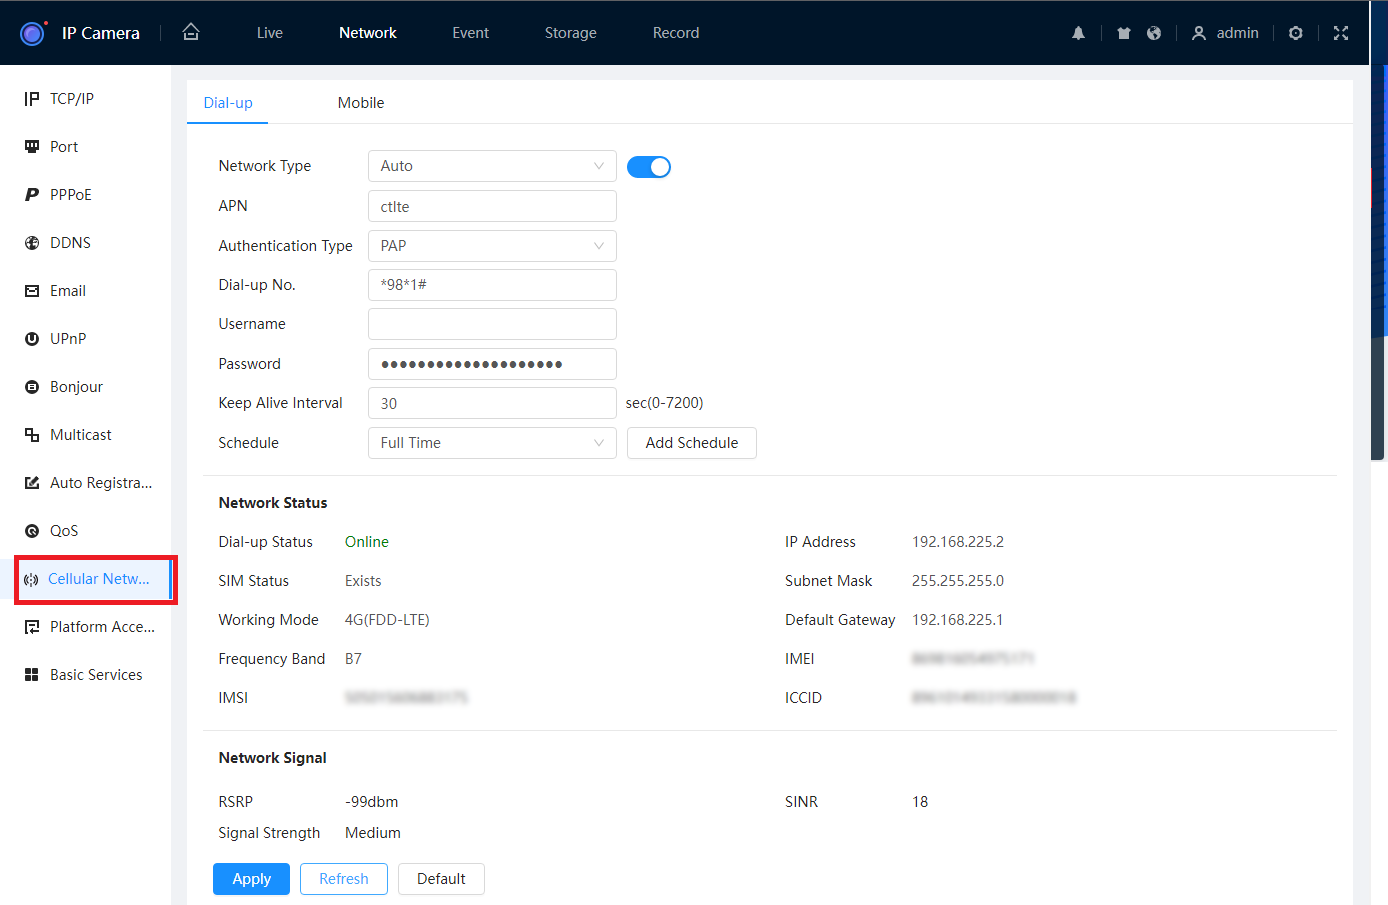
- Check the Dial-up Status. If it says Online the SIM card is already connected to the Cellular Network. Else, set the APN per your SIM Provider's specifications, then select Apply.
- Navigate to Platform Access > P2P
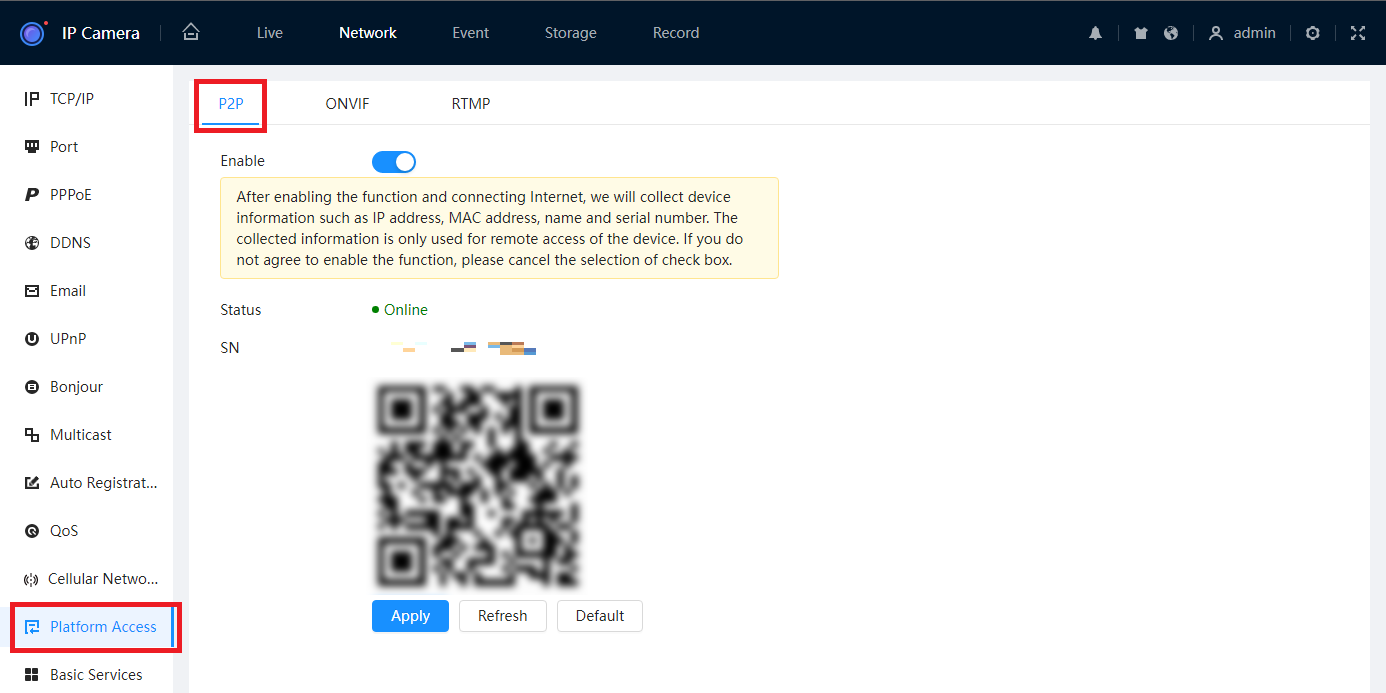
- The Status should be Online. You can now add it to the DMSS app.
Step 5 - Add the Camera to DMSS
How to add devices to DMSS mobile app
 DMSS is a remote surveillance app that can be used to view your Devices remotely.
It can be used access Live view, Recorded playback, get event notifications, and receive calls and unlock door stations away from home.
DMSS can be found on the Google Play store and iOS App Store.
How to add devices to DMSS via P2P
1. Select the Plus Icon At the Top Right.

2. If you are Not Logged in DMSS will give you this Message. At which you can either Log In or continue to add the device as a Local Device.

3. Select Scan QR Code

4. Scan the QR code for your Device's Serial Number, then click Next
Info
The QR code can be found at Main Menu > Network > P2P (or Easy4IP) on a recorder AND on the box the device came in.

5. After scanning your Serial Number It Will Appear in the Box.
Note
The Security code Dialog box is for only for certain Devices are not usually associated with NVR's and Cameras and can be Ignored.
Select Next.

6. Select the type of device you wish to add.
NVR for an NVR for a recorder with IP cameras
DVR/XVR for a recorder with CVI cameras
VTO for a Door Station
Wired Camera for a standalone Camera wired to a switch or router

7. Enter In details of the Device
i. Name Device, this is how you'll identify your device (home, office etc. ii. Enter Username of the device. iii. Enter The password of the Device
After you've entered those details select Save.

8. Confirm your Time Zone and DST is Set correctly. Select Next

9. This Is How It Will Appear on Your Home Screen

Adding Devices Via IP/Domain
If you wish to add a device to DMSS via it's IP address you will need to use Port Forwarding.
If you are unfamiliar with Port forwarding, we suggest that you use the P2P method outlined above.
1. Select Plus Button at top Right
2. Select IP/Domain

3. Select Add Mode If you to add via a different mode

4. Select on Which Protocol You Will be Using

5. Enter the NVR Information Address, Name, Username, Device Password and Select Save

Add Device Over Local Network
1. Select Plus Icon At the Top Right.
2. Select Search on LAN

3. Select Your Device From The ones Listed

4 . Select Add Mode And Select P2P or Domain (Note Selecting Domain/IP will allow access while on the same Network as the device)

Video Guide
Sharing Devices to Another Account
1. On Home Menu Select the 3 dots of the device you wish to share.

2. Select Share Device.

3. Enter the DMSS account you want it shared with and select what permissions you want that account to have access to.

4. Have the shared to account fully close and Reopen app. And the device should appear.
Revoking DMSS Shared Devices
If for any reason a shared needs to have their permission revoked follow Steps Below
1. On the Home Screen Select the Device you want to manage.

2. Select Share Device.

3. Select which Account you want to manage.
4. Select Cancel Sharing And Confirm

5. That User will no longer have access to the listed Device.
Additional Configuration
Recording Schedule & Events
By default, the camera is configured to record Alarm footage and snapshots when movement is detected by the in-built PIR.
You can adjust the recording schedule, and configure other event options such as Motion Detection.
How to adjust the recording schedule
- Navigate to Home
 > Record > Time Plan.
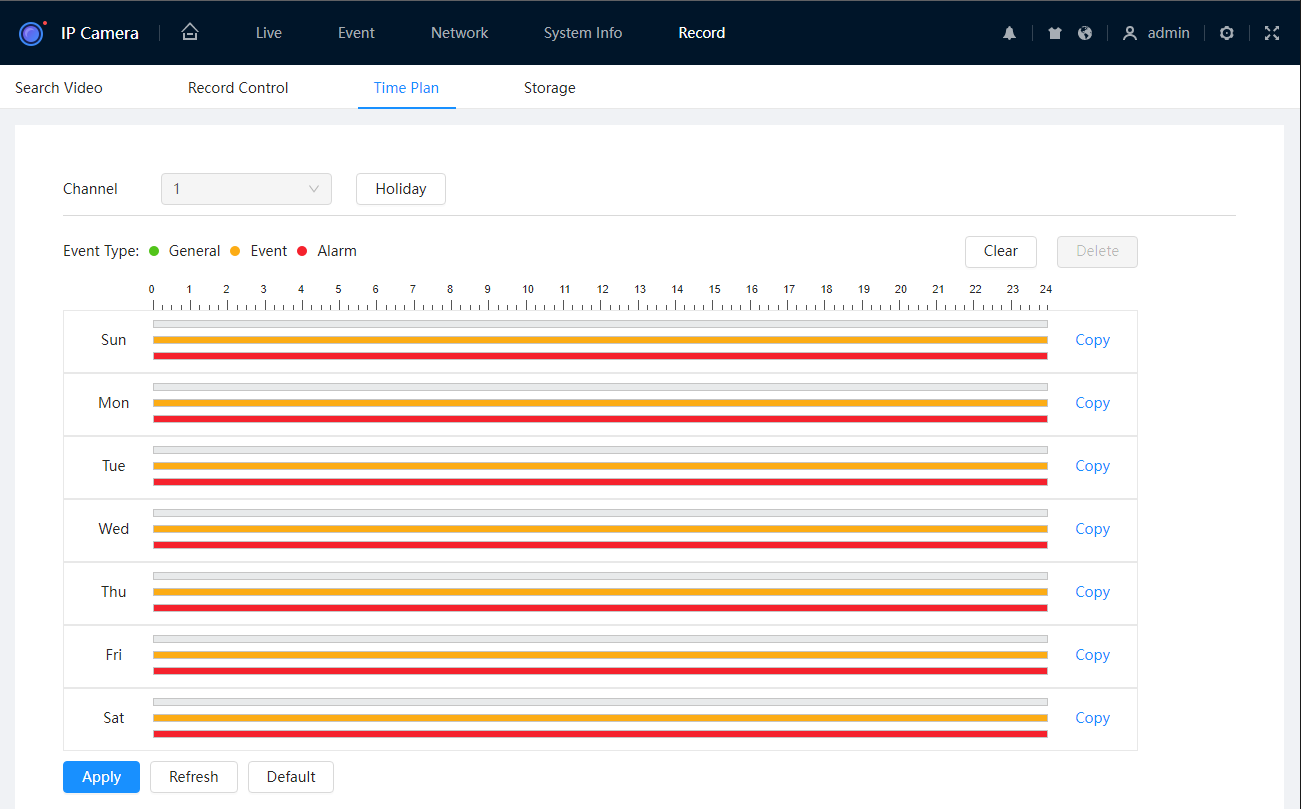
- For each day, click and drag on the schedule to adjust the time period for each event type.
General: 24/7 recording
Event: Records when an event is triggered (e.g Motion Detection & Audio Detection)
Alarm: Records when an alarm is triggered (E.g PIR)
PIR Configuration
- Navigate to Setting > Event > Alarm > PIR
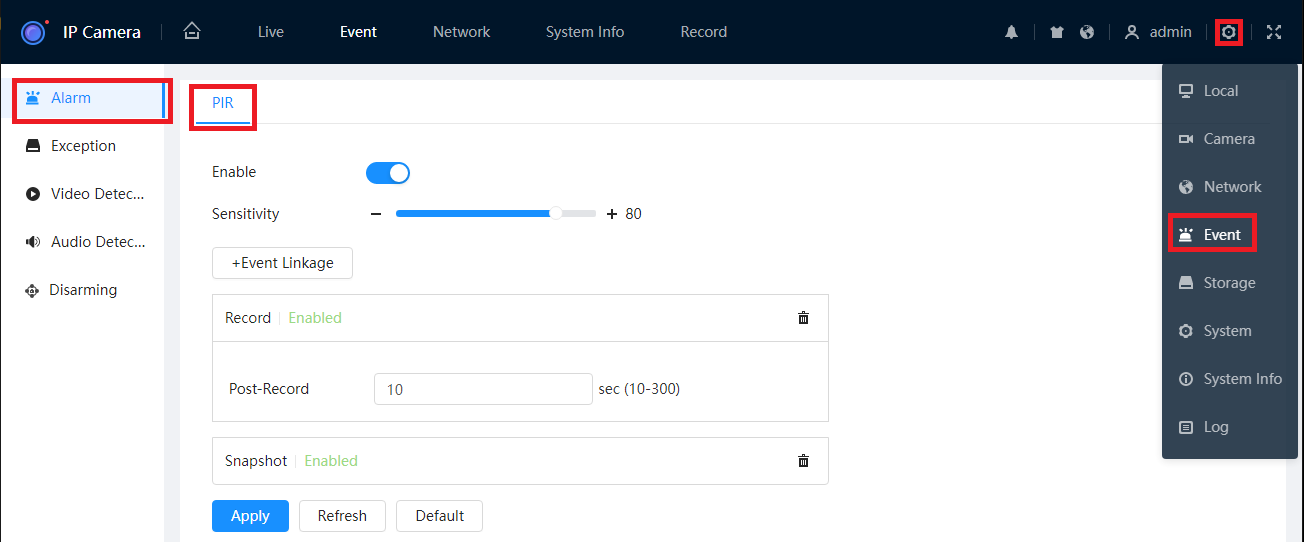
- Toggle Enable to the ON
 position to enable the PIR feature.
 - Adjust the Sensitivity if required. The default is 80.
- Add any required Event Linkages by selecting
 and choosing the option you wish to add from the list. Record and Snapshot are added by default.
 - Select
 to save your changes.
Event Linkage Options | |
|---|---|
| Record | Record video when the event is triggered. (Enabled by default) |
| Snapshot | Save an Snapshot when the event is triggered. (Enabled by default) |
| Send Email | Send an Email when the event is triggered. Requires Email settings to be configured under Network. Refer to Configuring Send Email for more information. |
| Send SMS | Send an SMS when the event is triggered. Requires SMS settings to be configured under Network. Refer to Configuring Send SMS for more information. |
| Audio Linkage | Play an audio alarm/siren via the camera's built-in speaker when the event is triggered. |
| Warning Light | Activate the red/blue strobe built into the camera when the event is triggered. |
Motion Detection Configuration
- Navigate to Setting > Event > Video Detection > Motion Detection.
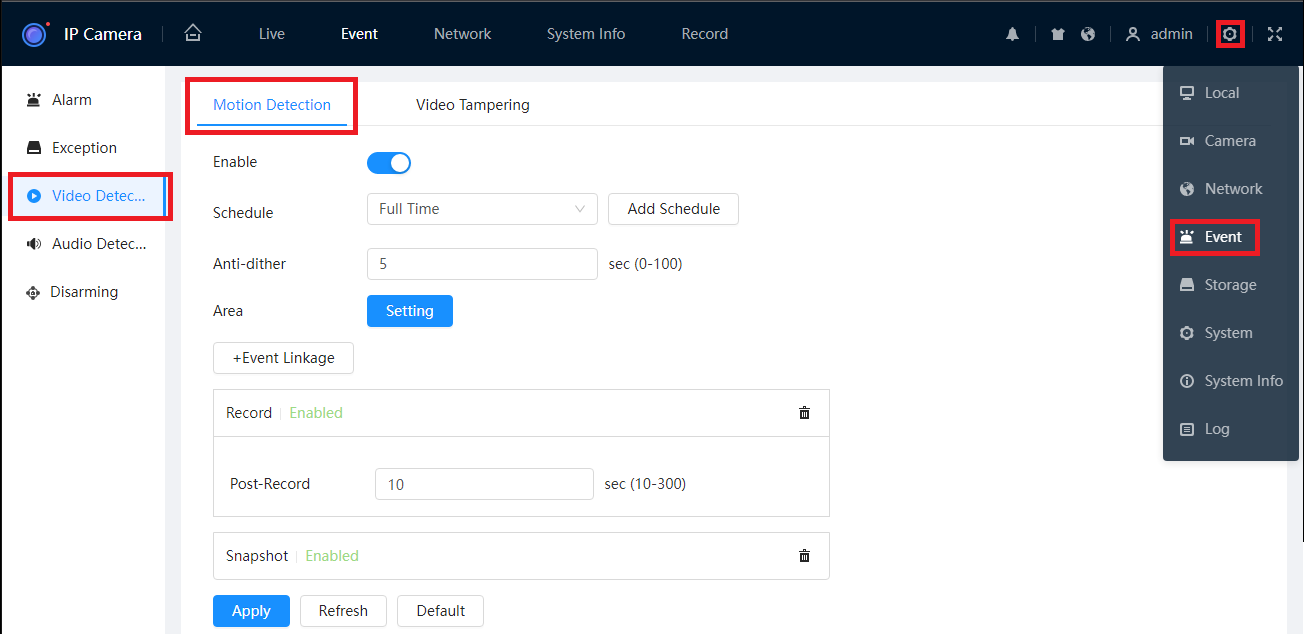
- Toggle Enable to the ON
 position to enable Motion Detection.
 - If you wish for Motion Detection to only be active during a specific time period, select
 to add a different schedule, then select the new Schedule from the list. The default option is Full Time.
 - If you wish for Motion Detection to only activate in specific areas of the image, select Area
 . Click and drag on the coloured squares to activate/deactivate them. When the square is coloured, Motion Detection will activate in that region. Select
  to save your changes to the Area settings.
 - Add any required Event Linkages by selecting and choosing the option you wish to add from the list. Record and Snapshot are added by default.
- Select to save your changes.
Event Linkage Options | |
|---|---|
| Record | Record video when the event is triggered. (Enabled by default) |
| Snapshot | Save an Snapshot when the event is triggered. (Enabled by default) |
| Send Email | Send an Email when the event is triggered. Requires Email settings to be configured under Network. Refer to Configuring Send Email for more information. |
| Send SMS | Send an SMS when the event is triggered. Requires SMS settings to be configured under Network. Refer to Configuring Send SMS for more information. |
| Audio Linkage | Play an audio alarm/siren via the camera's built-in speaker when the event is triggered. |
| Warning Light | Activate the red/blue strobe built into the camera when the event is triggered. |
Deterrence Features
This camera includes deterrence features which are designed to ward off intruders with an Audio (Siren) & Visual (White Light) warning. This can be triggered with events such as Motion Detection.
The deterrence features can be disarmed to temporarily disable the siren and strobe so they cannot be activated. This can be done on a schedule (e.g Business Opening Hours), or toggled on/off via DMSS (e.g A Manager accessing a business during closed hours).
Configuring Warning Light
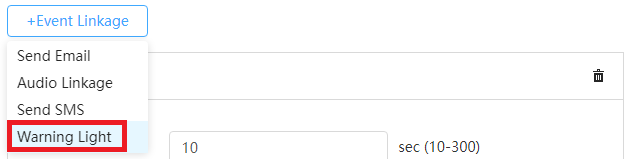
- On the Feature you wish to trigger the Warning Light for, select
 , then select Warning Light.
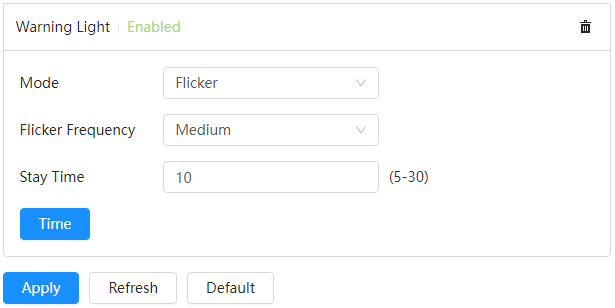
- Adjust the Mode if required. Flicker is the default, but Always On can be selected instead.
- If Mode is set to Flicker you can adjust the Flicker Frequency. The default is Medium.
- Adjust the Stay Time if required. This is how long the warning light is active for, the default is 10 seconds.
- Select to save your changes.
Configuring Audio Linkage (Siren)
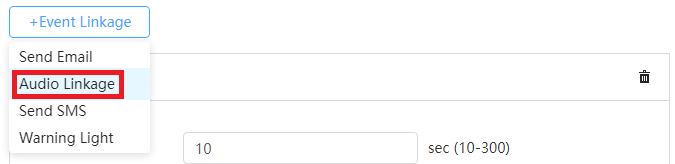
- On the Feature you wish to trigger the Audio Alarm for, select , then select Audio Linkage.
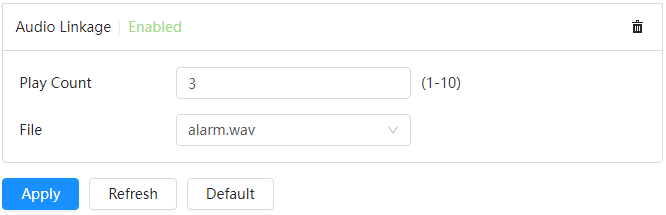
- Select the Audio File. Alarm.wav (Siren sound) is the default option
- Set the Play Count. This is how many times the audio file will repeat. 3 is the default option.
- Select Apply to save your changes.
How to Disarm via DMSS toggle
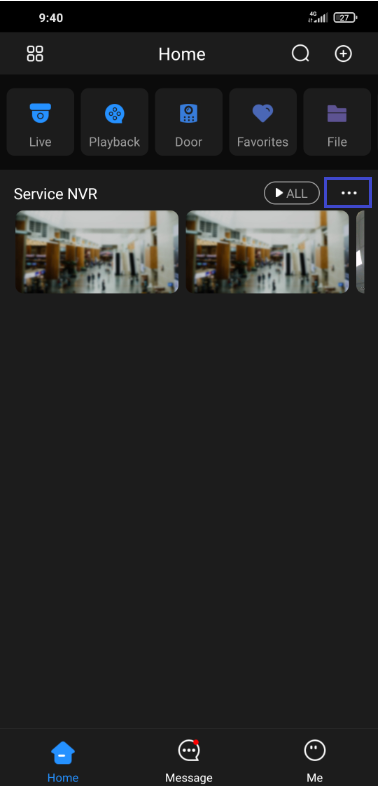 |
Open the DMSS App and tap the . . . Icon next to your device card on the home page, then select Device Details. |
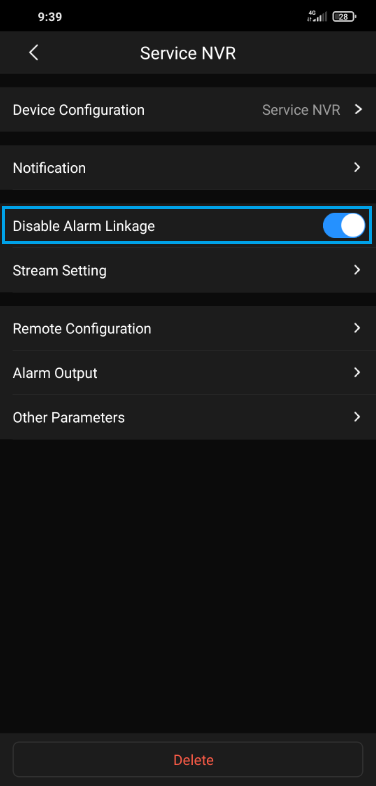 |
Wait for the device settings to load, this may take up to 10 seconds. Then turn on the Disable Alarm Linkage Function. |
How to Disarm for a Scheduled Time Period
- Navigate to Setting > Event > Disarming
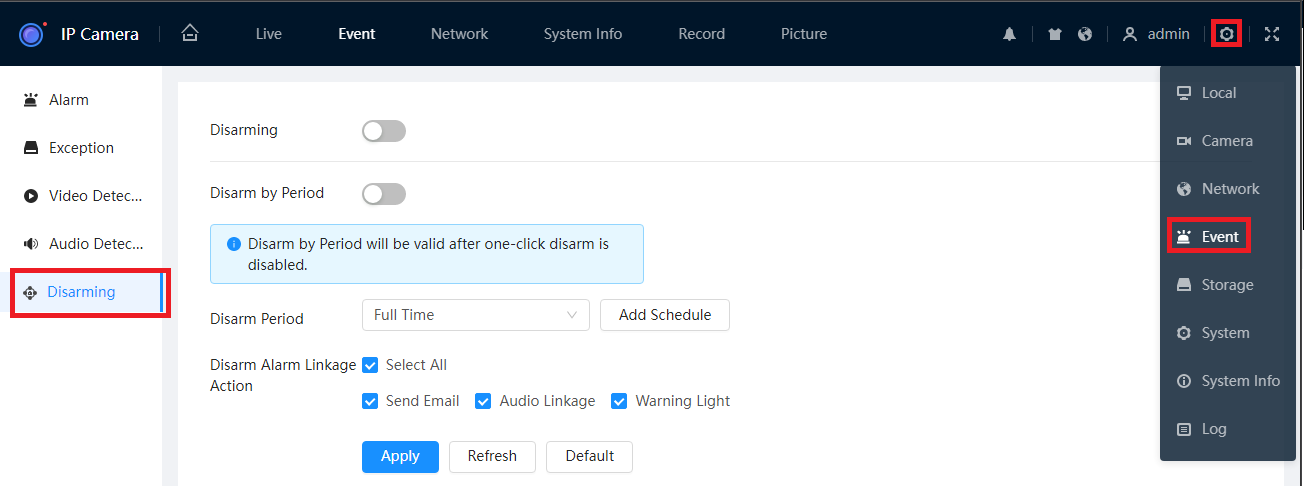
- Enable Disarm by Period.
- Select
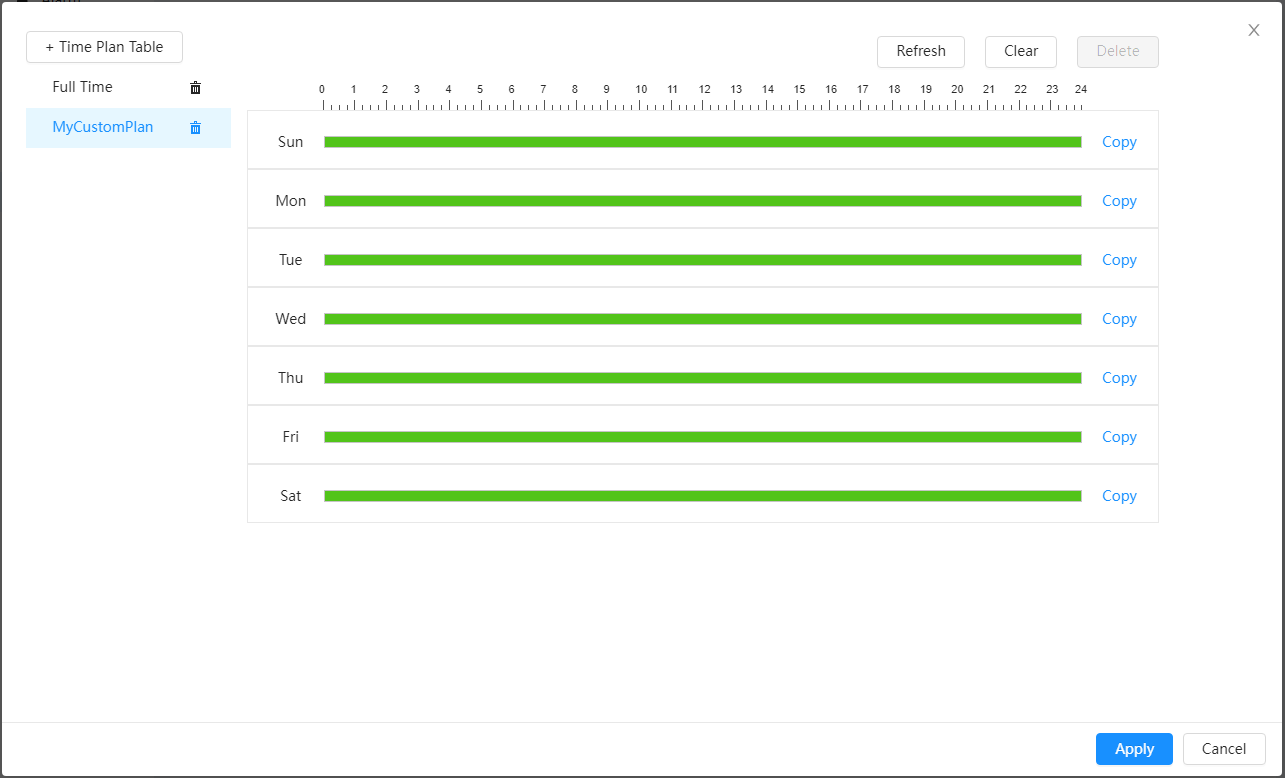
- Select
 to add a new Time Plan
 - Rename the Time Plan by double-clicking on the name.
- Click and drag on the schedule to adjust the active hours.
- Select
 to save your changes.
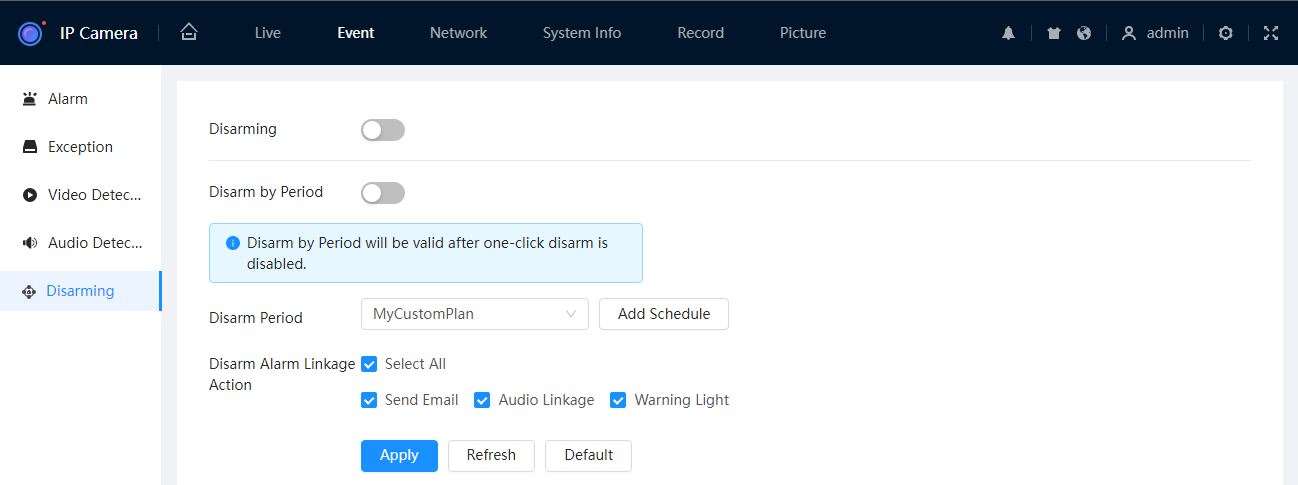
- Select your new Time Plan from the Disarm Period list.
- Adjust the Disarm Alarm Linkage Action. By default all options are selected, untick any options you do not want to disable when disarming is active.
- Select
 to save your changes.
Send Email & Send SMS
You can configure event triggers (Motion Detection, etc) to send an Email or SMS when triggered.
Configuring Send SMS
Info
This feature requires your SIM card to have Voice/Text capability.
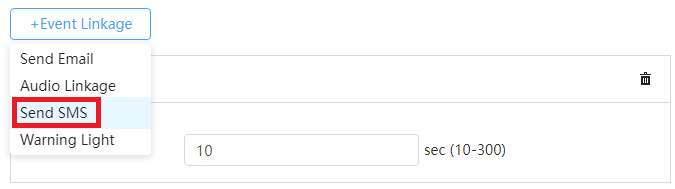

- On the Feature you wish to Send an SMS for, select +Event Linkage, then select Send SMS.
- This will add Send SMS to the list of linked events. Select Apply to save your changes.
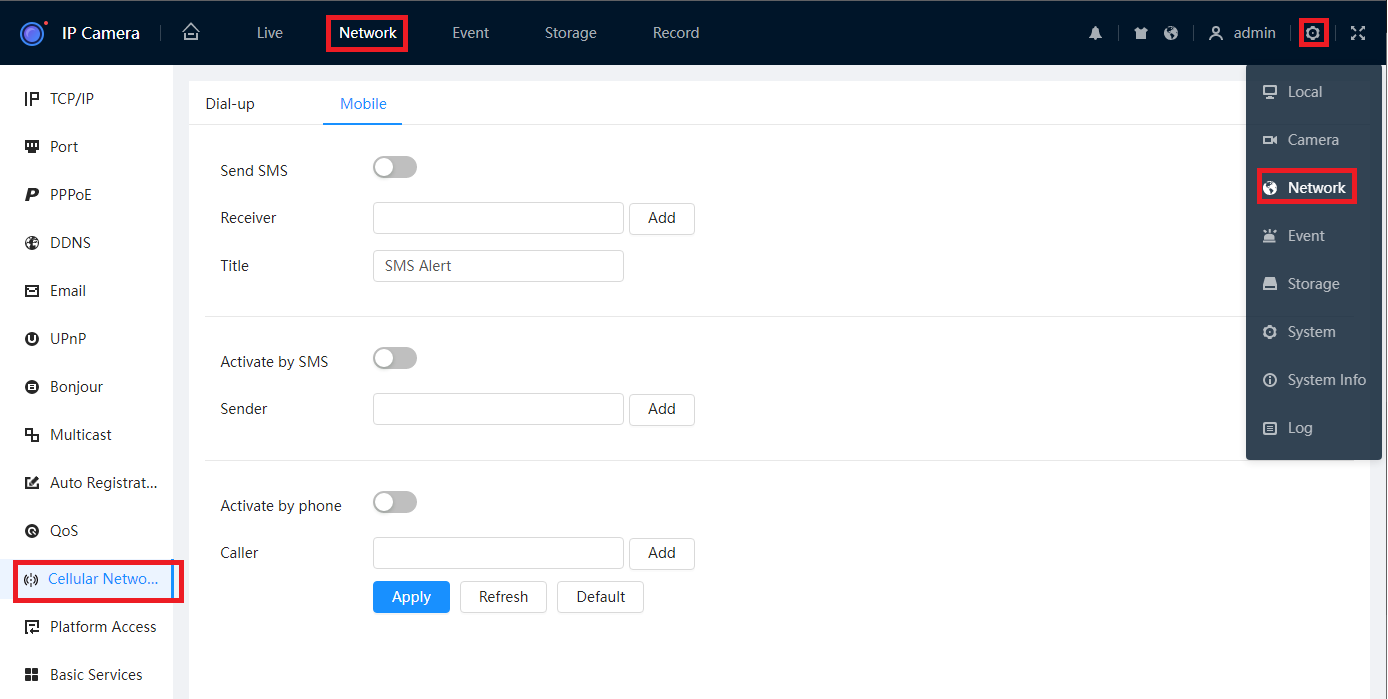
- Navigate to Setting > Network > Cellular Network > Mobile
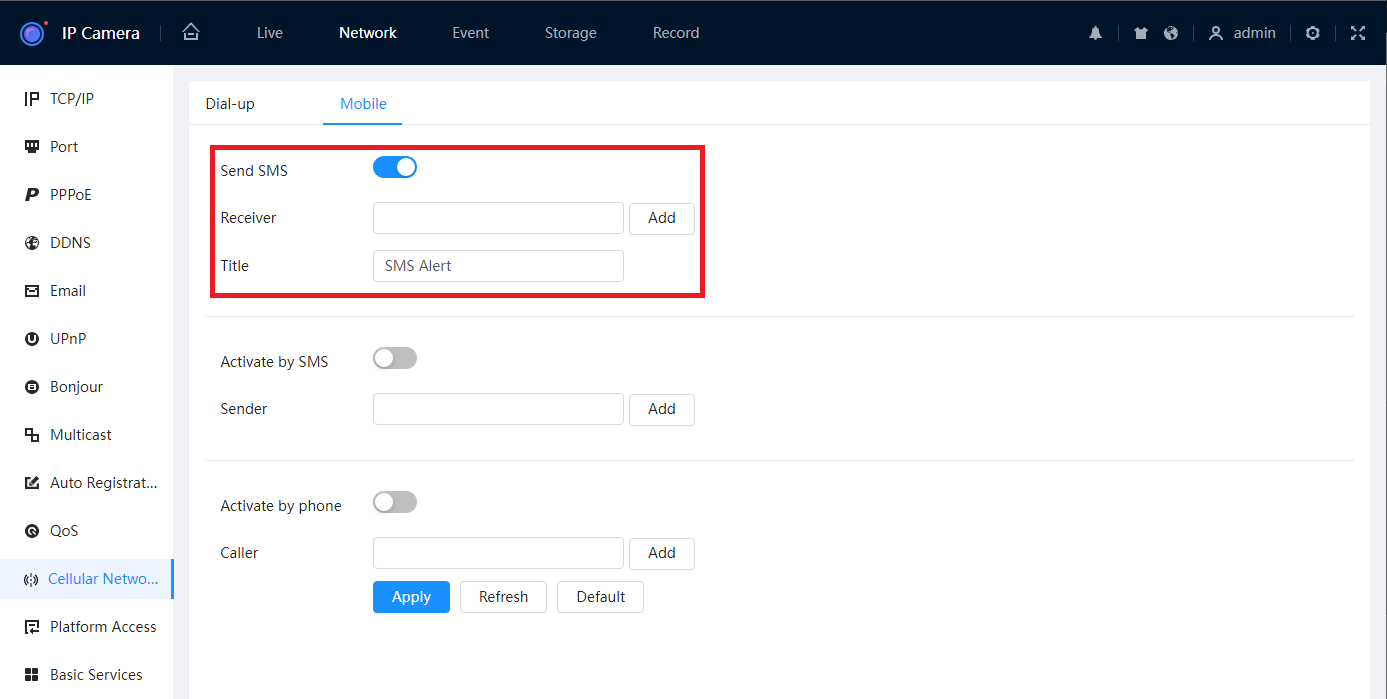
- Enable Send SMS.
- Type the mobile number you wish to receive SMS to into the Receiver Field, then select Add. Repeat for each mobile number.
- Select Apply to save your changes.
Configuring Send Email
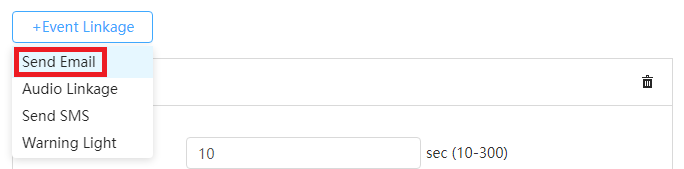

- On the Feature you wish to Send an Email for, select +Event Linkage, then select Send Email.
- This will add Send Email to the list of linked events. Select Apply to save your changes.

- Navigate to Setting > Network > Email
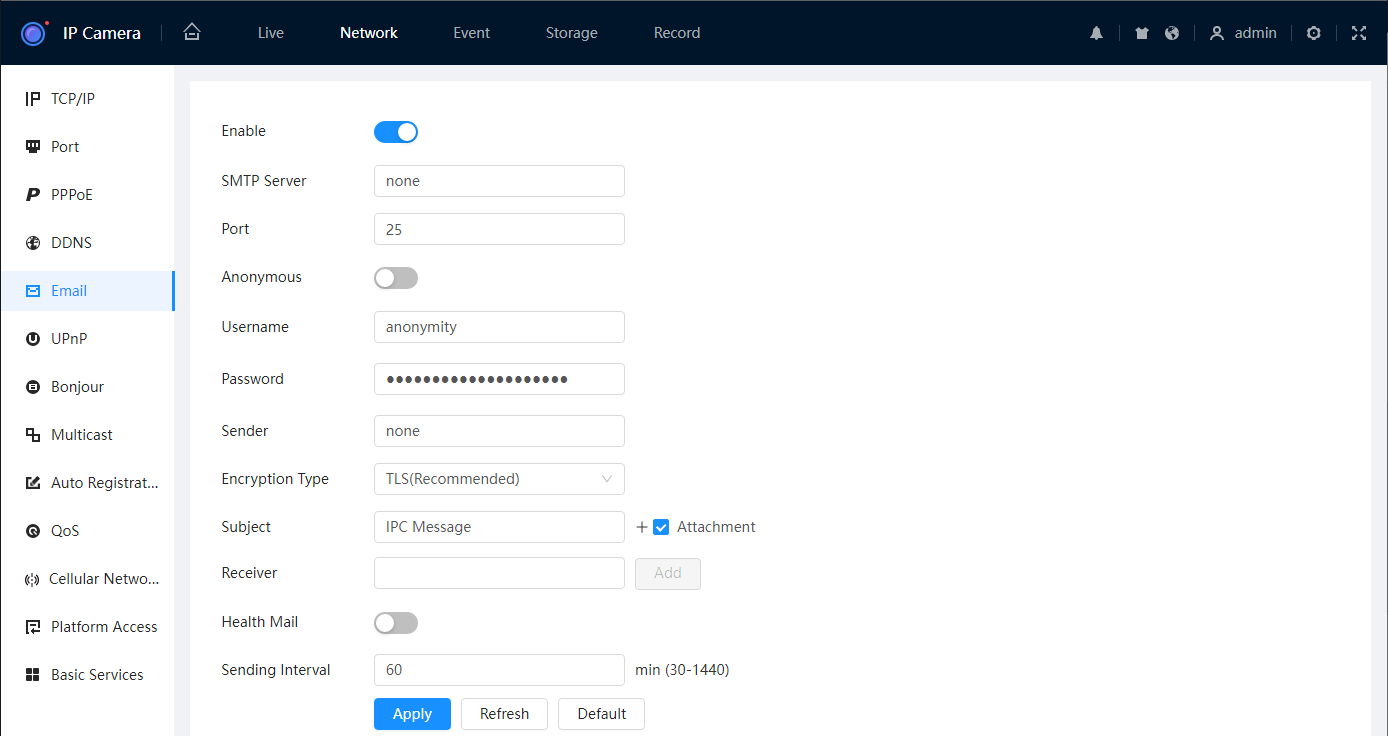
- Toggle Enable to the ON position
- Enter your SMTP server and Port. Refer to the Common SMTP Provider Settings table below, or alternatively, you can google your email provider with SMTP, eg, “Bigpond smtp settings”.
- Enter your Email address and Password into the Username and Password fields
- Input a different address for sender and receiver as they cannot be the same.
- Enter an email Subject.
- Select the encryption type, depending on your email provider, they may use different settings.
- Click Apply.
Common SMTP Provider Settings | ||
|---|---|---|
| Provider | SMTP Server | Port |
| Gmail |
smtp.google.com (OLD) smtp.gmail.com (NEW) |
SSL = 465 or TLS = 587 |
| Yahoo | smtp.mail.yahoo.com | SSL = 465 or TLS = 587 |
| Hotmail/Outlook | smtp-mail.outlook.com | SSL = 465 or TLS = 587 |
| Telstra | smtp.telstra.com | SSL = 465 or TLS = 587 |
Two-Way Talk
The cameras has a built-in microphone and speaker, this allows you to use two-way talk via DMSS.
The Microphone needs to be enabled for this feature to work.
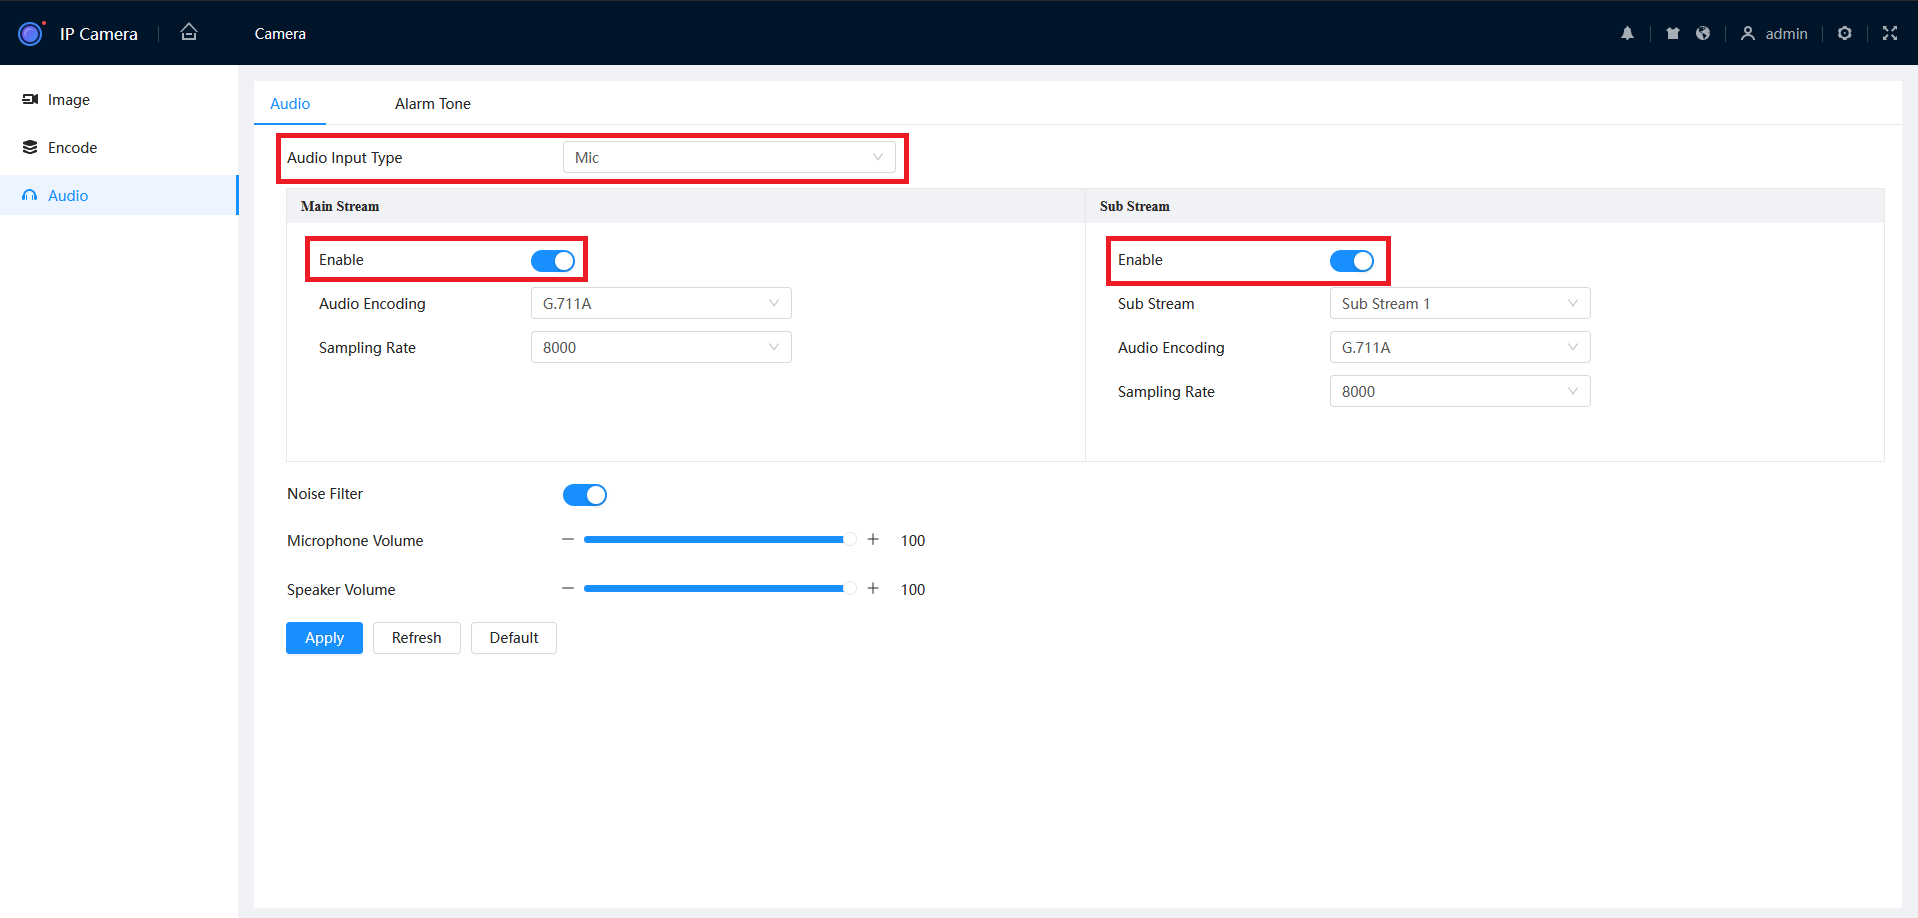
How to enable the microphone
- From the home page, navigate to Camera > Audio.
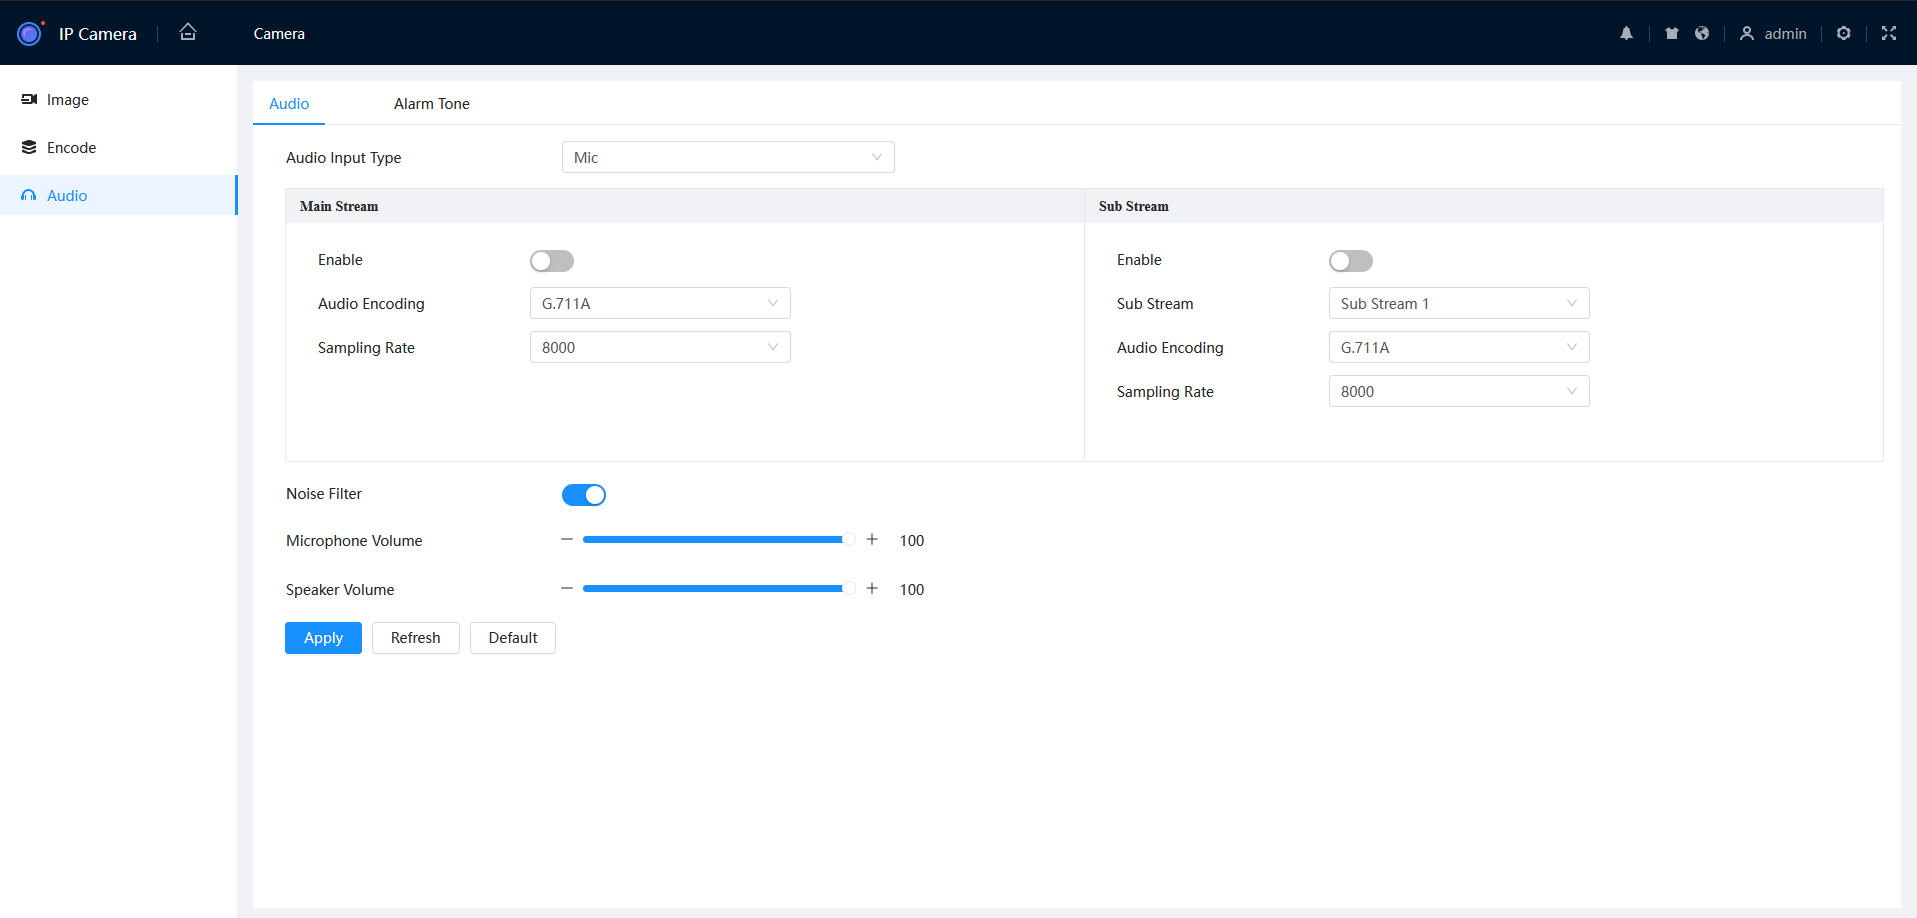
- Set the Audio Input Type to Mic, then enable the main stream and sub-stream.
How to use Two-Way talk via DMSS
 |
|
 to allow you to listen to the camera. The icon will display two curved lines when enabled, and an X when disabled.
  to enable the microphone. The icon will turn blue when listening for audio. If prompted to choose between channel and device, choose channel.