When installing HDCVI or analogue cameras, below are some problems that can arise and how to resolve them.
Ground Loop Issues
If the camera has slowly rolling grey bars going down the image, it could be caused by a ground loop, among other things.
If the camera is mounted to metal, remove it from the building and see if the problem persists. If the problem goes away, mount the camera in an alternative location, or to a different material.
Alternatively, install a ground loop isolator (Model Number VSGLI)

Shutter Speed Issues
 If you have one or more bars across your camera display that move up or down the screen, the shutter speed of your camera might be the same speed as your lighting.
Navigate the OSD menu through the PTZ controls on the NVR. Pressing the '+' for iris will open it.
Under the "Exposure" section, set Anti-Flicker to Outdoor. This will allow you to set the Exposure Mode to Manual so you can adjust the shutter speed. Choose a preset or enter your own min/max values.
Voltage Drop / Cameras Dropping Off at Night
Cameras Dropping Out Randomly / 0x04 Error
If the camera is going offline and/or the recorder that is connected to the camera is rebooting, check the log of the recorder. If there is an event "Reboot with Flag [0x04]", this means that there is a faulty camera causing the recorder to reboot. This problem usually occurs with analogue cameras.
1. Disconnect all cameras from the recorder.
2. Check playback on the recorder for any camera/s that look fuzzy/blurry or abnormal.
3. Reconnect all cameras, excluding the cameras that you have identified to have an issue.
4. If the recorder does not reboot, test cameras on a short cable to verify if the camera/s or cable is at fault.

Camera Not Showing On Recorder
If a camera is not showing on the recorder, the first thing to do is isolate both the cable and power by disconnecting the cables to the camera and bringing the camera back to the recorder. Connect the camera to a isolated power supply and a short length of RG59 cable.
If the camera works fine, then you can be confident the issue lies with either the power or coax cable.
If the issue remains verify that the recorder is functioning correctly by testing with another camera. Ensure that the camera you are using is compatible with the recorder, as recorders are designed to work with specific types of cameras.
IR Glare
IR / Night Vision
Most CCTV cameras have Infrared Illumination that is automatically activated at night.
By default, our IP cameras automatically will adjust the IR based on a few different things such as current brightness and current IR strength. We will call this reflected light, as this is how IR actually enables you to see at night. HDCVI cameras do not automatically adjust IR.
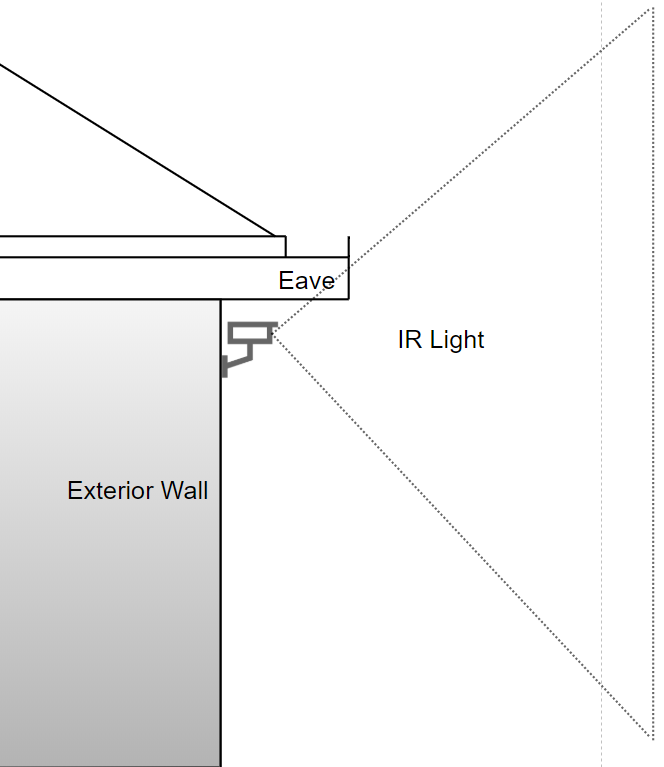
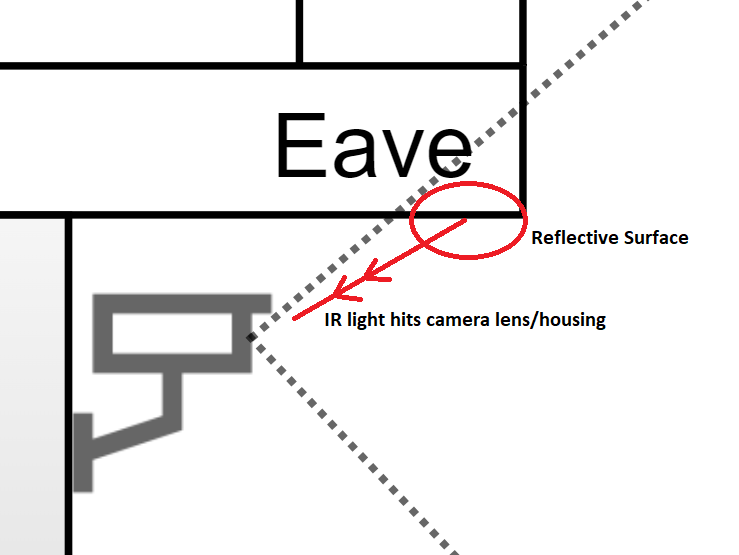
Generally, this is good, however, if the camera is close enough to a wall/eave or other reflective surface, it can cause the IR to bounce off nearby surfaces then reflect back into the camera lens, or camera housing.
The image below shows an example of how this can happen.
 |
 |
Resolving IR Glare
- Reposition the camera so there are no surfaces for the IR to reflect off.
- Move the camera to a lower point.
- Use a Junction box to move the camera away from the wall as much as possible.
- Ensure the camera is clean.
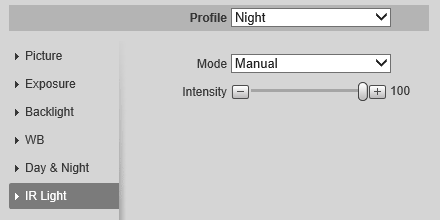
- In some cases, lowering IR strength can help, see the below for instructions.
Cameras with Dirty Dome Covers
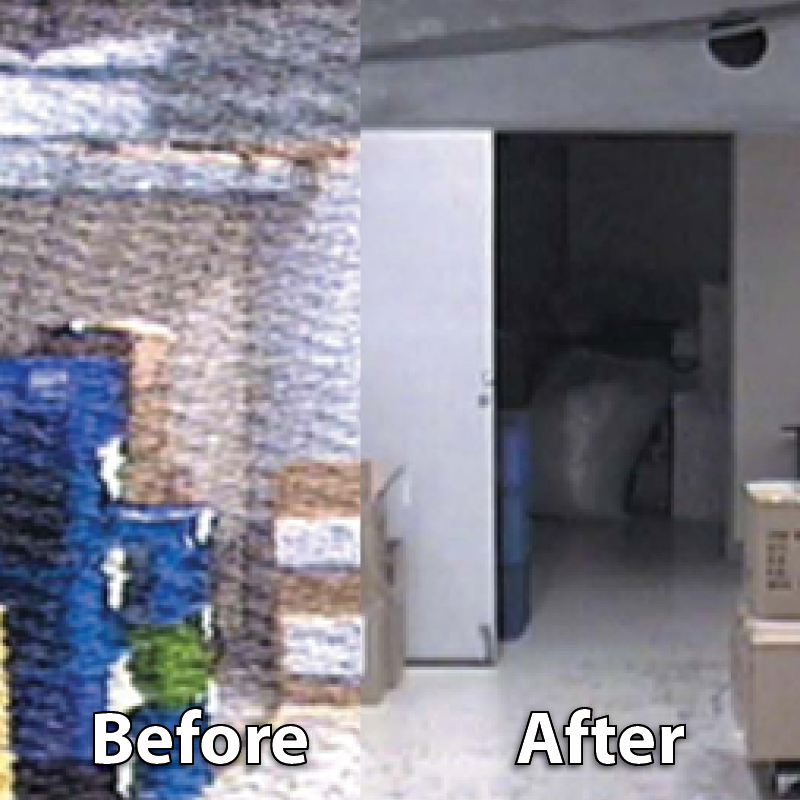
Cameras with dirty dome covers usually look fine during the day, but come night time you can see IR reflecting off the dirt/fingerprints, causing glare.
Ensure that the inside and outside of the dome is free from dirt, and fingerprints.
This most commonly occurs on traditional style dome cameras.
Dirty Dome Cover - Day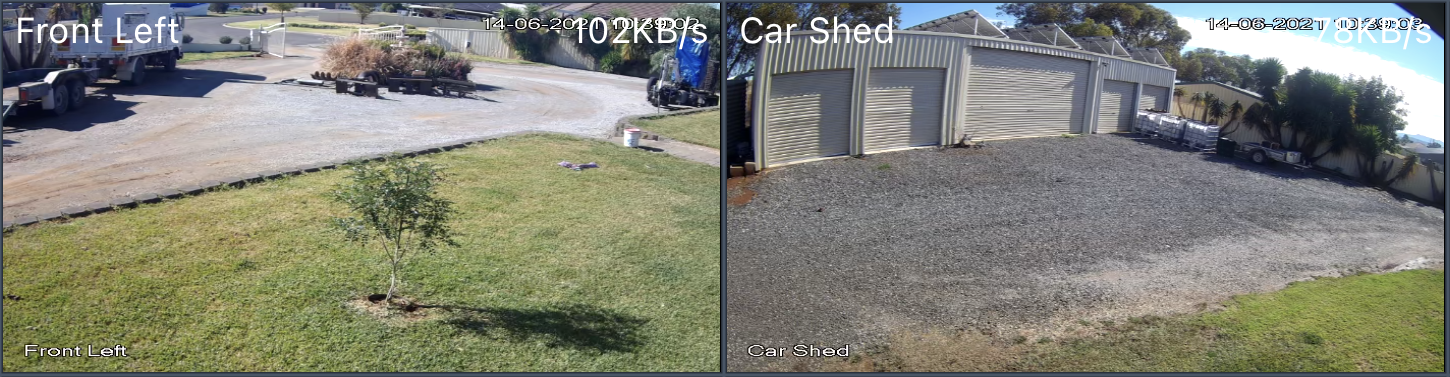
|
Dirty Dome Cover - Night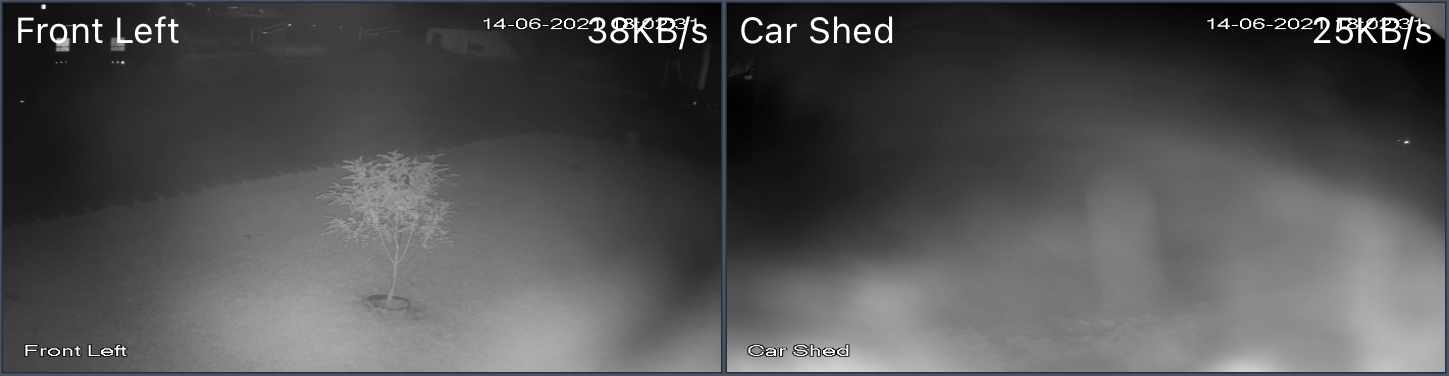
|
Clean Dome Cover - Night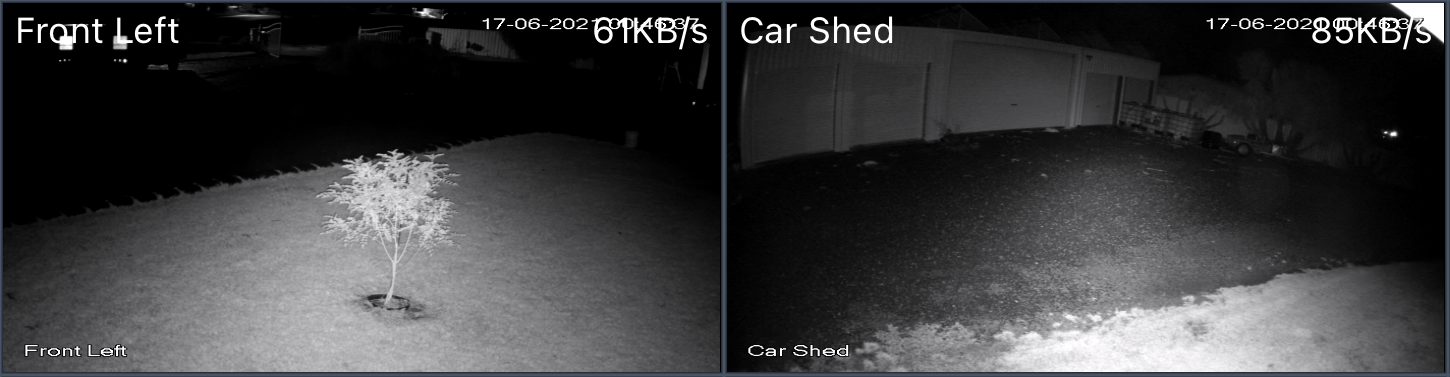
|
Configuring IR Sensitivity and Settings (IP Cameras only)
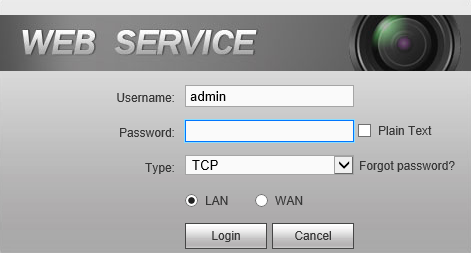
- Enter the IP address of the recorder or camera into the URL bar of internet explorer.
-
Enter the password for the admin account.

-
If you have logged into an NVR, select SETUP > IMAGE > REGISTRATION, If you have logged into an IP camera, go to Step 4. Any IP cameras that are currently connected will show here. To the right of each camera, there is a blue e. This will allow you to log into the camera directly.

-
A new tab will open and you will be presented with the login screen for the camera. Unless set otherwise, the camera password will be the NVR admin password.
-
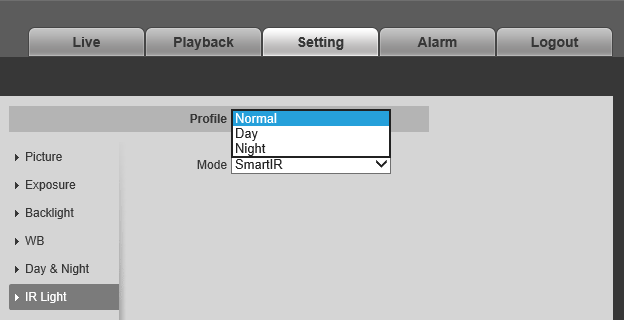
Click on Setting > Camera > Conditions. Then Select IR Light from the list.

|
Profiles Day: Profile specifically for Day. |
|
IR Mode Smart IR: Automatically adjust the IR Intensity based on lighting conditions. |
 |
Profile Management |
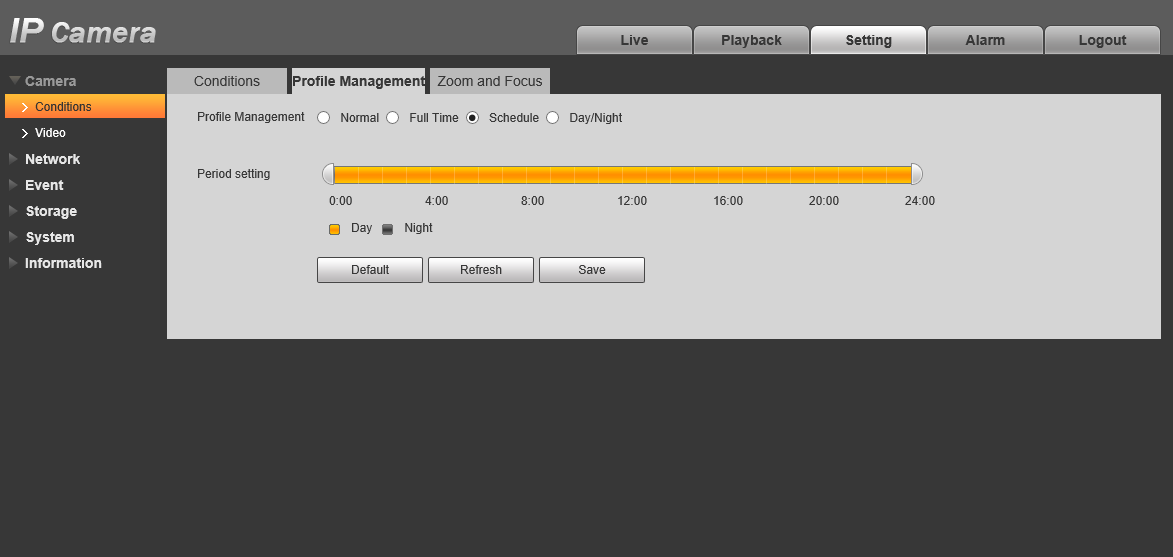
How to Configure IR Schedule
IR Configuration is available only on the IP camera web interface.
- Go to Setting > Camera > Conditions > Profile Management.
- Select the Schedule profile and configure the period setting.
- Select Save.