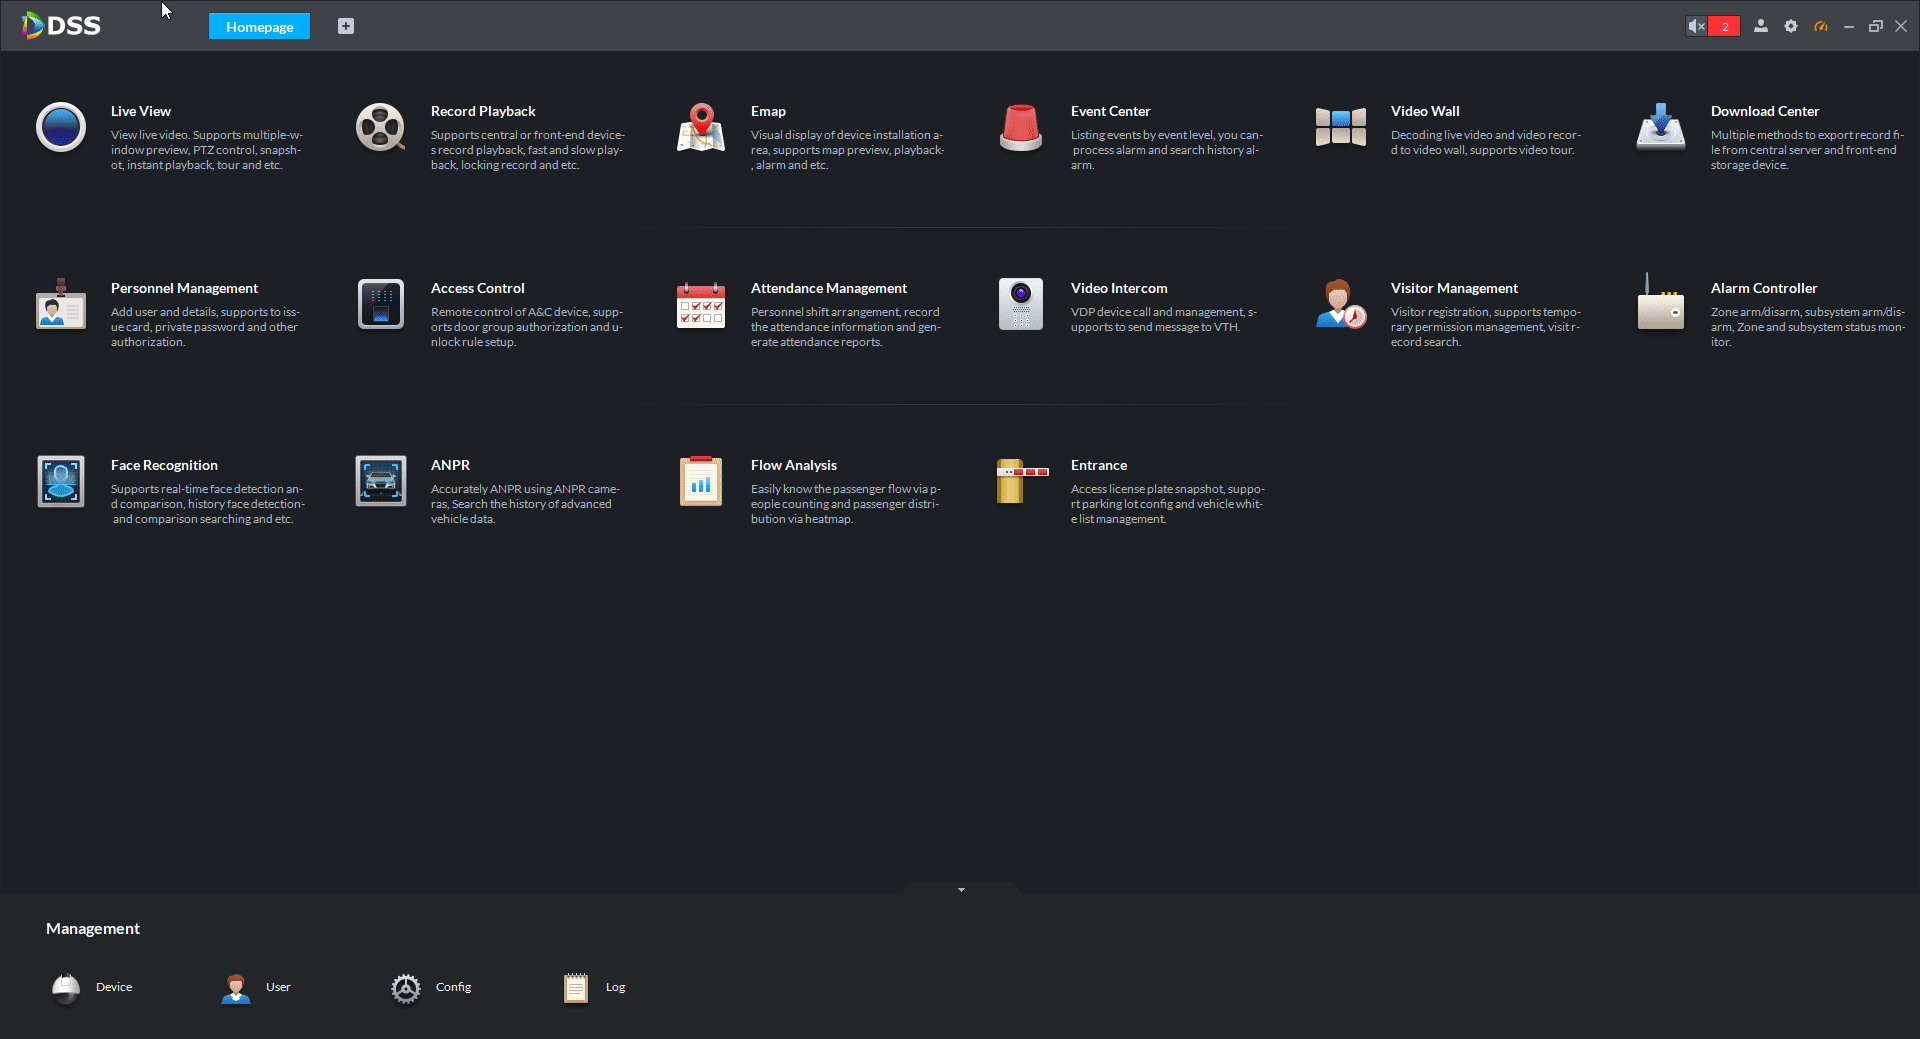
User Accounts
Adding User Accounts
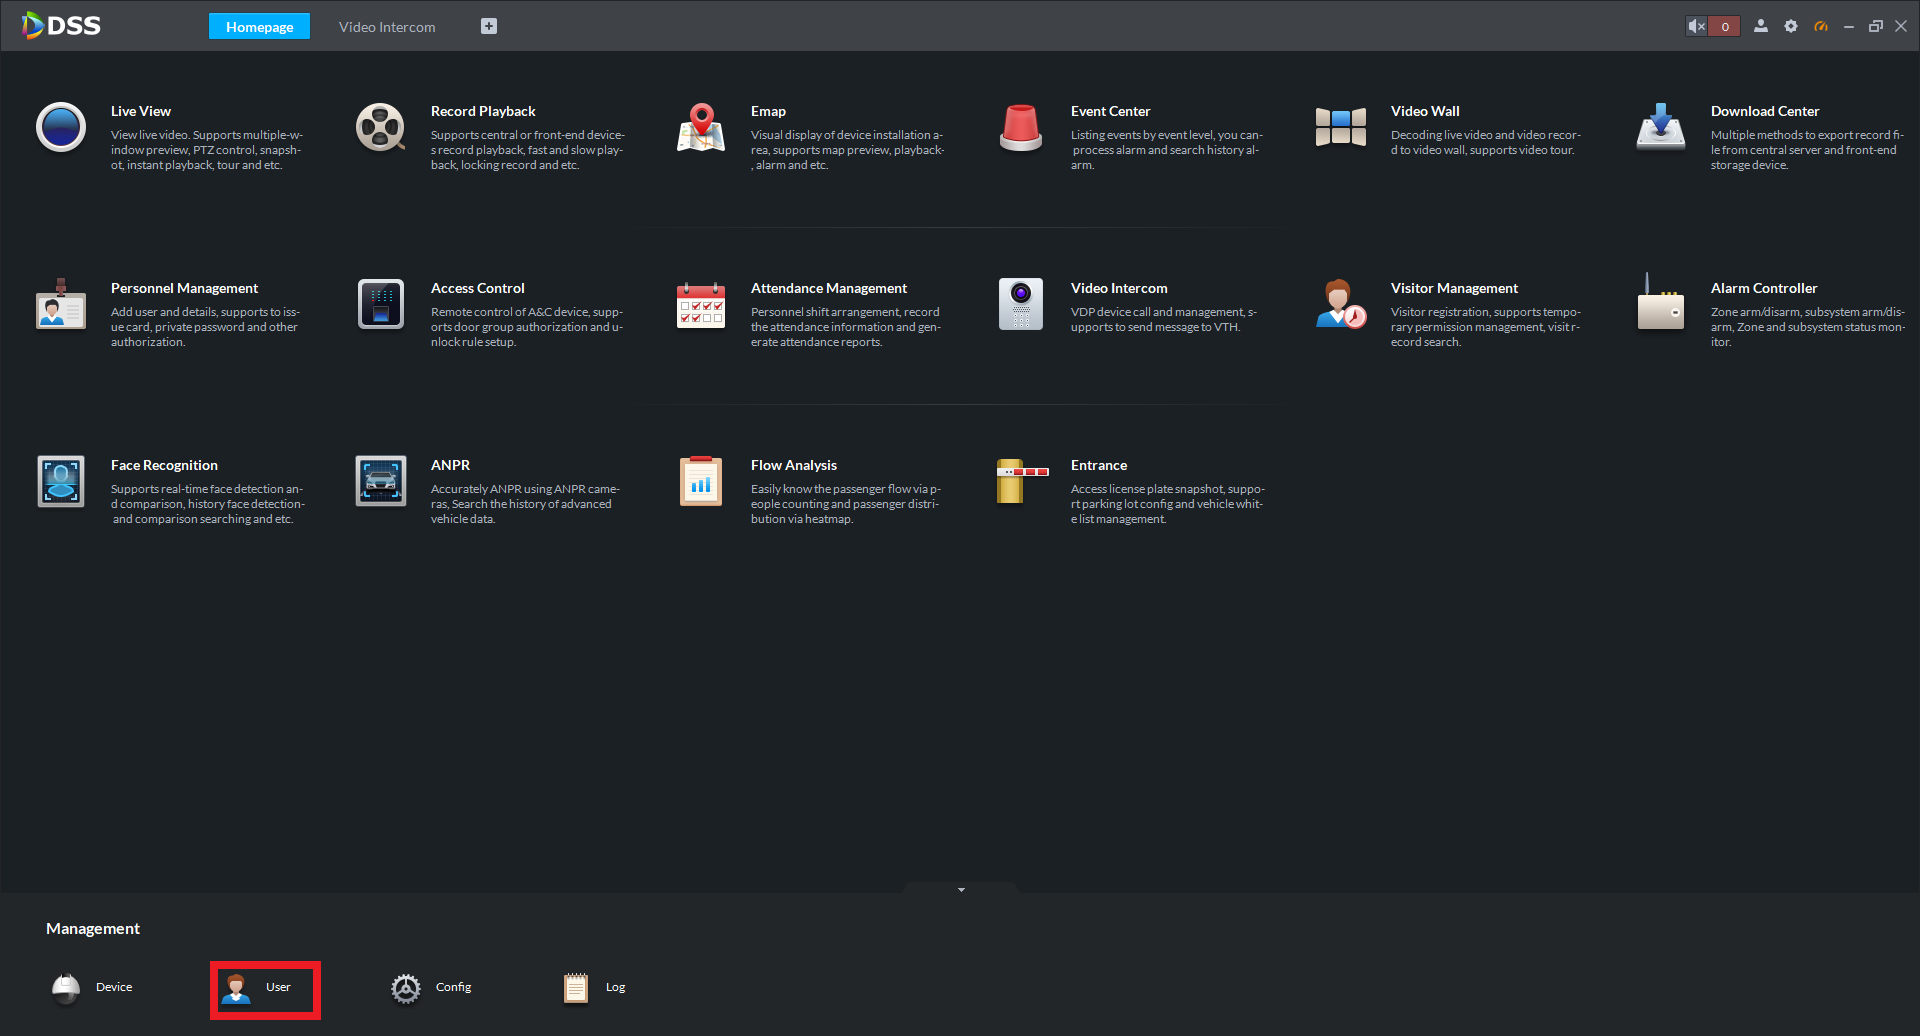
1. Open DSS, ensure you are logged in with a Admin account.
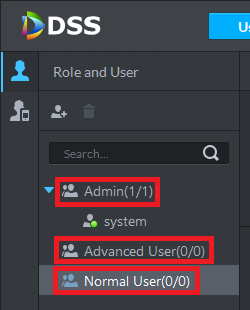
2. Select User.
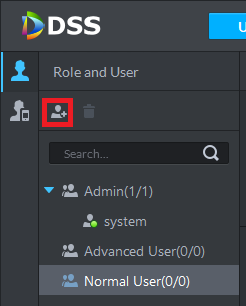
4. Select the Add button.
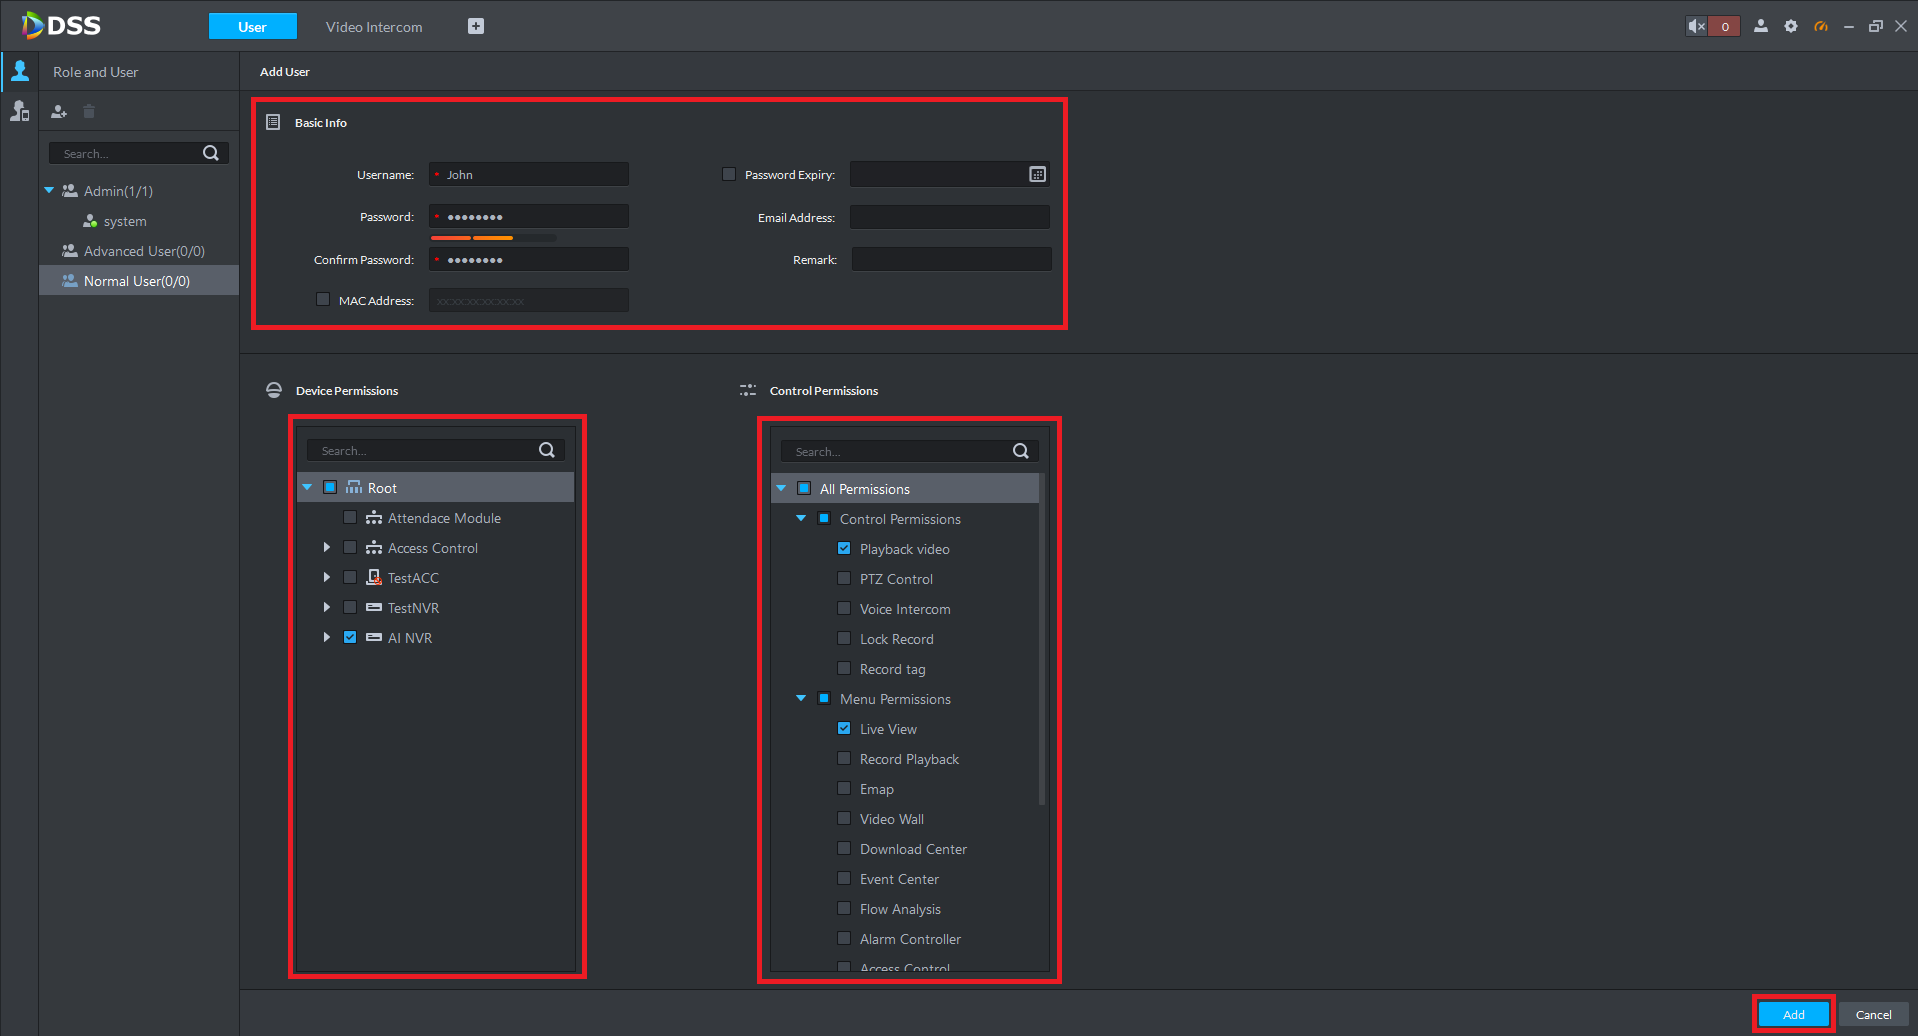
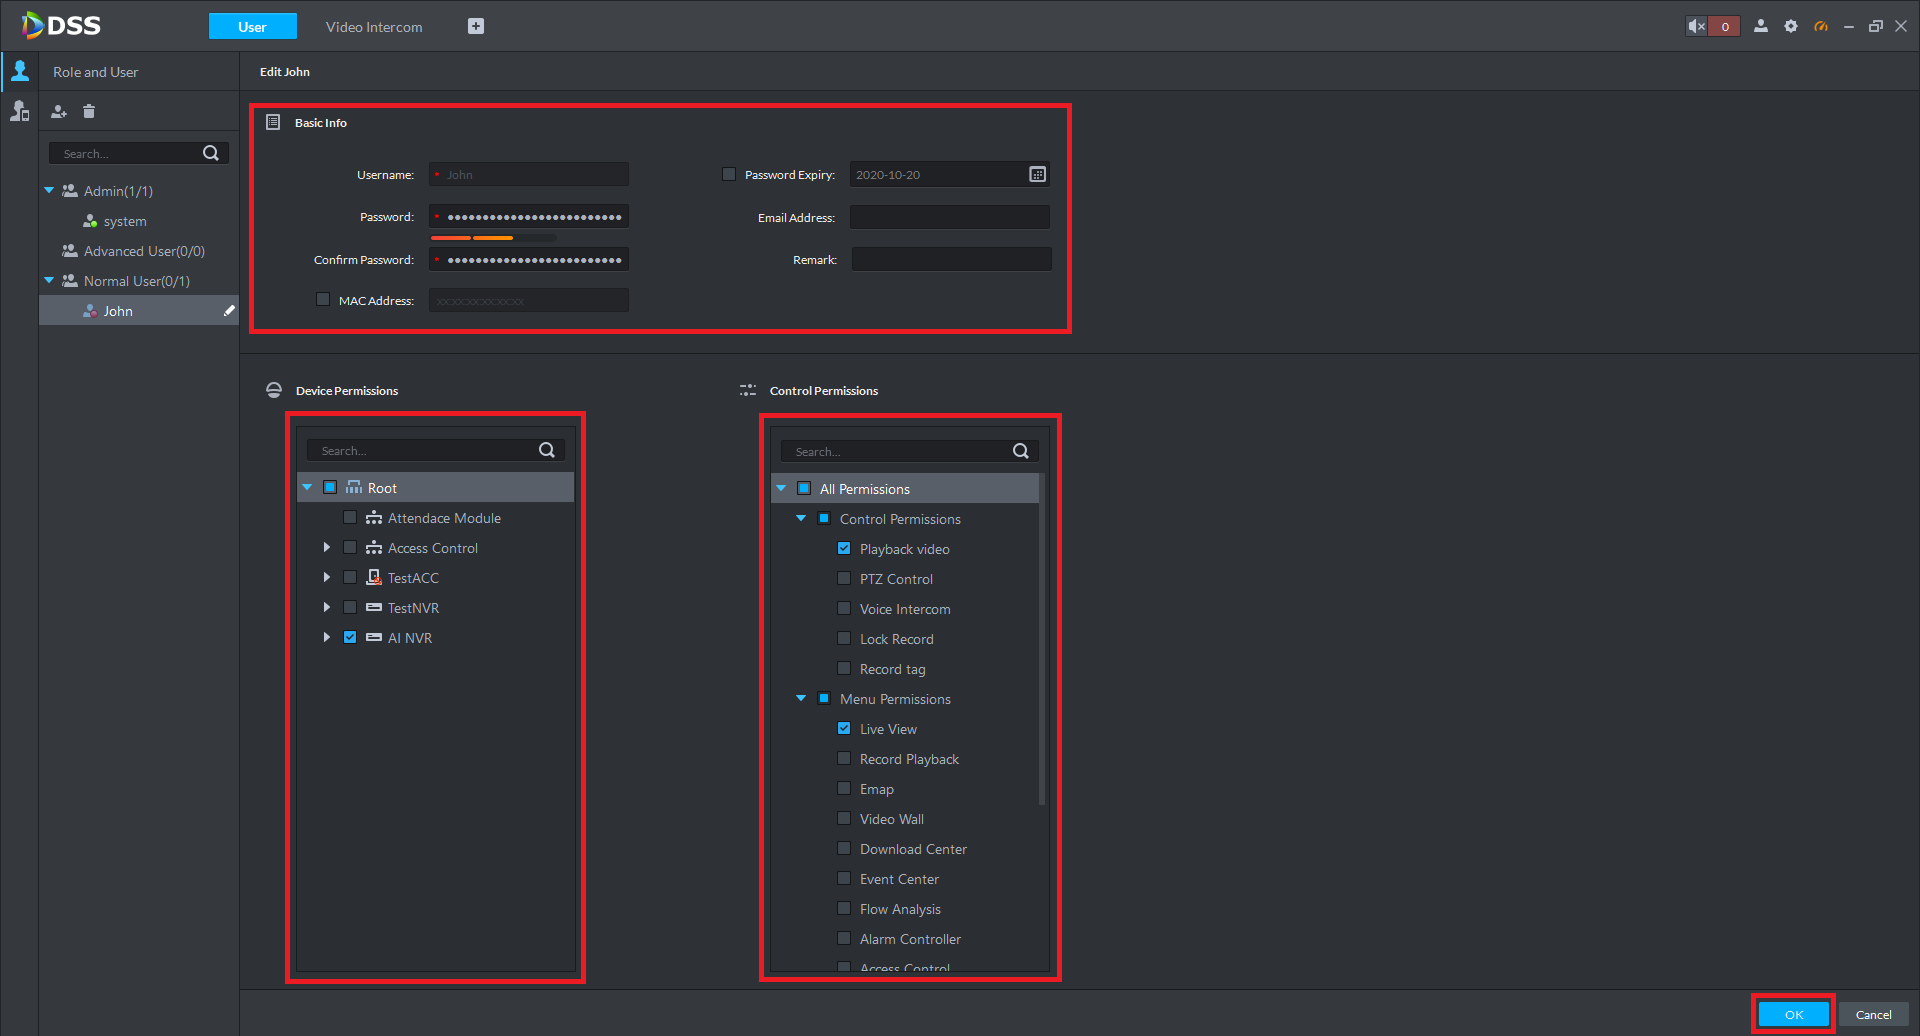
5. Enter the User's Details, then select which devices the user can access, and what permissions they have. Select OK.
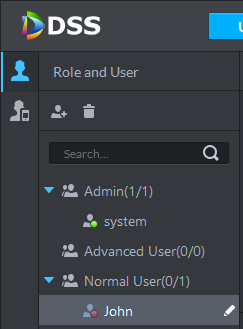
6. The user will now be added.
Demonstration
Deleting User Accounts
1. Open DSS, ensure you are logged in with a Admin account.
2. Select User.

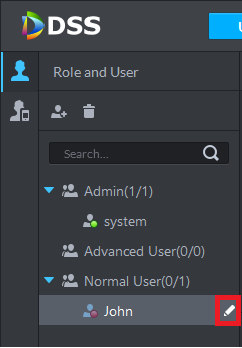
3. Select the account you wish to delete, and press the edit button.
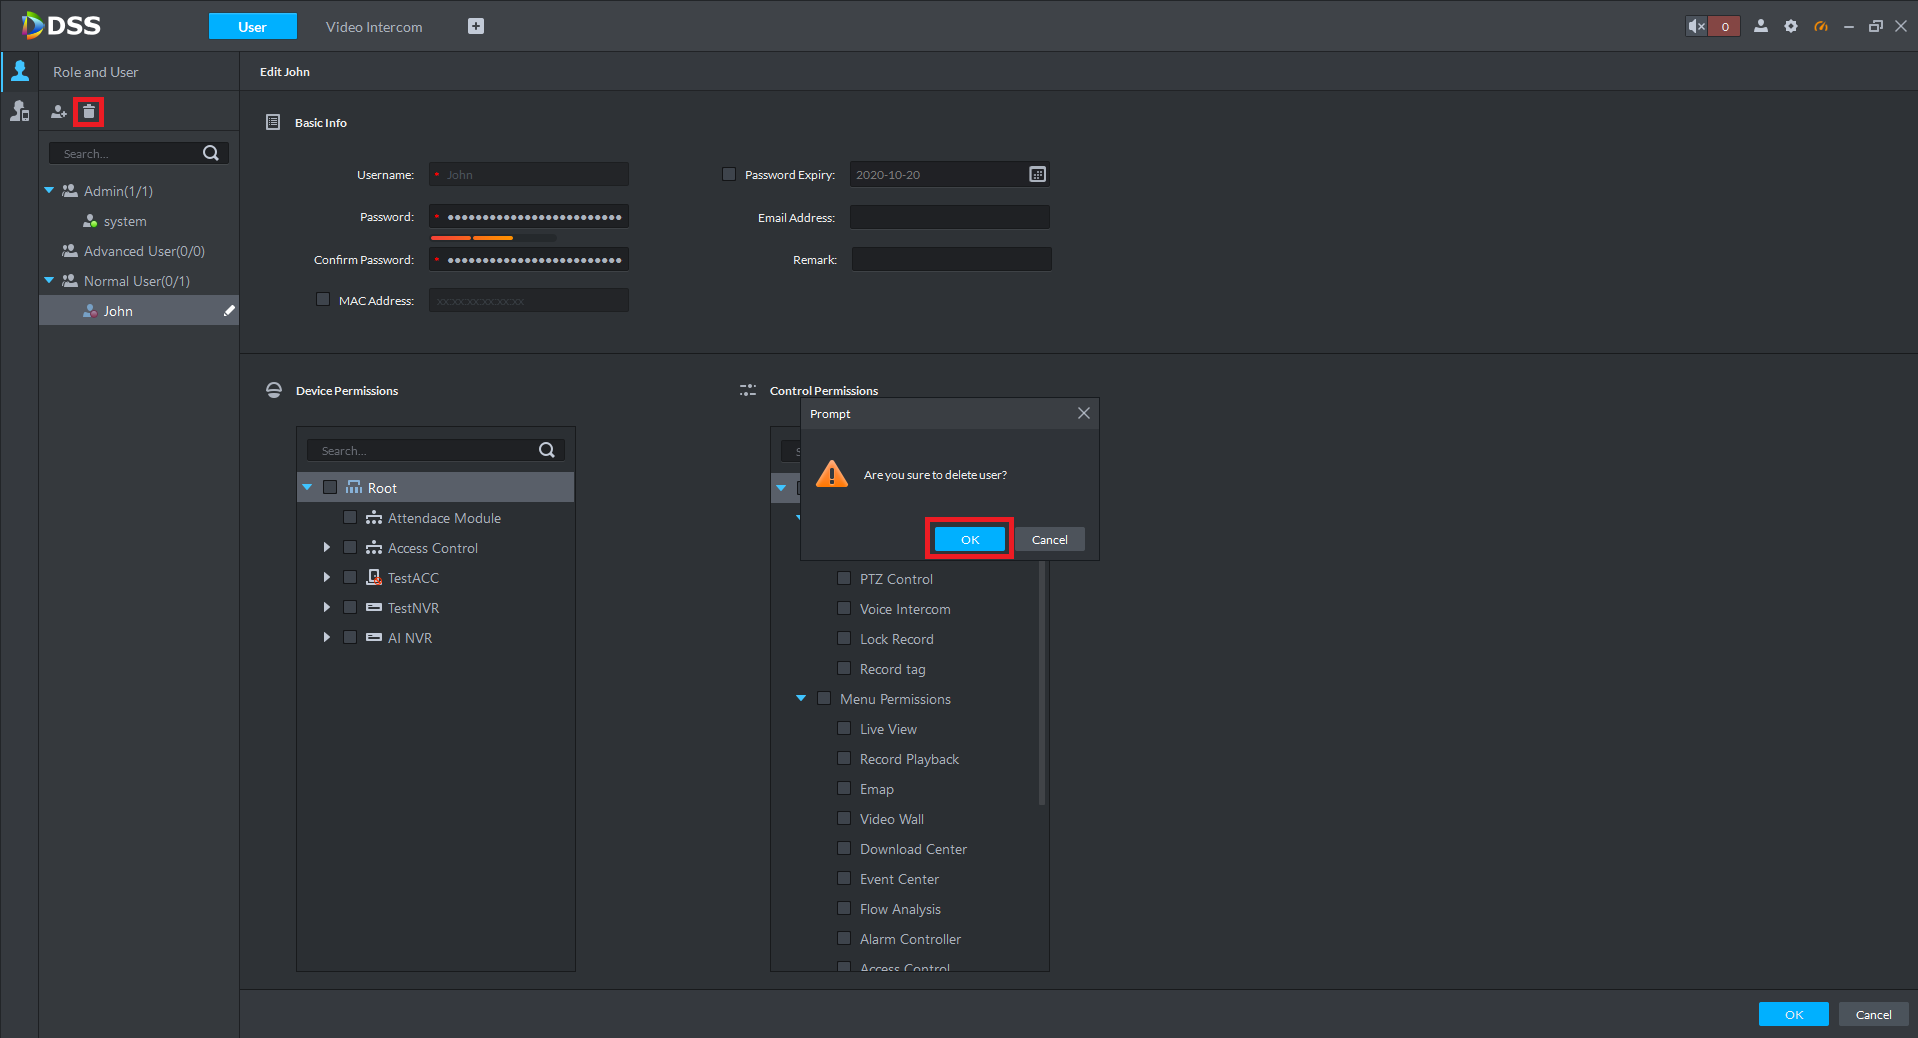
 4. Remove all permissions from the account, ensure no boxes are ticked. Select OK.
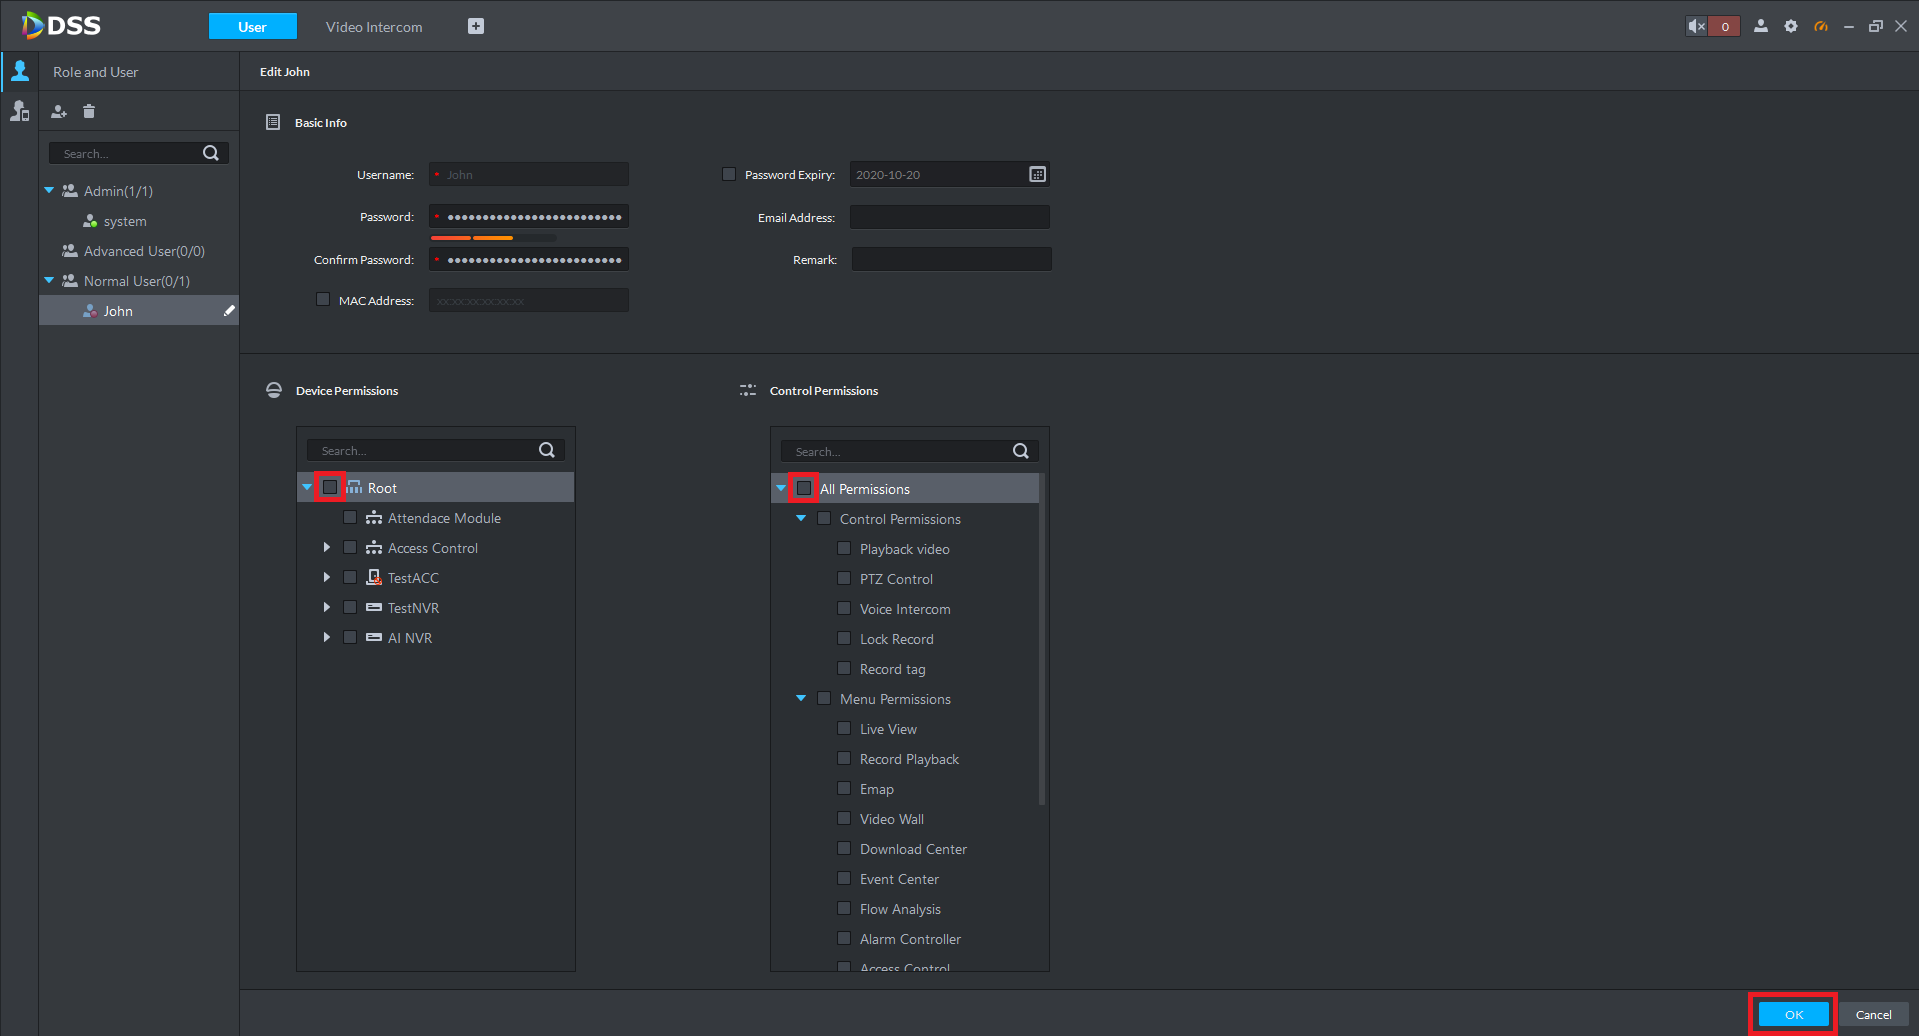
5. Select the Delete button, and OK to confirm deletion.
Demonstration
Edit User Account Settings
1. Open DSS, ensure you are logged in with a Admin account.
2. Select User.
4. Make the changes to the account. Select OK.
Demonstration
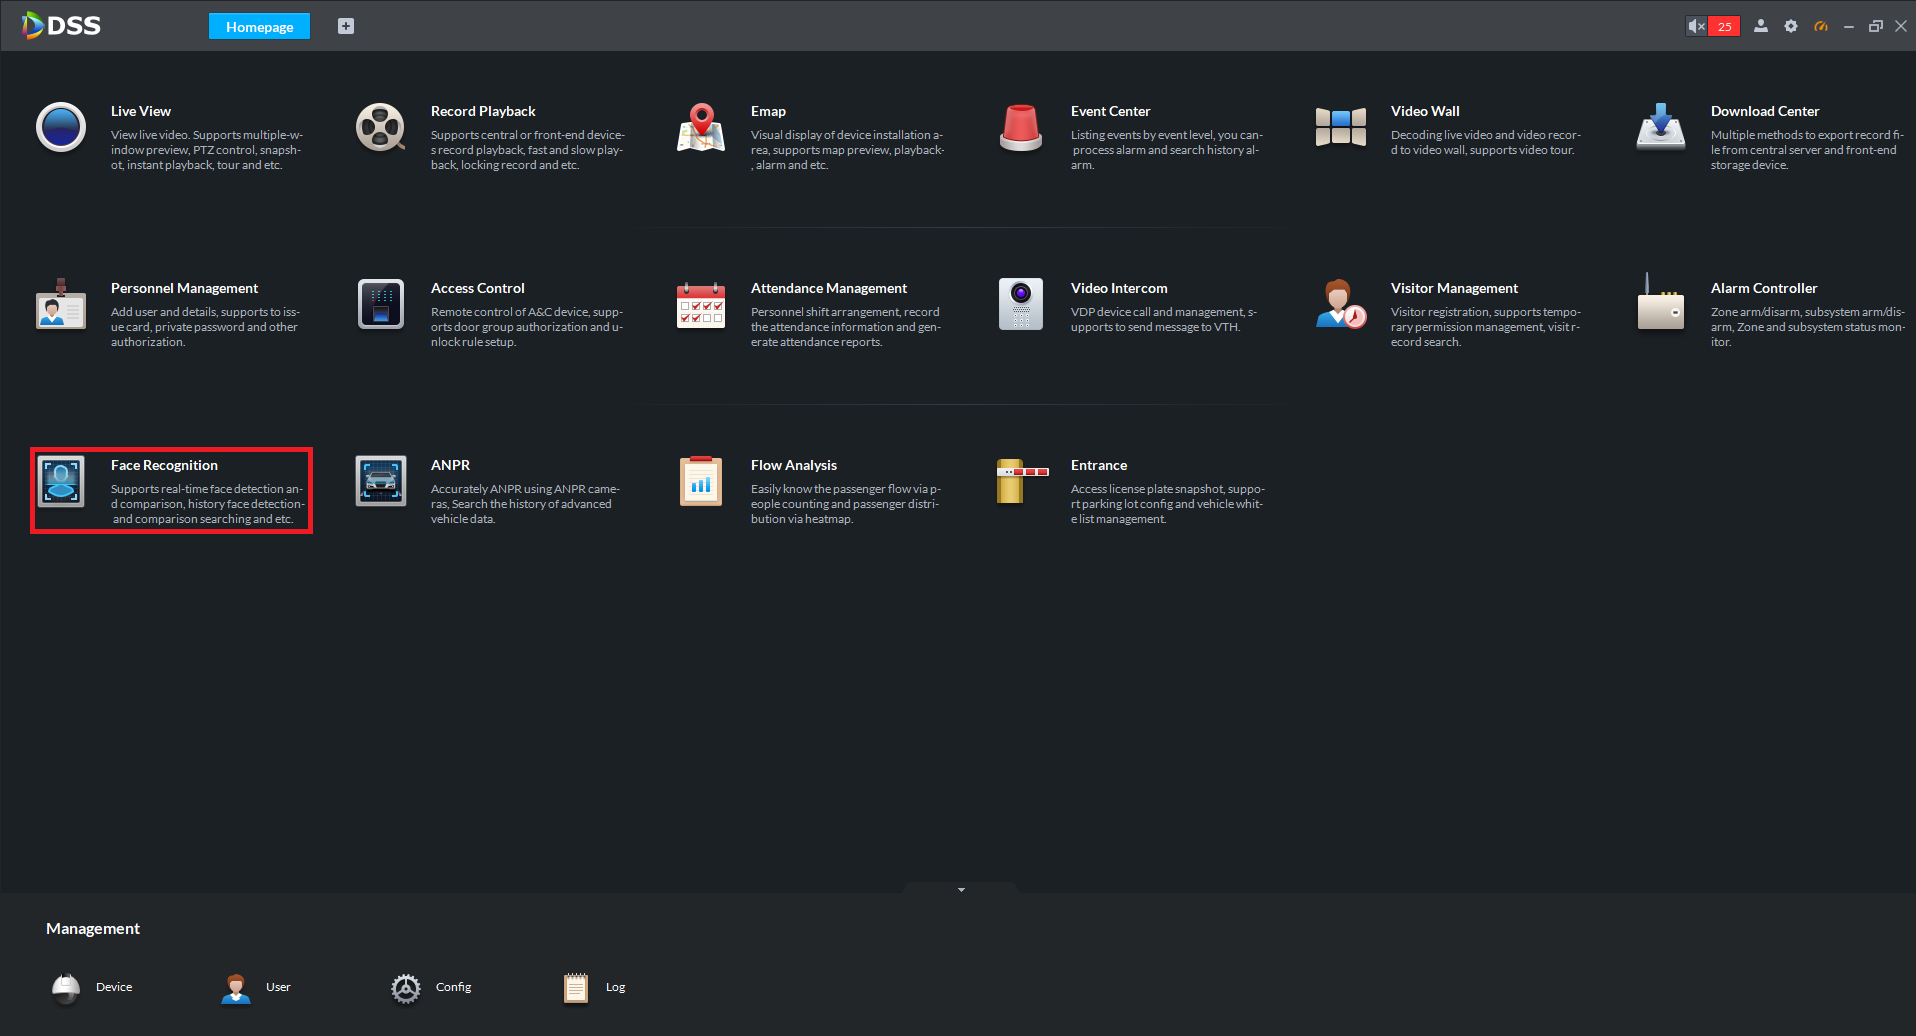
Face Recognition
Adding Faces to a Database
1. Open DSS, ensure you are logged in with an Admin account.
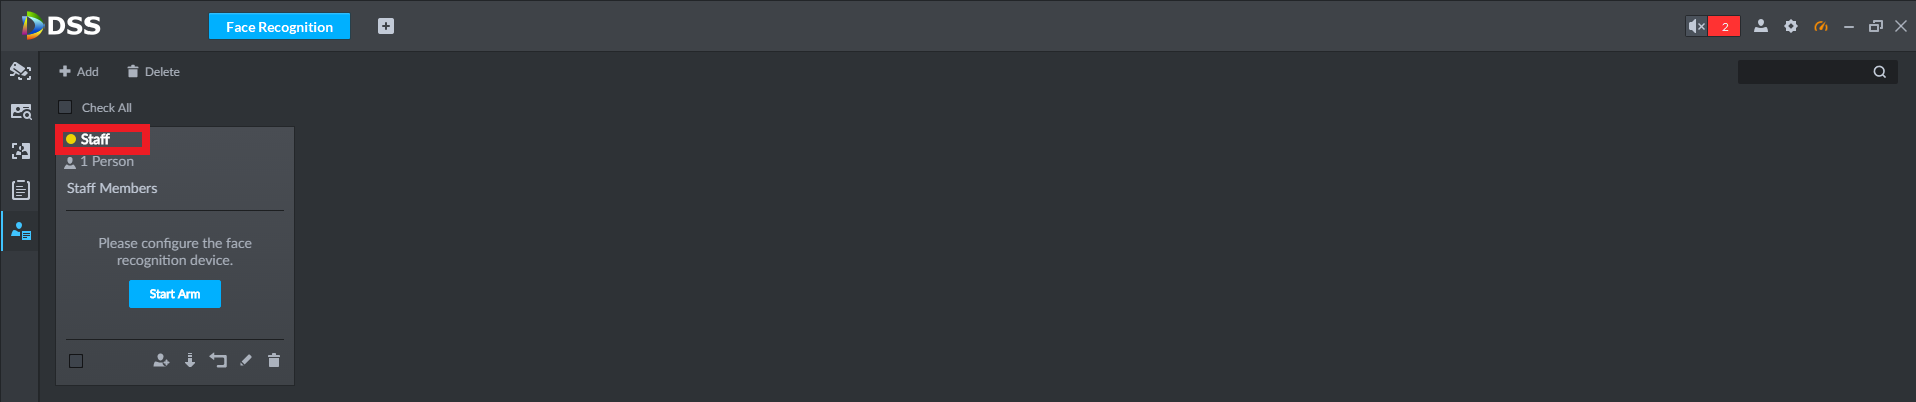
2. Select Face Recognition.
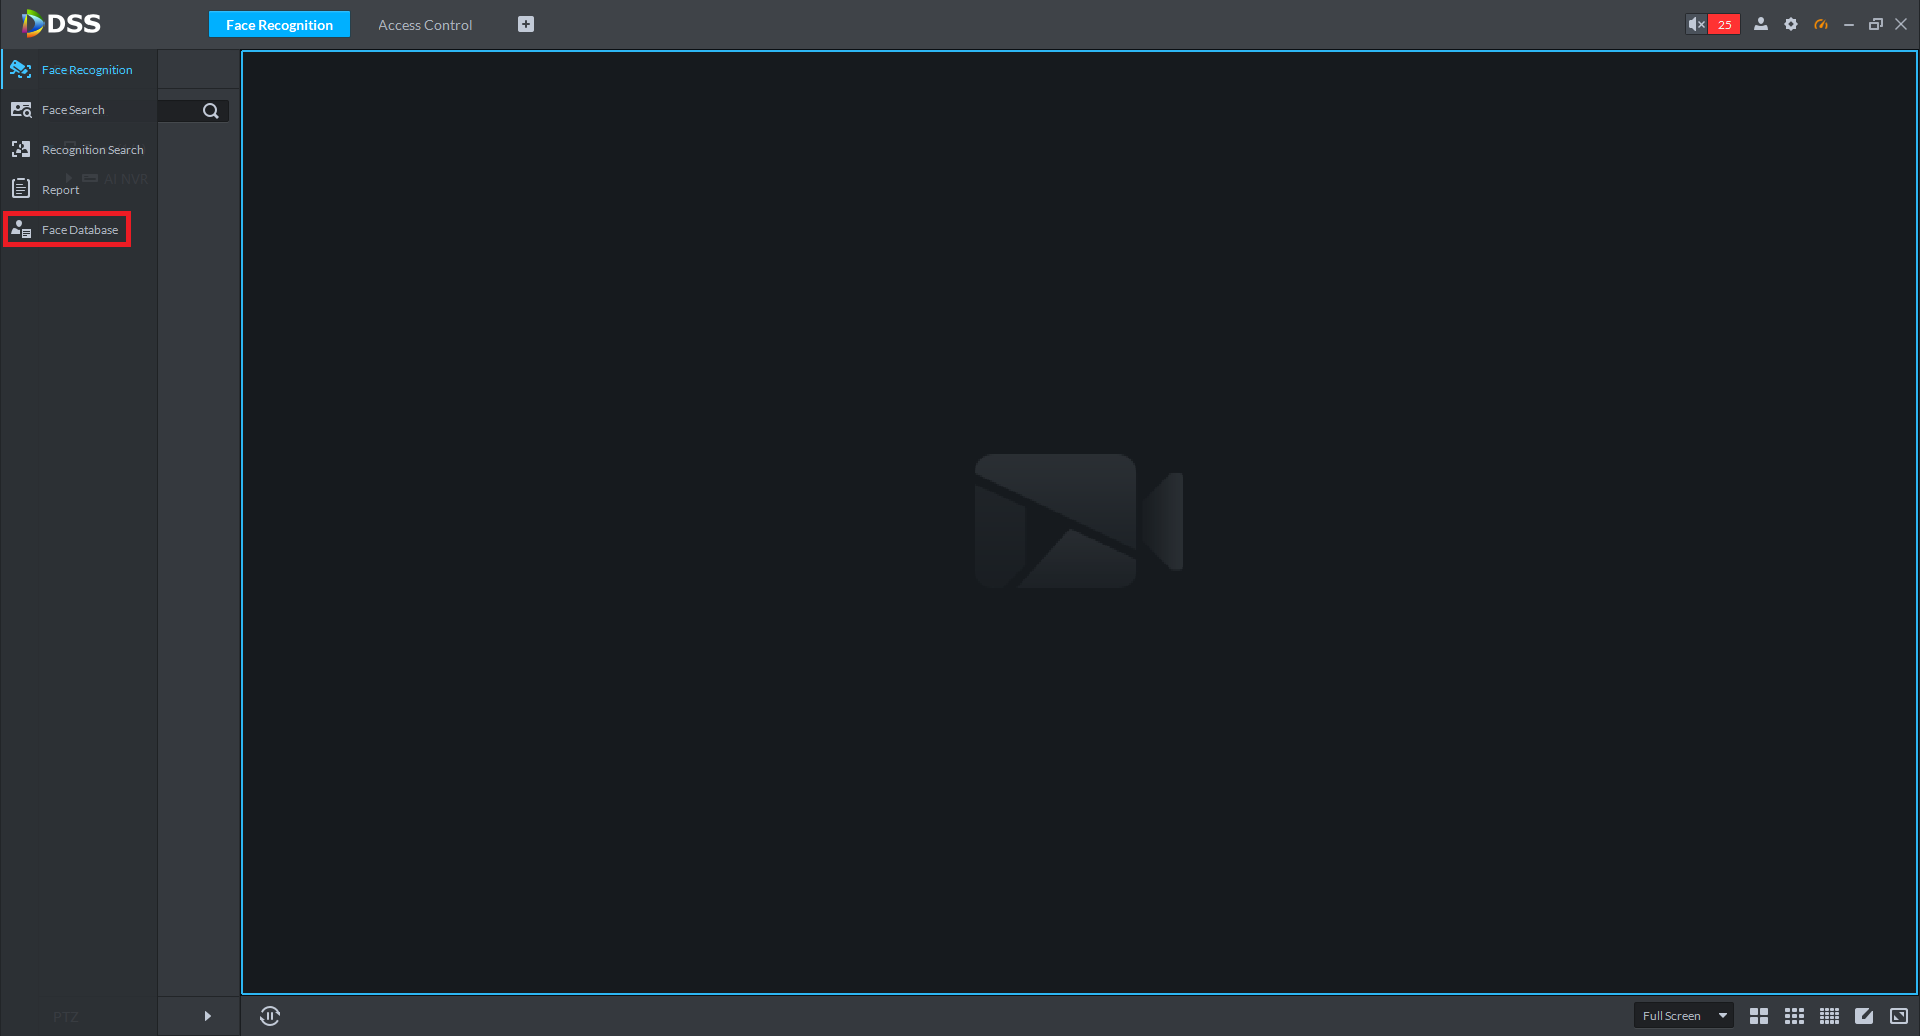
3. Select Face Database.
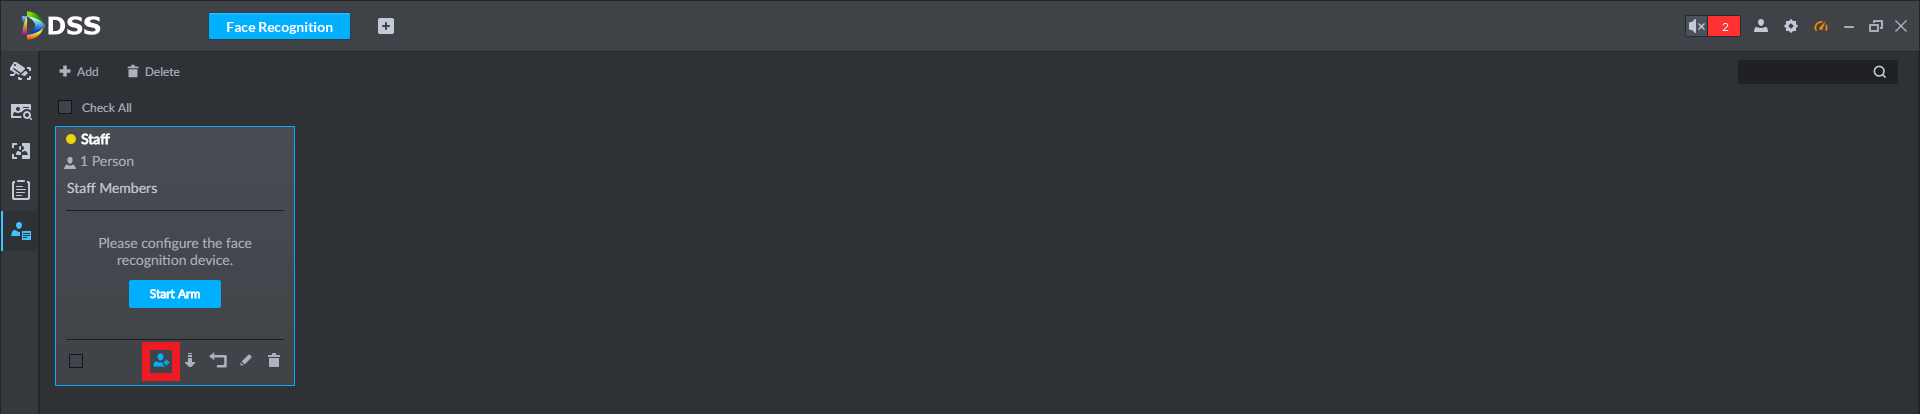
4. Select Add Person.
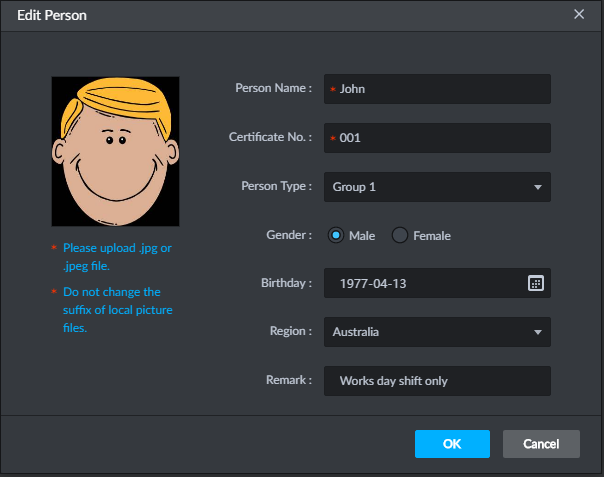
5. Enter the details for the person, including a photo, and assign them to a group. Each person must have a different Certificate No. Select OK.
 7. The people added to this list will be shown, and you can select the pencil icon if you wish to update details.
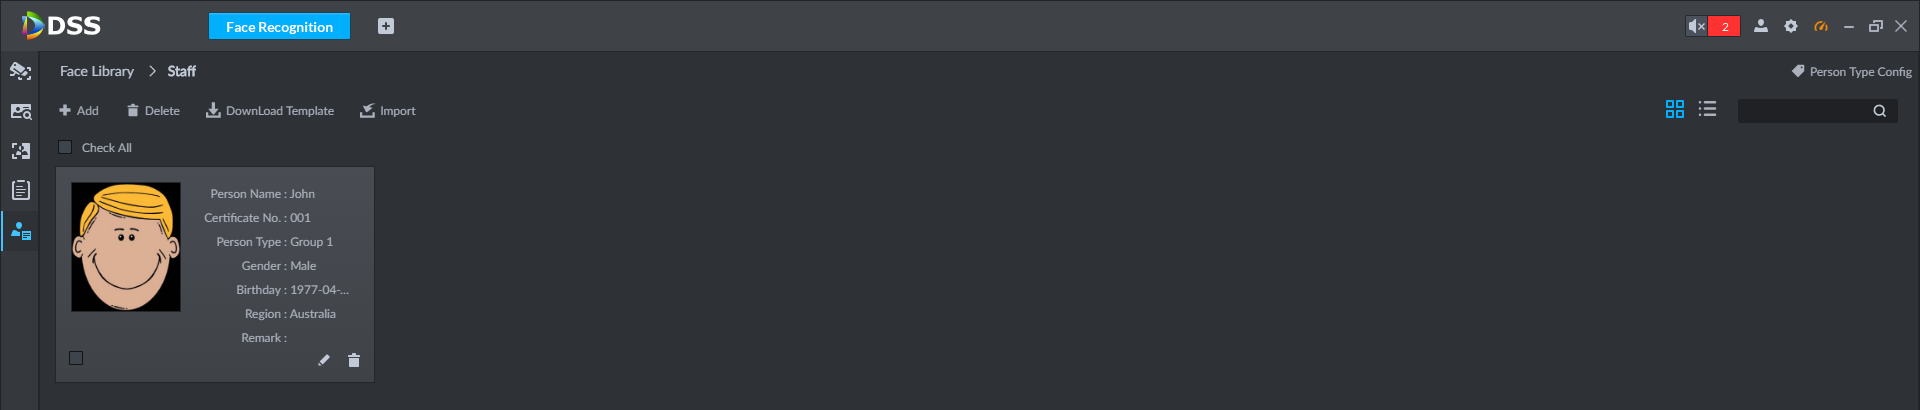
Access Control
Adding Access Control Users
1. Open DSS, ensure you are logged in with an Admin account.
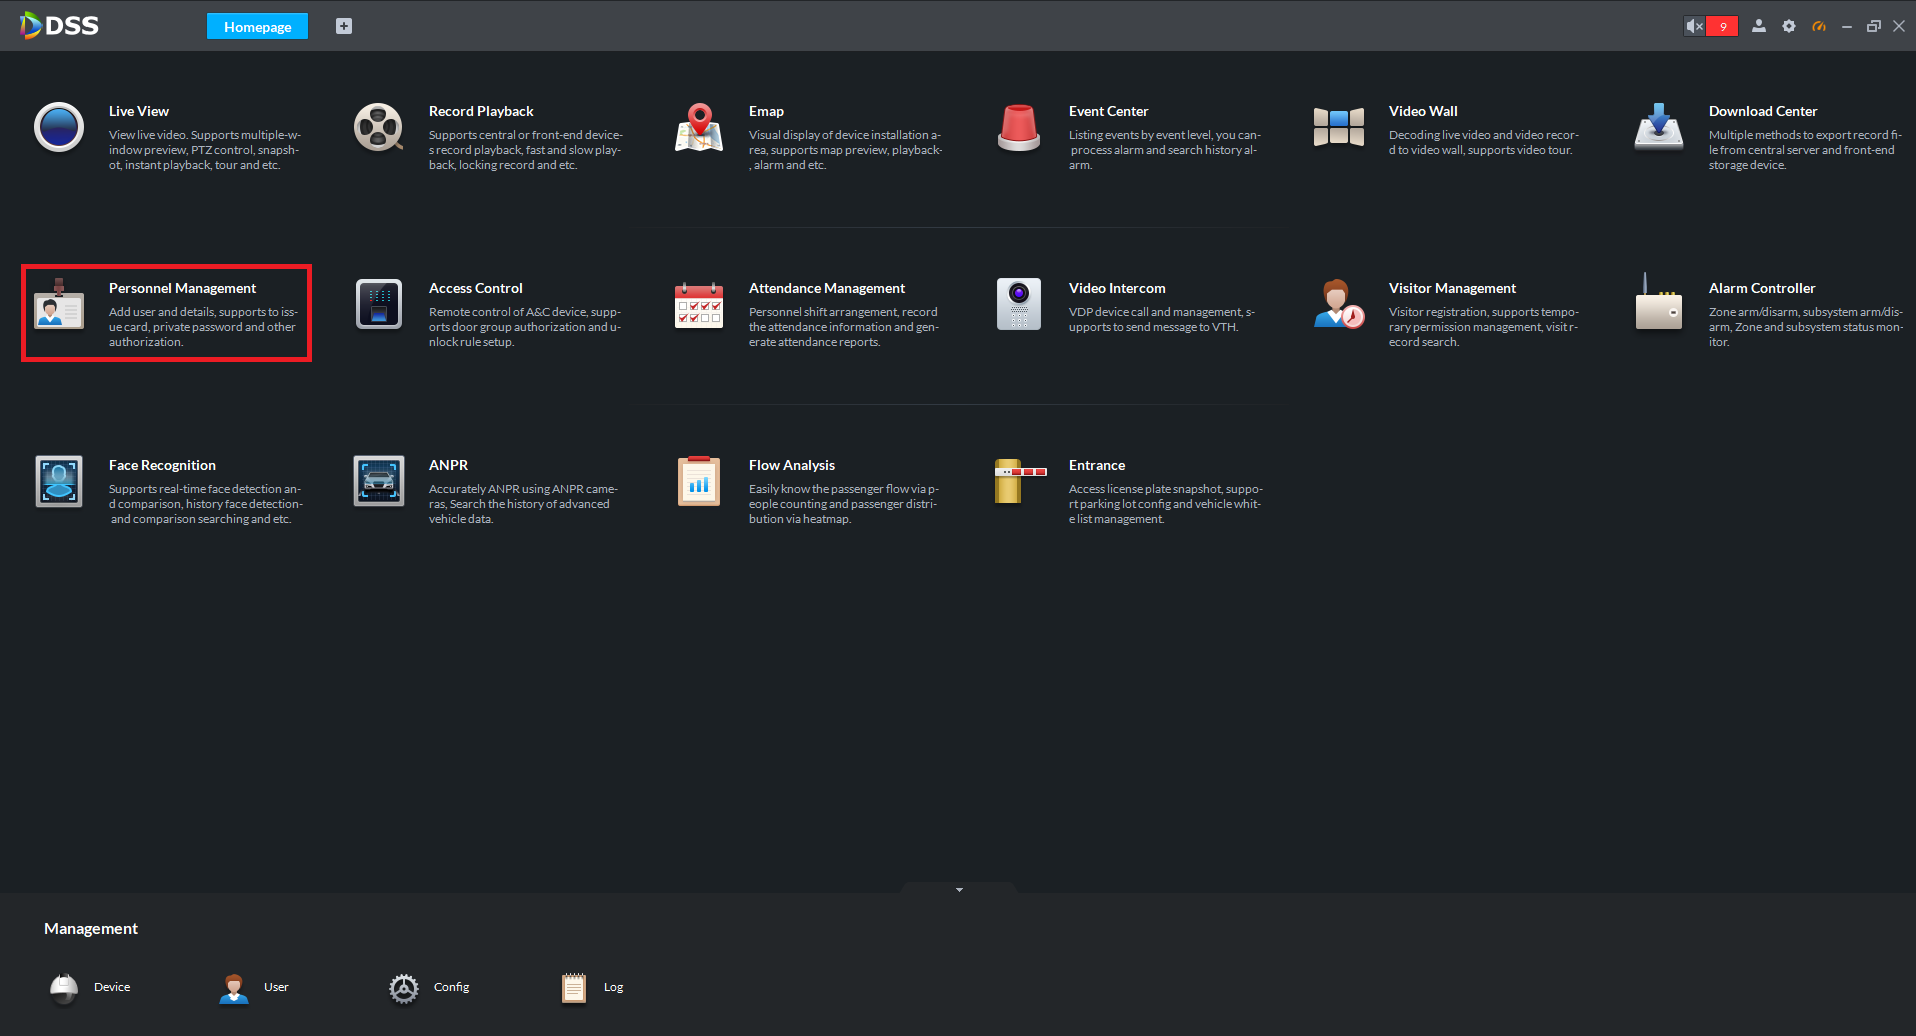
2. Select Personnel Management.
3. If there are existing users, looking at the user list, look at what the highest ID number is. Note this down.
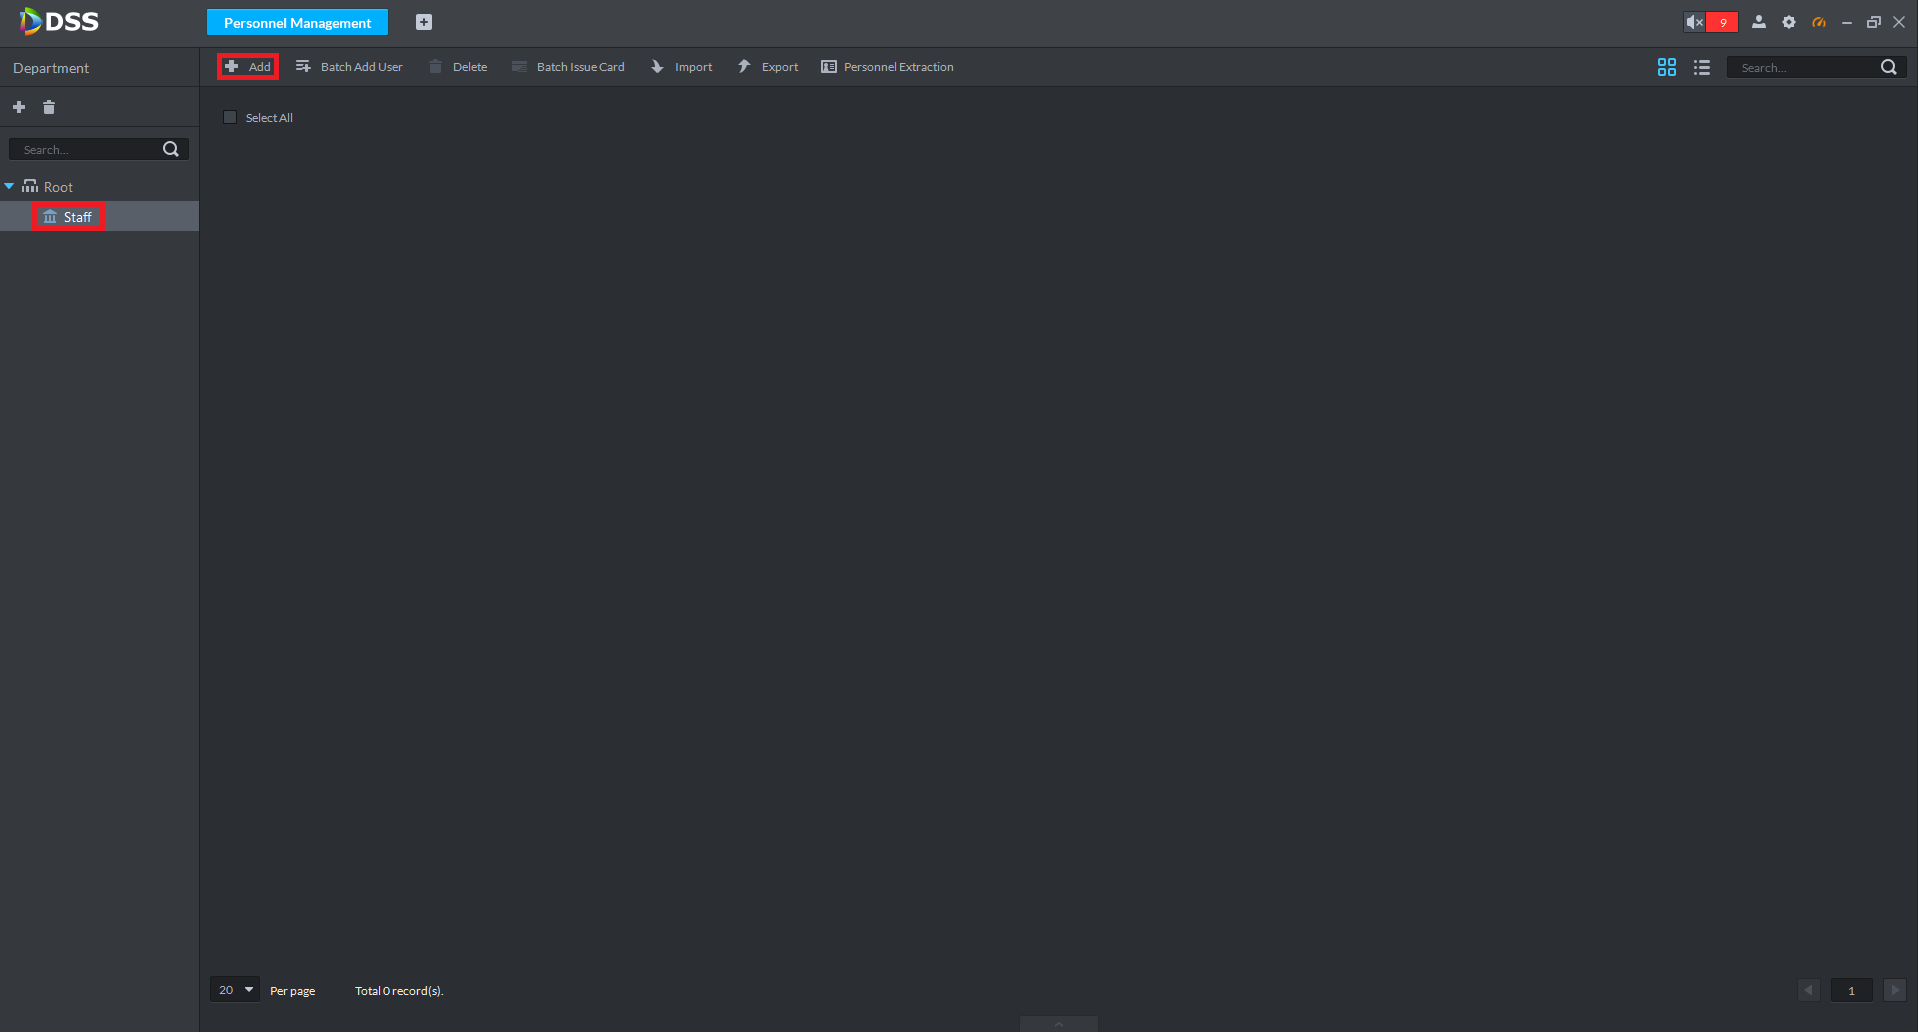
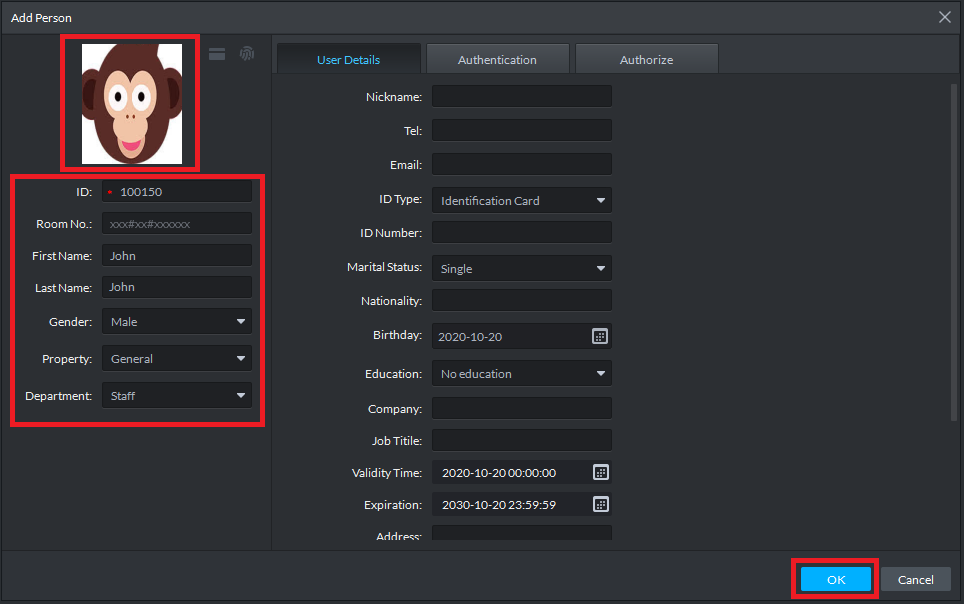
4. Select the Department to add the user to, then select the Add button.
5. Enter an ID Number, following on from the last user that was added, eg 100150. Fill out the First Name and Last Name , and any other relevant information. Select the Photo option, to import a photo of the user. Select OK.
Editing Access Control Users
1. Open DSS, ensure you are logged in with an Admin account.
2. Select Personnel Management.
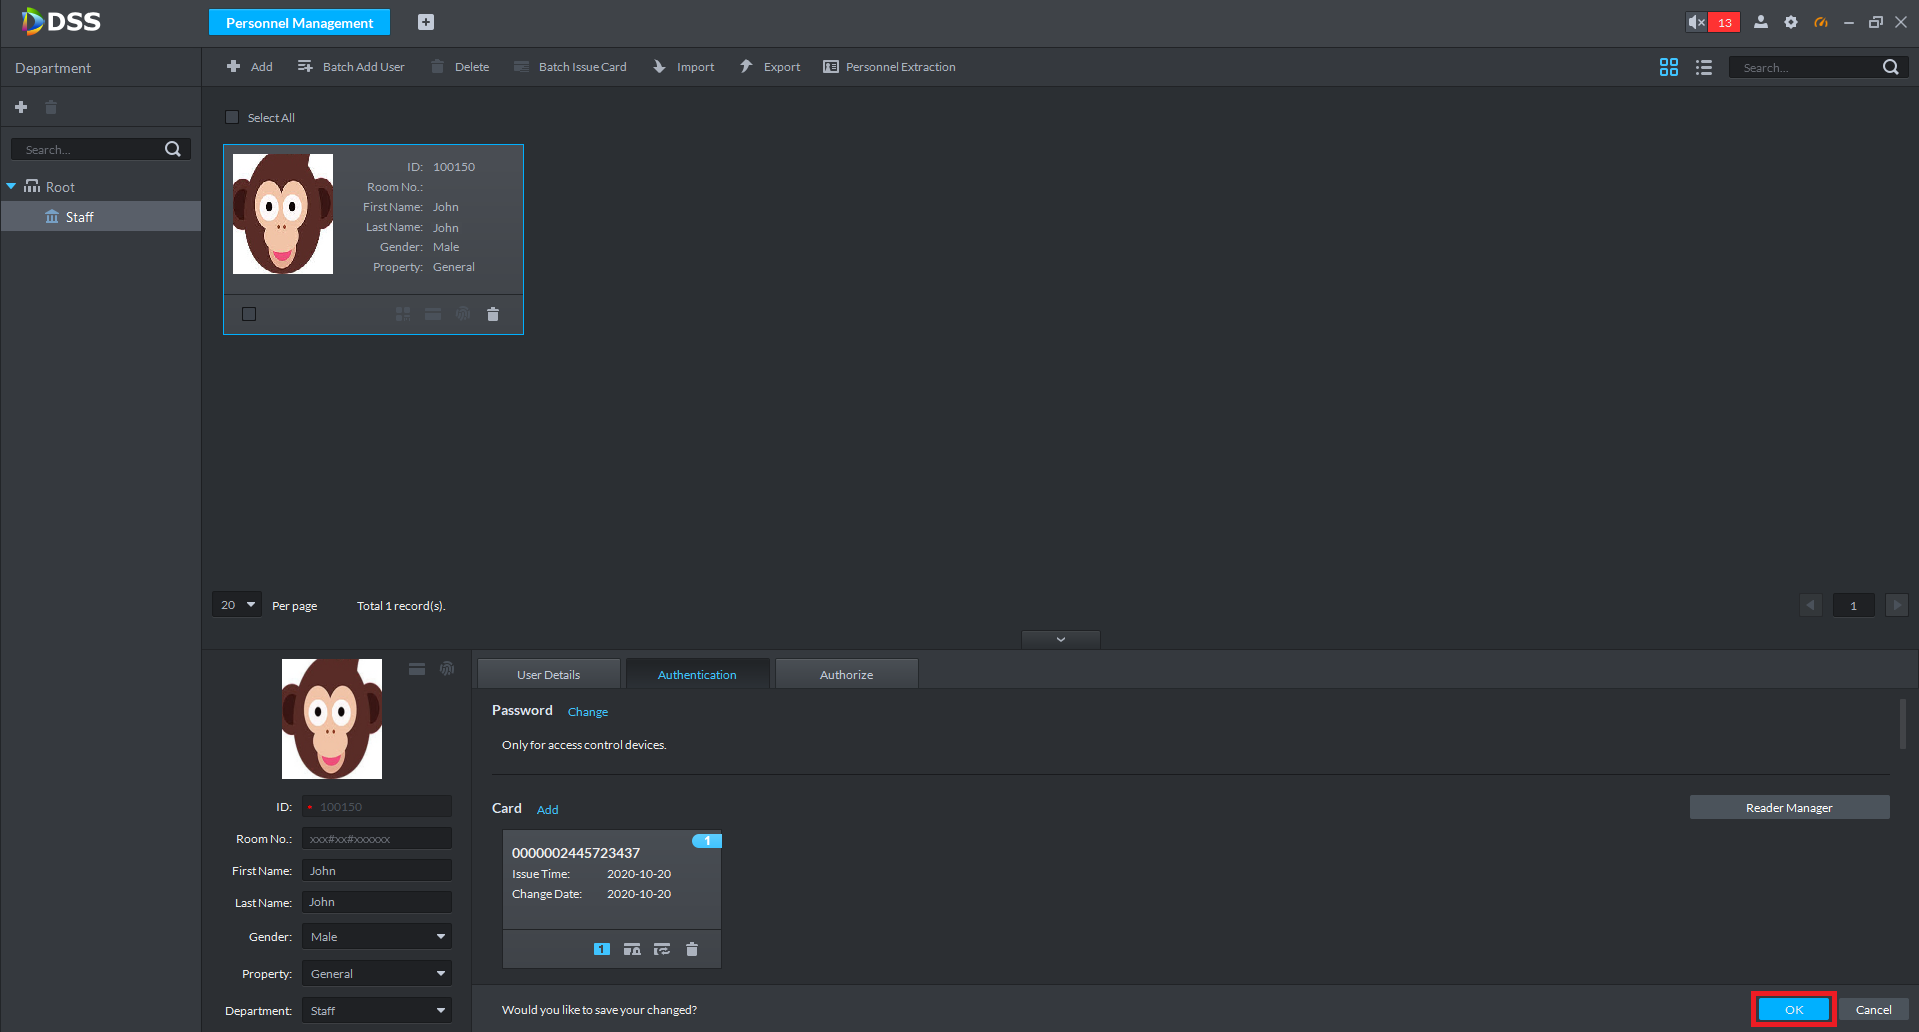
3. Double-Click on the user you wish to edit.
4. Update the user details, and select OK to save.
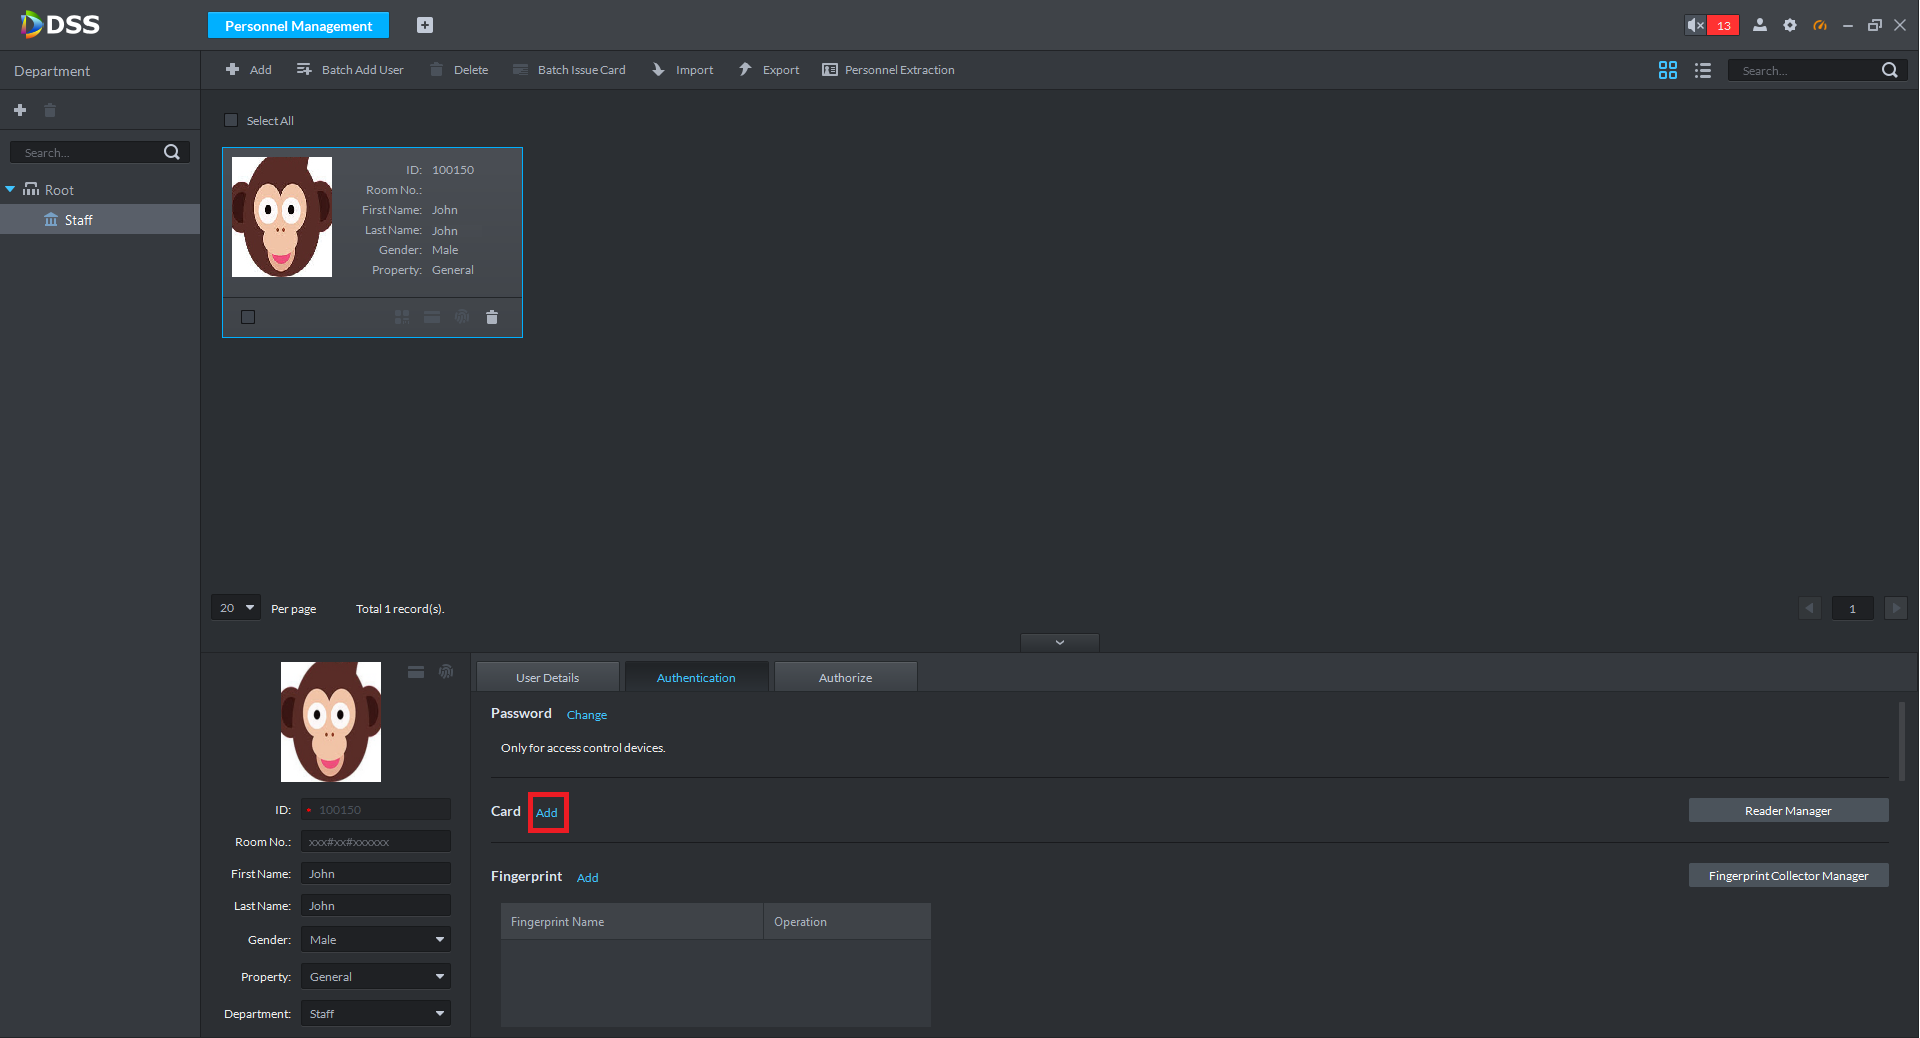
Adding Cards for Access Control Users
1. Connect the Card Reader to the computer.
2. Open DSS, ensure you are logged in with an Admin account.
3. Select Personnel Management.

4. Double-Click on the user you wish to add a card for.
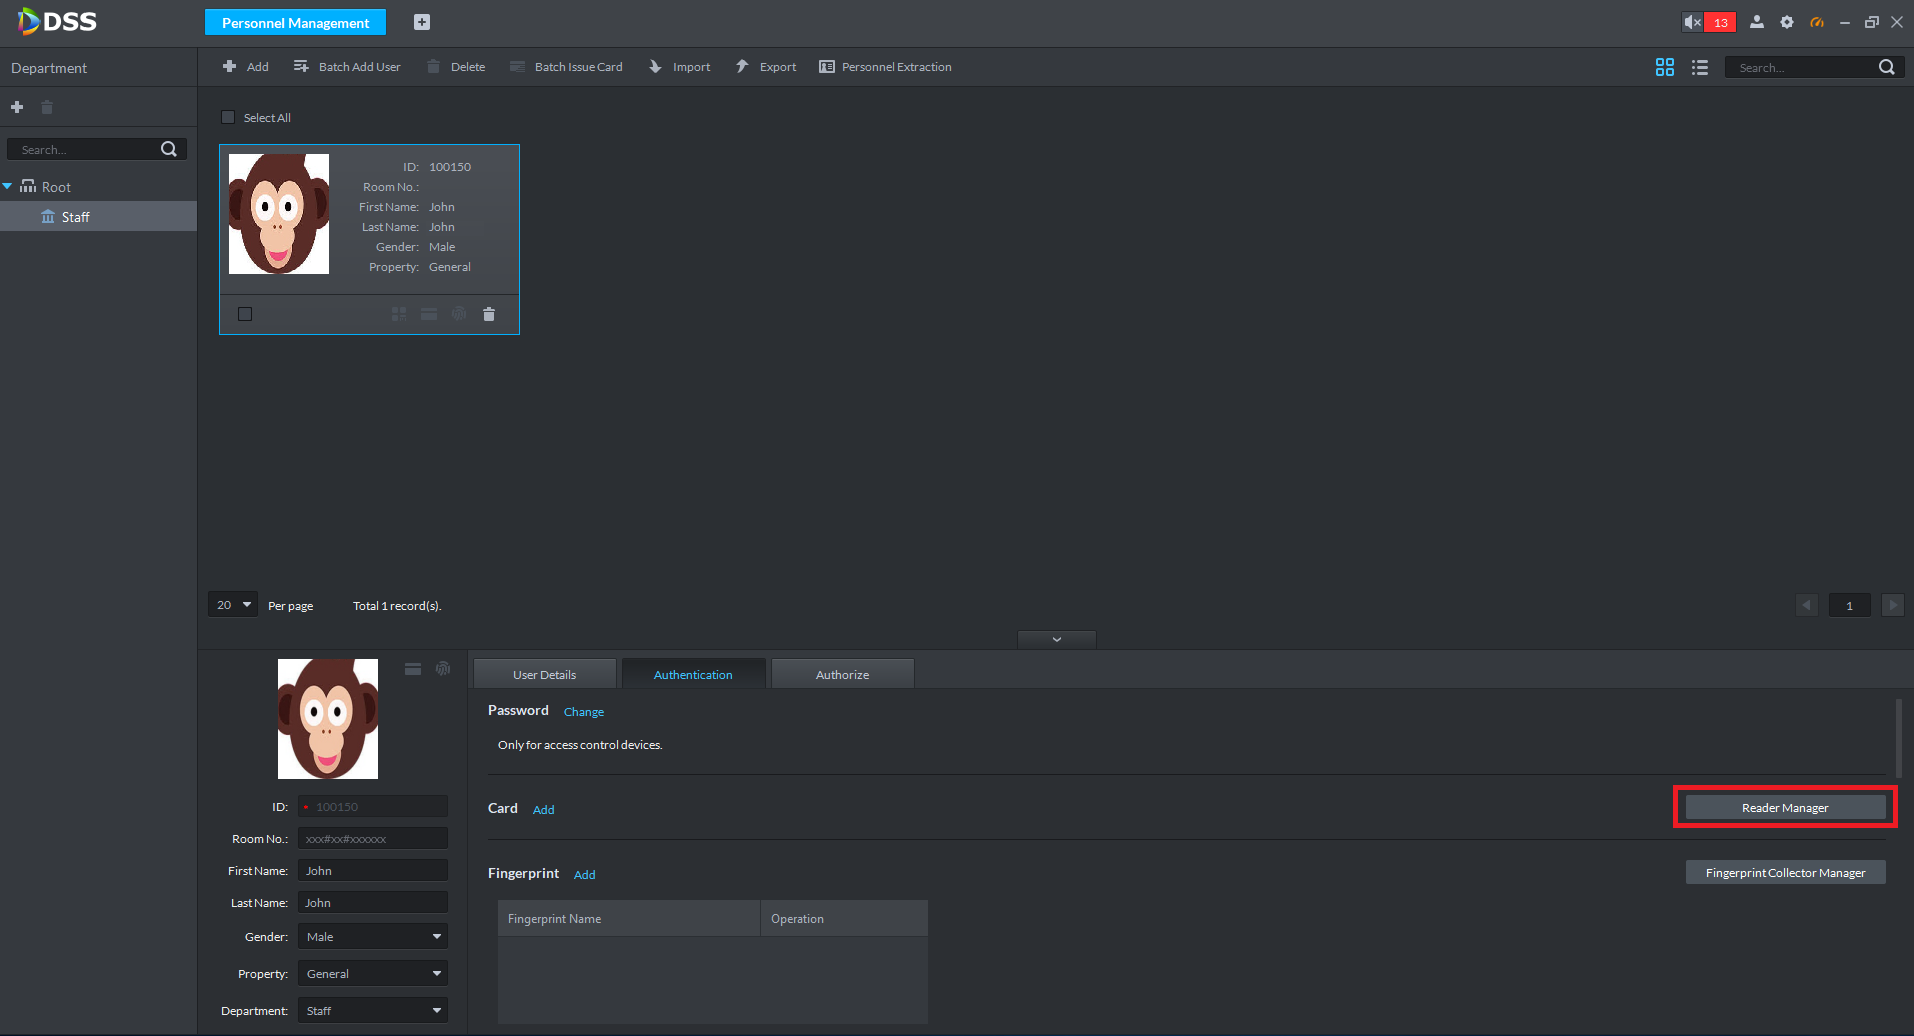
5. Select the Authentication tab.

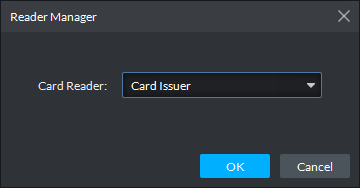
6. Select Reader Manager.
7. Set Card Reader to Card Issuer. Select OK. Card Issuer refers to the USB Card Reader that is connected to the computer.
8. Select Add. The card reader will beep once.
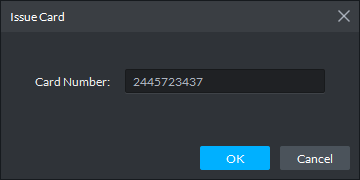
9. Scan the card on the reader. The card reader will beep once, and the card number will be listed in the box. Select OK.
10. If you wish to add addition cards, repeat steps 7 - 8. Select OK to save changes.

Adding Fingerprints for Access Control Users
1. Connect the fingerprint scanner to computer.
2. Open DSS, ensure you are logged in with an Admin account.
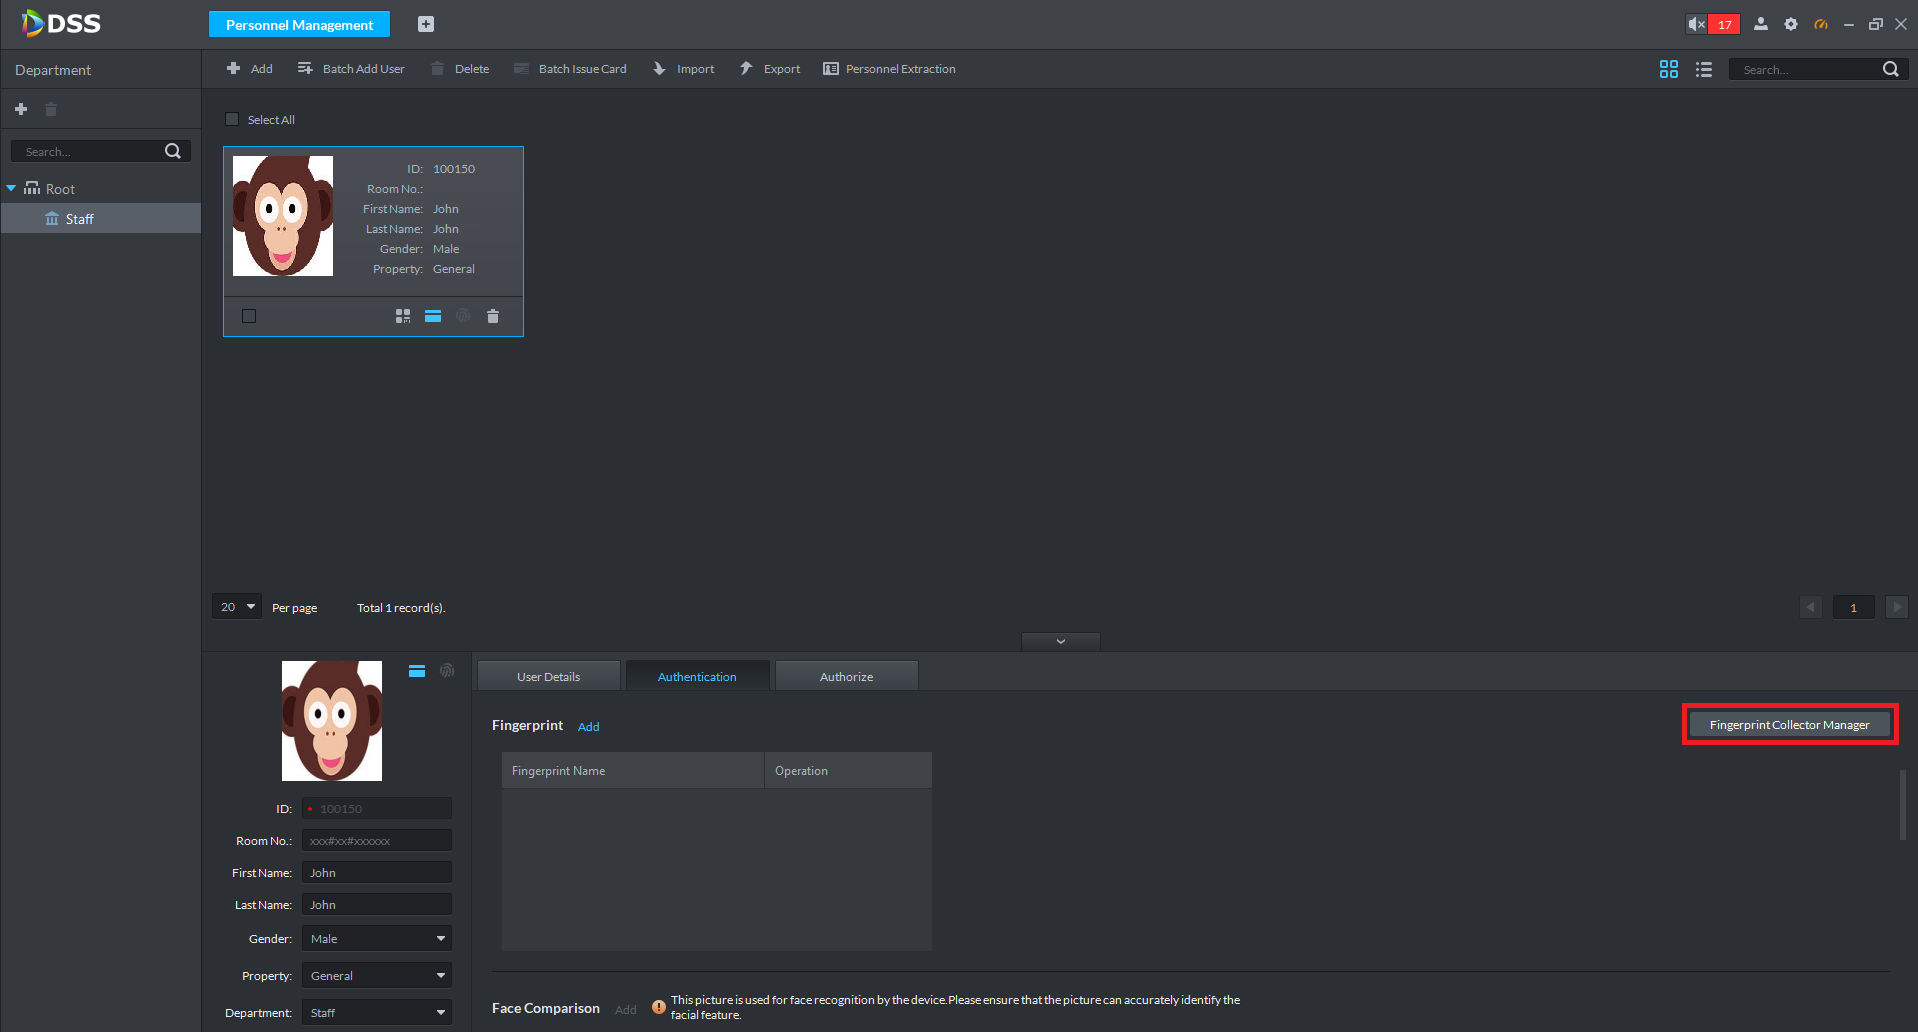
3. Select Personnel Management.
4. Double-Click on the user you wish to add a card for.

5. Select the Authentication tab.
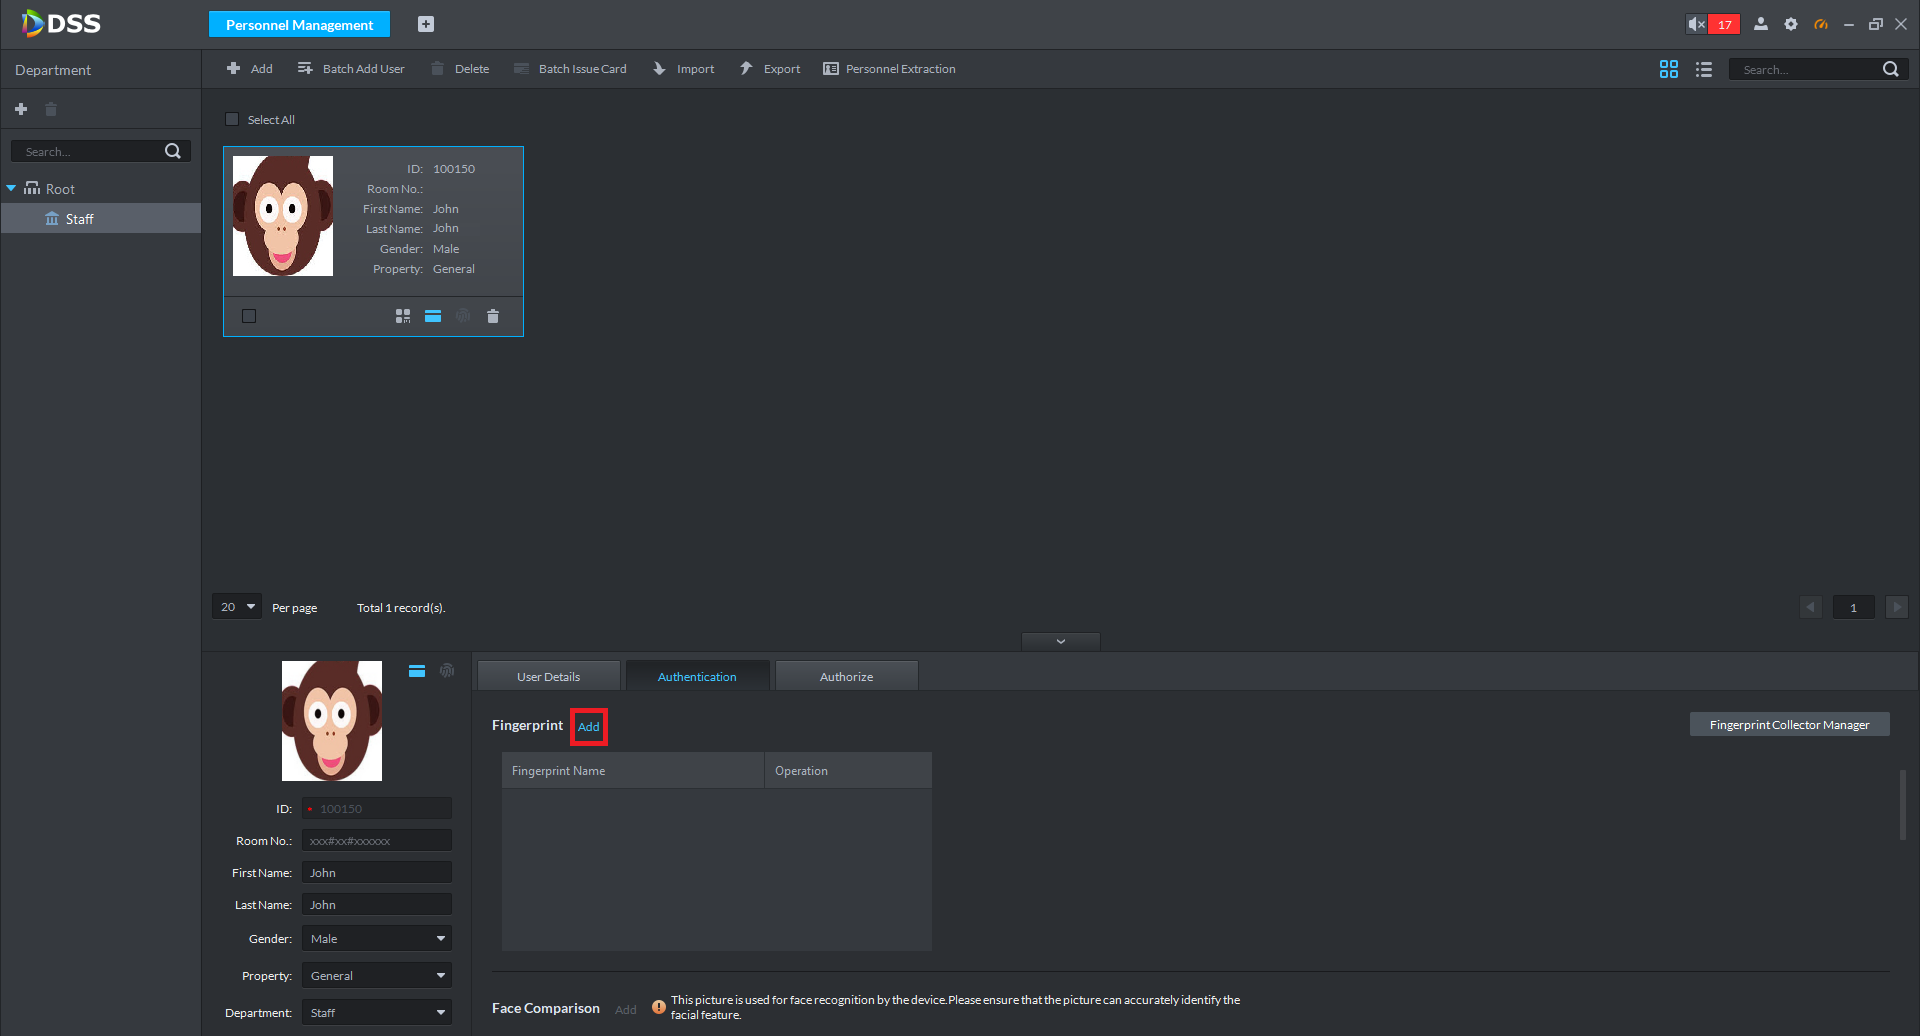
6. Scroll down to the Fingerprint section, and select Fingerprint Collector Manager.
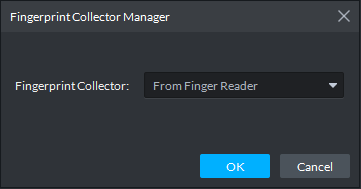
8. Select Add.
 9. Select Add Fingerprints, and follow the prompts on screen. The same finger will need to be scanned by the reader 3 times. Ensure the finger being scanned is clean, and dry.
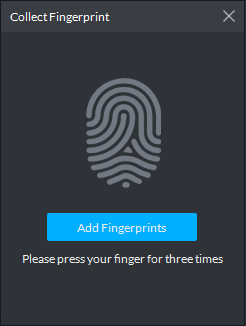
10. Name the fingerprint, e.g. Left Thumb
11. Repeat Steps 12 - 14 to add additional fingerprints, select OK to save.

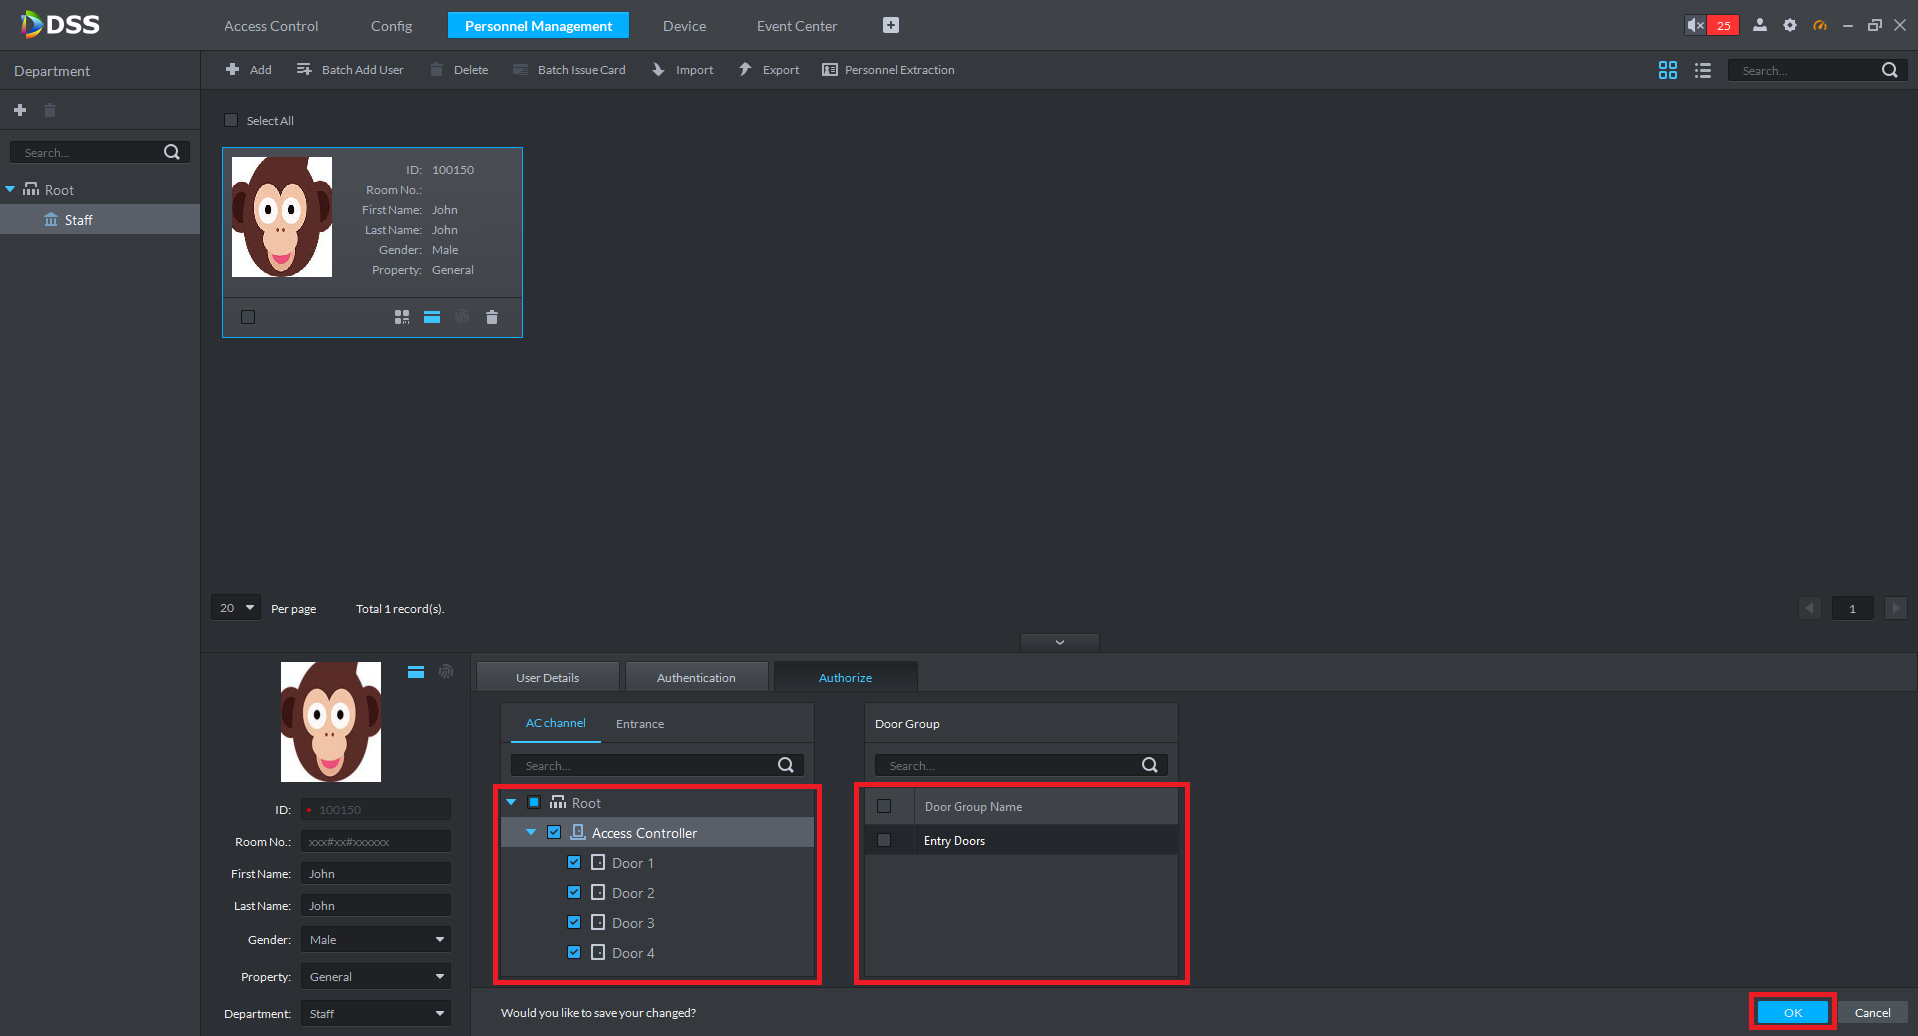
Giving Access Control Users Door Permissions
1. Open DSS, ensure you are logged in with an Admin account.
2. Select Personnel Management.
3. Double-Click on the user you wish to configure.

4. Select Authorize.
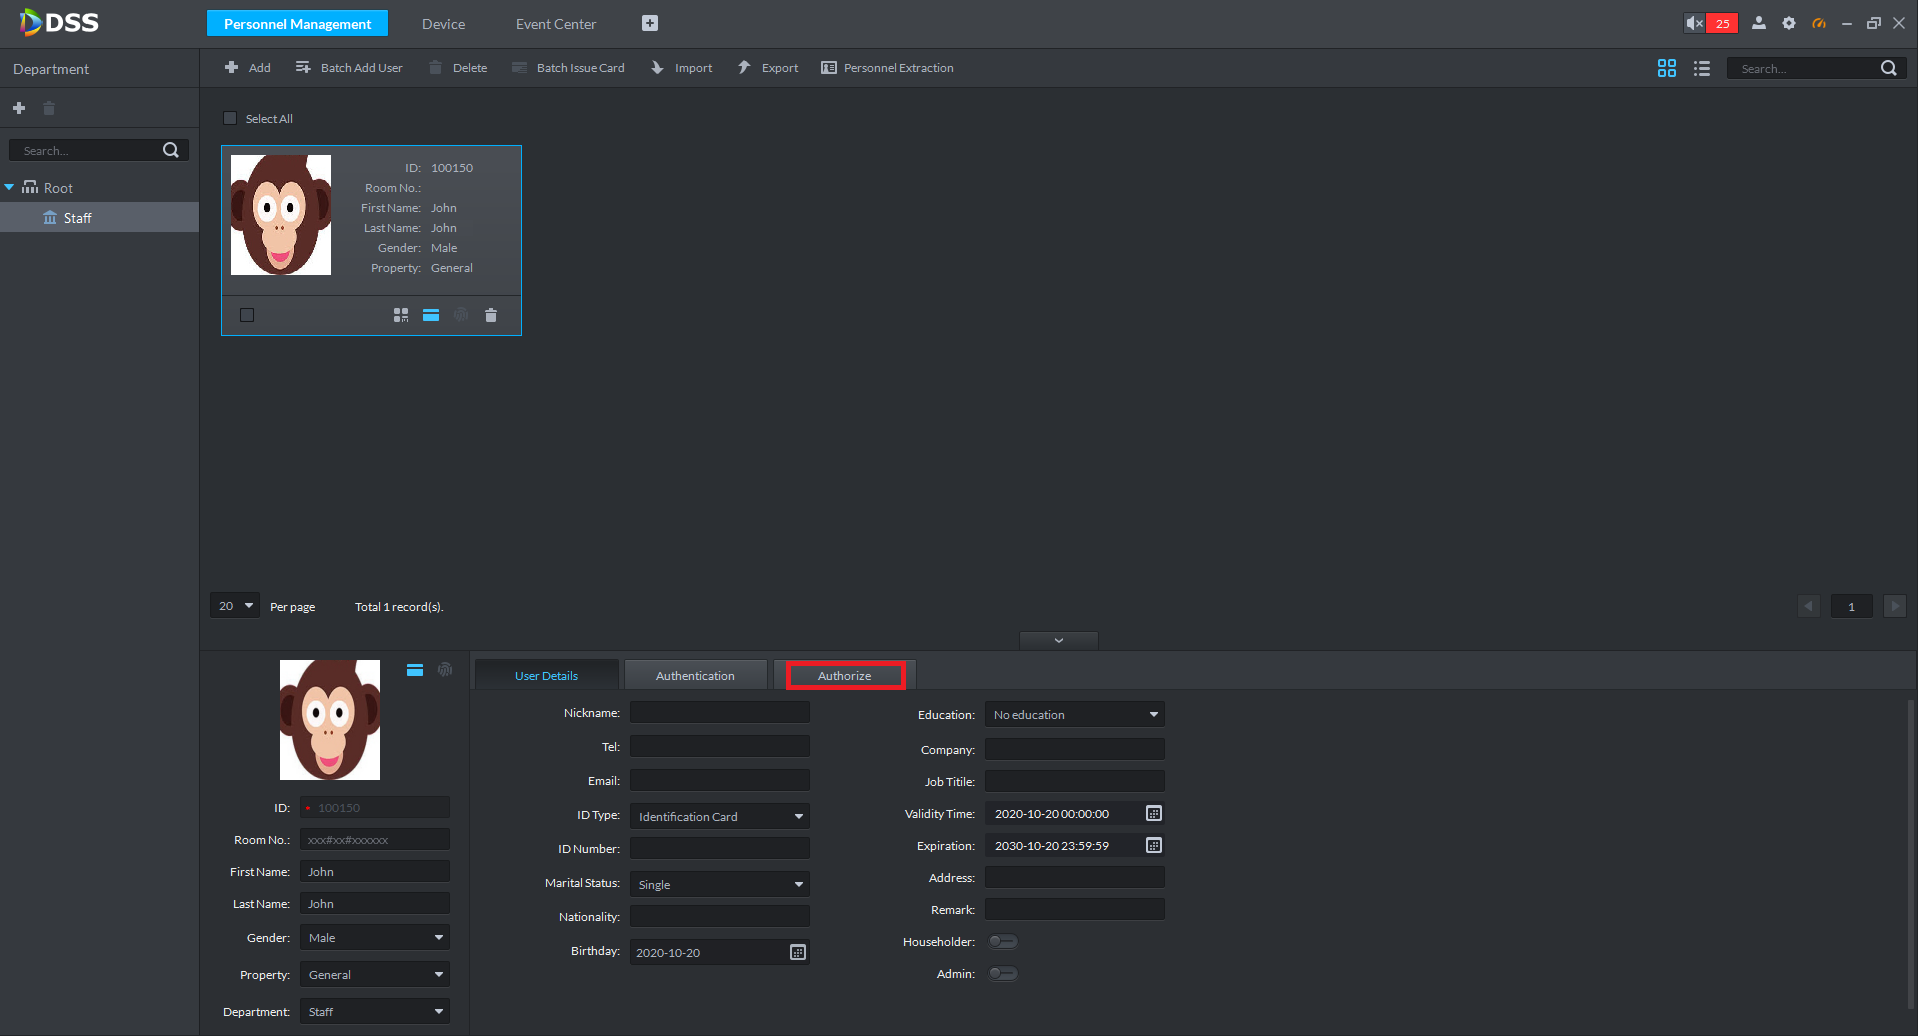
5. Select which doors or door groups the user can access. Select OK to save.
Creating Door Groups
1. Open DSS, ensure you are logged in with an Admin account.
2. Select Access Control.
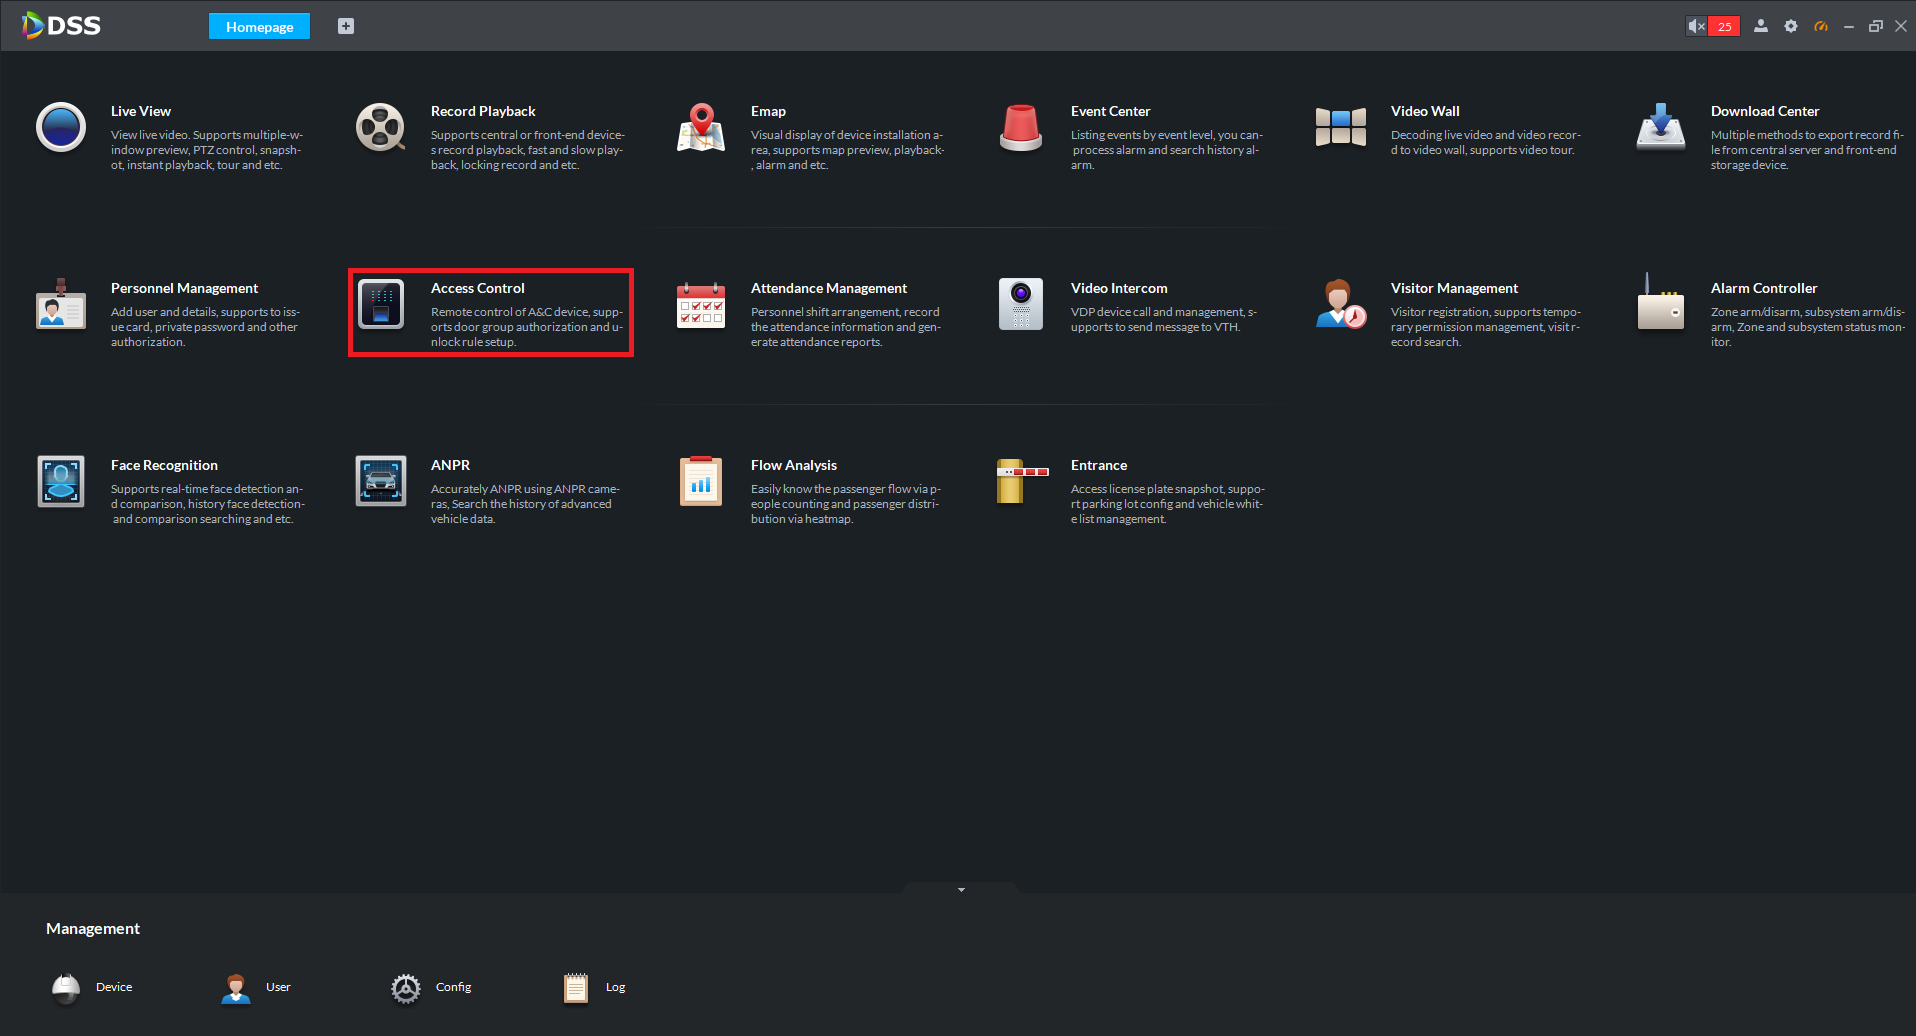
3. Select Access Level.

4. Select Add.
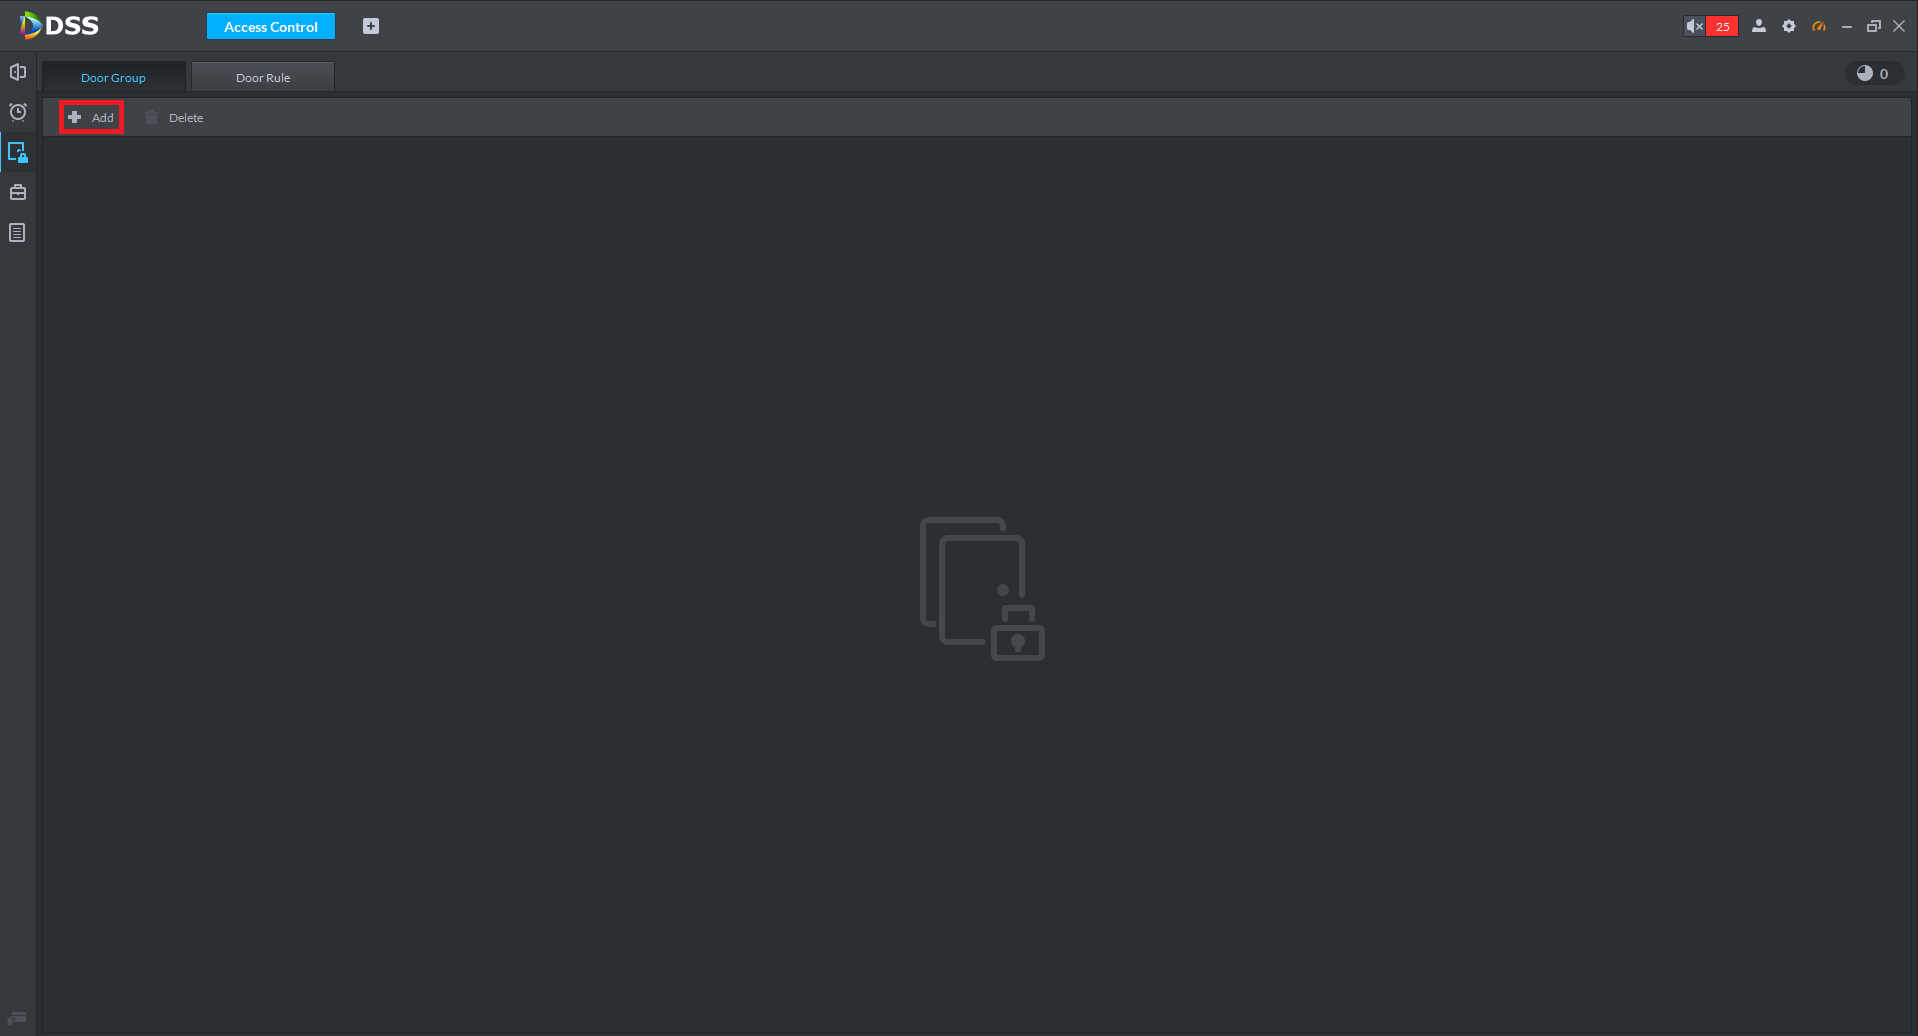
5. Give the Door Group a Name, select a Time Template (when the doors can be accessed), and select the doors that will be in the Door Group. Select OK to save.

Creating Door Time Templates
1. Open DSS, ensure you are logged in with an Admin account.
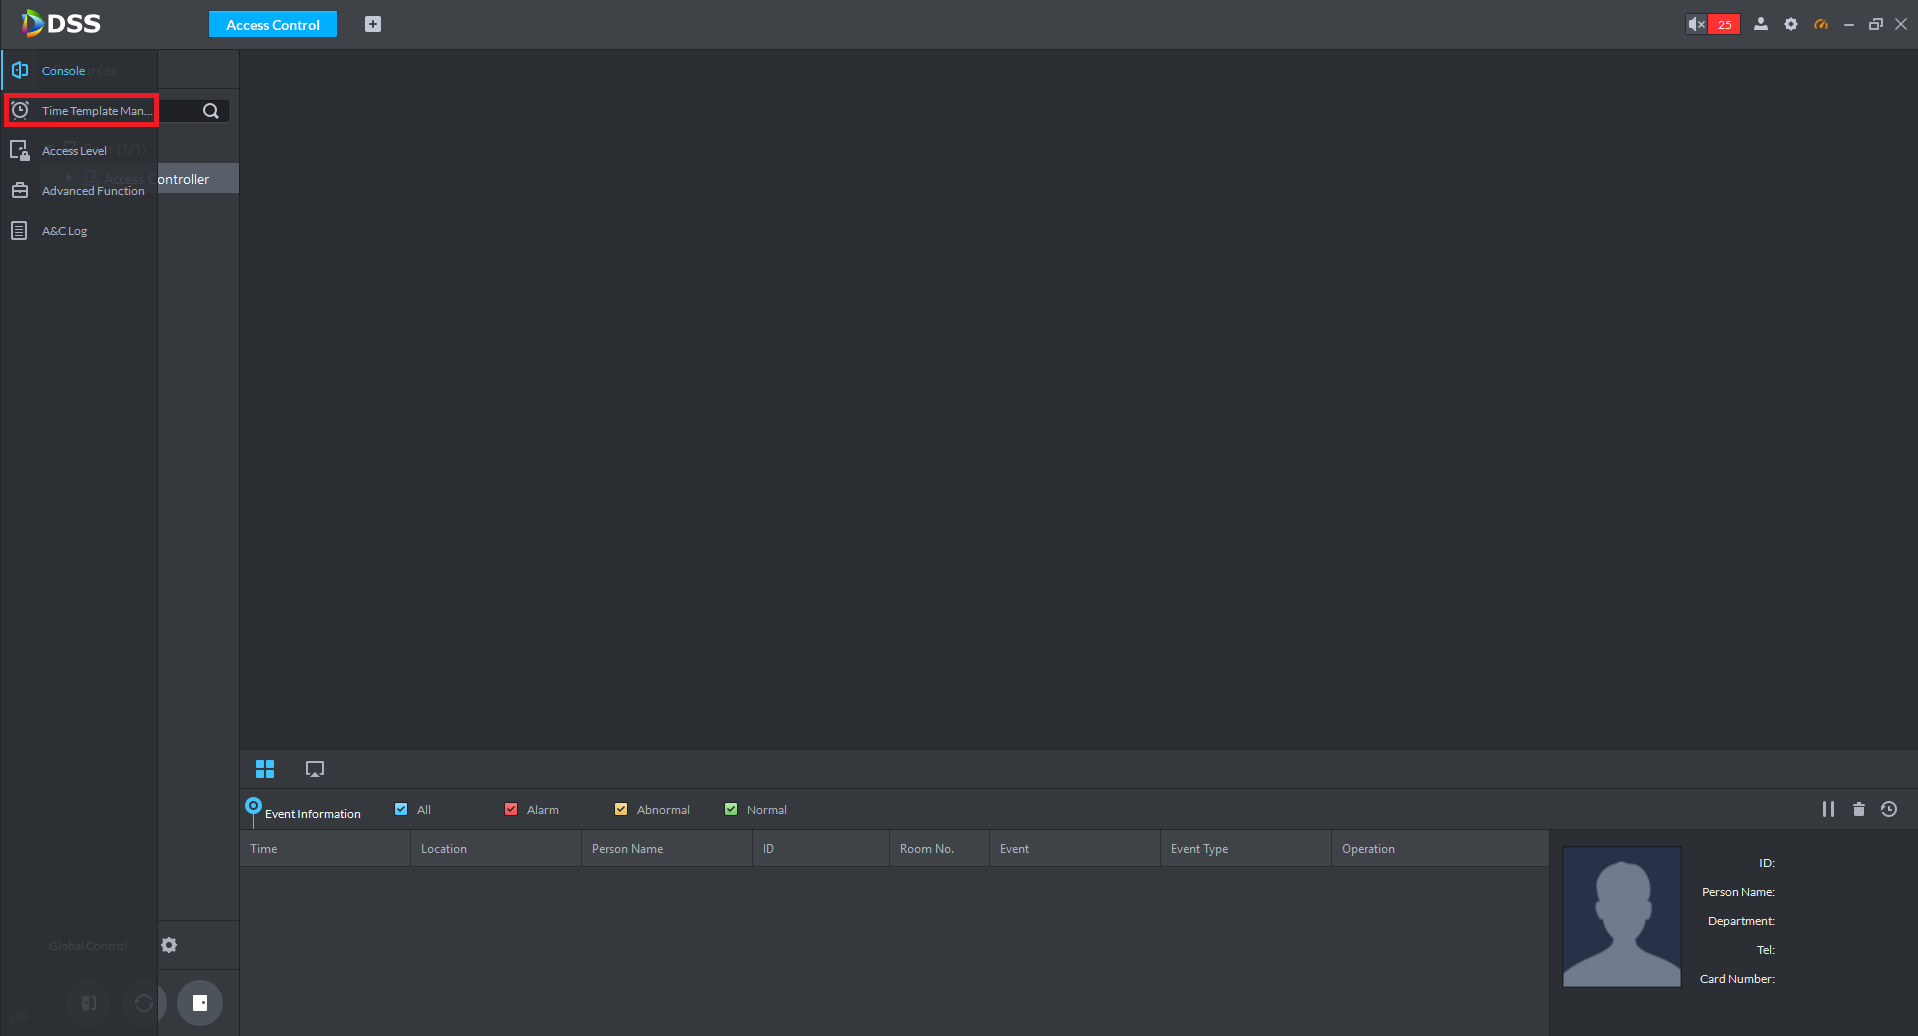
2. Select Access Control.
3. Select Time Template Management.
4. Select Add Time Template.
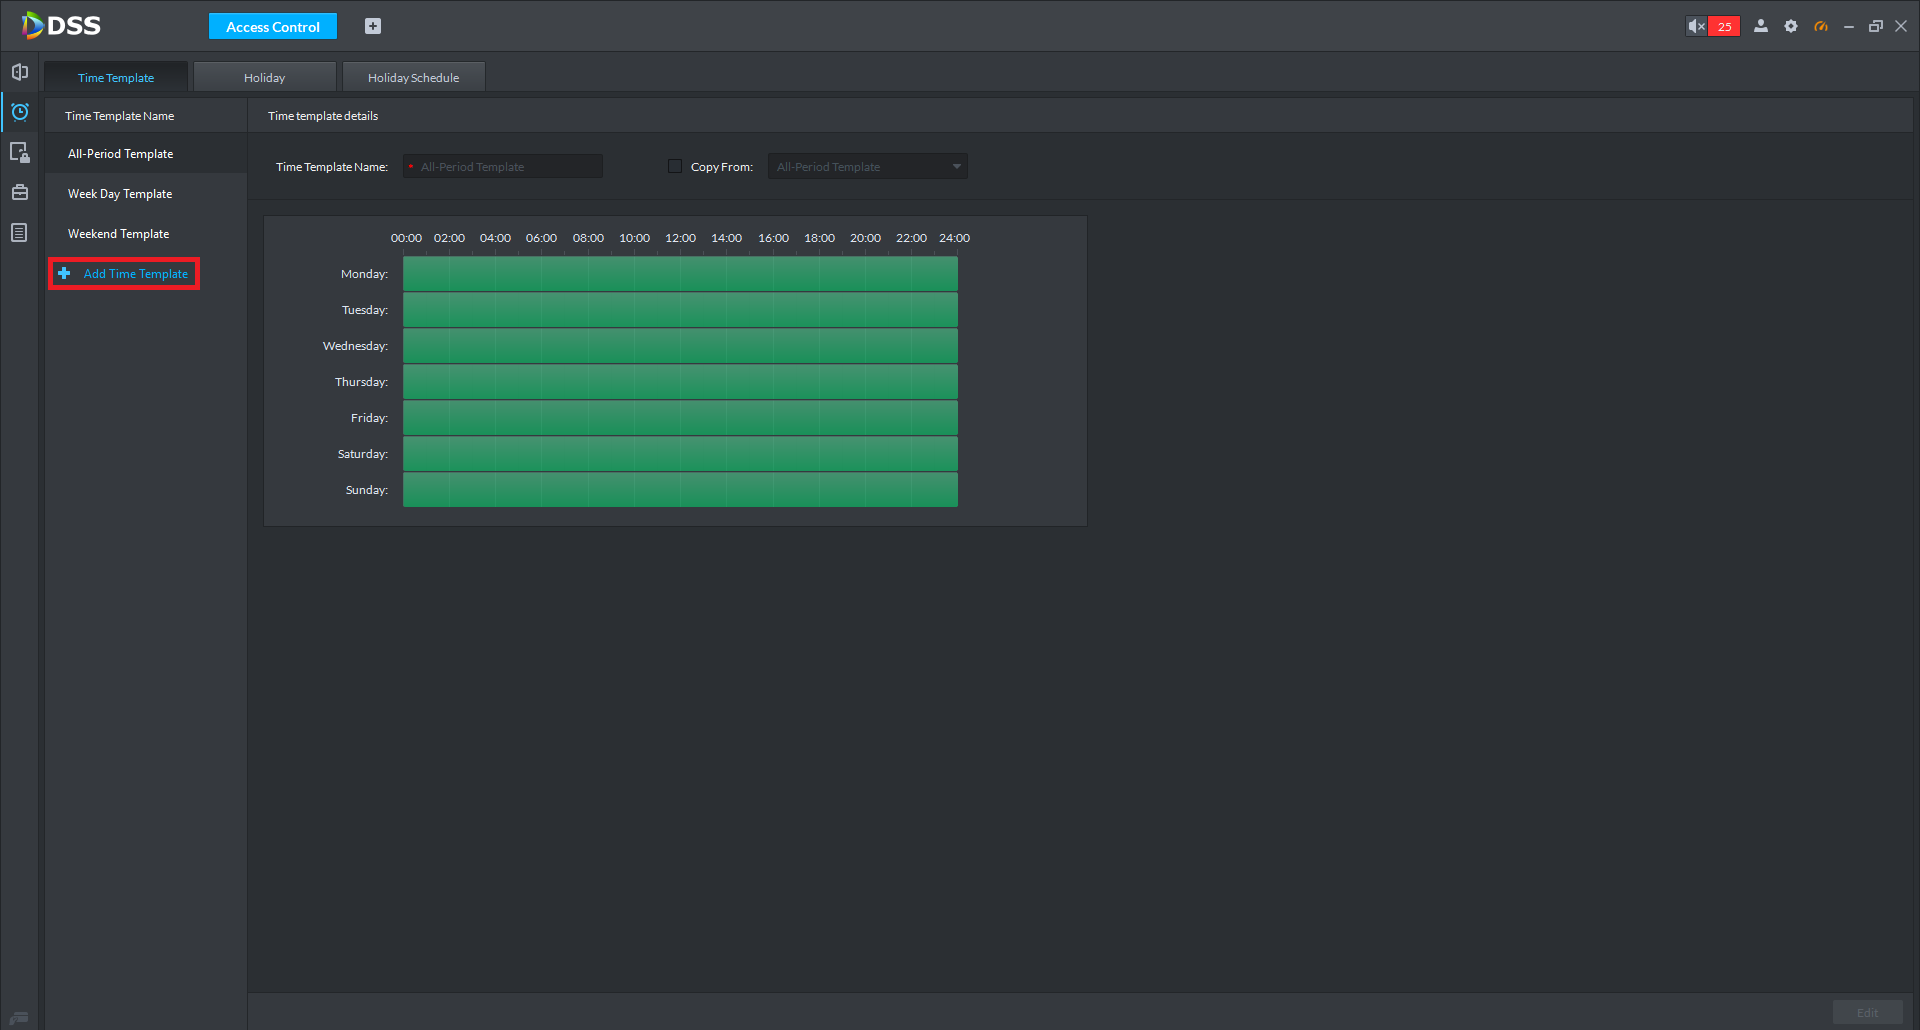
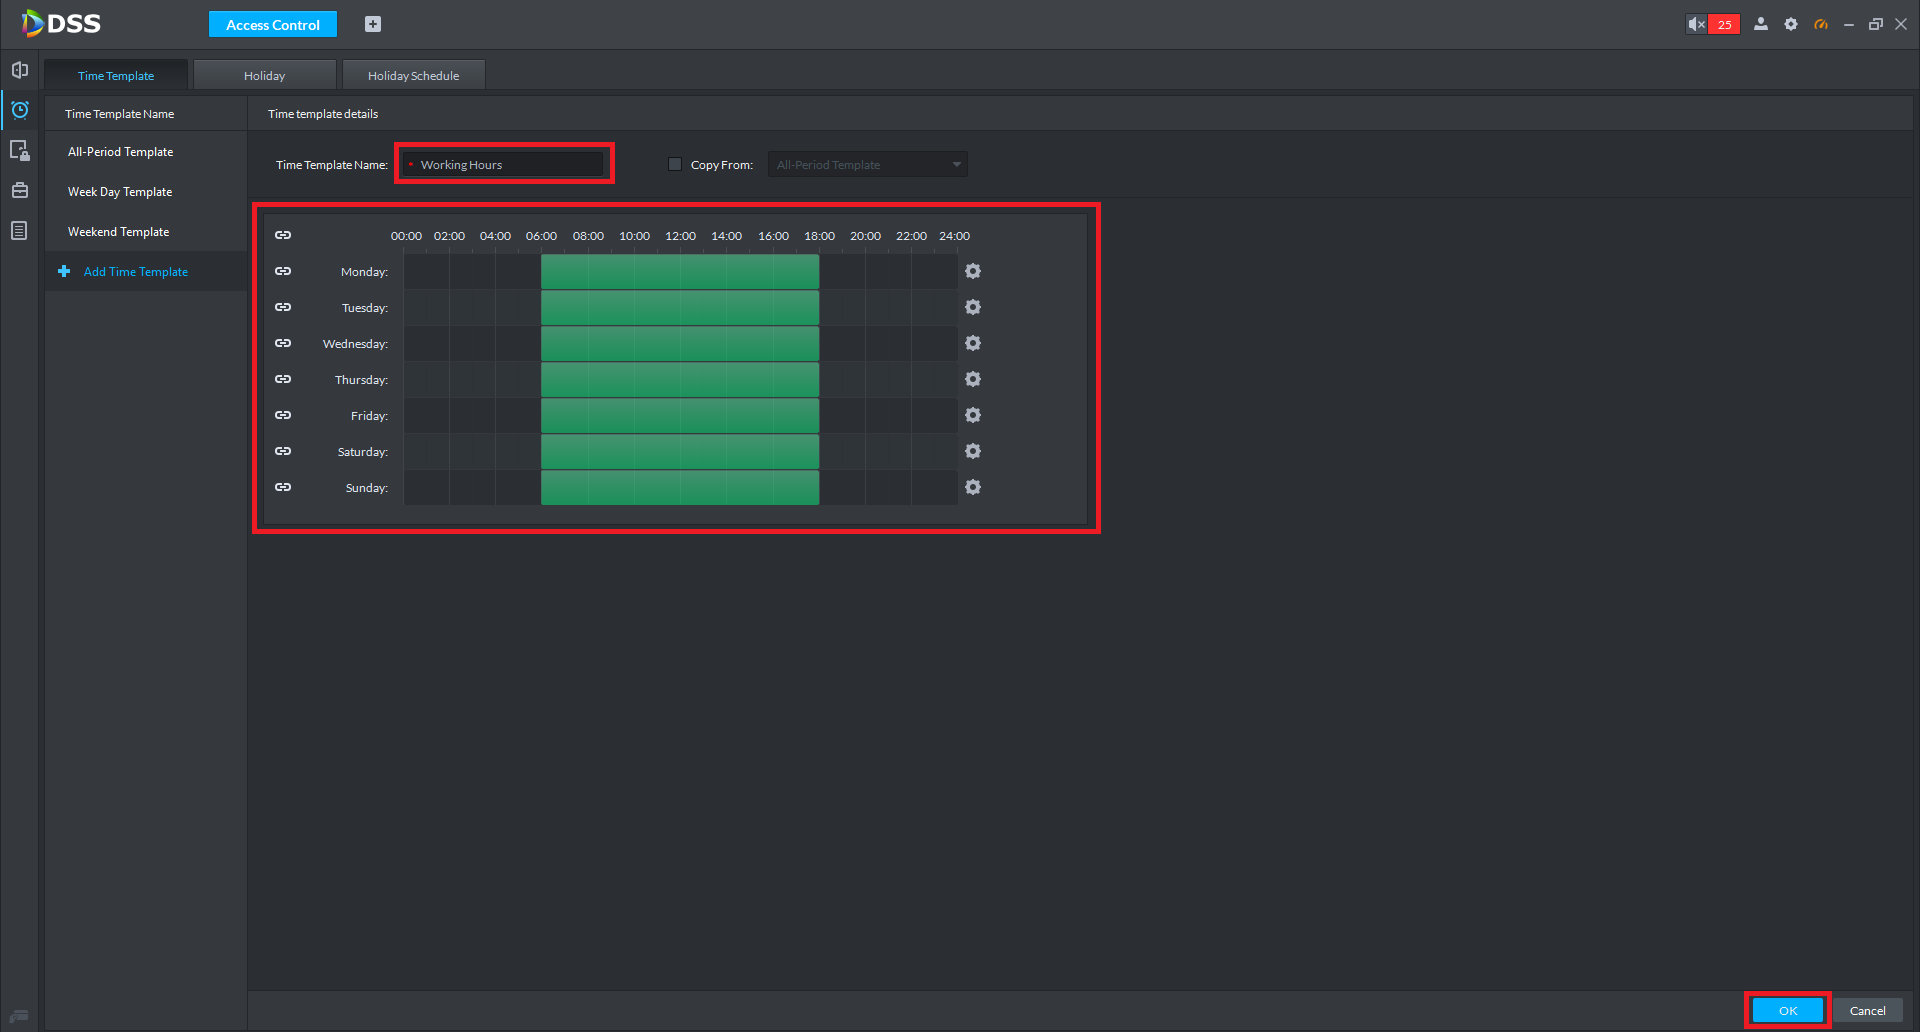
5. Give the Time Template a Name, and change the schedule to suit your requirements. Select OK to save. Repeat Steps 4-5 to create additional Time Templates.
Viewing and Exporting the Access Control Log
1. Open DSS, ensure you are logged in with an Admin account.
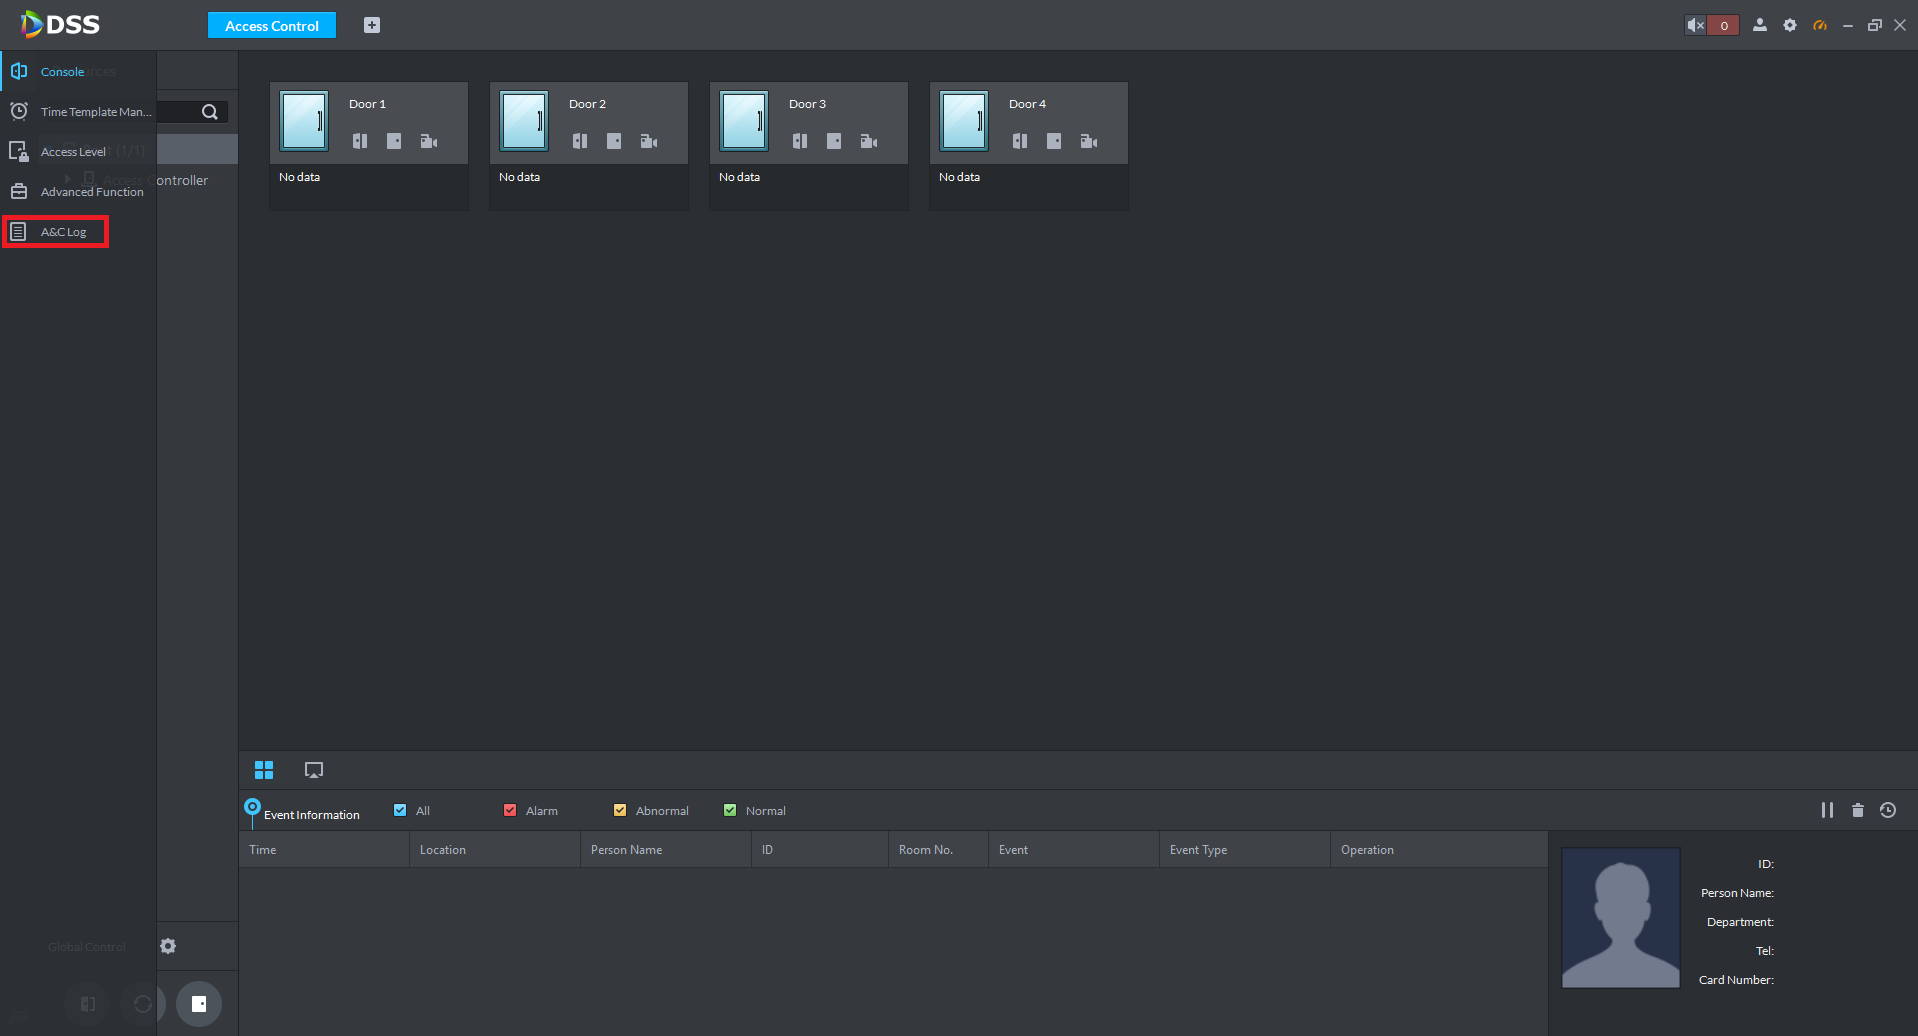
2. Select Access Control.
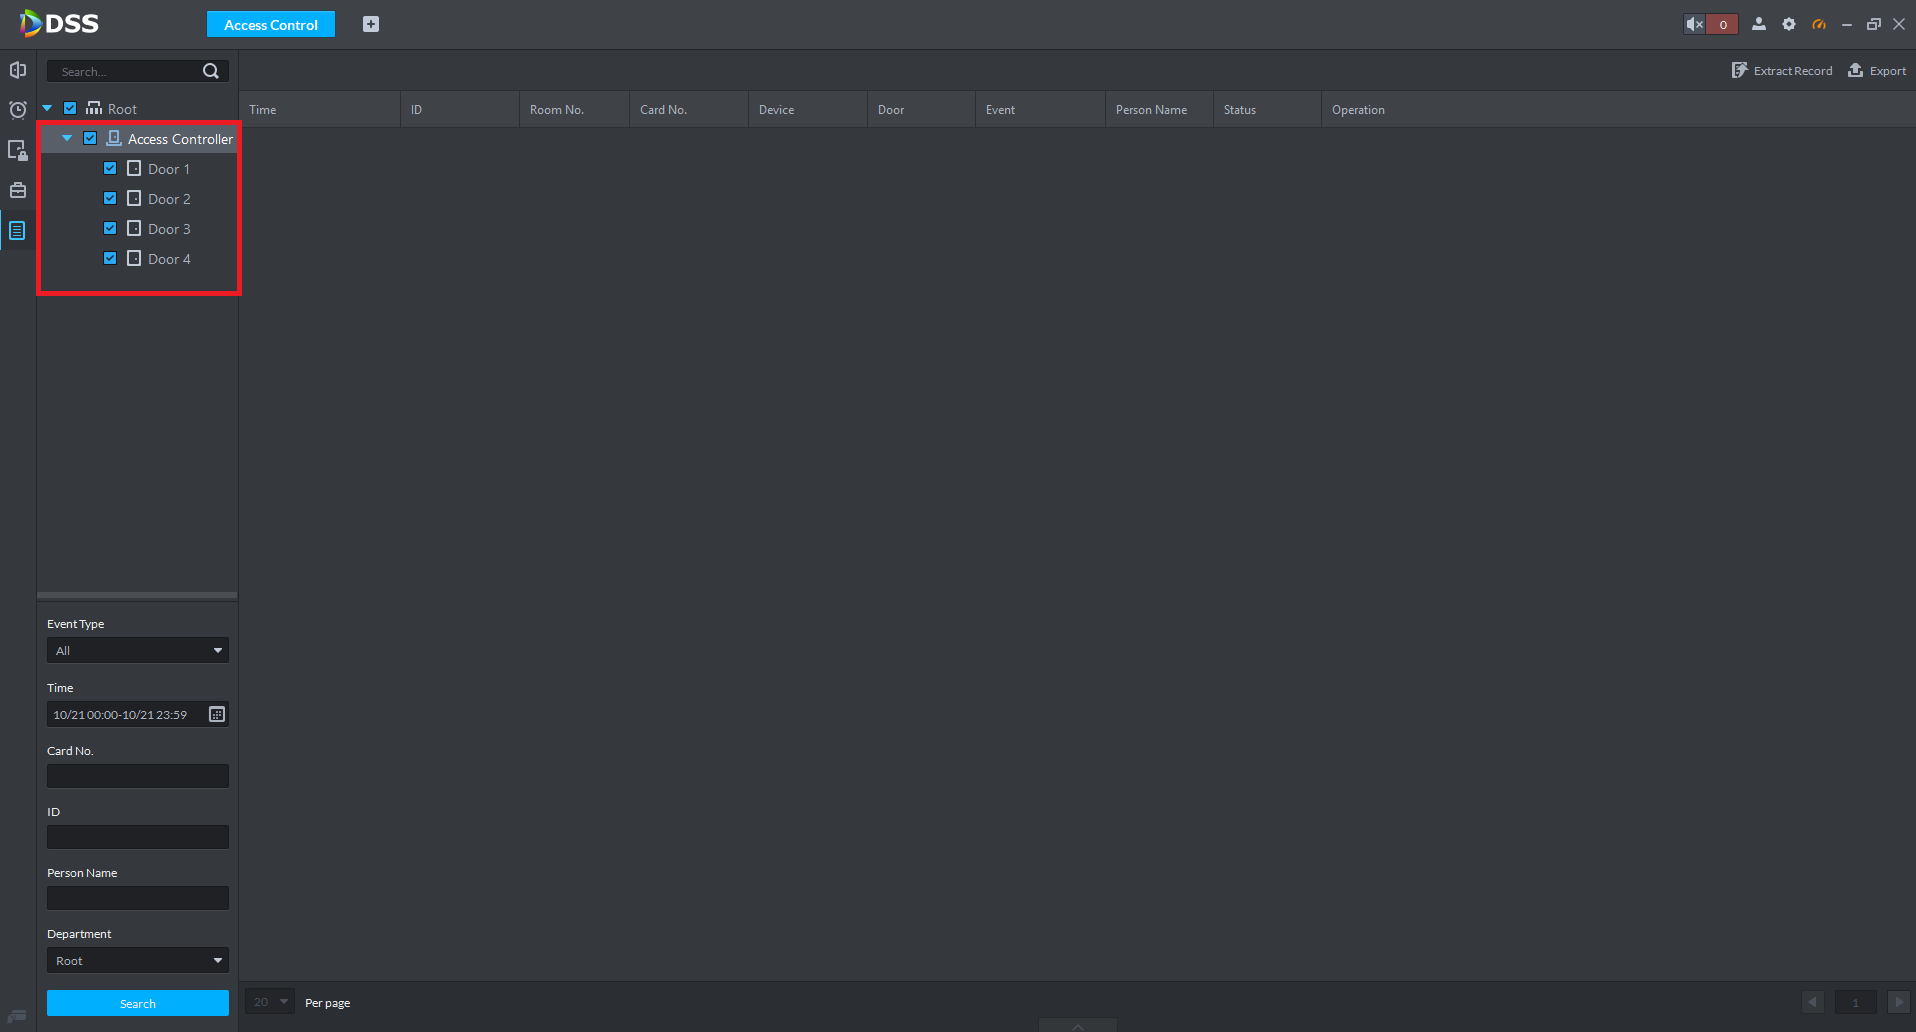
3. Select A&C Log.
4. Select which Access Controller or specific Door you would like to search the log for.
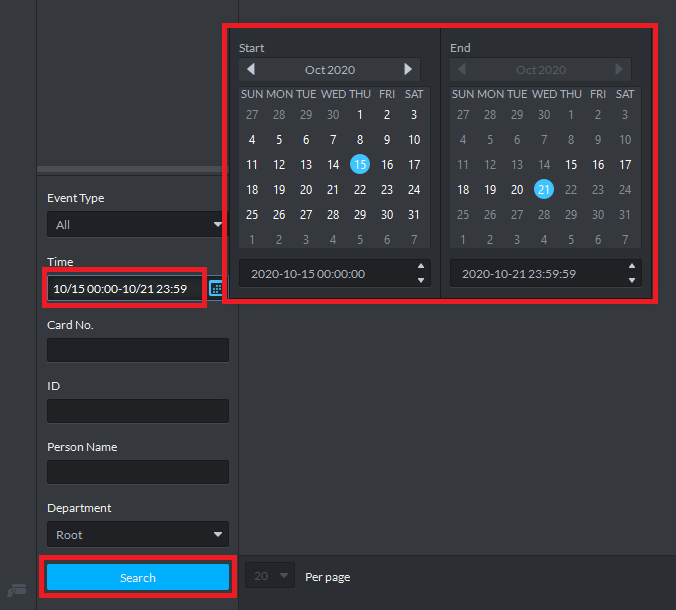
5. Select the start and end date and time. Select Search.
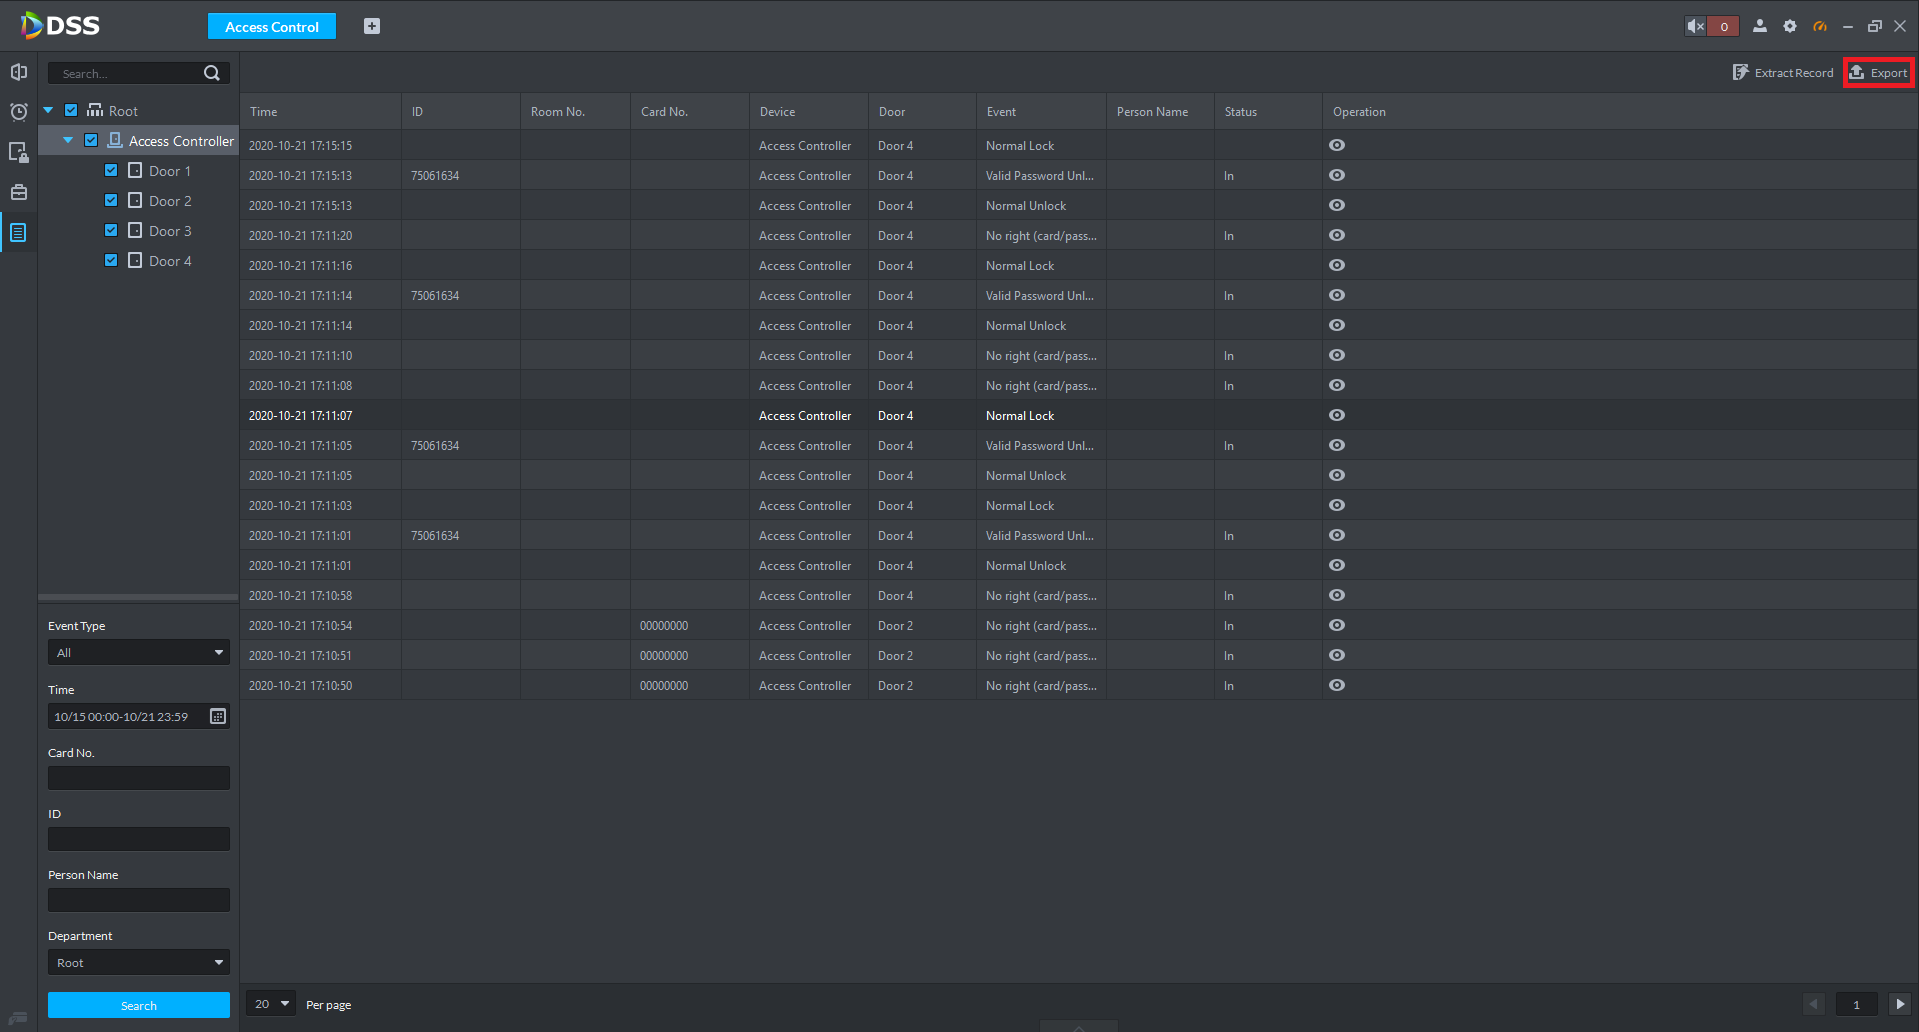
 6. The log will now be displayed. To backup the log, select the Export button.
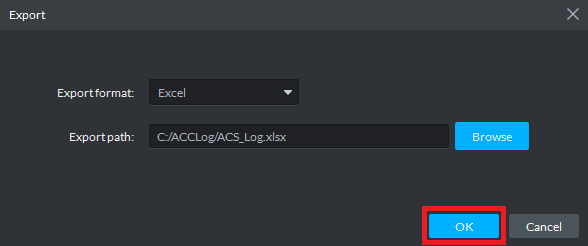
7. Choose the export format, then select Browse.
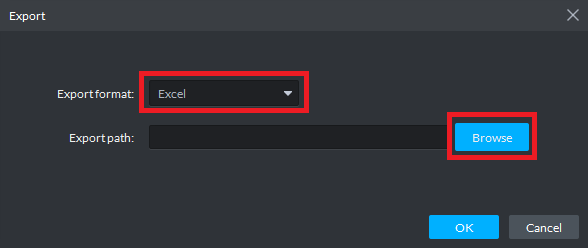
8. Choose a directory where you would like the exported log to be stored.
9. Select OK.
10. Your the log will now be exported.