Motion Detection
Motion Detection is triggered when the is any movement above the threash hold in the detection area. There is no distinction between targets.
Motion Detection is Required to be enabled from SMD.
NVR (Black GUI)
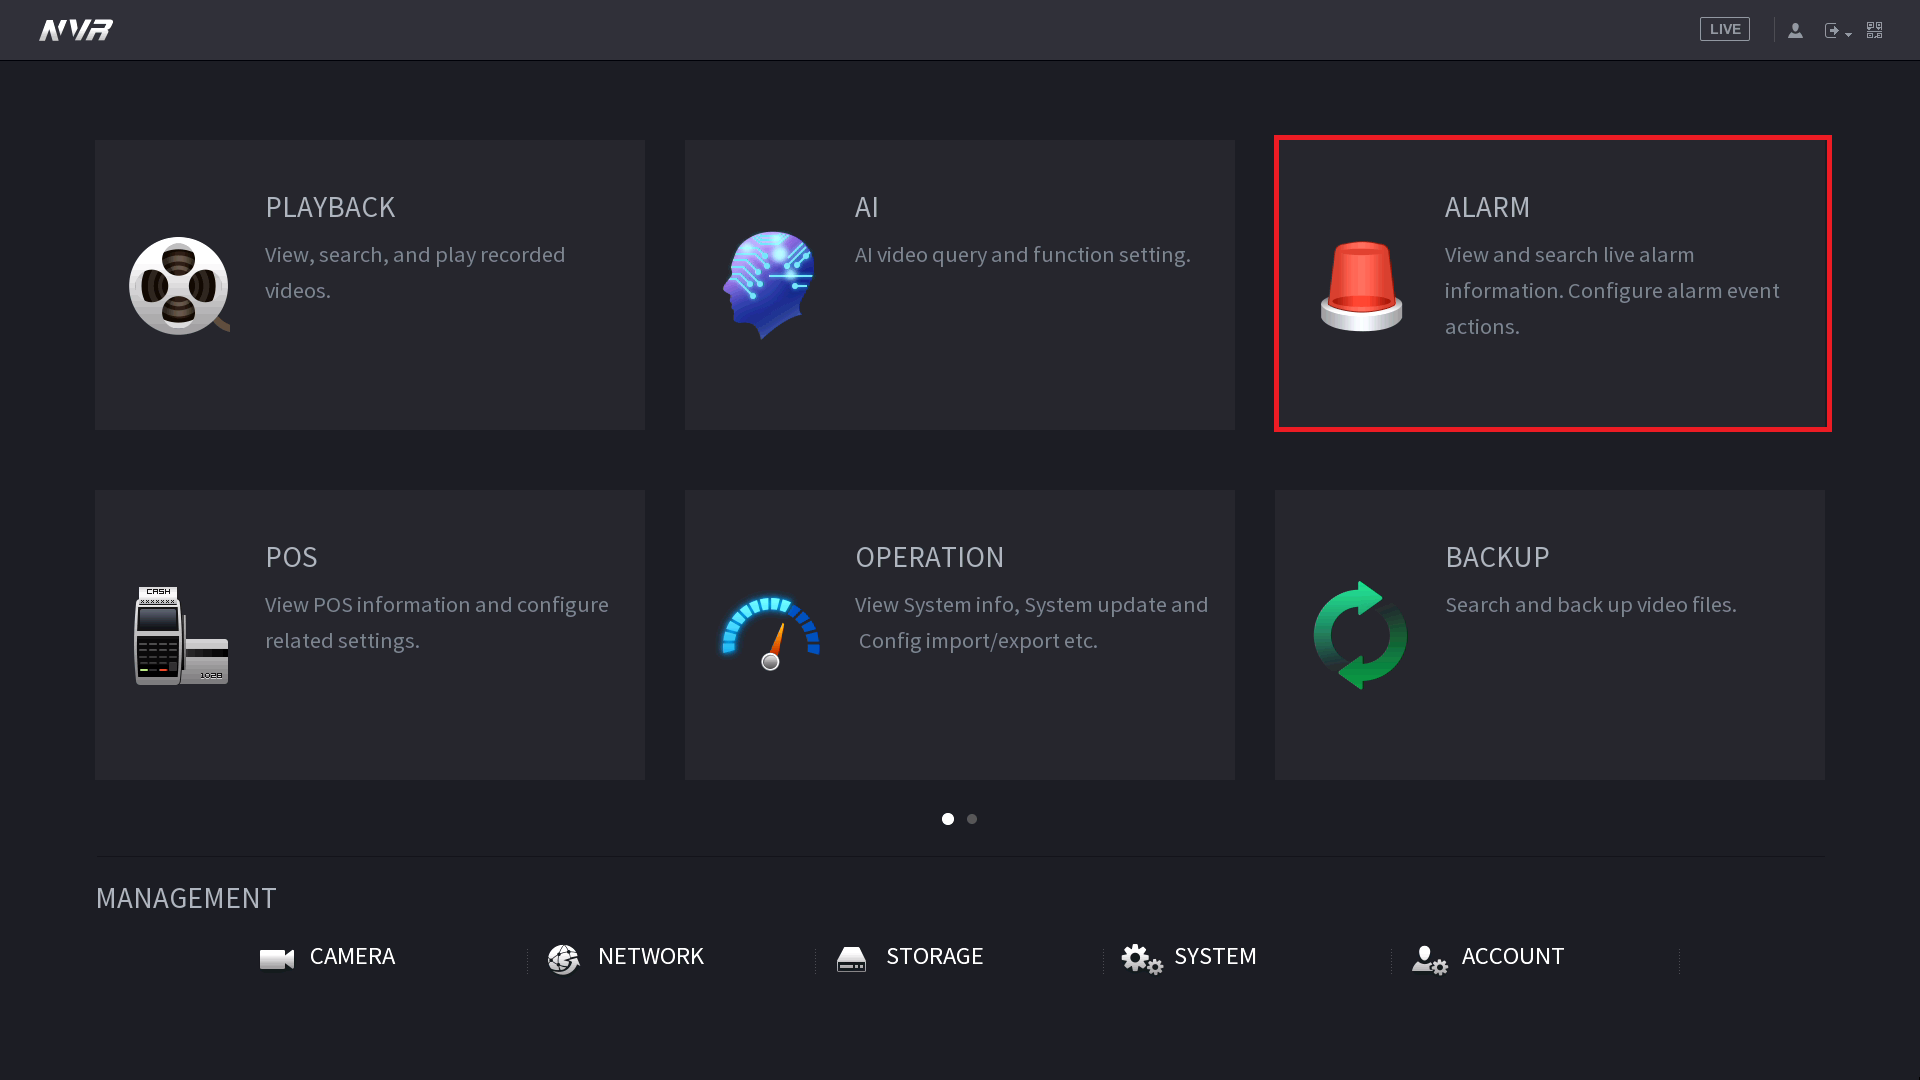
- Navigate Main Menu > Event > Alarm > Video Detection.
- Select the channel you want to Enable motion detection on with the drop down menu.
- After this you can choose to toggle motion detection sensitivity and area by selecting Region Settings.
- Click Apply to confirm settings.

NVR (Blue GUI)
- Go to Main Menu > Event.
- Select the Channel number of the camera you want to enable Motion Detection on.
- Tick Enable, then click OK.

Additional Settings
| Parameter | Description |
| Anti-Dither | Sets the Camera to only record one motion detection event in the set period. |
| Record | Enable this option if you wish for the camera to record when motion is detected. This requires Motion to be scheduled under Storage > Schedule > Record, and Auto to be selected for Record Mode under Storage > Record Control. |
| Record Delay | How long the camera will continue to record as part of the "motion event" after motion has stopped being detected |
| Relay-out | Enabling this will cause the relay of the camera to trigger when Motion is detected. |
| Alarm Delay | How long the relay will stay triggered for after motion is detected. Requires Relay-out to be enabled. |
| Send Email | Send an Email when Motion is detected. Requires configuration under Network > SMTP(Email) |
| PTZ | Set the PTZ to perform a configured Preset/Tour to Pattern when motion is detected. |
| Snapshot | A Snapshot will be taken when motion is detected. Motion Snapshots will need to be set in the Schedule under Storage > Schedule > Snapshot |
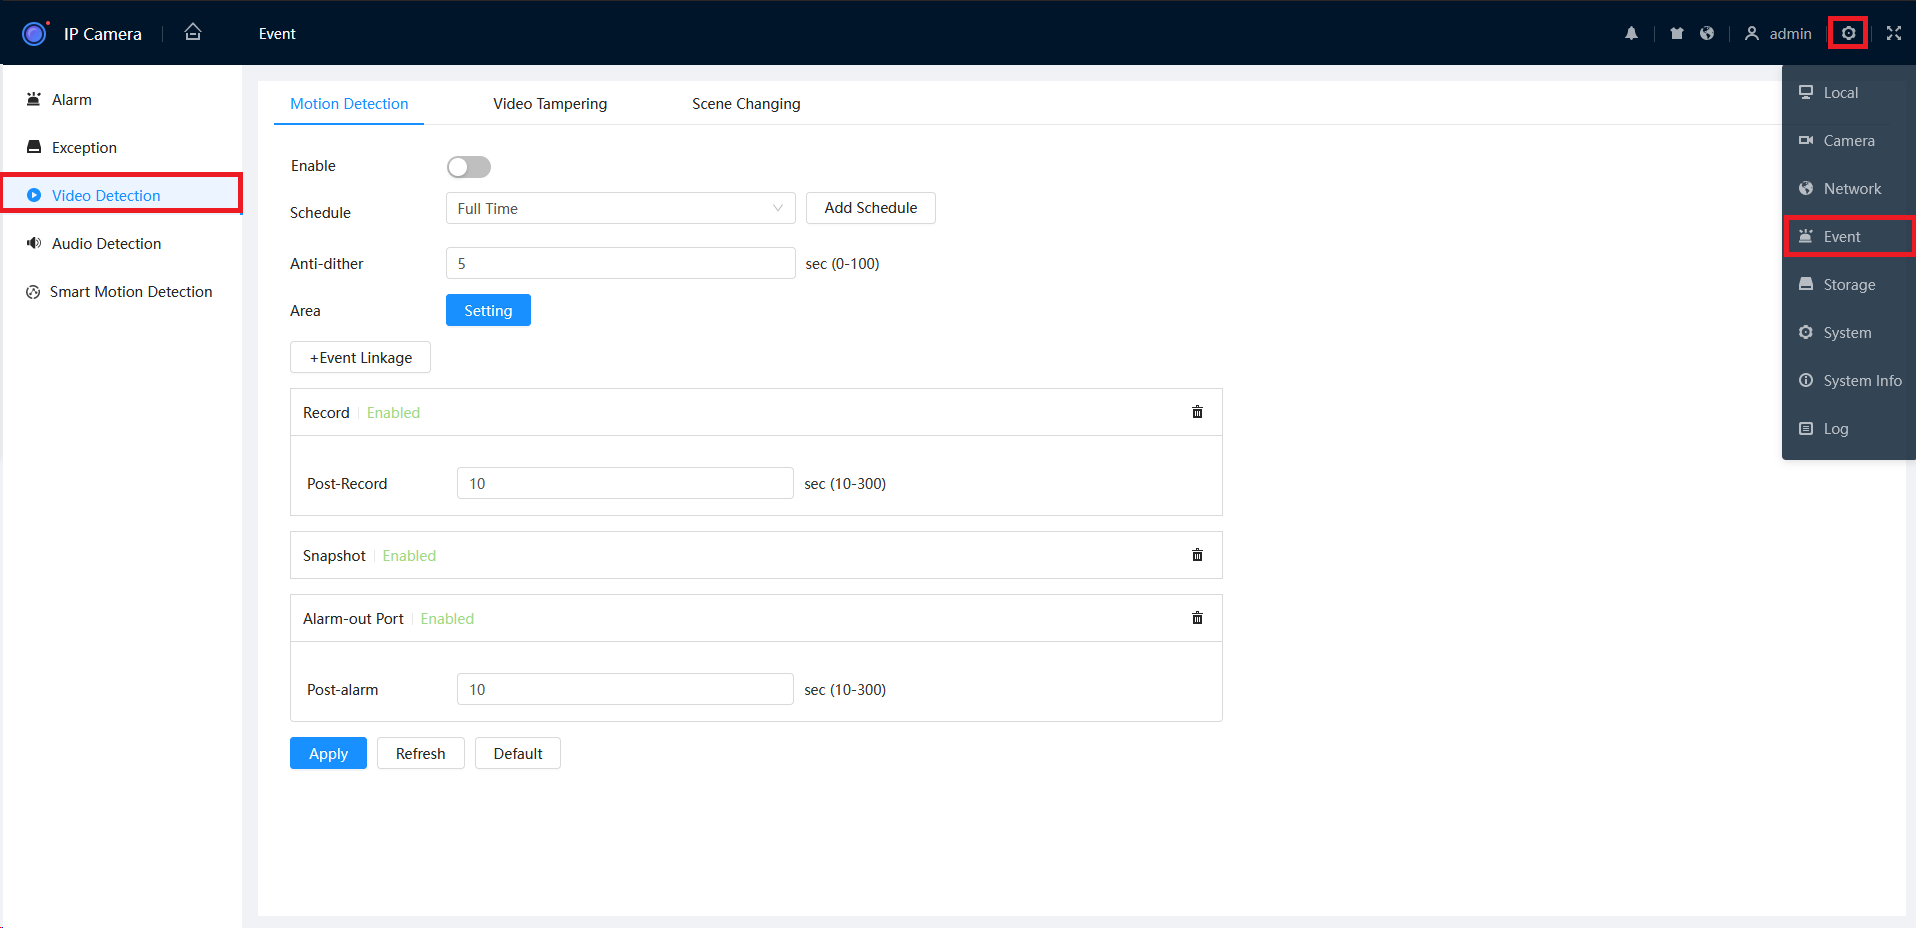
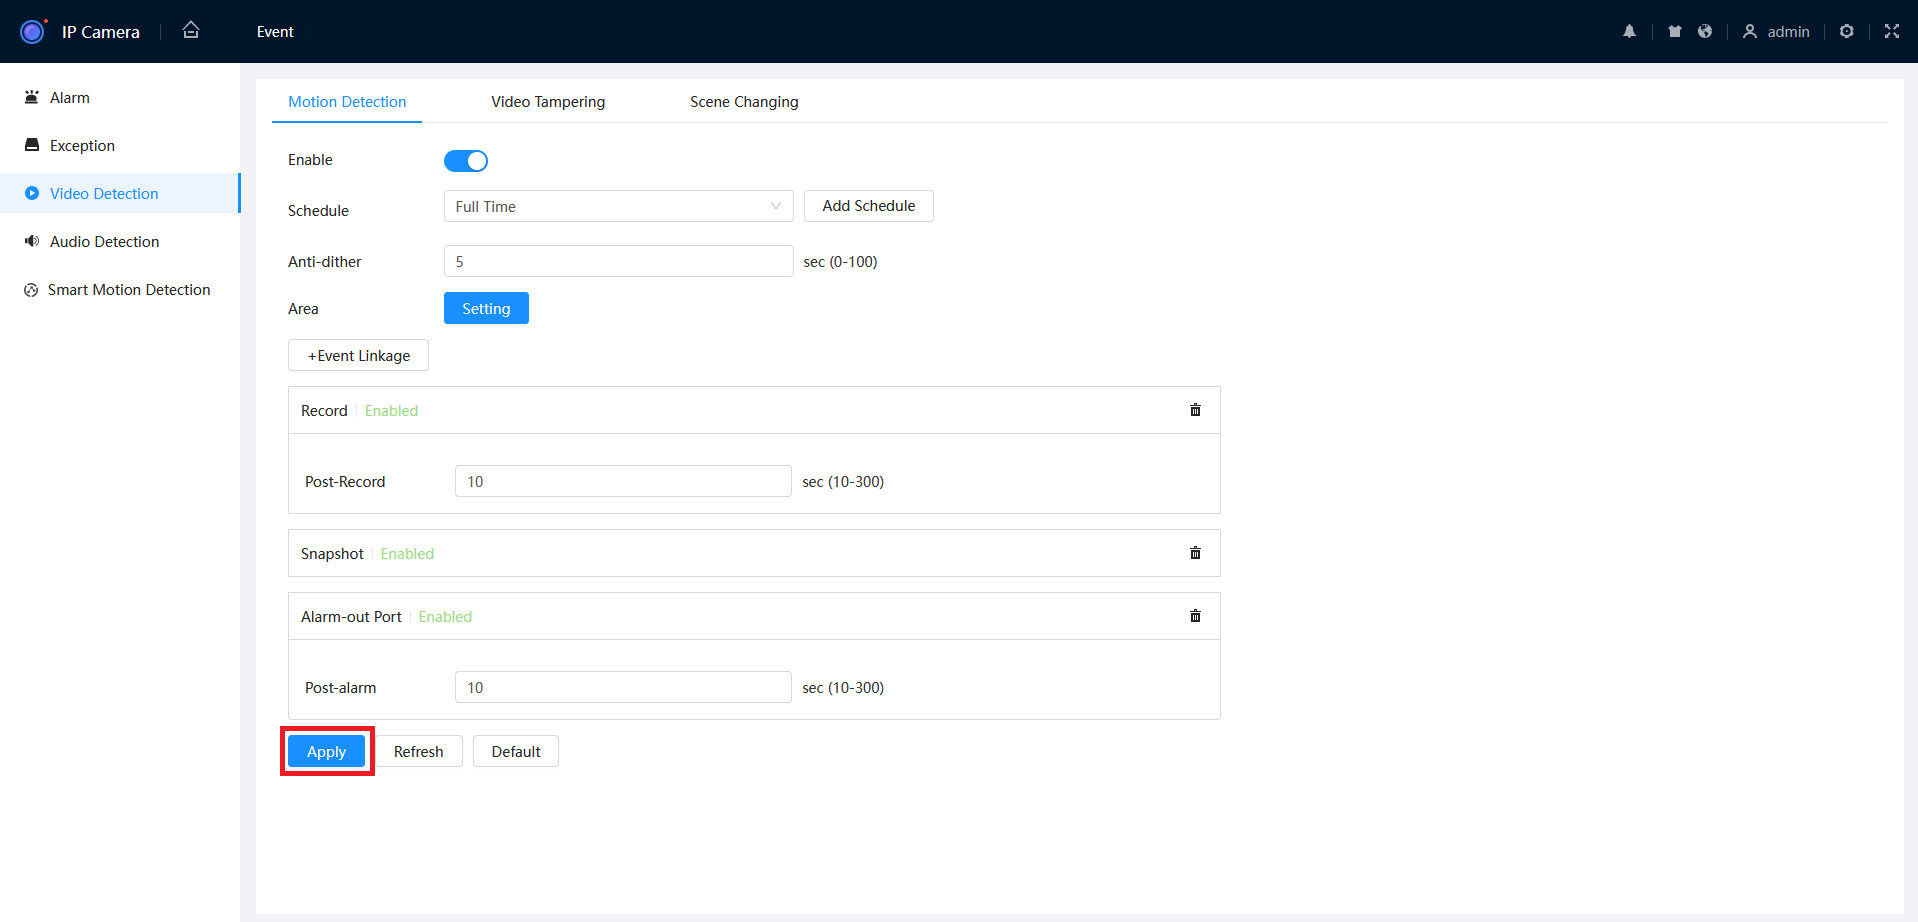
Camera Web Interface (Web 5.0)
- Navigate to Setting > Event > Video Detection > Motion Detection.
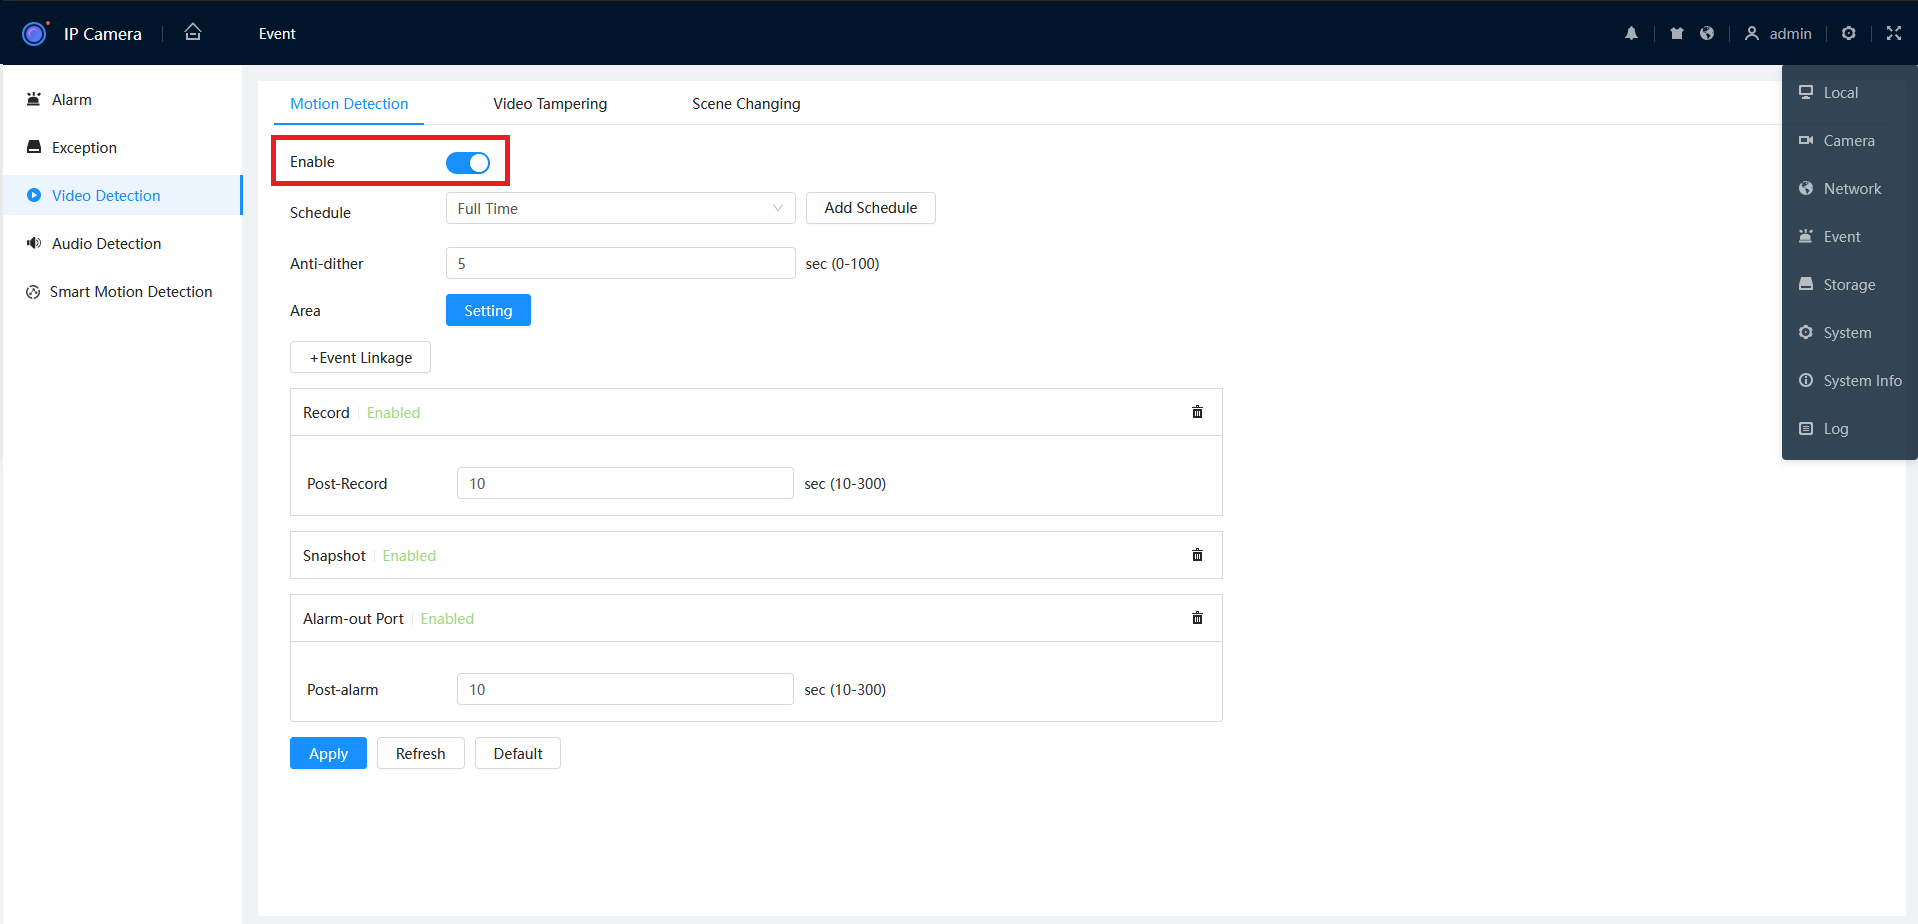
- Click the Enable switch to the on position (Blue).
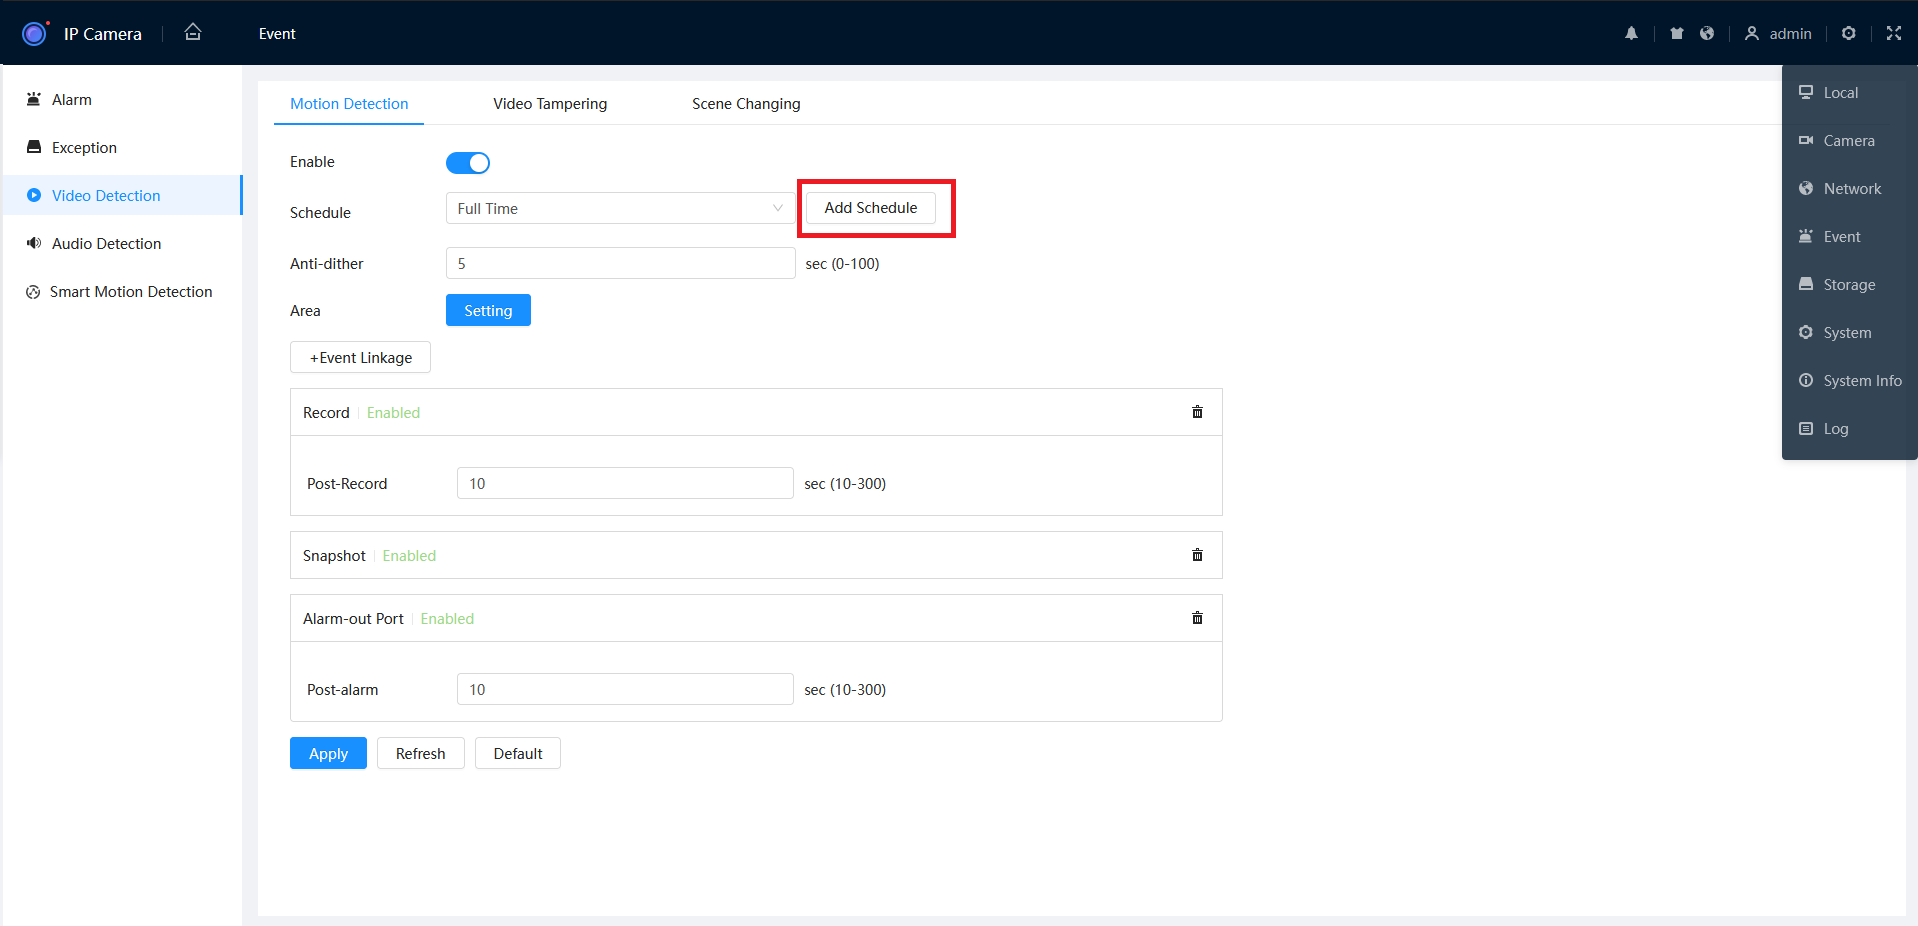
- If you only require motion during certain time periods, click Add Schedule.
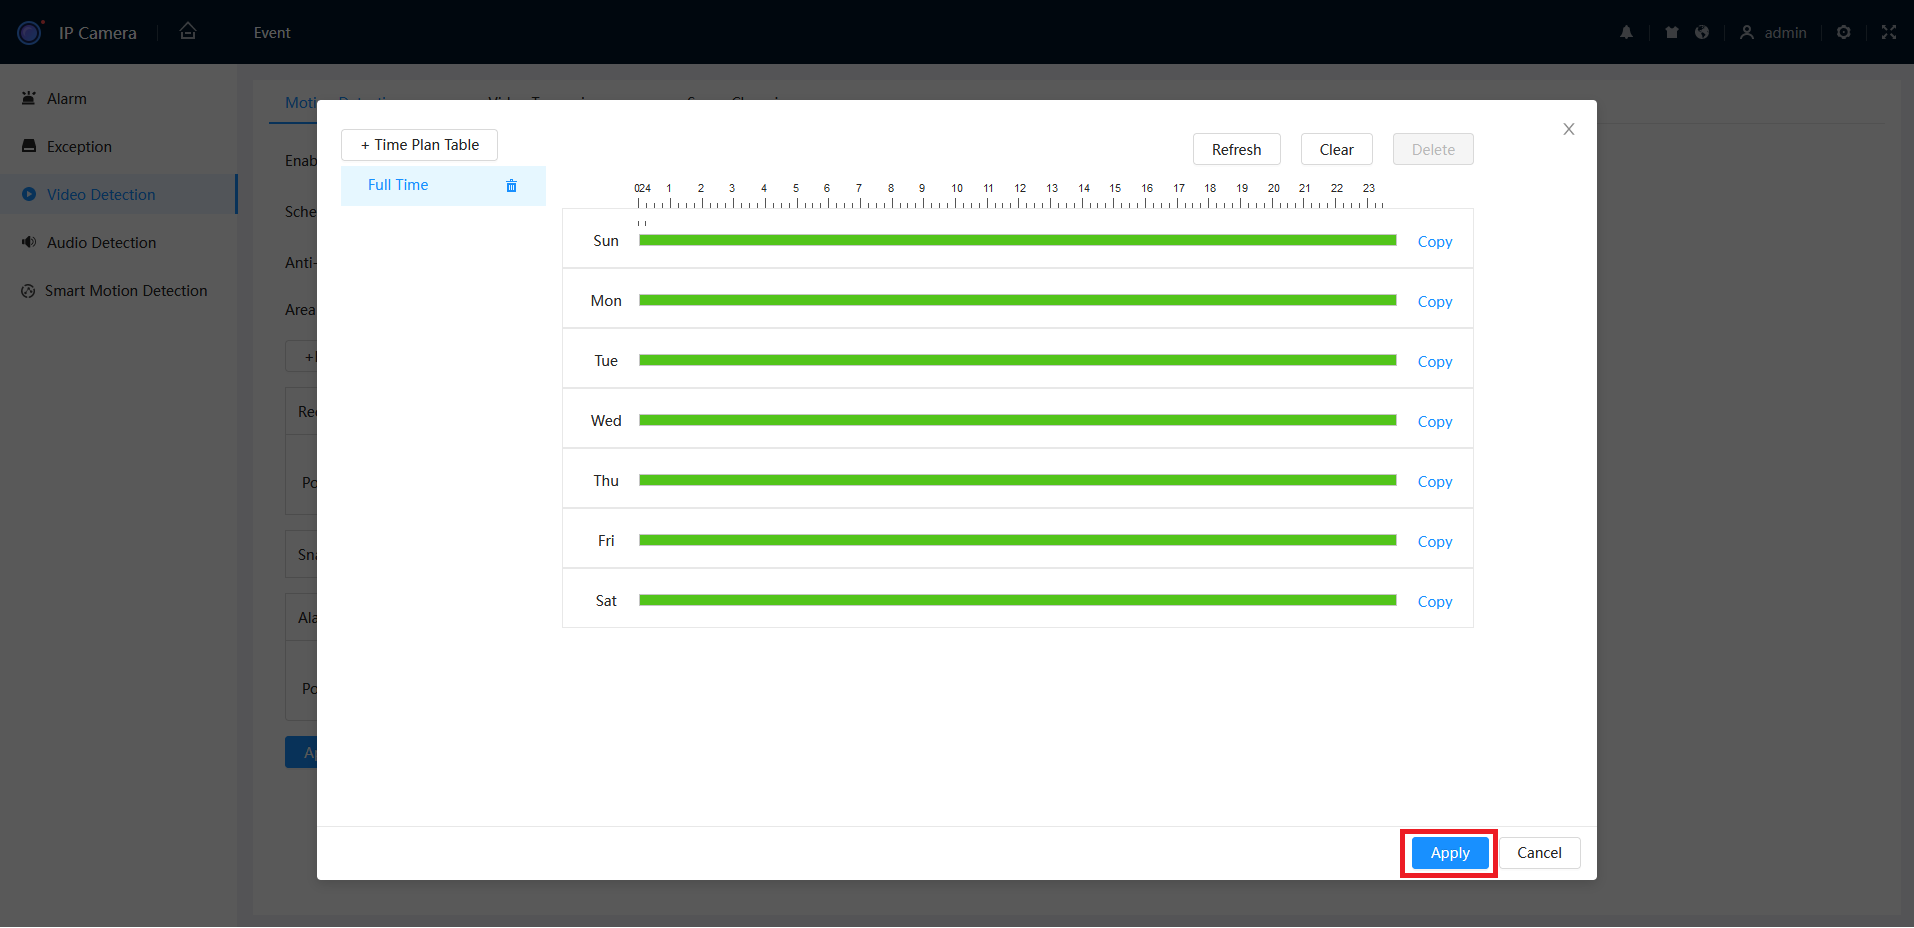
- From the "Add Schedule" you can now configure the active period for Motion Detection. Once the desired times are set, click Apply.
- Once the above steps are complete, click Apply.
Camera Web Interface (Web 3.0)
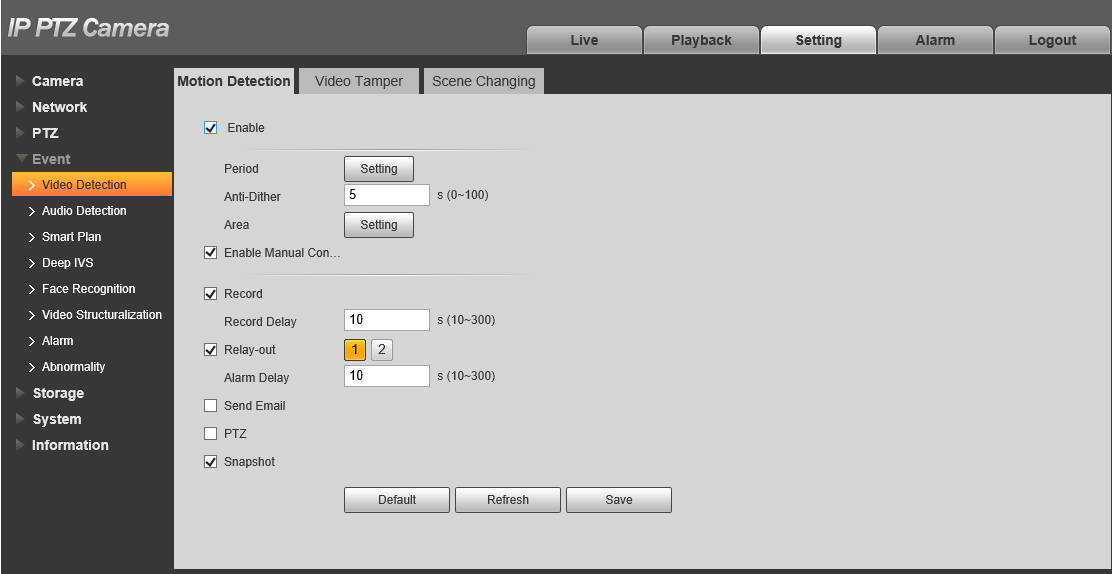
- Navigate to Setting > Event > Video Detection > Motion Detection.
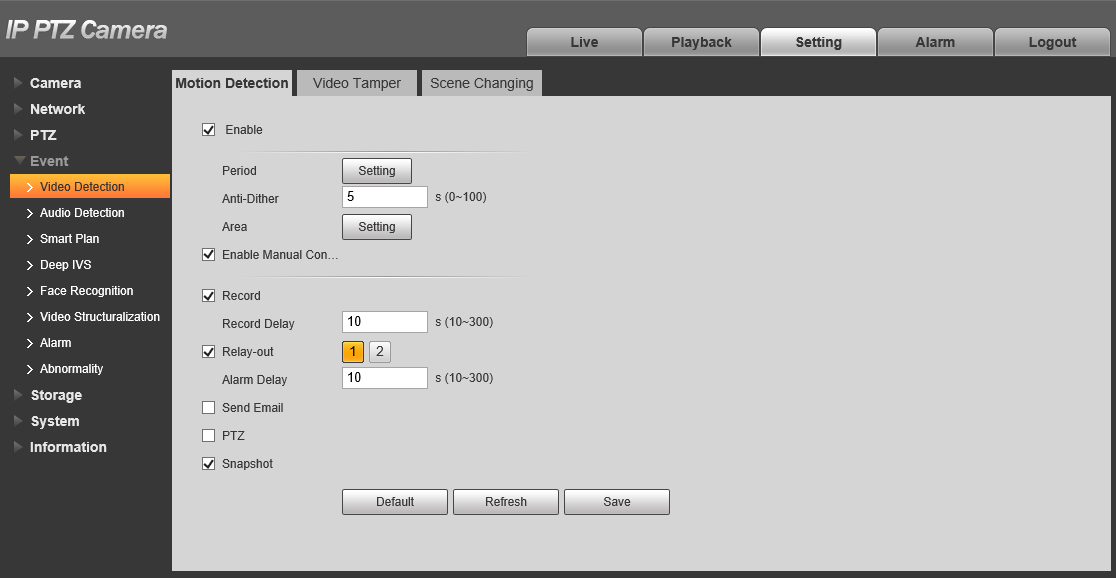

- Tick Enable to enable.

- If the camera is a PTZ, tick Enable Manual Control Trigger to exclude Motion Detection Event triggered by the PTZ being manually moved.

- Click
 next to Period to configure the active period for Motion Detection.
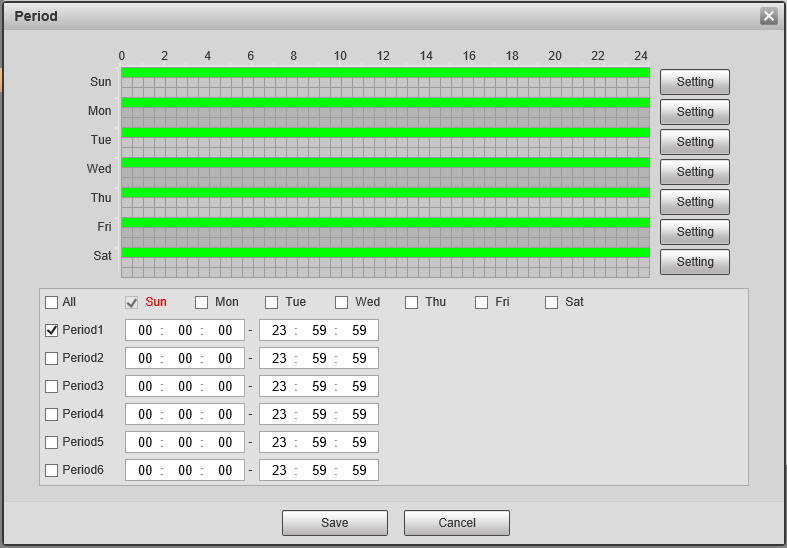
- Configure the schedule, then click
 .
. - Click
 .
.
Additional Settings
| Parameter | Description |
| Anti-Dither | Sets the Camera to only record one motion detection event in the set period. |
| Record | Enable this option if you wish for the camera to record when motion is detected. This requires Motion to be scheduled under Storage > Schedule > Record, and Auto to be selected for Record Mode under Storage > Record Control. |
| Record Delay | How long the camera will continue to record as part of the "motion event" after motion has stopped being detected |
| Relay-out | Enabling this will cause the relay of the camera to trigger when Motion is detected. |
| Alarm Delay | How long the relay will stay triggered for after motion is detected. Requires Relay-out to be enabled. |
| Send Email | Send an Email when Motion is detected. Requires configuration under Network > SMTP(Email) |
| PTZ | Set the PTZ to perform a configured Preset/Tour to Pattern when motion is detected. |
| Snapshot | A Snapshot will be taken when motion is detected. Motion Snapshots will need to be set in the Schedule under Storage > Schedule > Snapshot |
Smart Motion Detection (SMD)
Smart Motion Detection filters Motion Detection events to only active if the object that triggers it is a Human and/or a Vehicle. Motion Detection Must be enabled on the channel for SMD to function.
NVR (Black UI)
- Navigate Main Menu > Event > Ai Settings > SMD
- Select the Channel to apply Smart Motion Detection for, then click Enable.
- Set a Sensitivity level and Effective Targets will trigger it (Humans, Vehicles or both).
- Click Apply to confirm settings.

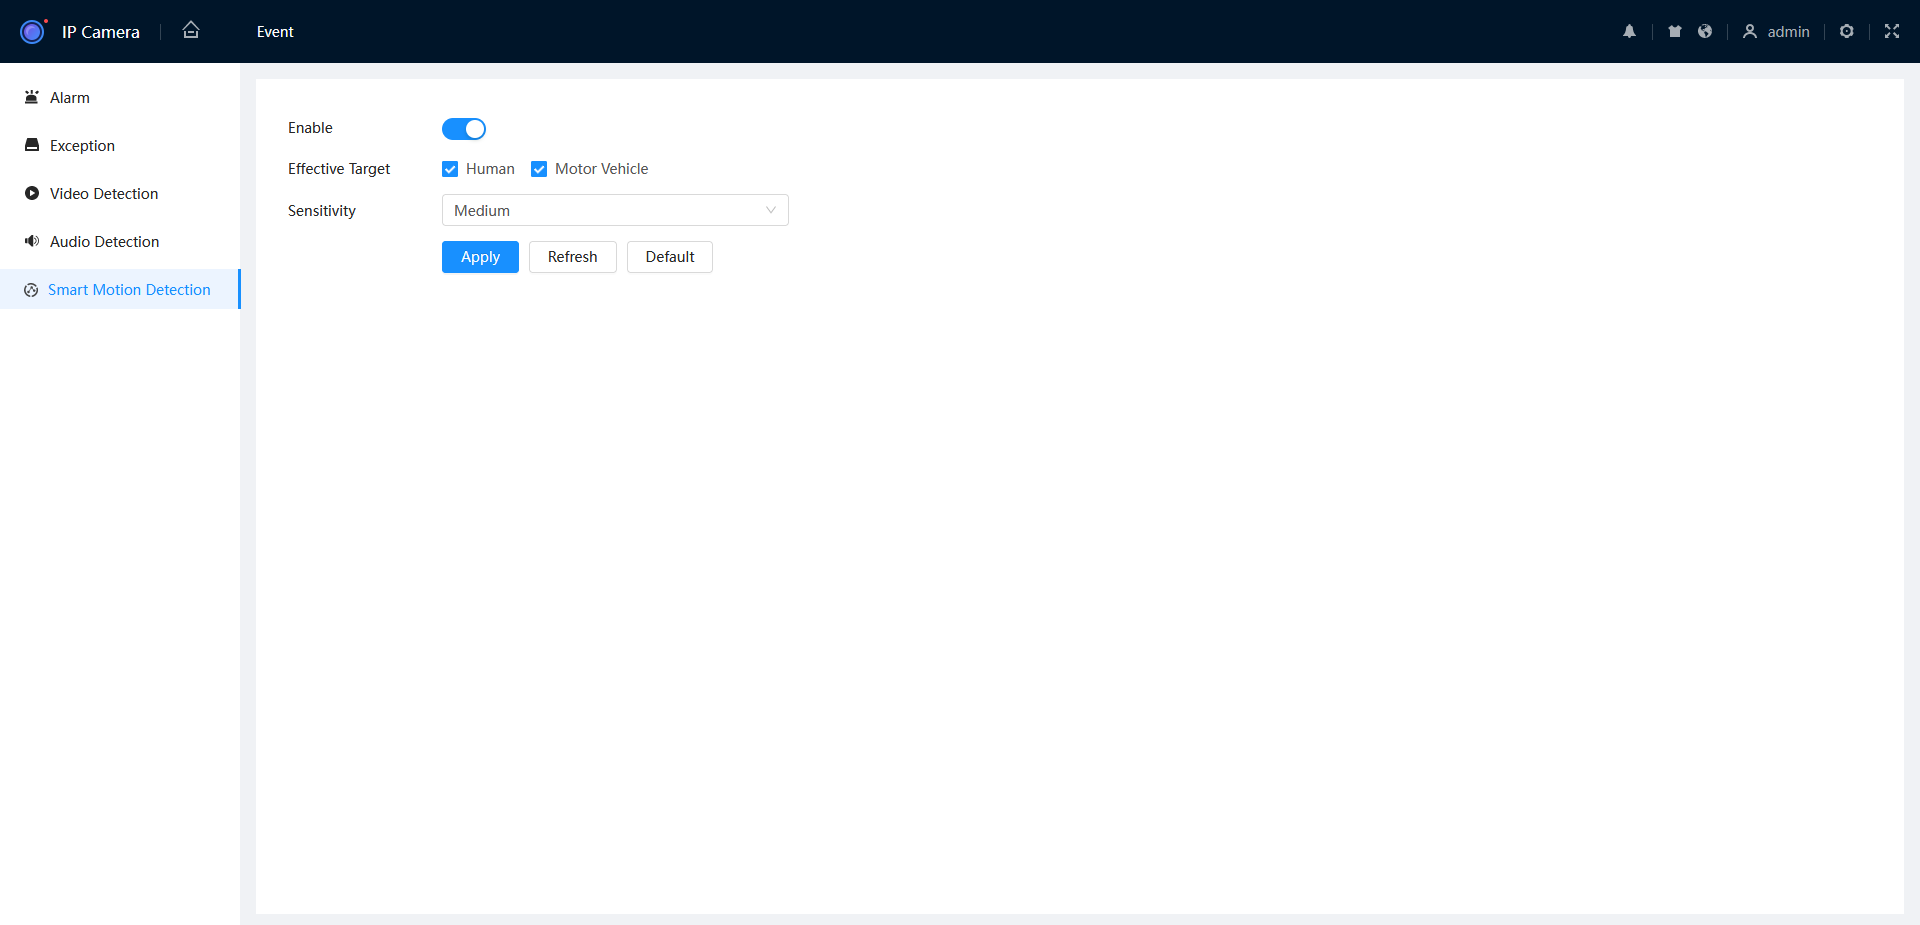
Camera Web Interface (Web 5.0)
- Navigate to Setting > Event > Smart Motion Detection.

- Enable SMD, then click Apply.
Camera Web Interface (Web 3.0)
- Navigate to Setting > Event > Video Detection > Smart Motion Detection.
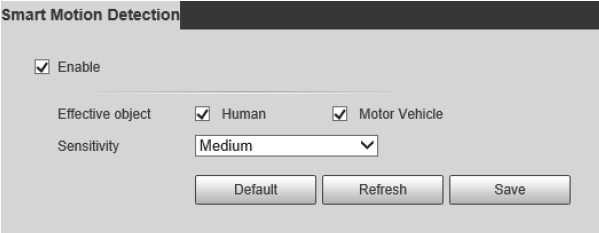
- Tick Enable to enable Smart Motion Detection.
- Tick Human and/or Motor Vehicle.
- Select the Sensitivity.
- Press
 to save your changes.
Additional Setup
Adjusting Trigger Actions
AI Trigger Actions
Event Trigger Actions Explained

-
Schedule: Sets the time when the rule is active and a trigger will occur.

Multiple IVS Rules on Single Camera
If creating multiple IVS rules on a Single camera that are scheduled for different times. Those Schedules must be configured in the Cameras Web interface.
- Anti Dither: The amount of time before an event will get triggered again.
-
Alarm-Out Port: Set if the Event will trigger the local alarm out put on the recorder/Camera

- Post-Alarm: The time the Alarm-out port will be Active for.
-
Show Message: Displays a Message on top of the live view that the Event has Occurred.

- Send Email: Will send the email with the event details. Requires configuration.
- Report Alarm: Sends Trigger Details to the Alarm Centre/Third party monitoring. Requires Configuration.
- Record Channel: Sets if the event will be recorded. (AI search, coloured on playback timeline).
- Post Record: Sets recording time after event occurred.
-
PTZ Linkage: Allows calling PTZ functions from other channels PTZ Linkage

- Tour: Starts a tour of selected channels.
- Picture Storage: Set if the event will take a snapshot of the event.
- Buzzer: Set if the NVR will Beep and event triggers.
- Log: If the Event will be Logged.
- Alarm Tone: Plays a designated .wav file in response to an event trigger. This can be imported via a USB flash drive to the NVR.
- Camera Audio: Selects to play Audio from active deterrent Camera.
-
Remote Warning Light: Select to set off Active deterrent lights.

Adjusting Motion Detection Sensitivity and Region
Adjusting Motion Detection Region & Sensitivity
If motion detection is triggering too easily, follow the below steps to adjust th...
If motion detection is triggering too easily, follow the below steps to adjust the sensitivity and region of detection.
Black GUI
- Go to Main Menu, then Alarm.
- On the left hand side select Video Detection. Select the Region Setting button.

-
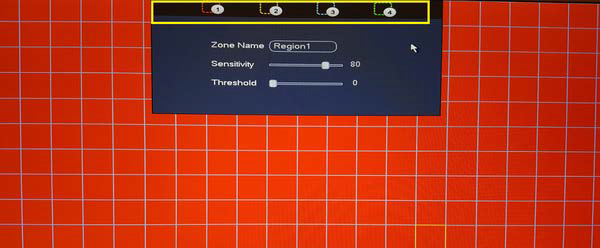
Adjust the Sensitivity and Threshold. There are multiple region settings if you wish to set different Sensitivity and Threshold settings for different parts of the image. Sensitivity is how easy it is to trigger (30-70 is recommended).Threshold is how much motion is required to trigger an event. (1-10 is recommended).

- Adjust the area of detection by clicking and dragging on the red squares. Red squares are where motion will be detected. Clear squares are where motion will not be detected. Right Click to exit, and select Apply.
Blue GUI
Go to Main Menu > Event > Video Detection > Motion Detection
- Click the Setup/Setting button next to Region to access the zone, sensitivity and threshold settings for motion detection.
- Adjust the Sensitivity & Threshold to suit your environment. High Sensitivity, Low Threshold mans it will be easy to trigger. Low Sensitivity, High Threshold means it is hard to trigger.
- Adjust the area of detection by clicking and dragging on the red squares. Red squares are where motion will be detected. Clear squares are where motion will not be detected. Right Click to exit, and select Apply.
Sensitivity: Determines how sensitive the zone is to movement. 1 being the lowest and 100 the highest. (30-70 is recommended)
Threshold: Determines the minimum size of an object that can trigger motion detection. 1 Being the lowest and 100 the highest (1-10 is recommended).
Camera Web Interface
- Navigate to Setting > Event > Video Detection > Motion Detection
- Click next to Period to configure the active period for Motion Detection.

- Configure the schedule, then click .
- Click next to Area to configure the active motion detection area and it's sensitivity.
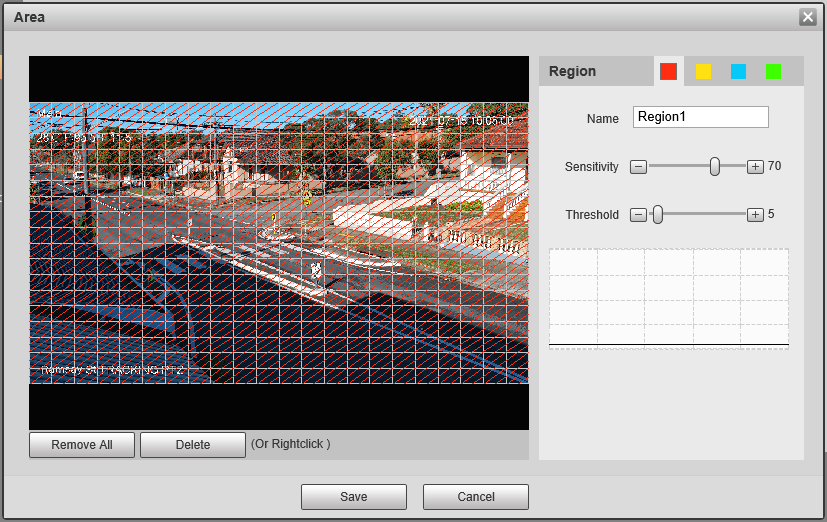
- Add/Remove the coloured squares to configure where motion will be detected. For example you may want to remove the coloured squares that overlap trees.
- Adjust Sensitivity & Threshold if necessary. There are four different colours so you can have four different settings.
Sensitivity is how easy it is to trigger 30-70 is recommended.
Threshold is how much has to move to trigger 1-10 is recommended.
High Sensitivity/Low Threshold will pick up motion easier, whereas Low Sensitivity/High Threshold will be harder to trigger. - Click .