SMTP Email Setup
(Black GUI) Setup
- Navigate to Main Menu > Network > Email
- Tick Enable.
- Enter your SMTP server and Port. Alternatively, you can google your email provider with SMTP, eg, “Bigpond smtp settings”
- Enter your Email address and Password into the Username and Password fields
- Input a different address for sender and receiver as they cannot be the same.
- Enter an email Subject.
- Select the encryption type, depending on your email provider, they may use different settings.
- Click Apply.
(Black GUI) Setup Example
| SMTP Server | smtp.gmail.com | Email provider |
| Port | 587 | Port encryption. In this eg TLS =587. |
| Username | sparemail@gmail.com | Use a spare email or make a new email |
| Password | eg admin123 (Whatever the password is for the spare email) | Password the spare email |
| Sender | sparemail@gmail.com |
Re input the spare email in the sender. So both the Username and Sender are the same. |
| Encryption Type | TLS | Encryption Type |
| Receiver | mainmail@gmail.com | The email you want to receive notifications from. Click the +. After clicking the + the email will be placed in the box which will receive the notifcations. You can have multiple receiver emails. |
.png)
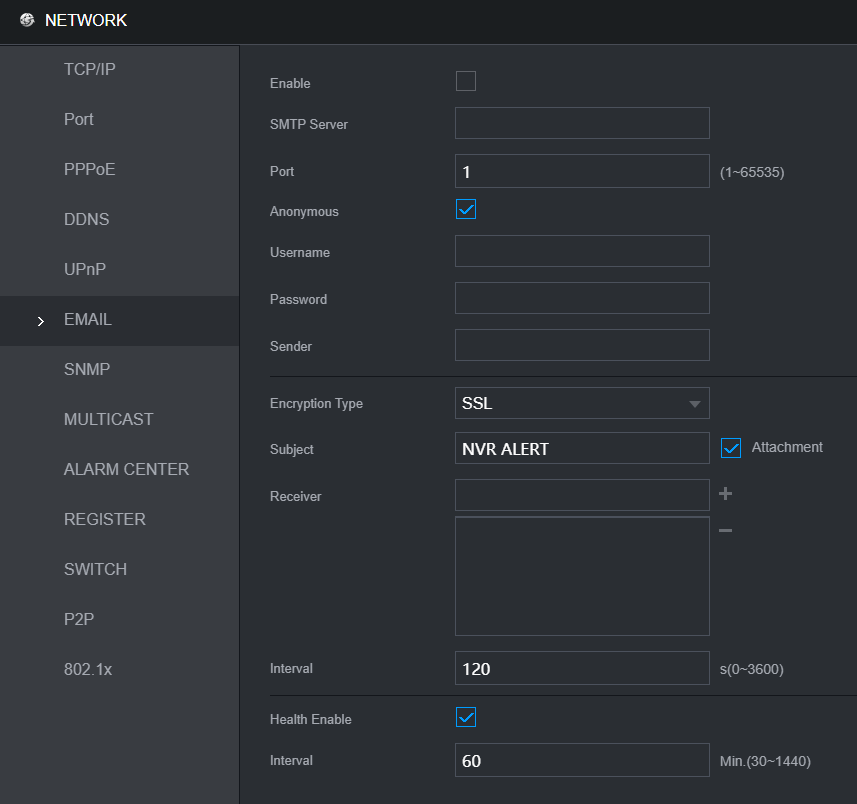
(Blue GUI) Setup
- Navigate to Main Menu > Network > Email
- Tick Enable.
- Enter your SMTP server and Port. Alternatively, you can google your email provider with SMTP, eg, “Bigpond smtp settings”
- Enter your Email address and Password into the Username and Password fields
- Input a different address for sender and receiver as they cannot be the same.
- Enter an email Subject.
- Select the encryption type, depending on your email provider, they may use different settings.
- Click Apply.

Extra Steps for Gmail Account
Google has updated its account security policy to block all third-party apps that only use account name and password to log in to your Google account. The below steps will allow you to make a separate "App Password" which you will can in the NVR in place of your account password.
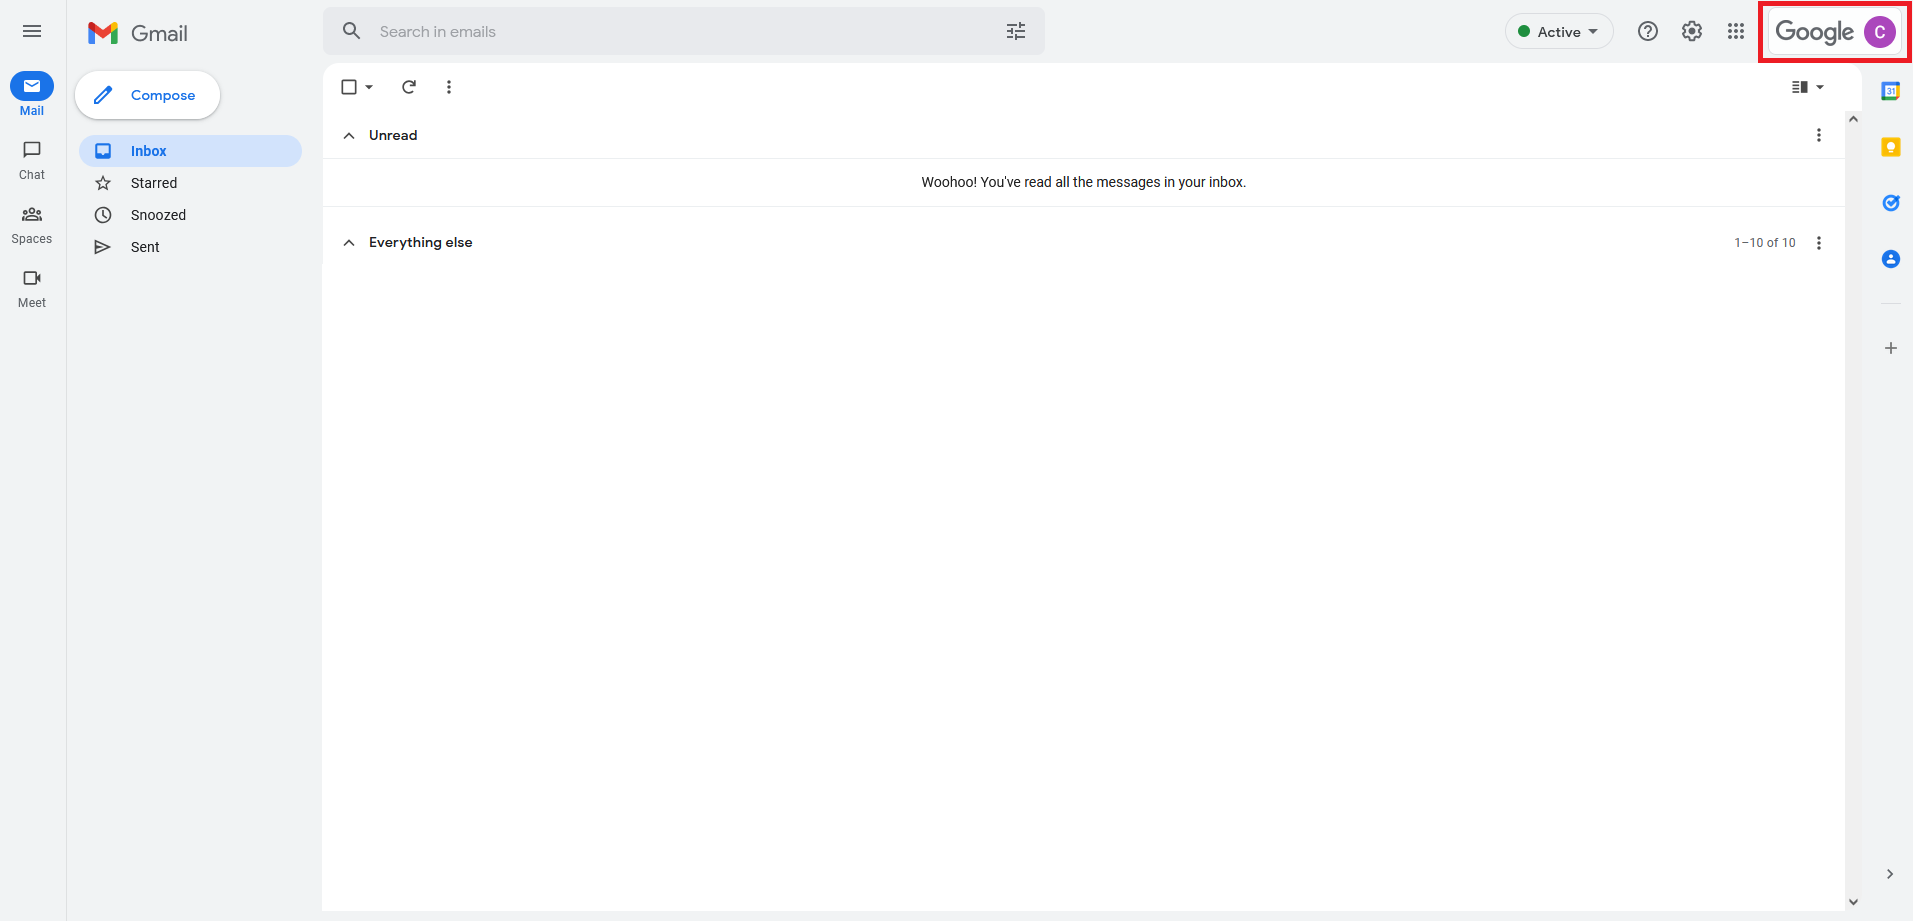
- Using your phone/computer, log into your Gmail account, then click the Account Icon at the top right.
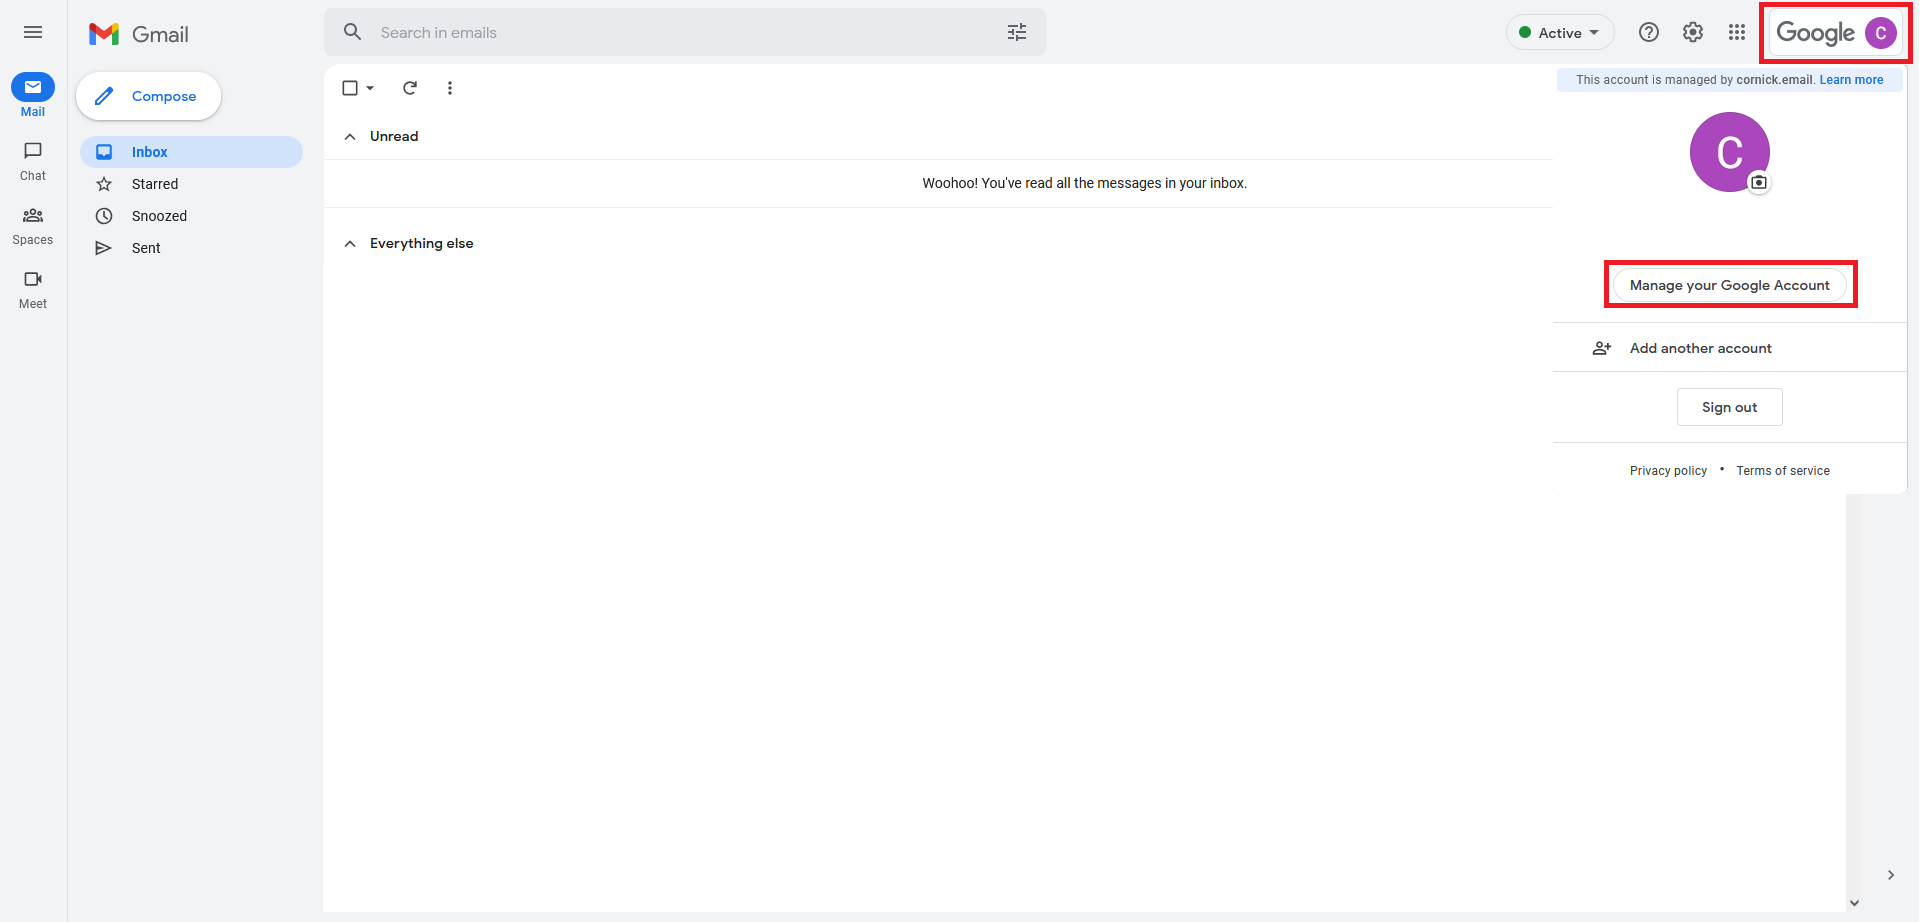
- Select Manage your Google Account.
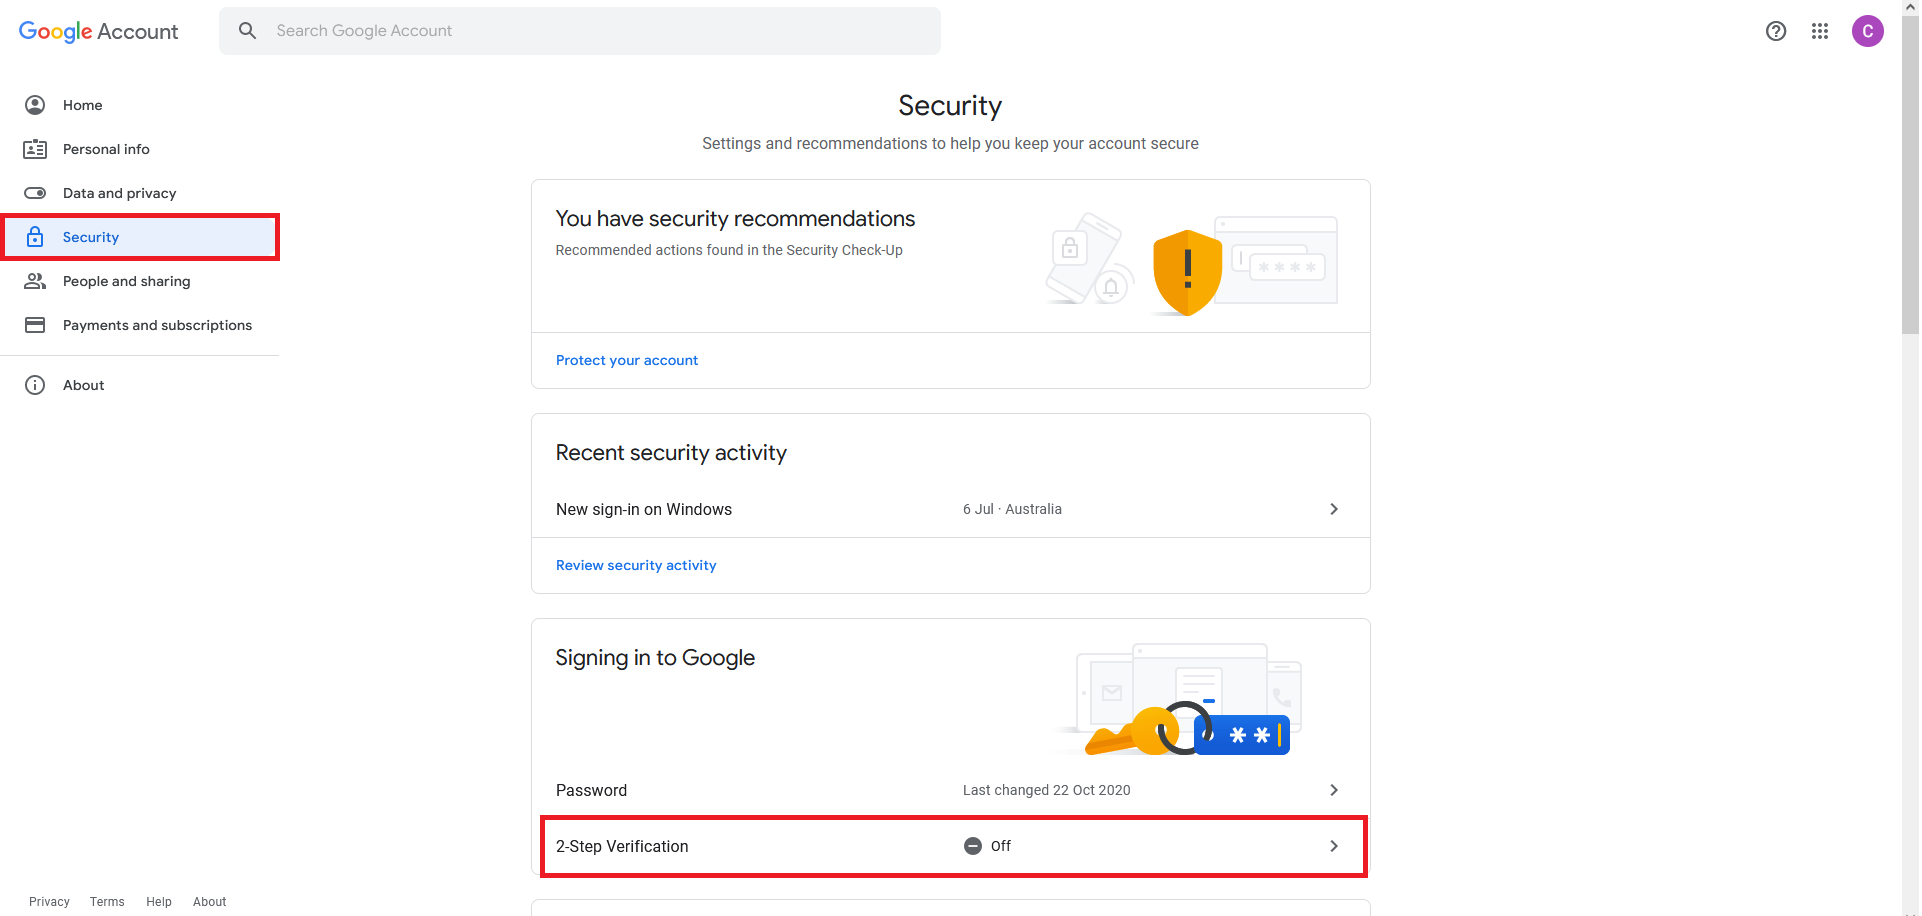
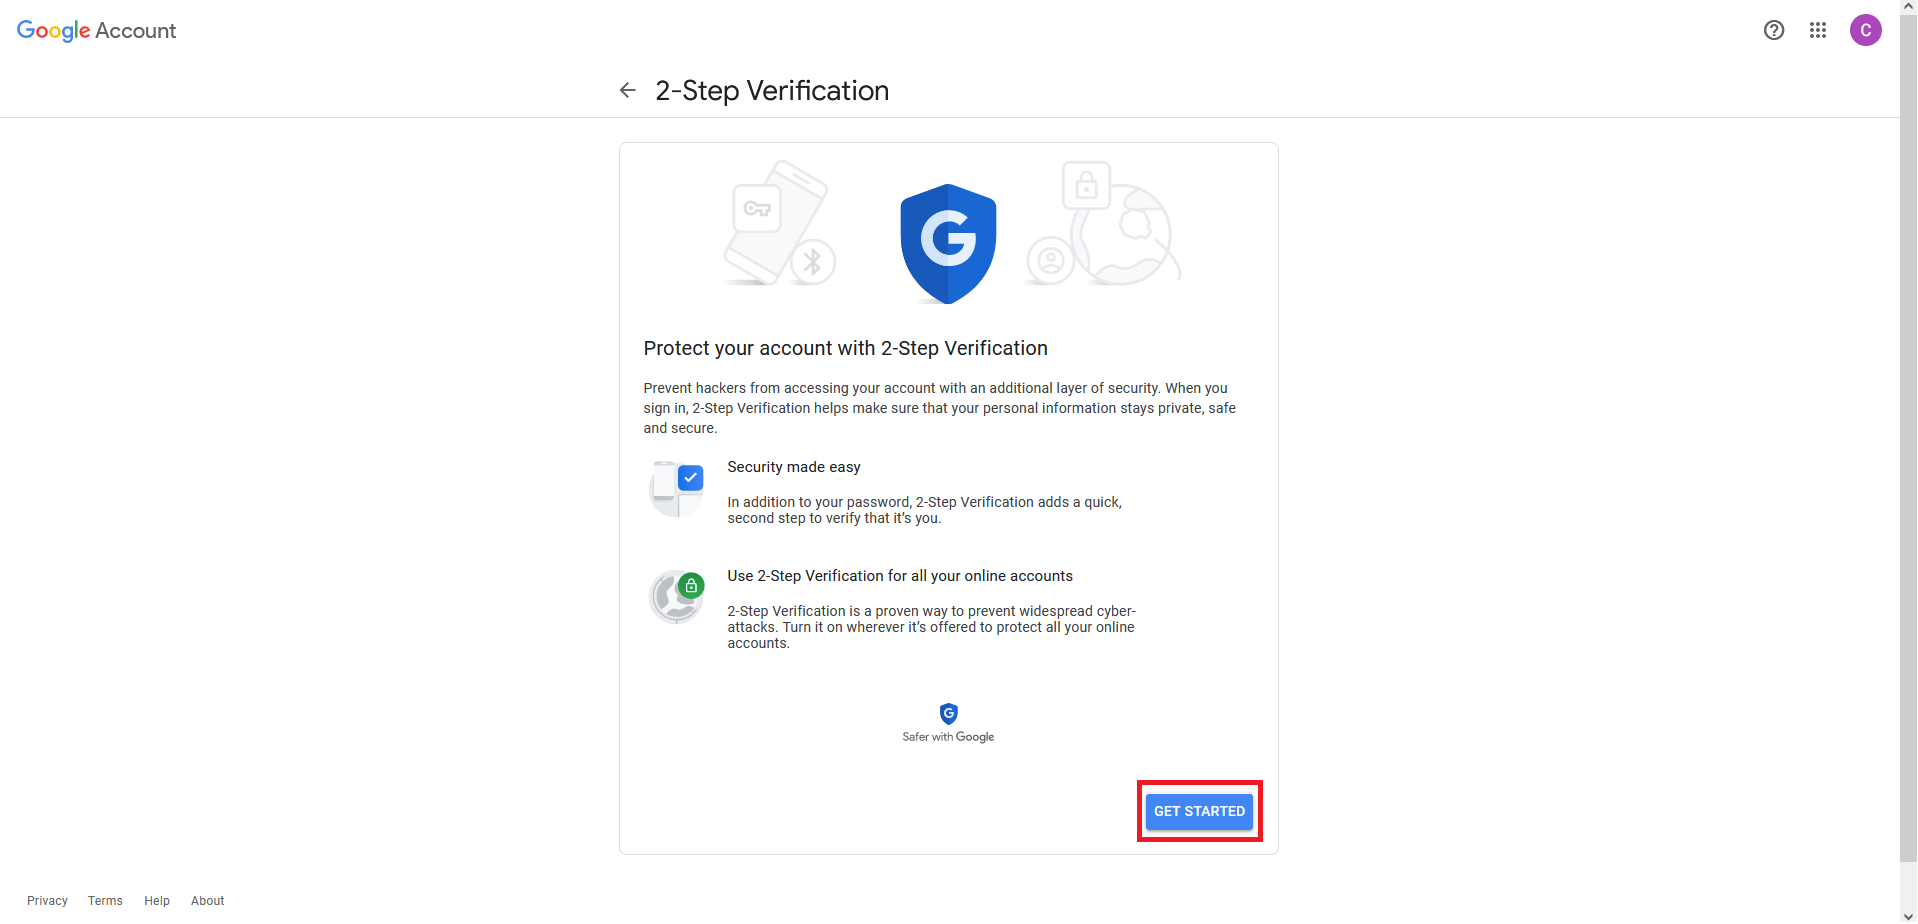
- Select Security from the list on the left. If 2-Step Verification is already listed as "On", skip to Step 5. If 2-Step Verification is listed as "off", click the arrow to the right of 2-Step Verification.
- Select Get Started and then follow through all the steps to setup 2-Step Verification for your Gmail account.
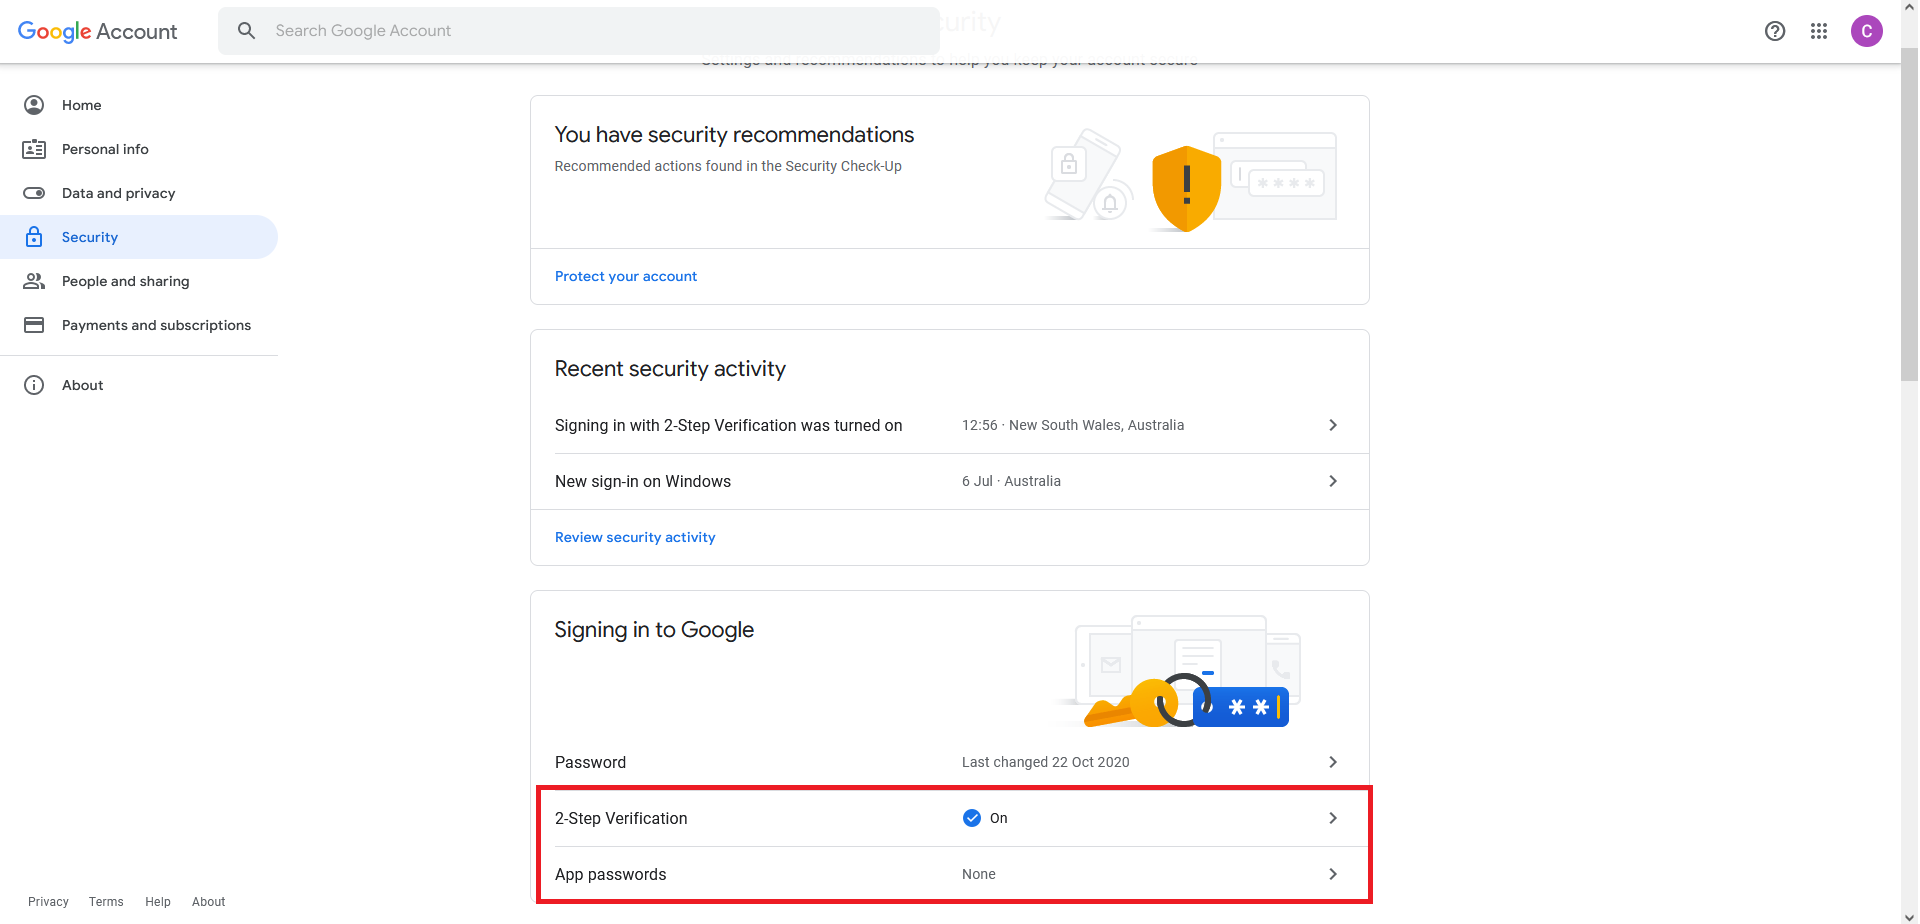
- Confirm that 2 Step Verification is listed as "On", then select the arrow to the right of App Passwords.
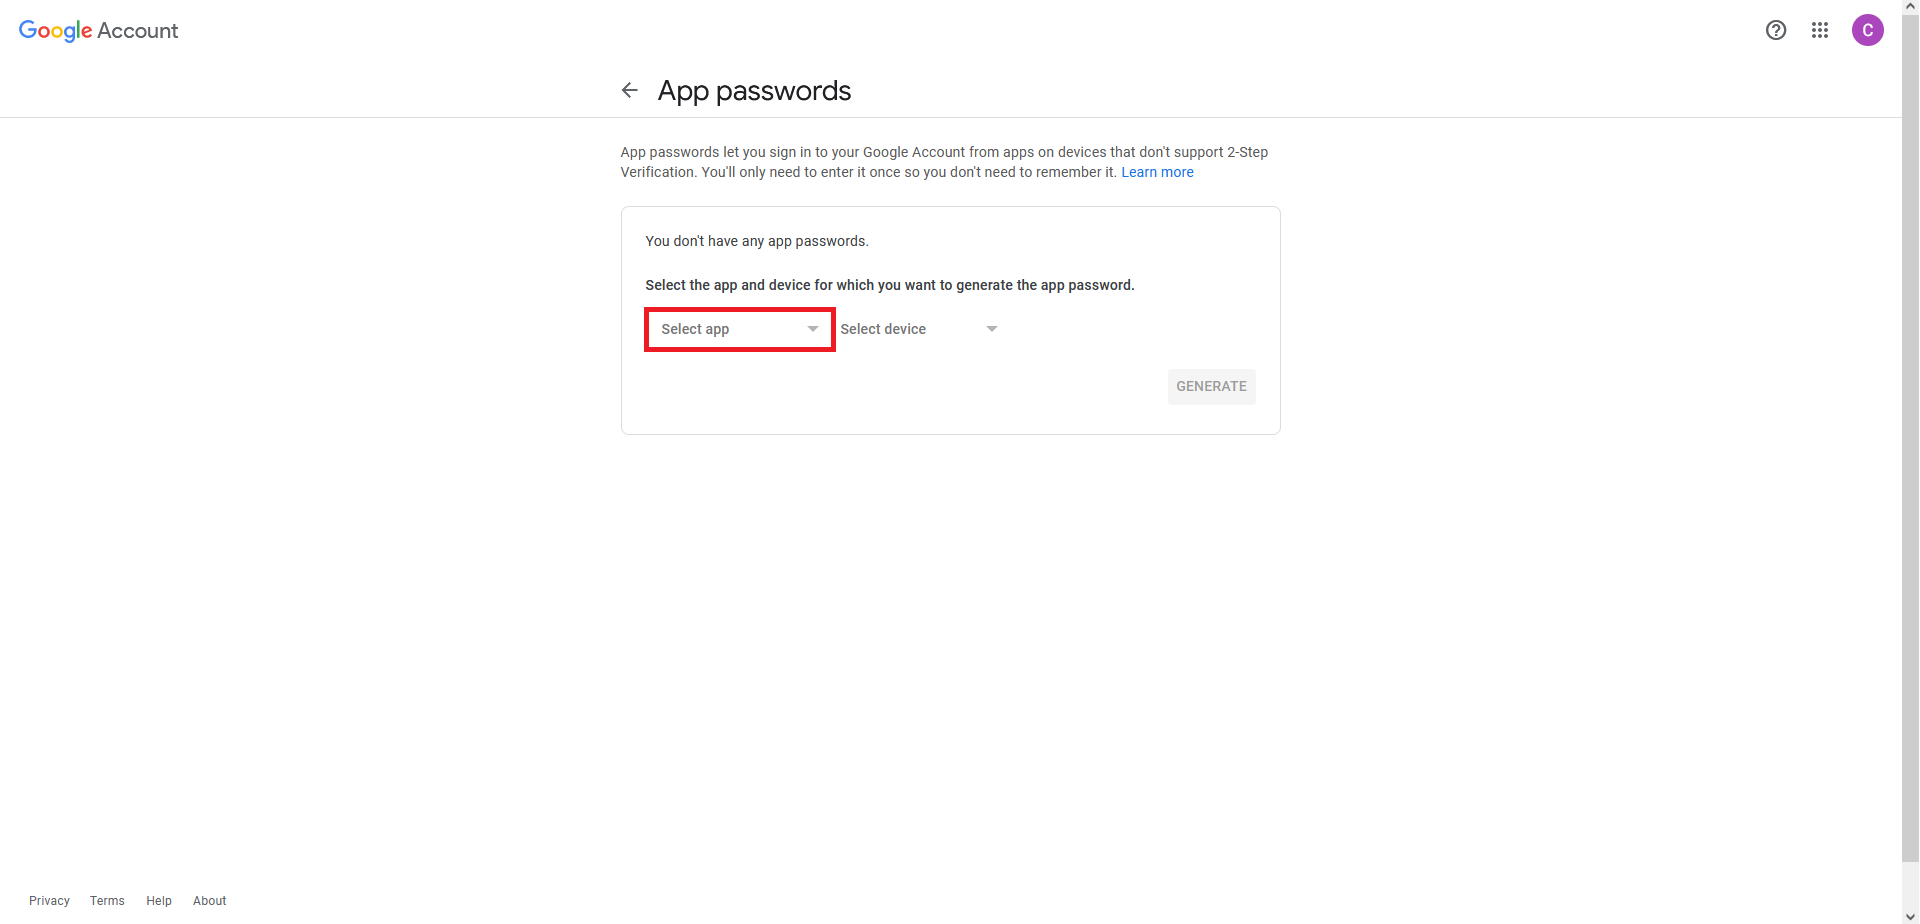
- Click Select App, then select Mail from the drop-down.
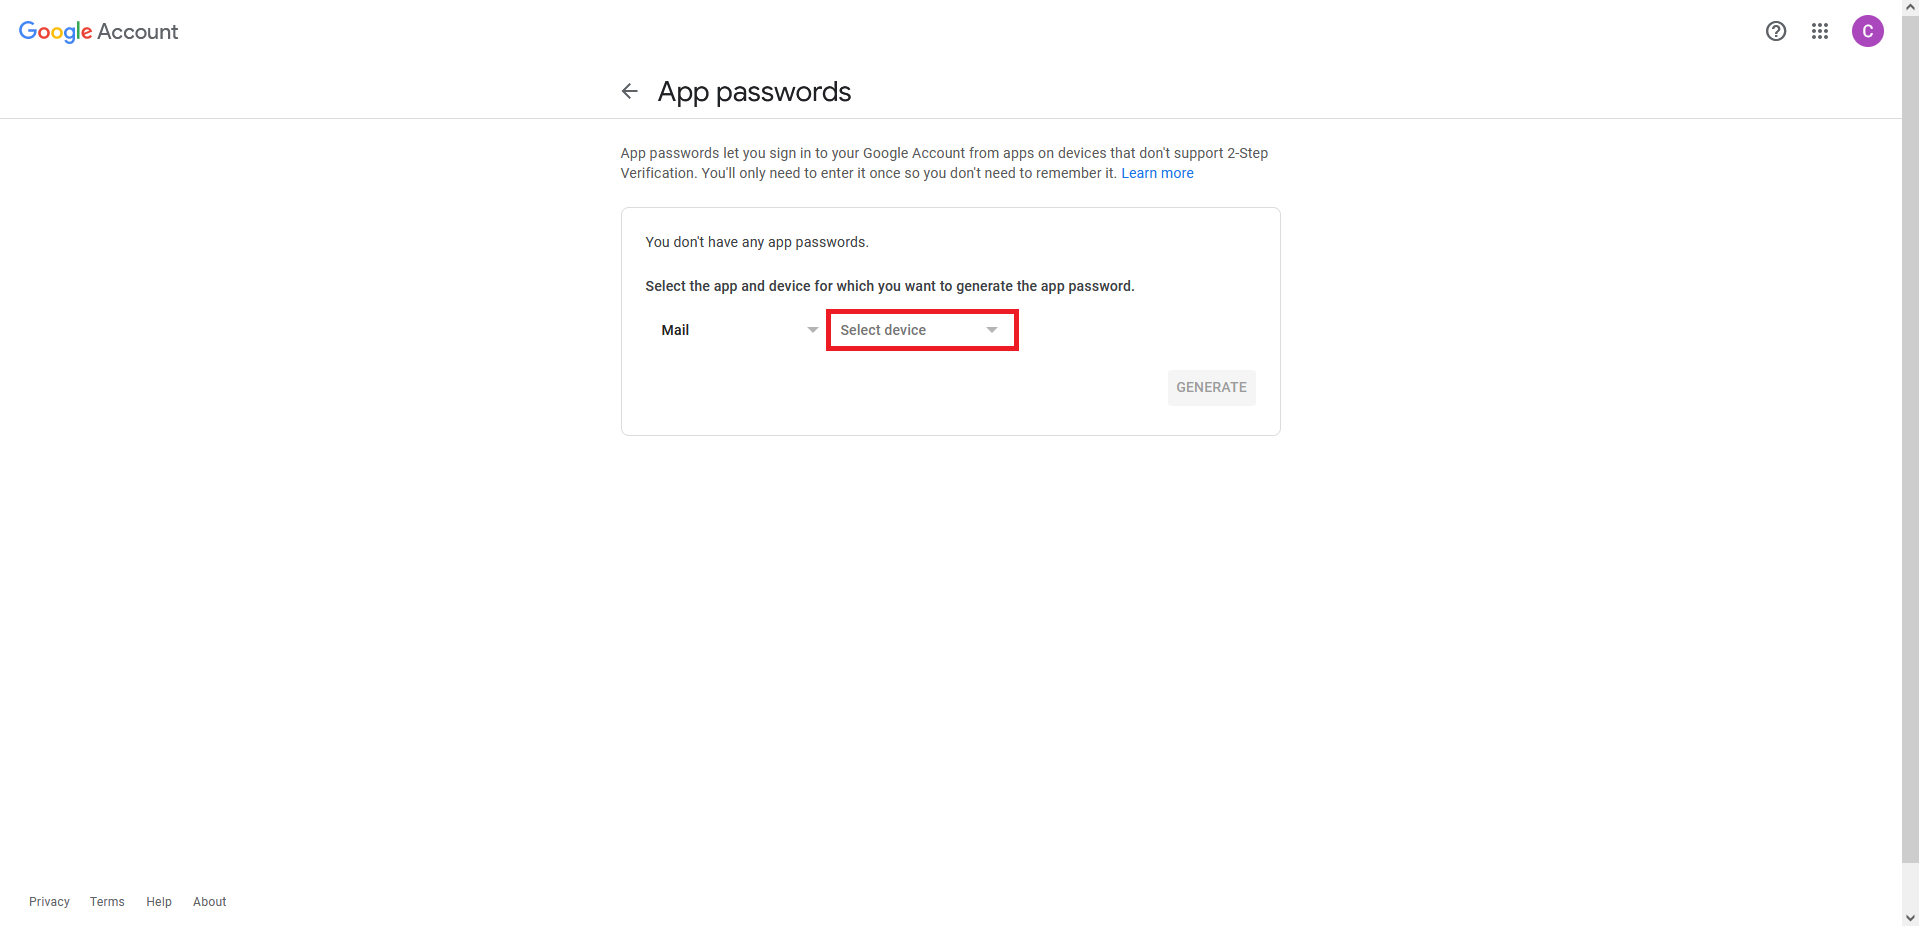
- Click Select Device, Then select Other (Custom name) from the drop-down.
- Click on the field and type in the desired name (e.g "VIP NVR"), then select Generate.
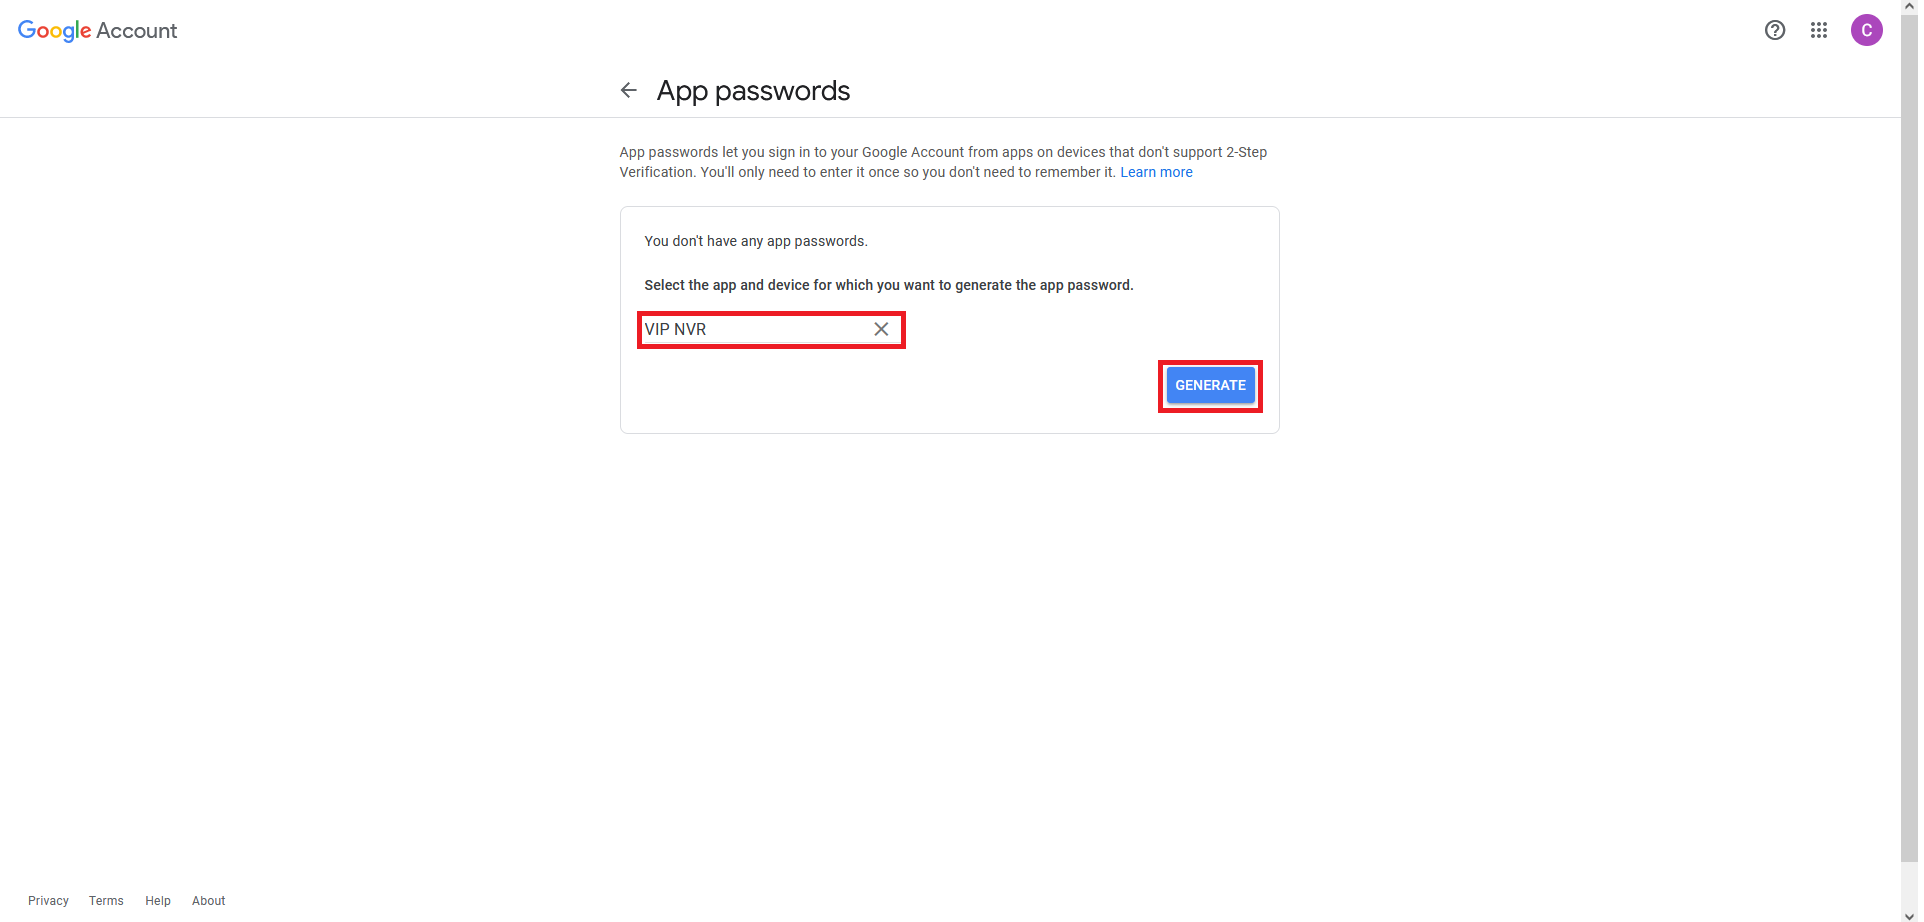
- Take note of the unique password that has now been generated for use with your NVR.
Once these steps have been completed, follow the steps below using the new "App Password" instead of your email account password.
DeleteCommon SMTP Provider Settings
| Provider | SMTP Server | Port |
| Gmail |
smtp.google.com (OLD) smtp.gmail.com (NEW) |
SSL = 465 or TLS = 587 |
| Yahoo | smtp.mail.yahoo.com | SSL = 465 or TLS = 587 |
| Hotmail | smtp-mail.outlook.com | SSL = 465 or TLS = 587 |
| Telstra | smtp.telstra.com | SSL = 465 or TLS = 587 |
Configuring Events to Send Emails
Once your SMTP settings have been configured you will need to enable the Send Email option for the event you wish to receive emails for. E.g Motion Detection, or IVS.
Black GUI IVS Rule Example
Event Trigger Actions Explained

-
Schedule: Sets the time when the rule is active and a trigger will occur.

Multiple IVS Rules on Single Camera
If creating multiple IVS rules on a Single camera that are scheduled for different times. Those Schedules must be configured in the Cameras Web interface.
- Anti Dither: The amount of time before an event will get triggered again.
-
Alarm-Out Port: Set if the Event will trigger the local alarm out put on the recorder/Camera

- Post-Alarm: The time the Alarm-out port will be Active for.
-
Show Message: Displays a Message on top of the live view that the Event has Occurred.

- Send Email: Will send the email with the event details. Requires configuration.
- Report Alarm: Sends Trigger Details to the Alarm Centre/Third party monitoring. Requires Configuration.
- Record Channel: Sets if the event will be recorded. (AI search, coloured on playback timeline).
- Post Record: Sets recording time after event occurred.
-
PTZ Linkage: Allows calling PTZ functions from other channels PTZ Linkage

- Tour: Starts a tour of selected channels.
- Picture Storage: Set if the event will take a snapshot of the event.
- Buzzer: Set if the NVR will Beep and event triggers.
- Log: If the Event will be Logged.
- Alarm Tone: Plays a designated .wav file in response to an event trigger. This can be imported via a USB flash drive to the NVR.
- Camera Audio: Selects to play Audio from active deterrent Camera.
-
Remote Warning Light: Select to set off Active deterrent lights.

Blue GUI Motion Detection Example
