Product Overview
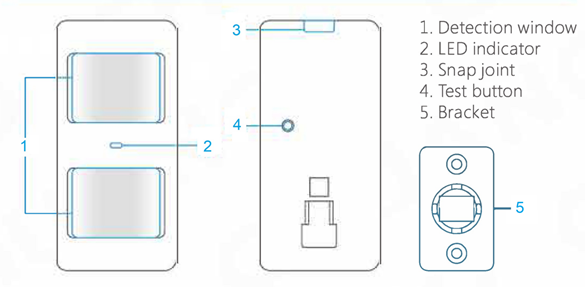
LED Indication
Display |
Meaning |
Blink continuously |
Self-testing |
Blink once |
Intrusion detected |
Blink twice |
Testing mode is finished, the detector enters power-saving mode |
Blink once every 3 seconds |
Low battery, please replace the battery as soon as possible |
PCB Layout
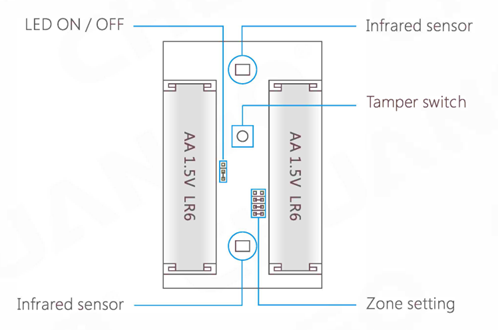
Infrared sensor: It detects the infrared rays released by human body motion, please don't touch the surface and always keep it clean.
Tamper switch: Once the case is opened in work mode, the tamper switch is triggered and then generates an alarm signal.
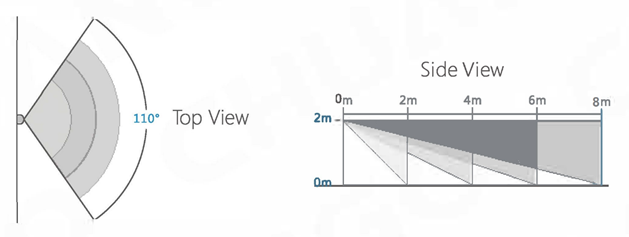
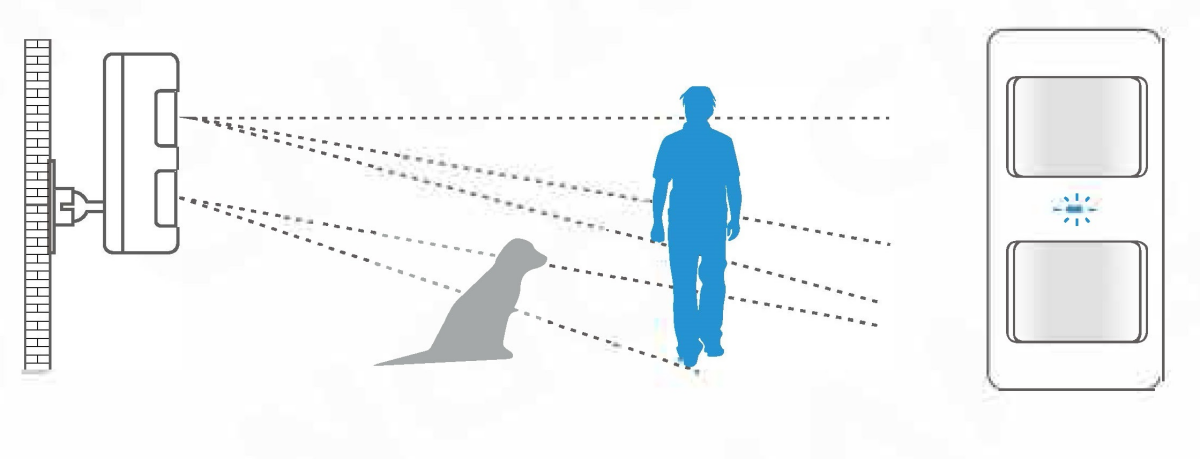
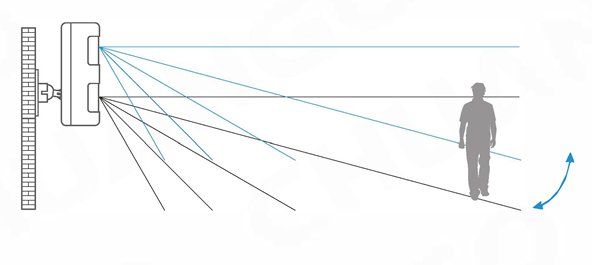
Detection Range
Pet Immune Function
This sensor adopts dual detection window design to improve detection accuracy. It was only when both two detection windows detect body movement will it trigger an alarm. While only one window will not cause an alarm. Based on this principle, pets less than 25 kgs will not be detected by the sensor.
Pairing to Control Panel
Control panel enters paring state
Make the control panel in paring state.
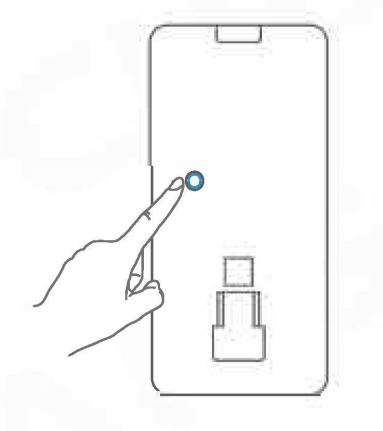
Press the test button
Press the test button on the back of the detector twice, the control panel beeps once to indicate a successful pairing.
Note: If the control panel beeps twice when the above operation is done, it means the detector has been paired already.
Working Mode
Testing Mode
Press twice on the test button, the detector enters testing mode and detects once every movement at the front lens of the detector. After 3 minutes, the LED indicator blinks twice, and the detector switches to power saving mode.
Power Saving Mode
This motion detector has smart power saving function. If the detector is triggered twice within 3 minutes, it enters sleeping state immediately to save power. During this period, any movement detected does not generate an alarm. After no movement within the next 3 minutes, it goes back to working mode again.
Note:
When the detector goes into sleeping mode, the precondition of alarm is that nobody
moves in 3 minutes in the detection area, otherwise it will remain in the sleeping mode.
If the detector is in sleeping mode, it is suggested to leave the room and make sure
nobody moves in the detection area. The detector will go back to working mode in 3 minutes.
Test
It is to check whether the PIR Motion Detector can work properly or not.
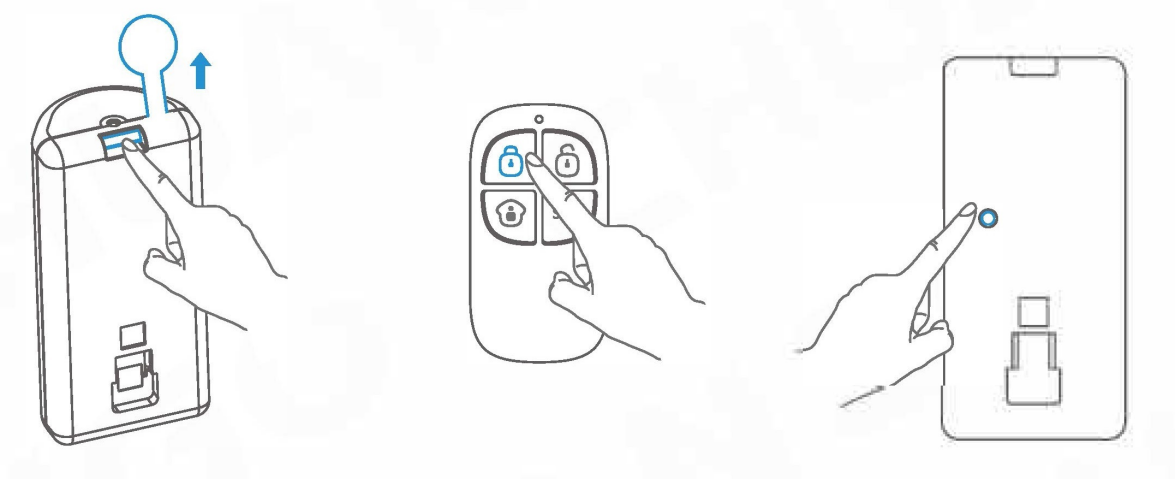
Remove the insulation strip
Press down the snap joint, open the case, and remove the insulation strip to activate batteries. After self-testing for 1 minute, it enters working mode.
Arm the system
Make sure the alarm system is in armed state.
Trigger an alarm
Press the test button until an alarm is triggered. The detector is proved to be connected successfully and ready for installation.
Installation
After making sure the detector works normally, do as follows:
Choose a suitable installation location
It is recommended to mount it at the height of 2m from the ground.

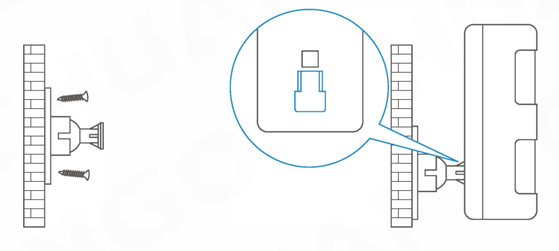
Fix the detector
Fix the bracket on the wall with screws and attach the detector to the bracket.
Test the PIR motion detector
Press the test button at the back. It switches to the testing mode and sustains for 3 minutes. Walk in the detection scope and observe the LED. When body movement is detected, the LED blinks once.
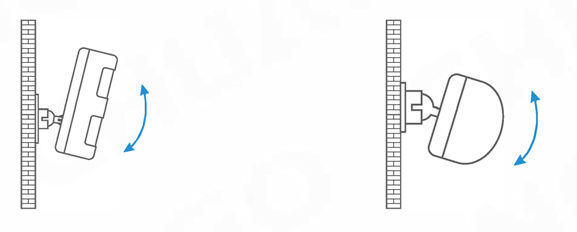
Adjust the angle
Adjust the bracket angle to achieve the best detection effect.
Installation Notices
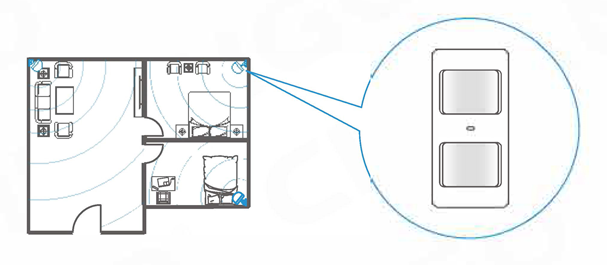
Mount the detector to a location close to the entry or exit.
The detector aims at preventing intrusion. Detecting human movement at the entry or exit is critical for security.