If remote access is all that is required please see our P2P guide Here.
Port forwarding is a network configuration technique that enables external devices to access services on a private network, which otherwise wouldn't be directly accessible from the outside. With port forwarding, you can connect from a local computer to another server.
Port Forwarding Steps
The default ports associated with this process:
Port 80 - This a HTTP traffic port that serves up the webpage you see in Internet Explorer.
Port 37777 - This is a TCP type video streaming port that is necessary for viewing video using any method, i.e. there must be a port forwarding rule for this port enabled on your router or remote viewing will not work.
Port 37778 - This is a UDP type data streaming port that is optional.
Port 554 - This is an optional TCP and UDP type port that allows video to be accessed from the Recorder using RTSP protocol.
-
Determine Network Information needed.
The first thing will be to determine all the network information needed.
Gateway IP Address: The default IP address of your router; your computer and Recorder must be connected to this gateway and have an IP address that conforms to this Gateway IP. (Can be found using ipconfig command in cmd prompt)
External IP Address: The IP address for your internet connection provided by your ISP. This is your IP address on the Internet. All of the computers on your local network are behind this IP address. (Can be determined from google searches what is my IP etc.) https://whatismyipaddress.com/
Recorder IP address: The IP address of your Recorder. Found in Network > TCP/IP
Change Recorder to Static IP, making sure DHCP is turned off.
Ports that need to be port forwarded: Found in Network > Port the defaults are 80, and 37777, 37778 and 554 if you are planning to use RTSP streaming
-
Set port Fording rules on Router.
Depending on your router the following images will be different, with possibly different names for the forward settings as well as different method of adding rules.
Login into your router using the router IP address found via ipconfig.
Type the IP address of the router into URL, Then login into your router.
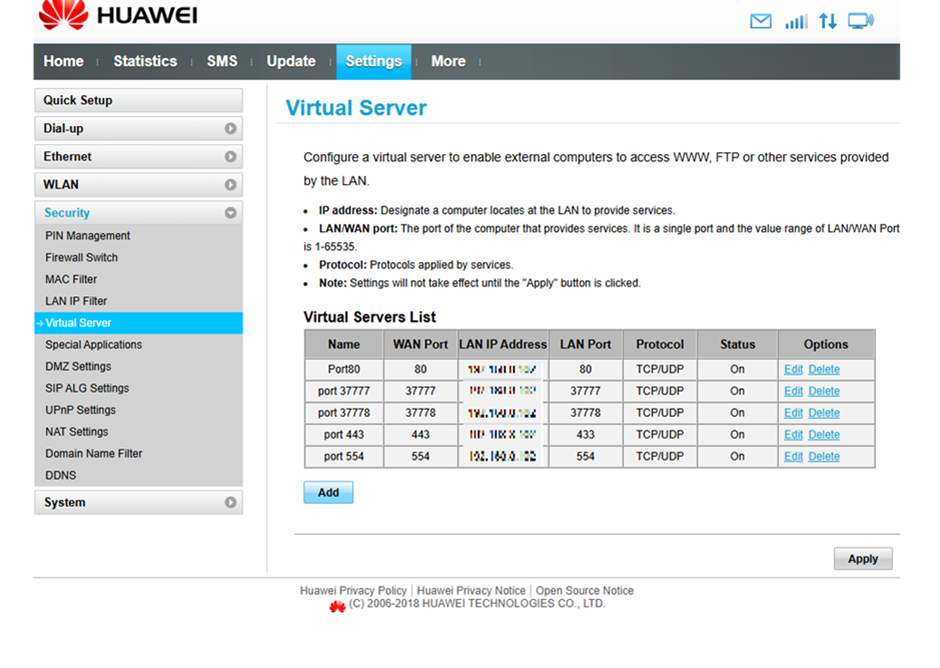
Find the port forwarding menu. In this example its under Security > Virtual Serve
- Add your Port Forwarding Rules
- Name of the port rule.
- The WAN or inbound port.
- The local IP address of Recorder.
- The format of the rule, TCP or UDP
- The local port of the Recorder.
4. Test to see if the ports are open.
Using a site like https://canyouseeme.org/ can verify if your port settings are done correctly.
5. Try to login.
Through a computer on a different network by typing your yourpublicip:port80 (192.168.1.108:80) you should get the login screen of your Recorder.
Delete
DDNS
dynamic DNS (DDNS)
Is a service that maps internet domain names to IP addresses, automatically updating if or when an IP address changes.
It is used for when you have a public IP address that changes, the DDNS that points to that address will update, so when logging into your device off site, you can login into the domain rather then into the changing up address.
for example, instead of remembering IP addresses like 192.168.1.108 that may constantly change, you can access your devices through the internet via an easily remembered web address such as yourcamera.dyndns.com
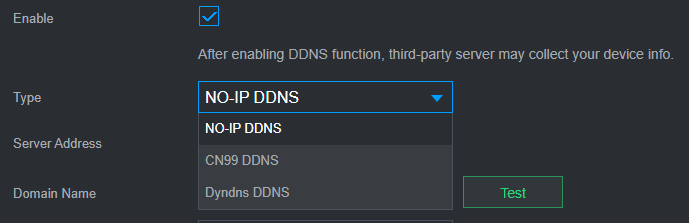
To Setup DDNS navigate to Network > DDNS
The DDNS services that are available to use (They may be different on your machine)
Input the DDNS Information provided to you when signing up for one of those services.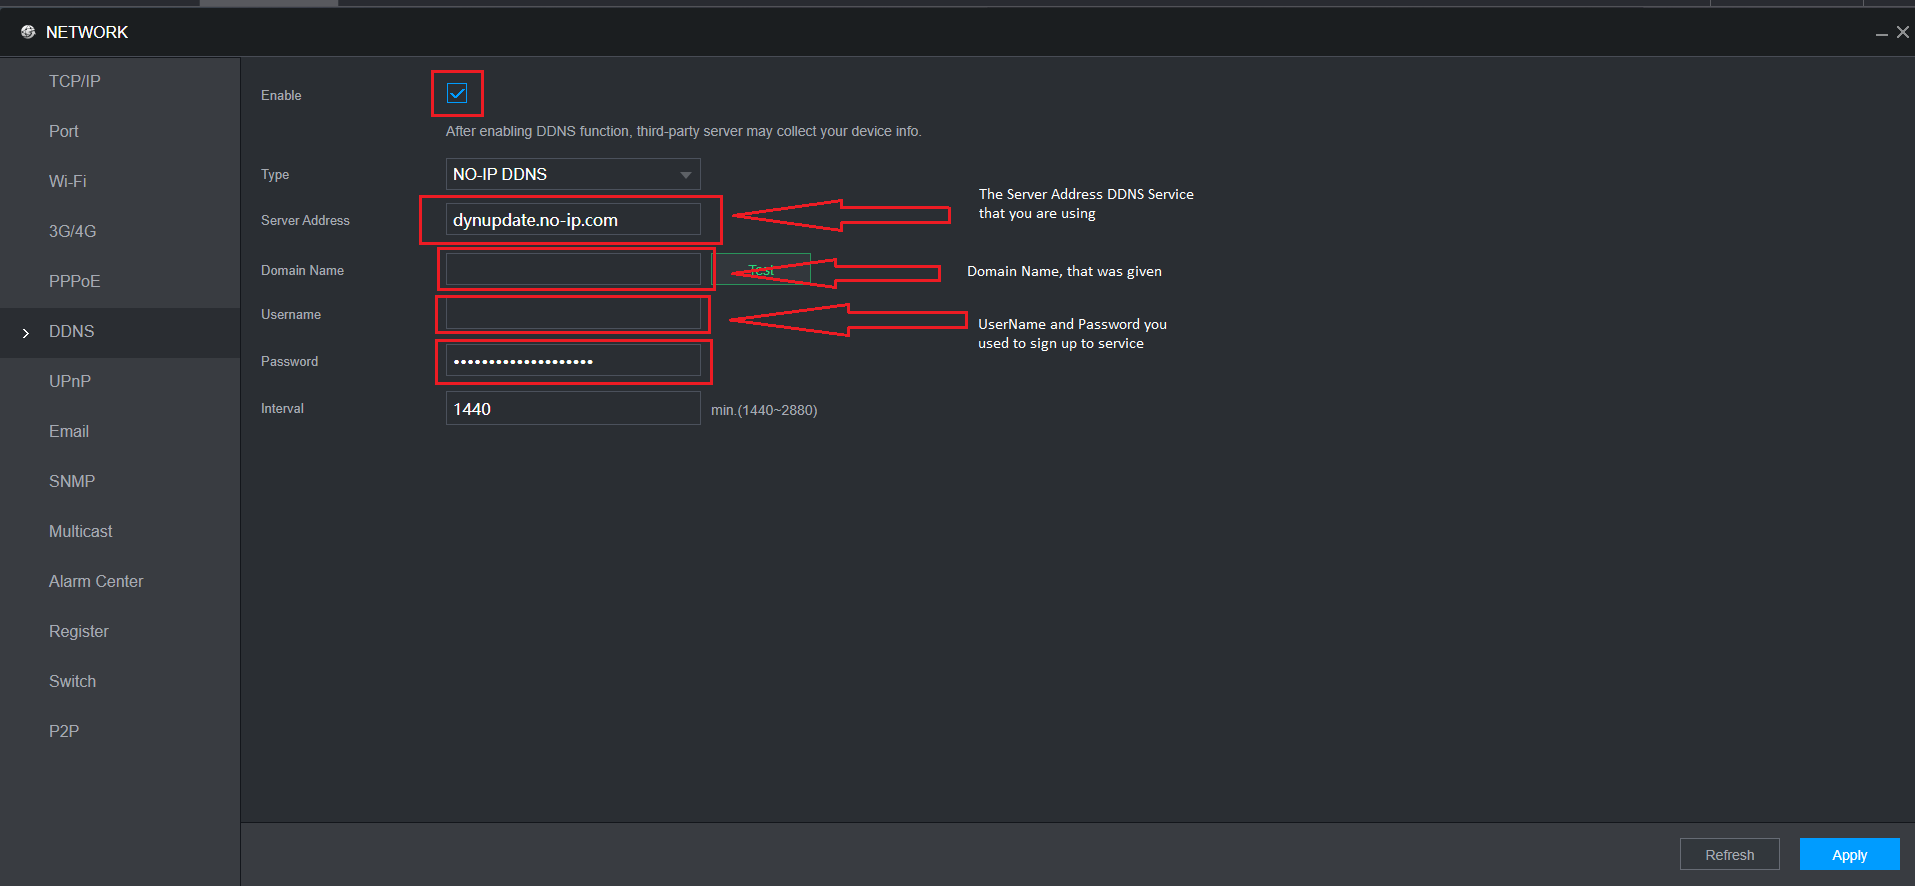
Verify that the DDNS service is working.
You can now login to your device using the domain name in the URL of your browser.
The RTSP link is used to integrate a camera, recorder or intercom with 3rd party software, recorders, or even pull the stream through VLC Media Player. The RTSP stream details provided are compatible with VIP and Watchguard cameras and recorders.
Full API Documentation can be found here.
RTSP URL Format
The RTSP URL format for VIP & Watchguard products is:
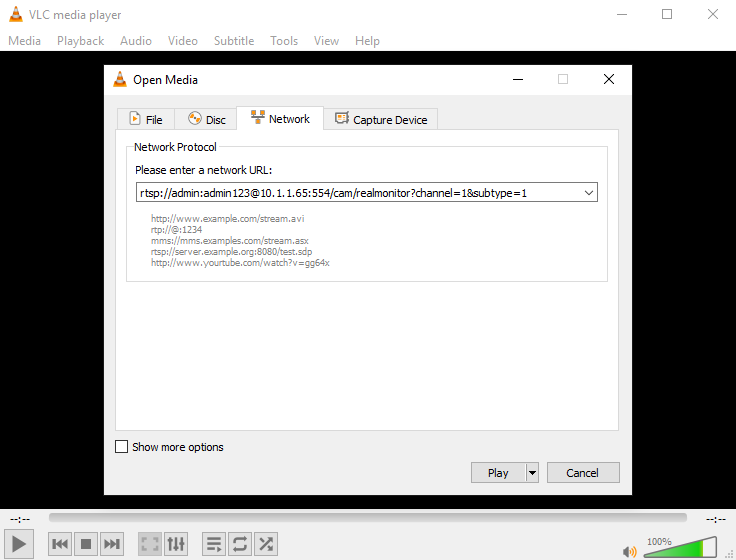
rtsp://USER:PASSWORD@IPADDRESS:554/cam/realmonitor?channel=1&subtype=1
If it is a standalone camera or intercom, set the channel to 1. If the camera is from an NVR, set it to the channel number of the camera you wish to access.
Set the subtype value to 0 for Mainstream, 1 for Substream 1, and 2 for Substream 2.
For Example: rtsp://admin:admin123@10.1.1.65:554/cam/realmonitor?channel=1&subtype=1
Retrieving Recorded Footage For a Specific Date & Time via RTSP
You can add a Start Time & End Time to retrieve footage from a specific Time Period.
For example to retrieve one minute of recorded footage from 13/2/2015 12:37:05 on NVR channel 1:
rtsp://username:password@IPADDRESS:554/cam/playback?channel=1&starttime=2015_02_13_12_37_05&endtime=2015_02_13_12_38_05
Retrieve a live snapshot JPEG file using a web browser
Use the following link format to retrieve a live snapshot of a specific NVR channel, by entering the channel number, or use 0 if connecting to a standalone camera.
Replace IPADDRESS and USER:PASS with actual credentials.
CH 3 of NVR
http://IPADDRESS/cgi-bin/snapshot.cgi?channel=3
Standalone IPC (channel 0)
http://USER:PASS@IPADDRESS/cgi-bin/snapshot.cgi?channel=0
http://USER:PASS@IPADDRESS/cgi-bin/snapshot.cgi?
NOTE: When taking snapshots on a standalone camera, the snapshot interval must be set to "1" and snapshot schedule set to "General" for every day. Otherwise a HTTP 500 error will be returned at random intervals when trying to retrieve a snapshot.
Using PHP to Retrieve Snapshots
Use PHP to retrieve snapshots from channel 1 and channel 2 of an NVR each time a someone visits the index.html page and display them on screen. Does not retrieve if images are less than 10s old.
Download both of these files and place them on a web server with PHP, then edit the PHP file to set your recorder details:
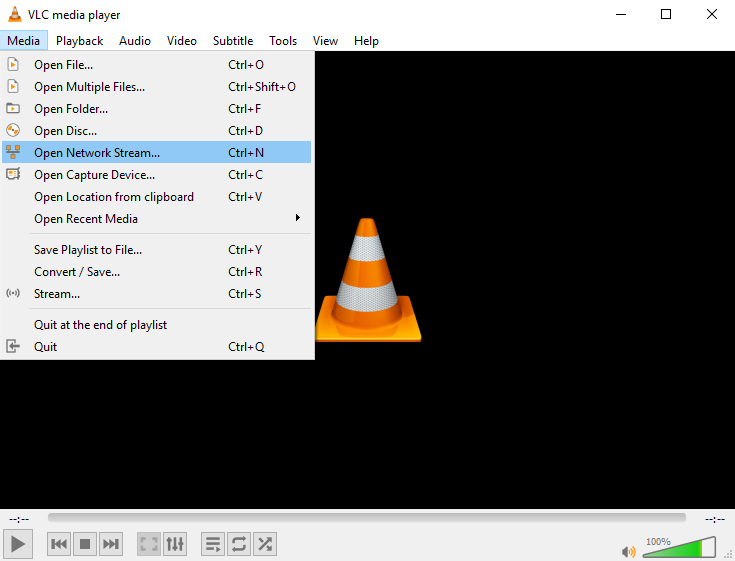
Testing RTSP Stream with VLC Media Player
Before attempting to add an RTSP steam to a 3rd Party NVR or software, it is recommend to test the stream first in VLC, to ensure the stream details are correct. This method can be used of any brand camera, however you will need to use the correct RTSP details for the particular camera you have.
1. Download VLC Media Player from the official website and install the software - https://www.videolan.org/vlc/index.html
2. Select Media, then Open Network Stream.
3. Enter the stream details, then select Play. If the stream link is correct, the live video will be displayed. If it does not display, check the stream link is correct and the devices are in the correct IP range.