In some situations it may be required to have some cameras displayed on a monitor, away from the recorder.
This can be achieved by connecting a second recorder to the network with a CAT5 cable, and streaming the cameras directly from the main recorder. The second recorder must have enough channels available for the amount of cameras you wish to display. The second recorder does not require a hard drive if only using it for live viewing. A hard drive can be added if you wanted some redundancy for the cameras that are added.
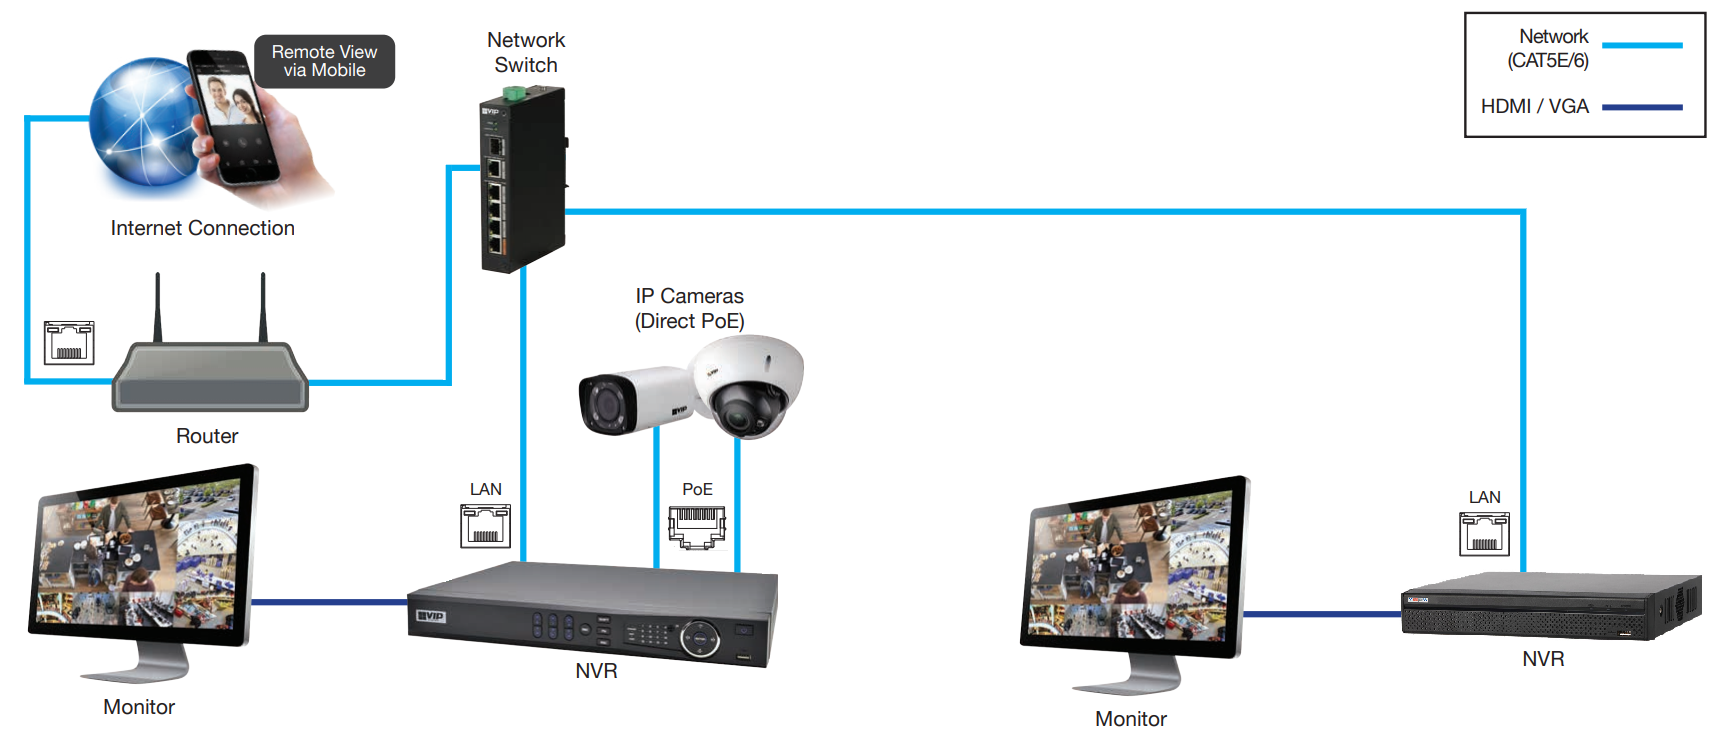
Before beginning, ensure that both recorders are connected to the network.
Steps on Main NVR
1. On the first NVR, Right Click and select Main Menu.
2. Select Network.
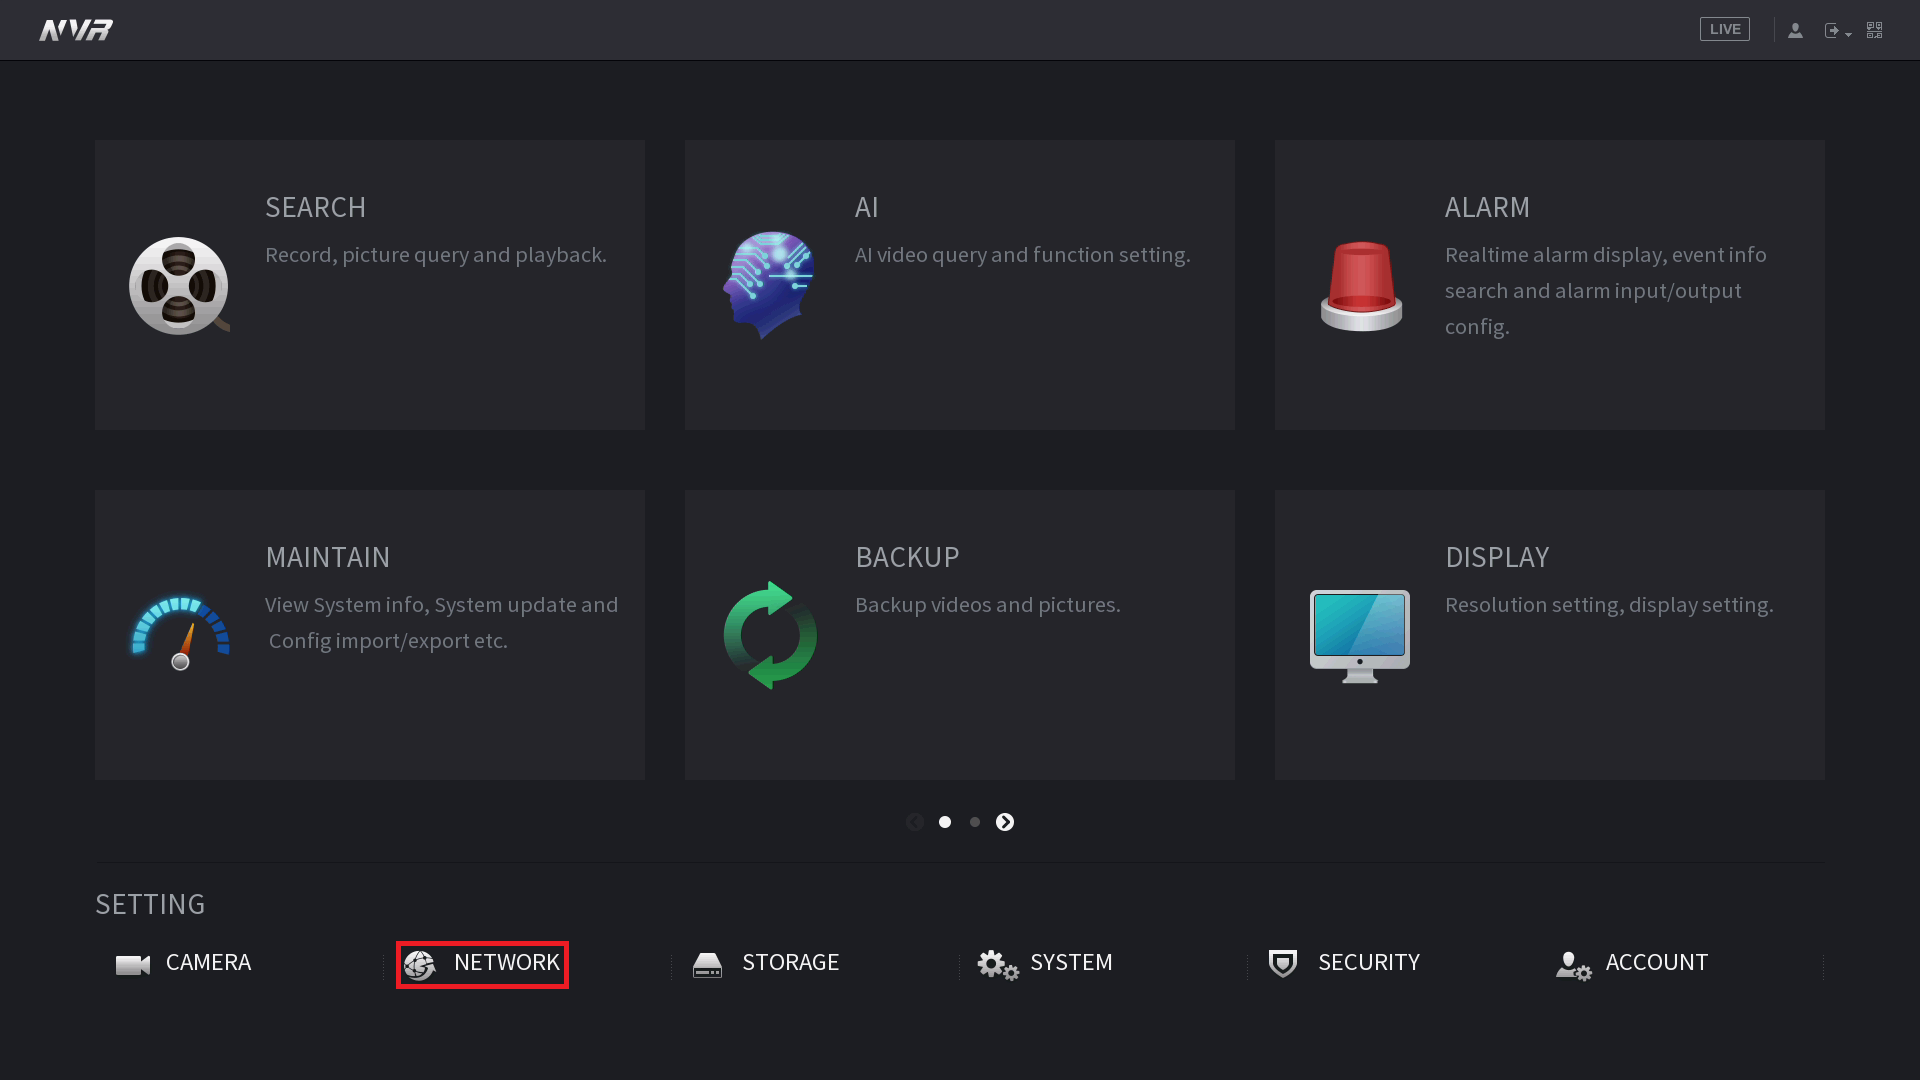
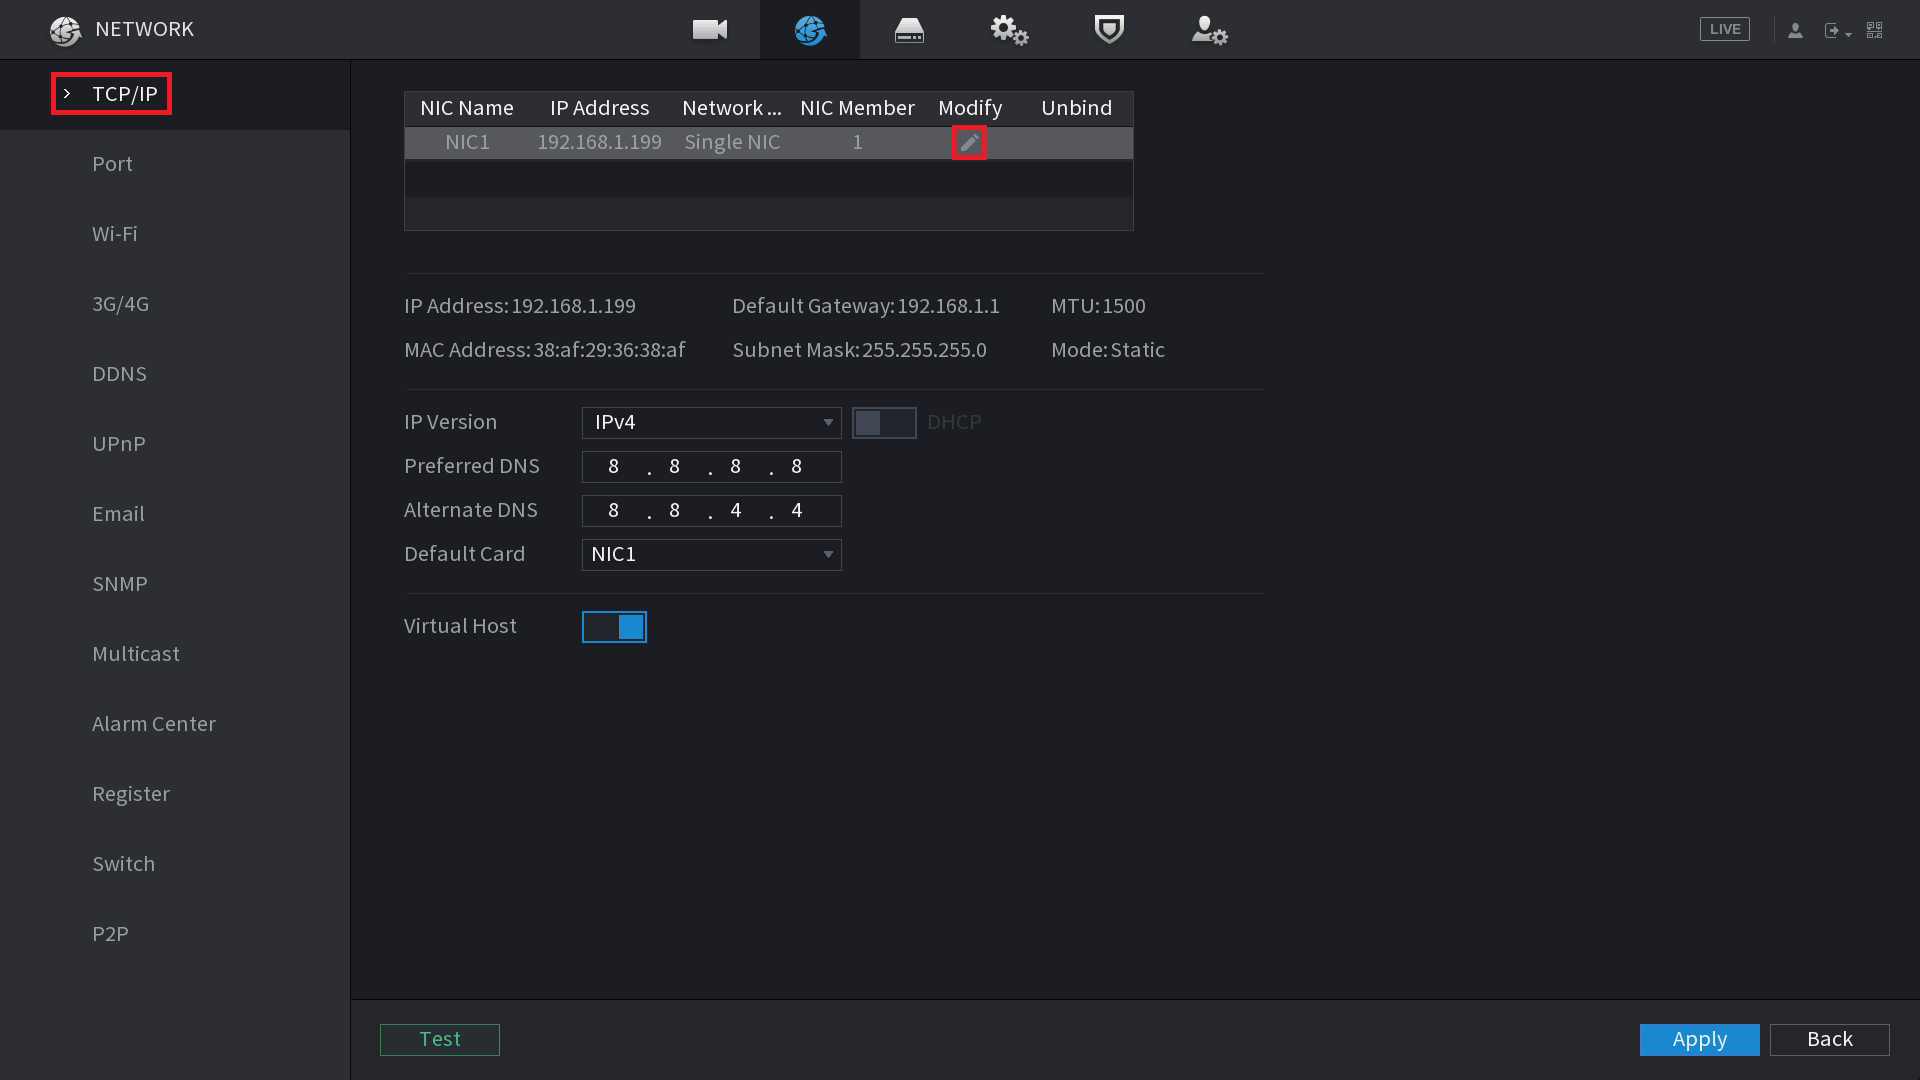
3. Select TCP/IP, then select the Modify button.
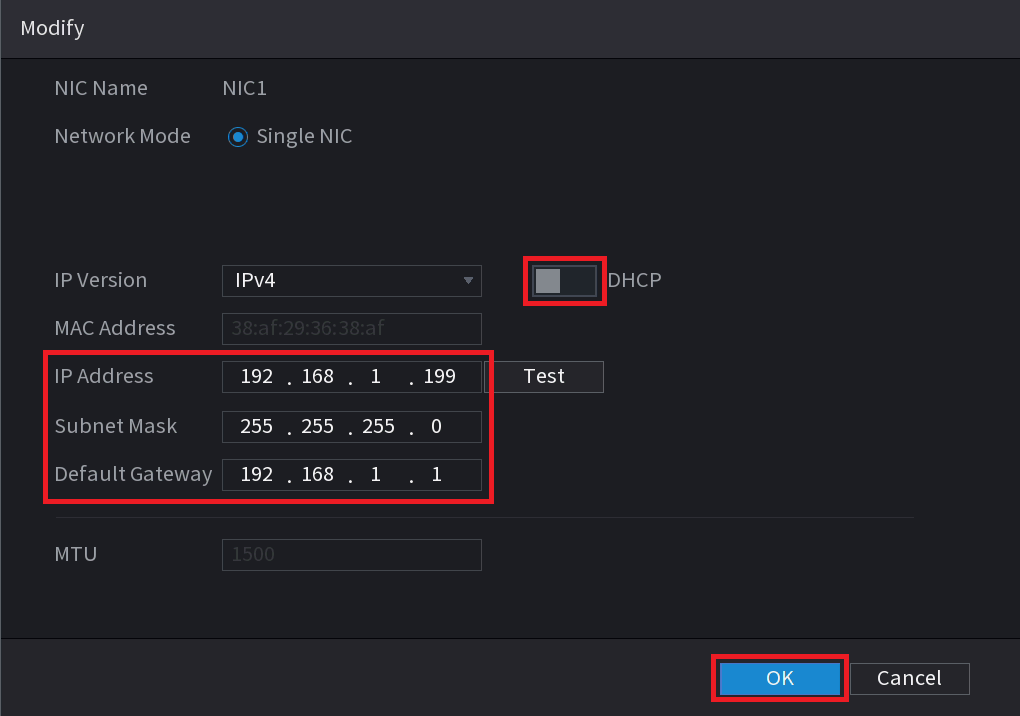
4. Ensure DHCP is turned off. Set an IP address, Subnet Mask and Default Gateway to the recorder that suits the local network the recorder is connected to. Select OK.
Steps on Spot Monitor NVR
- Move to the second NVR, Right Click and select Main Menu.
- Select Network.

- Select TCP/IP, then select the Modify button.

- Ensure DHCP is turned off. Set an IP address, Subnet Mask and Default Gateway to the recorder that suits the local network the recorder is connected to. Ensure the IP address is different between each device on the network. Select OK.

-
Right Click to return to the Main Menu, then select Camera.

- Select Camera List, then select Search Device.
- The main NVR should be listed, put a tick in the box and select Add.

- You will be prompted to select a Remote CH No., this is the camera/s from the main recorder you wish to display on this recorder. Select OK.
- If the camera/s status icon is red, select the modify button, and enter the correct username and password for the recorder. If the camera/s status icon is green, the process is complete.

